How to Make Pipe Cleaner Flowers (5 Easy Designs)

Based on a video by BendyTwist

Opens their YouTube channel

Steps written out by CraftingStepByStep · Published · Updated

Watch the original video (opens YouTube)
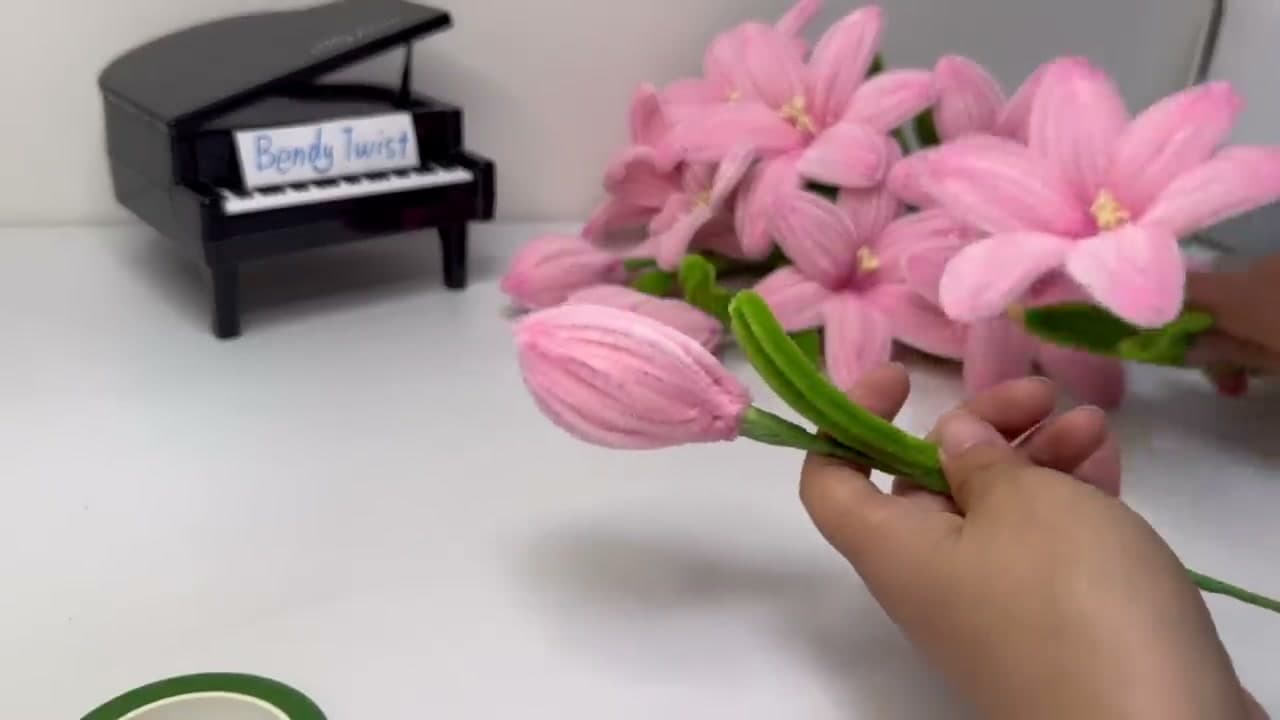
The finished result: How to Make Pipe Cleaner Flowers (5 Easy Designs)
Also in:Paper Crafts

Pipe cleaner flowers look like a kids craft until you see a finished bouquet of these lilies. The project builds five different pieces - open lily petals, a full open bloom, closed buds, grass-like leaves and color-dusted petals - and then gathers them into one bouquet that sits in a vase. No sewing, no paint, and nothing you cannot find at a craft store and a drugstore.

Plan on an afternoon for a full bouquet. A single stem takes about 20 minutes once you have made the first one.

What you need

  • Pink and green chenille stems (pipe cleaners). Jumbo or premium stems are fluffier.
  • 18-gauge floral wire for the stems
  • Green floral tape
  • Scissors or wire cutters, plus a small pair of sharp craft scissors for trimming
  • A hot glue gun
  • A ruler, and a pencil to wrap strands around when you want a tight curl
  • Matte pink eyeshadow for the color dusting

Budget roughly 12 pink stems per lily. Bulk packs of 100 are cheaper than they look.

The five pieces and what makes each one work

  1. Petals - two strands per petal, folded and twisted. One strand looks thin. Two give the ribbed body.
  2. Open lily - six petals glued around the wire, then trimmed to points. The points make it a lily. Round tips read as a daisy.
  3. Closed bud - strands stacked into a teardrop and twisted onto wire. It gives the bouquet a second height.
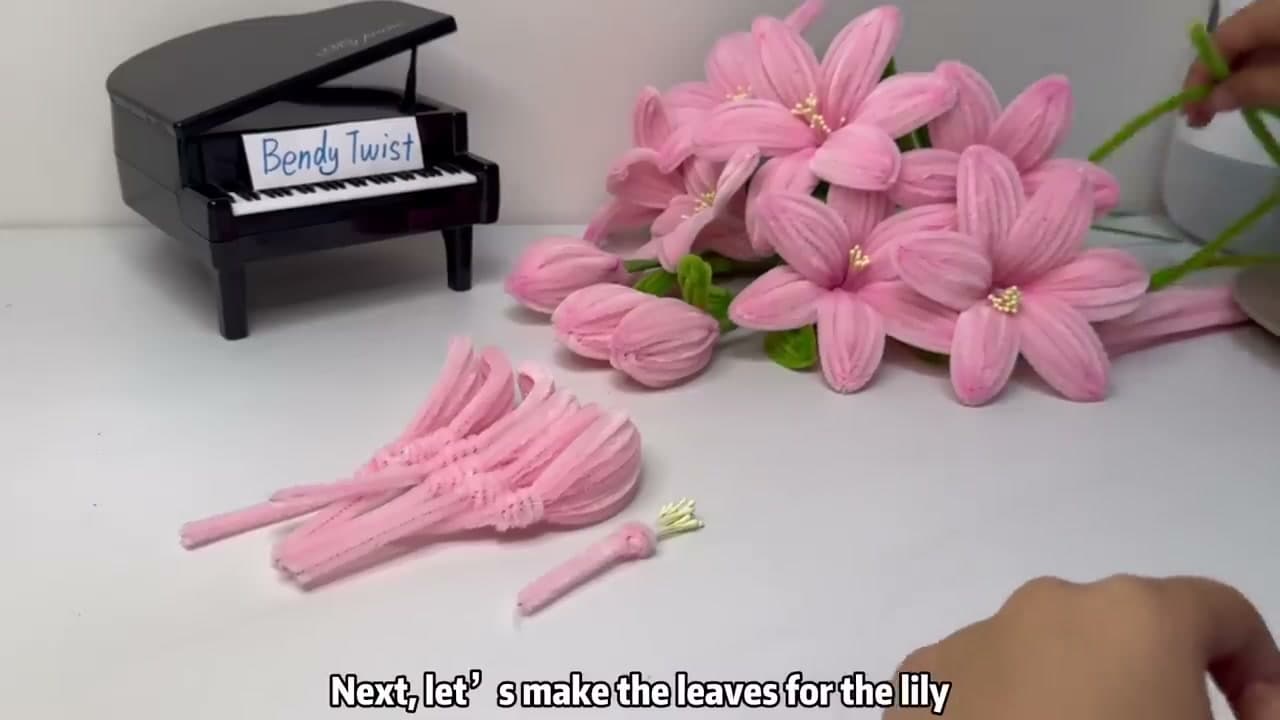
  4. Leaves - a folded green bundle fanned into long curved blades.
  5. Dusted petals - pink eyeshadow pressed into the chenille leaves the center darker than the tips, the way a real lily fades.

Making a bouquet

Six open lilies, three buds and five leaves is a good full bouquet. Odd numbers look more natural. Build it in your hand at different heights, then wrap the base with floral tape.

For Mother's Day, pink and white lilies in a small jar with a ribbon. For Valentine's Day, red stems and a few buds make a flower that will not wilt by Tuesday. For a classroom, skip the glue gun and let each kid make one open flower by twisting the petals straight onto a green stem. Put them together as a class bouquet for a teacher.

If you like this, the same bouquet idea works in paper: tissue paper flowers, coffee filter flowers and crepe paper flowers all mix well with chenille lilies in one vase.

Notes for making these with kids

The wire inside a pipe cleaner is sharp once cut. Fold every cut end back on itself about a quarter inch and pinch it flat. An adult should run the hot glue gun. Kids aged 5 and up can handle cutting, twisting and bending. Younger ones do fine with pre-cut strands. Supervise the eyeshadow step unless you want pink fingerprints on the table.

Common mistakes

  • Floppy petals. One strand per petal, or cheap thin stems. Double up.
  • Flowers look like blobs. The petal tips were not trimmed to points.
  • Floral tape will not stick. Stretch it as you wrap. It only goes tacky when pulled.
  • Petals fall off. Hold each glued petal for five seconds, and glue at the base, not the side.
  • Shimmery, plastic-looking color. Blush or glitter shadow. Use matte eyeshadow.
  • Every flower the same height. Stagger them and add buds.

What you'll need

Step-by-step guide

8 steps, about 15 minutes. Tap a picture to jump to that step. Your progress saves automatically.

Tick each step off as you go.

  1. Step 1: Cut and Twist the Pink Petals

    Watch this step · 1:00
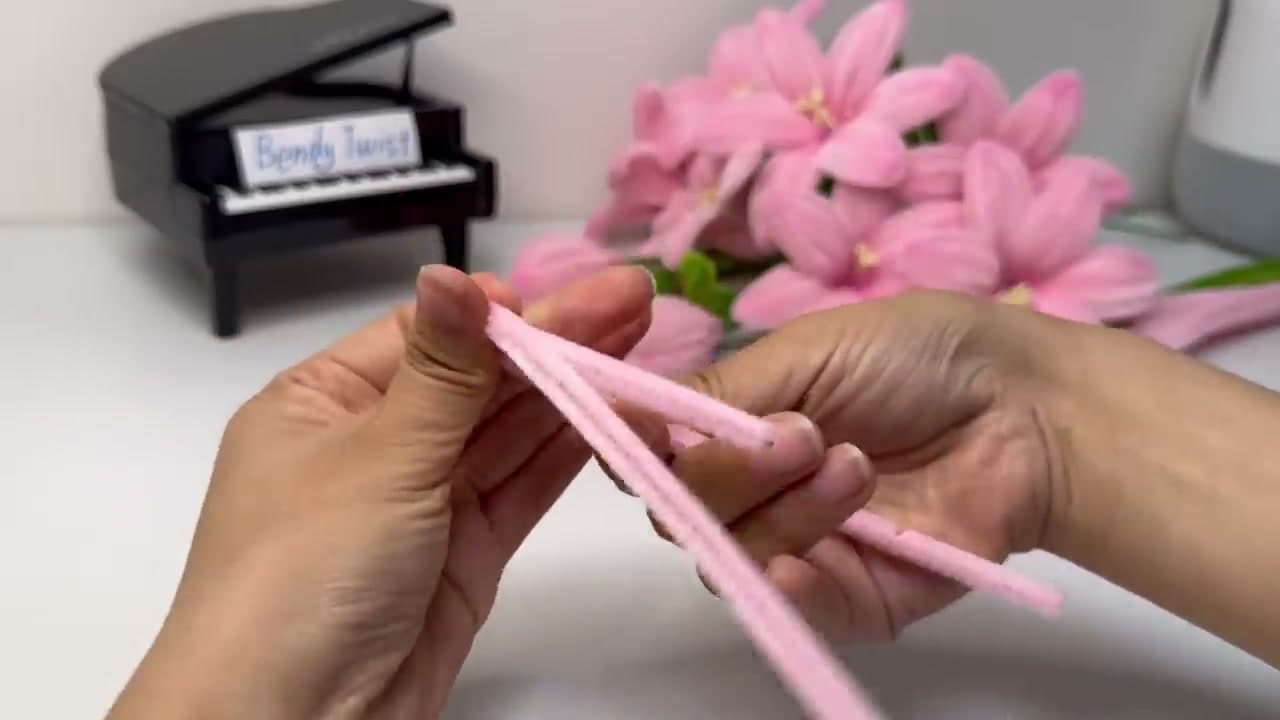
    Lay out a stack of pink pipe cleaners. For a single lily you need twelve - that gives you six petals, two strands per petal for body. Lay the metal ruler across a pipe cleaner and snip at the 10 cm mark. Repeat until you have twelve 10 cm pink strands.

    Pair the strands up. Hold two together, fold the doubled pair in half, and twist the loose ends a couple of turns so they bind. That doubled-up twist is what gives the petal its ribbed, full-bodied look once it gets shaped - a single strand looks thin and floppy.

    If you can find them, longer or extra-fluffy chenille stems (often labelled jumbo or premium) make a softer petal than the standard craft-store pack. Both work, but the premium ones photograph better.

    Tip:

    Cut a few extra strands the first time you try this. The first two or three petals are practice, and you'll want spares.
    Back to all steps

  2. Step 2: Make the Green Filler Leaves

    Watch this step · 2:55

    The lily leaves are long, pointed, and grass-like. Take two green pipe cleaners, fold one in half, then fold it in half again so you end up with four parallel strands bound at one end. Pinch the bound end and twist a third green strand around it to anchor the bundle.

    Pull the four free ends apart and bend each one into a gentle curve so they fan out. That's your leaf shape - a flat fan that narrows to a point. Make four to six of these for one bouquet.

    Set them aside in a small pile. You'll attach them to the bouquet right at the end, so they don't need to be glued to anything yet.

    Tip:

    If the leaves look flat or floppy, run your thumb and forefinger down each strand to give it a slight curl. Real lily leaves are never perfectly straight.

    Back to all steps

  3. Step 3: Glue Six Petals Around the Wire Stem

    Watch this step · 4:45

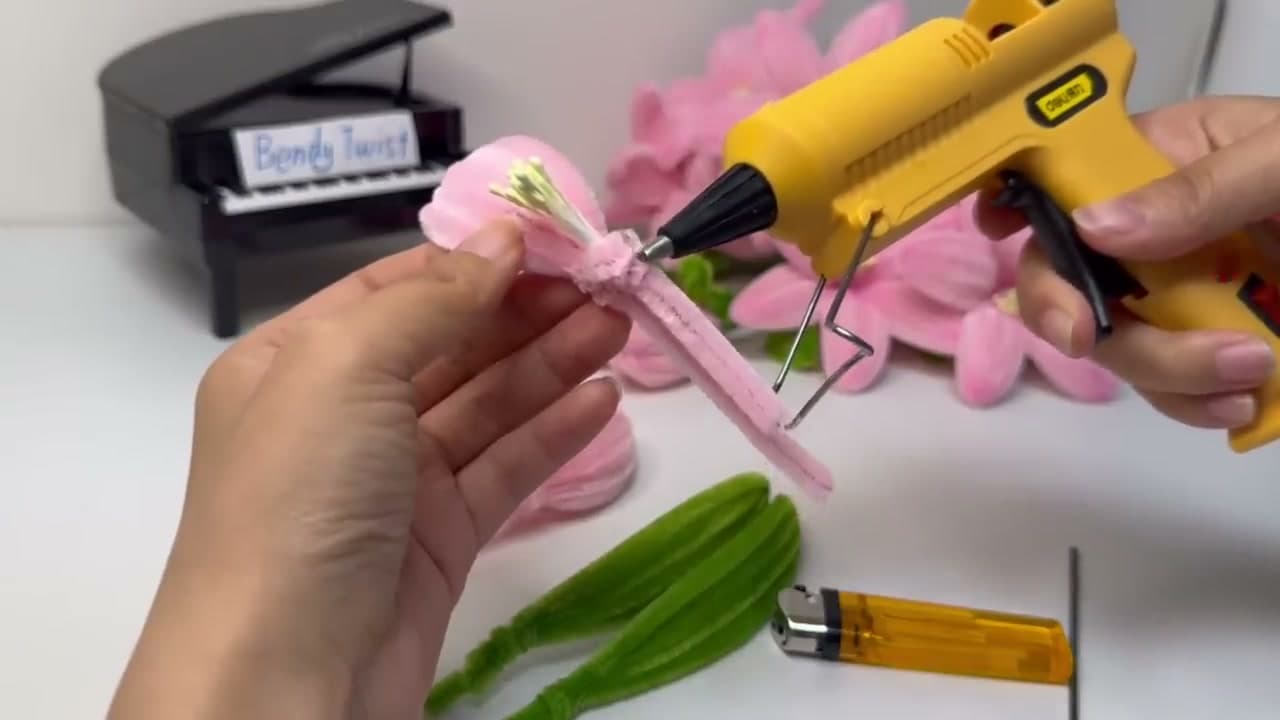
    Plug in the hot glue gun and let it warm up for a couple of minutes. While it heats, cut an 18-gauge floral wire to about 30 cm - that's the stem length for one stalk.

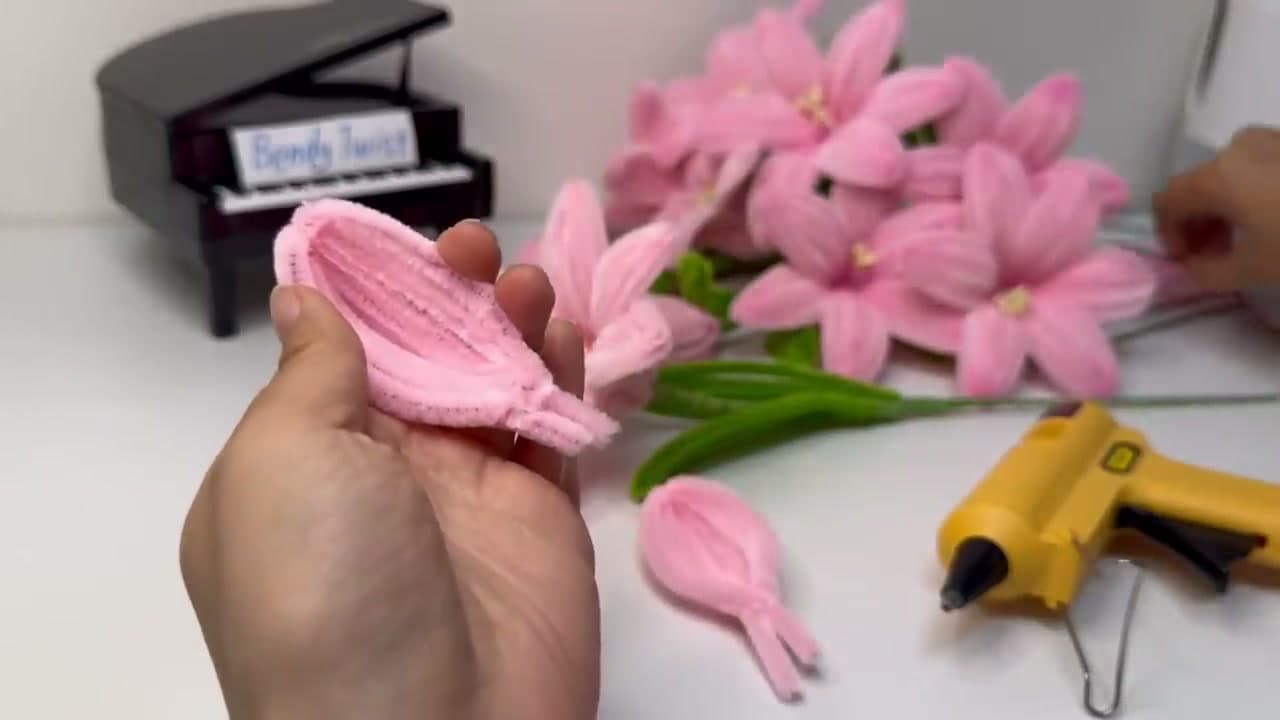
    Take the first petal pair, fold it into a teardrop shape with the twisted end as the base, and pinch the base around the top of the floral wire. Squeeze a small dot of hot glue at the join and hold for five seconds while it sets.

    Add the next petal the same way, rotating about 60 degrees around the wire so the petals spread evenly. Keep going until all six petals sit around the stem in a tight circle. The flower will look like a closed bud at this point - that's fine, it opens in the next step.

    Tip:

    No hot glue gun? A lighter works. Briefly pass the flame under the petal base to soften the chenille fibers, then press them onto the wire. It's slower but the bond is strong.

    Back to all steps

  4. Step 4: Trim and Shape the Open Petals

    Watch this step · 6:05

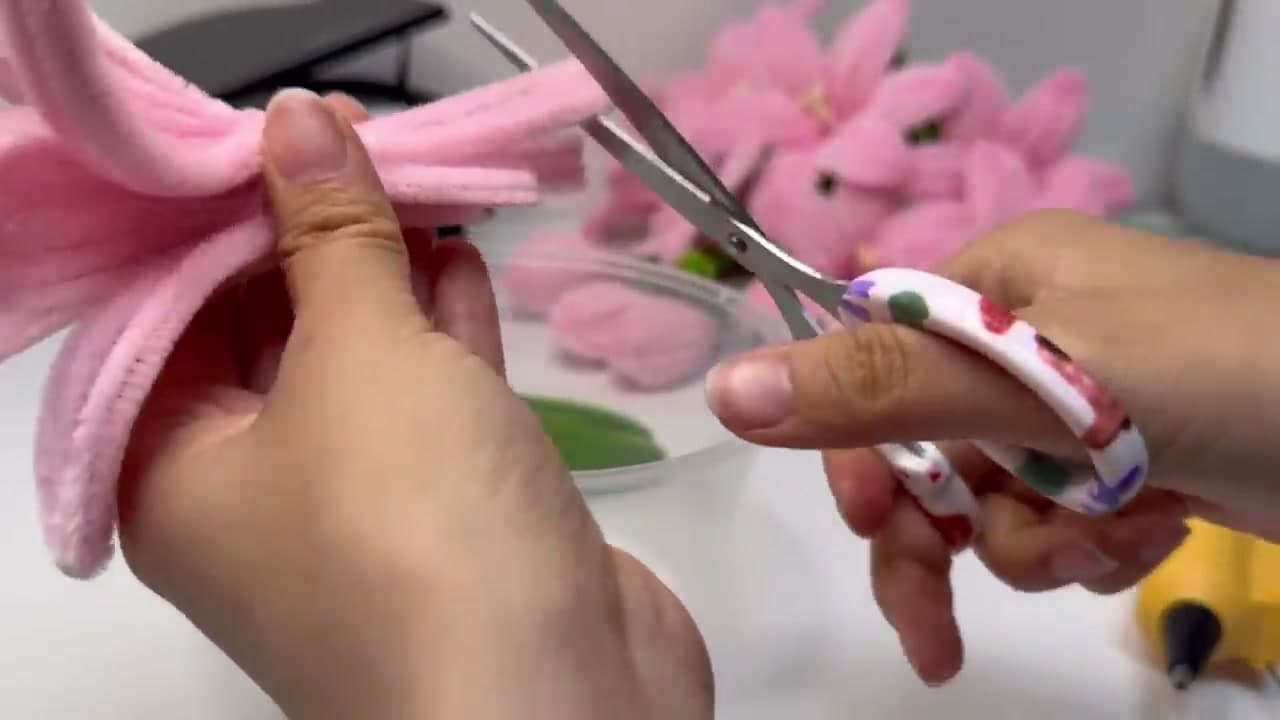
    Take a small pair of scissors and trim a clean point at the tip of each petal. The cut should taper from the outside edge to a pointed center - that's what gives the lily its star shape.

    Once all six petals are trimmed, bend each one gently outward at the base so the flower opens up. Separate any petals stuck together and fluff the chenille fibers with your fingertips so the flower looks soft, not wired.

    Step back and look at it from a few feet away. If one petal sits noticeably higher or lower than the others, ease it into line. You're looking for a balanced star.

    Tip:

    Sharper trim equals more dramatic flower. Round-tip petals read as daisies. Pointed petals read as lilies.

    Back to all steps

  5. Step 5: Wrap a Closed Bud Variation

    Watch this step · 10:05

    Buds add depth to a bouquet so it doesn't look like a row of identical open flowers. To make one, take three 10 cm pink strands and stack them flat. Fold the stack in half lengthwise so it forms a long teardrop, then pinch the base and twist it tight around a short length of floral wire.

    The teardrop is the closed bud. Run your fingertips down the rounded side to smooth the chenille fibers in one direction, and pinch the tip gently to a soft point. Done - it should look like a lily on the day before it opens.

    Make two or three buds. A bouquet of six open flowers plus three buds reads as much more natural than nine open flowers.

    Tip:

    If the bud bulges in the middle, you've used too many strands. Two-strand buds are slimmer and more realistic than three.

    Back to all steps

  6. Step 6: Dust the Petals With Pink Eyeshadow

    Watch this step · 12:40

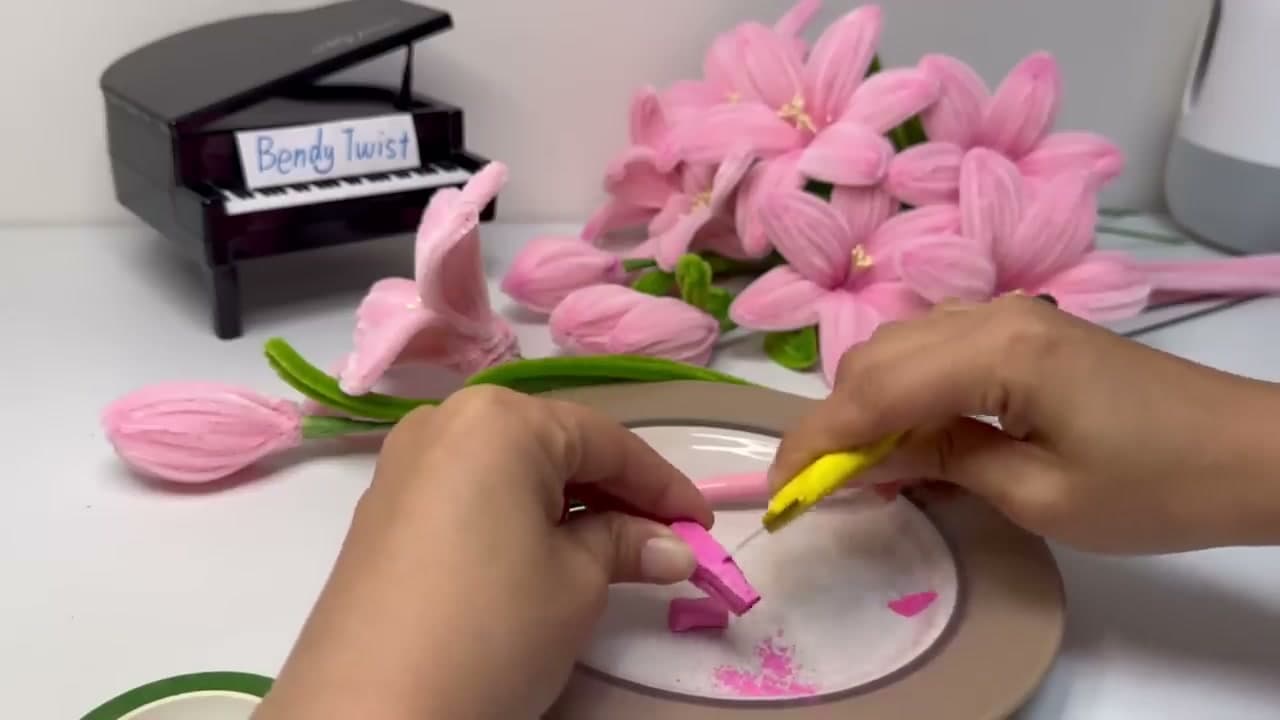
    This is the secret-weapon step that lifts pipe cleaner flowers from craft project to gift-worthy. Squeeze a small mound of bright pink eyeshadow onto a saucer (a free single-shade pan from any drugstore works fine) and use a yellow chalk pastel or makeup brush to grind it to a fine powder.

    Press the petal face-down into the powder, lift, and tap off the excess. The chenille catches just enough pigment to deepen the color in the center of each petal and fade out to the original soft pink at the tips. That two-tone gradient is what real lily petals do.

    Repeat on every flower. Skip the buds - they look more realistic in a single flat pink.

    Tip:

    Don't use blush or bronzer - they have shimmer that reads as plastic on chenille. Matte eyeshadow is the right finish.

    Back to all steps

  7. Step 7: Wrap Each Stem With Green Floral Tape

    Watch this step · 6:50

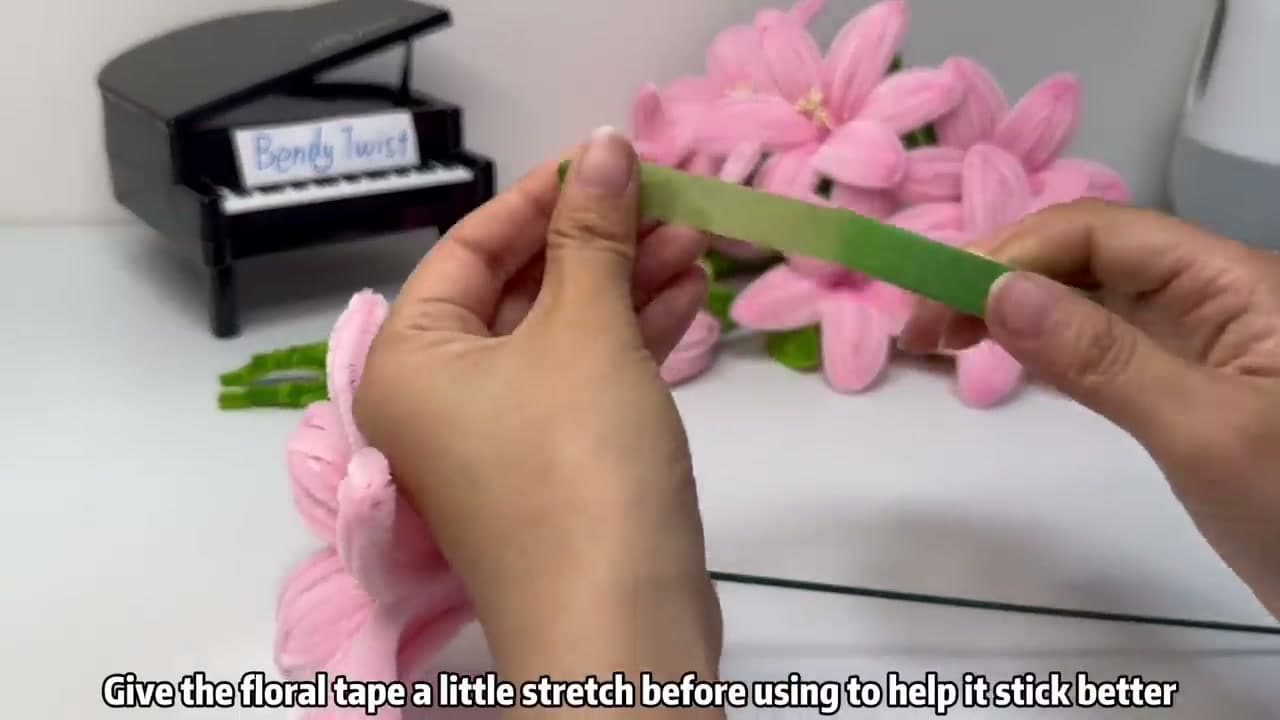
    Floral tape only sticks when stretched. Tear off a 60 cm length, pinch one end, and pull gently until the tape thins and becomes tacky. That activates the wax adhesive.

    Starting just below the flower head, wrap the tape down the wire at a slight angle, overlapping each pass by about half the tape width. The tape covers the bare wire and the petal base in one motion. Pause halfway down and press a green leaf flat against the stem, then keep wrapping over the leaf base to anchor it.

    Finish at the bottom of the wire and press the tape end firmly to seal. The stem should feel smooth and look like a single green stalk.

    Tip:

    If the tape keeps tearing, you're stretching too hard. Stretch just enough to make it tacky - not enough to thin it to nothing.

    Back to all steps

  8. Step 8: Gather Into the Finished Bouquet

    Watch this step · 14:10

    Lay your finished pieces on the table: six open lilies, two or three buds, four to six green leaves. Now arrange them by feel rather than by rule.

    Hold one open lily in your dominant hand and add the next one slightly lower, then a bud slightly higher and to the side. Add the next open lily across from the first. Keep building, tucking each new piece in at a slightly different height so the bouquet has natural depth.

    Once everything is in your hand, slide the leaves around the outside so they cradle the flowers like a collar. Tape the whole bunch together at the base with a short wrap of floral tape and trim the stems flat. Set it in a clear vase and you're done - a craft project that doesn't look like a craft project.

    Tip:

    Odd numbers always look better than even. Six flowers, three buds, five leaves is more pleasing to the eye than five flowers, two buds, four leaves.

    Back to all steps

Keep going

How to Make Tissue Paper Flowers (Easy 5-Minute Craft)

Products Used

The Checklist

How to Make Pipe Cleaner Flowers (5 Easy Designs)

Tools
4
Materials
7
Steps
8
Video
15 min

Tools we recommend

As an Amazon Associate we earn from qualifying purchases. Links on this page may be affiliate links - clicking them and buying doesn't change your price, but helps support CraftingStepByStep.

Tags

The Crafter's Weekly

New other crafts tutorials, every Sunday

One short email with the week's best step-by-step guides. Free, no spam, unsubscribe anytime.

Test your knowledge

Did the lesson stick? Start with this one.

5 questions covering what you just read. No signup, no score saved, and you can stop after this one.

Question 1 of 5

Why pair pipe cleaners (two strands per petal) instead of using single strands?

Quick reference

Key takeaways from How to Make Pipe Cleaner Flowers (5 Easy Designs)

5 questions, answers, and one-line explanations. Tap to expand.

  1. 1.Why pair pipe cleaners (two strands per petal) instead of using single strands?

    Answer: Doubled-up twist gives the petal a ribbed, full-bodied look - single strand looks thin and floppy

    Two-strand petals have body; single strands look flimsy.

  2. 2.What's the secret-weapon step that lifts pipe cleaner flowers from craft project to gift-worthy?

    Answer: Dusting petals with bright PINK EYESHADOW - creates the two-tone gradient real lily petals have

    Eyeshadow grinds fine and catches on chenille fibers for a realistic petal gradient.

  3. 3.Floral tape only sticks when...

    Answer: You STRETCH it - pinch one end and pull gently to thin and activate the wax adhesive

    Stretching activates the wax adhesive; un-stretched tape is just plastic.

  4. 4.What gives the lily its star shape after gluing petals around the stem?

    Answer: Trimming a clean pointed tip on each petal (taper from outside edge to a center point)

    Pointed petal tips = lily star shape. Untrimmed they look like rounded blobs.

  5. 5.Why mix BUDS into the bouquet (not just open flowers)?

    Answer: Buds add depth so the bouquet doesn't look like a row of identical open flowers

    Bouquet of 6 open flowers + 3 buds reads as much more natural than 9 identical blooms.

Did this work for you?

What's next

Related collections

Curated theme pages that include this tutorial.

Similar tutorials

Hand-picked next reads based on the one you just finished.

Liked this other crafts tutorial?

Pick the crafts you want to hear about. One email every Sunday with new step-by-step tutorials. No spam, easy to unsubscribe.

Get more like this in your inbox

Weekly digest. Pick the categories you want. Unsubscribe anytime.

Send me tutorials about

We only email about new tutorials. Easy unsubscribe anytime.