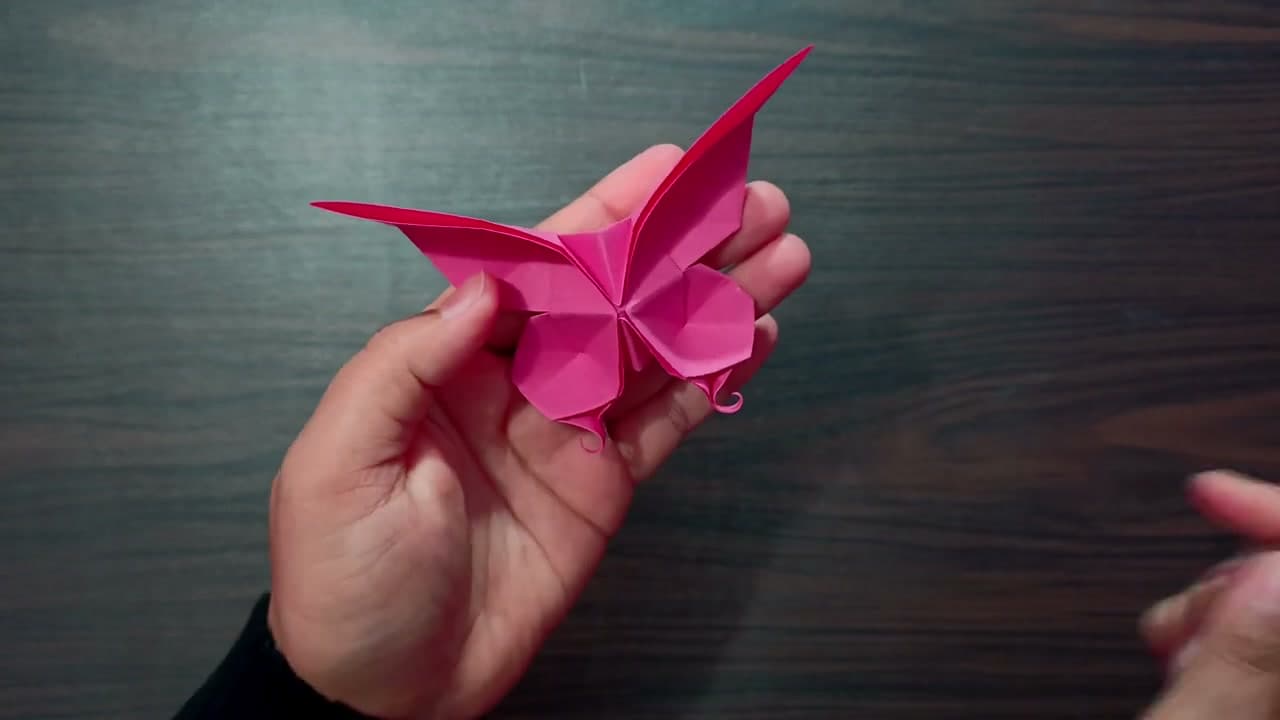
There is something satisfying about starting with a flat square and ending with a butterfly that stands up on its own. This model looks fancy, but it comes down to a handful of folds you repeat and shape.
The video from Nishiegami has no narration, so you learn by watching the hands. We have broken it into clear steps with a screenshot of each fold. Grab one square sheet and work slowly - sharp creases are what make the wings pop.
Pink shows the folds off nicely, but any origami paper works. Once you have the sequence down, a second butterfly takes only a few minutes.
Picking the paper
Start with a 6-inch (15 cm) square. It is big enough to handle comfortably and small enough that the finished butterfly looks delicate. Go down to 3 inches once you know the folds and want a swarm of little ones.
Origami paper, or kami, is thin and holds a crease well. That matters here, because the wings are shaped by pinching and a thick sheet fights back. Printer paper works for a practice run. Cut it square and expect the body to look a bit chunky.
Patterned paper is where this model shines. Only one side shows on most of the wings, so fold with the pattern face down at the start and it ends up on the outside.
The base it comes from
This butterfly starts from the waterbomb base - the triangle you collapse in Step 3. The same base is behind the origami jumping frog and plenty of other traditional models, so the time you spend getting it clean pays off later. If the collapse feels awkward, it is almost always a crease pointing the wrong way. Fold each line both directions and try again.
Making it look 3D
A flat butterfly looks like a paper shape. A shaped one looks like it landed there. Three small moves make the difference:
- Pinch the center ridge hard and hold it for a second. That ridge lifts the wings.
- Tilt the upper wings up at a slight angle instead of pressing them flat.
- Curl the antennae around a toothpick so they arch forward.
Stand it on a table and look at it from the side. If the wings sit flat on the surface, pinch the body again.
Ways to use your butterflies
- Cards: glue one butterfly by the body only, so the wings stay free and lift off the card.
- Garland: thread a needle through each body and space them along a string.
- Wall art: fold 15 or 20 in shades of one color and fix them to the wall with small dots of putty.
- Gift toppers: tape one to a wrapped box in place of a bow.
Want a different look? The paper butterflies tutorial uses cut paper instead of folding, and it is quicker for a big batch.
Common mistakes
Uneven wings. This starts in Step 1. If the first diagonal is off by a millimeter, every fold after it drifts. Line up the corners before you press.
Soft creases. Run a bone folder or your thumbnail over every fold. The collapse and the pinch both rely on the paper remembering its lines.
Paper that is not square. A sheet cut by eye makes one wing longer than the other. Fold one corner to the opposite edge and trim the extra strip to get a true square.
Tearing at the body. Thin paper can split where the layers bunch. Ease off the pinch a little, or switch to a slightly larger sheet.
Ready for another model? Try the origami swan for something easy, or the origami dragon when you want a challenge.