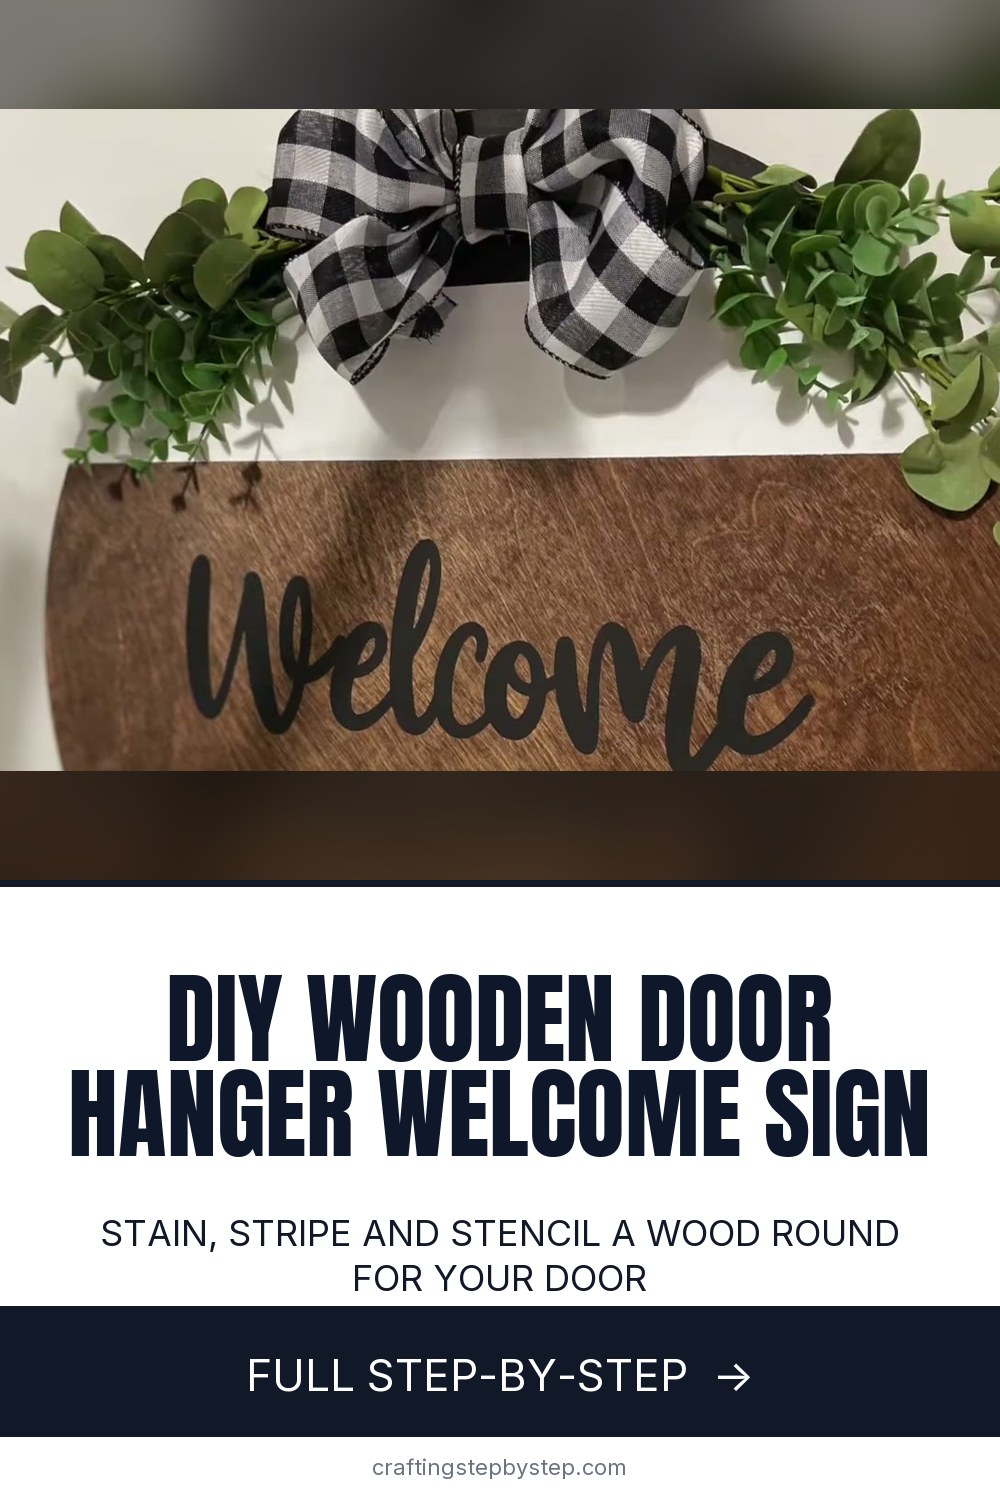
How to Make a Wooden Door Hanger (Stained Welcome Sign)

The finished result: How to Make a Wooden Door Hanger (Stained Welcome Sign)
  • Difficulty: Easy
  • About 1 hour 30 minutes, plus 4 hours to dry or set
  • 10 steps

You tapped Save

Save this project for later

We'll email you a link, no password.

How to Make a Wooden Door Hanger (Stained Welcome Sign)

  • Your saved projects in one list
  • Your ticked steps on any device

Check your inbox for an email from us. Not there? Look in your spam folder.

Print

Steps written out by Crafting Step by Step from Craft n' Creations' video (opens YouTube) (10:42). Published .

Also in:Painting

A wooden door hanger is a painted wood round with a greeting on it, topped with a bow and a little greenery. It makes your front door look finished in every season. Jessica Burbano of Craft n' Creations walks through a walnut-stained round with black and white stripes, a stenciled Welcome and a buffalo check bow. It is a good first sign, and you can change the colors to suit your porch.

How to make a wooden door hanger: the short version

  • Stain a pre-cut wood round and let it dry.
  • Tape off stripes and paint the top and bottom black, then two white stripes.
  • Apply a vinyl Welcome stencil and seal its edges with Mod Podge.
  • Dab paint through the stencil, then peel it away.
  • Add a hanger, a bow and some greenery.

Choosing the wood round

Pre-cut wood rounds come in sizes from about 12 to 24 inches. Fourteen to 18 inches suits most front doors. Look for one at least a half inch thick so it does not warp in the sun. Craft stores, Etsy and many hardware stores sell them already sanded. Give the edges a quick pass with fine sandpaper anyway so the stain goes on evenly.

Stain, chalk paint or both

A thick coat of walnut stain gives deep, even color in one go. Chalk paint dries fast and covers in two or three coats, which is handy for stripes. White usually needs a third coat to hide the wood grain. Let each coat dry before you pull the tape, or the edges can lift.

Stencil or vinyl lettering

This sign uses a stencil cut from vinyl on a Cricut. You can also cut the word as regular adhesive vinyl and stick it straight on, which skips the painting. A stencil gives a painted look that lasts longer outdoors. If you do not have a cutting machine, a ready-made reusable stencil works too, and so does hand lettering with a paint pen.

Hanging it

A light round can hang from a small sawtooth hook on the back. For a heavier board, screw in a D ring and loop a ribbon through it to hang over a wreath hanger. If the door gets direct sun or rain, brush on a clear outdoor sealer once the paint has cured.

Seasonal ideas

  • Swap the bow for orange and plaid in fall, red and green at Christmas.
  • Add your family name under the greeting for a housewarming gift.
  • Use pastel stripes and faux tulips for spring.
  • Paint the stripes in team or school colors for game days.

Common mistakes

  • Paint bleeding under the stencil. Seal the edges with Mod Podge first and dab paint rather than brushing it.
  • Crooked stripes. Measure from the top and bottom edges before you tape.
  • Peeling paint with the tape. Wait until it is dry and pull the tape back low and slow.

More door decor

Want a matching bow? Learn how to make a bow for a wreath. Prefer greenery to a sign? Try a door wreath. New to cutting machines? Start with how to use a Cricut, then learn to cut SVG files for your own stencils.

Free printable

Print the steps and supply list for this project

One page you can take to the table. Free with a free account, no password.

Get the free printable

What you'll need

Free, for this project

Get this checklist by email

  • All 17 tools and materials, with tick boxes
  • A link to print all 10 steps on paper, to keep by you while you craft

No password. The whole tutorial stays free on this page.

Quick answer

How to make a wooden door hanger: stain a wood round, paint stripes, stencil a Welcome and add a bow and greenery for your front door. An easy project: about 1 hour 30 minutes, plus 4 hours to dry or set. Materials cost about $20 to $40. You need 17 things, including pre-cut wood round, walnut wood stain and black chalk paint. The 10 steps start with stain the Wooden Door Hanger Round With Walnut Stain.

Step-by-step guide

10 steps, about 11 minutes. Tap a picture to jump to that step. Your progress saves automatically.

Tick each step off as you go.

  1. Step 1: Stain the Wooden Door Hanger Round With Walnut Stain

    Watch this step · 1:05

    Pick a pre-cut wood round for your door hanger. Put on gloves and apply a thick coat of walnut wood stain with a rag, rubbing it into the grain all over. Do the front, the back and the edge. Jessica tried a watery stain first and switched to a darker walnut for richer color. Let the round dry completely before you move on.

    Tip:

    Lay a plastic drop cloth down first. Stain is hard to get off a table.

    Back to all steps

  2. Step 2: Plan the Door Hanger Layout With the Stencil and Tape

    Watch this step · 2:10

    Before painting, lay your stencil and any decorations on the stained round to see how everything fits. Then use painters tape to divide the round into sections. Here the top and bottom edges will be black, two stripes will be white, and the middle stays stained for the word. Move the tape until the spacing looks right to you.

    Tip:

    Use a ruler so the stripes come out the same width on both sides.

    Back to all steps

  3. Step 3: Paint the Top and Bottom of the Door Hanger Black

    Watch this step · 3:25

    With the tape in place, paint the top and bottom edges of the round black. Chalk paint dries faster than regular acrylic and covers well. Give it two coats, letting the first dry before adding the second. Paint around the side edge too so the sign looks neat from every angle. Once it dries, peel the tape off slowly.

    Tip:

    Paint away from the tape edge, not into it, to keep the line crisp.

    Back to all steps

  4. Step 4: Tape and Paint the White Stripes on the Door Hanger

    Watch this step · 5:12

    Tape off the next section so the white stripes sit between the black edges and the stained middle. Brush on white chalk paint with a foam brush. White takes more coats to cover the dark stain. Jessica used about three so the wood did not show through. Let each coat dry before you add the next one.

    Tip:

    Press the tape edges down firmly with a fingernail so paint cannot creep under.

    Back to all steps

  5. Step 5: Peel the Tape to Reveal the Door Hanger Stripes

    Watch this step · 5:52

    When the white paint is dry, pull off all the tape. You should now have a black top and bottom, two white stripes and a stained wood band across the middle. Check the edges. If paint crept under the tape anywhere, you can touch it up with a small brush later. A little mistake is easy to fix at the end.

    Tip:

    Pull the tape back at a low angle, folding it over itself, for clean edges.

    Back to all steps

  6. Step 6: Apply the Vinyl Welcome Stencil to the Door Hanger

    Watch this step · 6:25

    Cut your Welcome stencil from vinyl on a cutting machine, or use a ready-made stencil. Pick it up with transfer tape, center it on the stained band, and smooth it down. Then slowly peel away the clear transfer tape, leaving the vinyl stencil stuck to the wood. Rub over every letter so the edges are sealed tight against the surface.

    Tip:

    Prefer no painting? Cut the word in solid vinyl and stick it on instead.

    Back to all steps

  7. Step 7: Seal the Stencil Edges With Mod Podge

    Watch this step · 7:12

    Brush a thin layer of Mod Podge over the open letters of the stencil. This seals the stencil edges so the paint you add next cannot bleed underneath. Mod Podge dries clear, so any that lands on the wood will not show. Let it dry until it is no longer tacky before painting over it.

    Tip:

    A thin coat is plenty. Thick Mod Podge can leave a ridge around the letters.

    Back to all steps

  8. Step 8: Dab Black Paint Through the Door Hanger Stencil

    Watch this step · 7:35

    Load a little black paint onto a foam pouncer or a gloved fingertip and dab it straight down through the stencil. Dabbing pushes paint into the letters without sliding it under the edges. Cover every letter evenly. Let it dry, and add a second light coat if the wood grain still shows through the letters.

    Tip:

    Blot most of the paint off on a paper towel first. Less paint means sharper letters.

    Back to all steps

  9. Step 9: Peel the Stencil Off the Wooden Door Hanger

    Watch this step · 8:25

    While the last coat is still a little soft, start peeling the vinyl stencil away. Go slowly and pull at a low angle. The black Welcome lettering stays behind on the stained wood. Use a weeding tool to lift out small pieces from inside letters. Touch up any fuzzy spots with a fine brush or a paint pen.

    Tip:

    If paint starts lifting with the vinyl, stop and let it dry a little longer.

    Back to all steps

  10. Step 10: Add a Hanger, Bow and Greenery to the Door Hanger

    Watch this step · 10:10

    Fix a small hook to the back for hanging. A light round only needs a sawtooth hook. Tie a bow from wired ribbon, or make your own with loops. Arrange faux eucalyptus along the top edge and attach it with staples or hot glue, then fix the bow in the center over the stems. Hang it on your front door.

    Tip:

    For a heavy board outdoors, use a D ring and a ribbon over a wreath hanger.

    Back to all steps

How to Make a Propagation Station With Test Tubes

Keep going

How to Make a Propagation Station With Test Tubes

Keep going with crafts

More on this topic, picked for this wooden door hanger.

You reached the last step

Save this project to come back to it

Your ticked steps, the free printable and your other saved makes, together in My Projects. Free, no password.

You tapped Save

Save this project for later

We'll email you a link, no password.

How to Make a Wooden Door Hanger (Stained Welcome Sign)

  • Your saved projects in one list
  • Your ticked steps on any device

Check your inbox for an email from us. Not there? Look in your spam folder.

Free printable

Printable sheet and shopping list for this project

The bonus is hidden until you sign up.

Free with a free account, no password. Every step above stays open to everyone.

Products Used

The Checklist

How to Make a Wooden Door Hanger (Stained Welcome Sign)

Tools
7
Materials
10
Steps
10
Video
11 min

Tools we recommend

As an Amazon Associate we earn from qualifying purchases. Links on this page may be affiliate links - clicking them and buying doesn't change your price, but helps support Crafting Step by Step.

Tags

The Crafter's Weekly

New crafts tutorials, every Sunday

One short email with the week's best step-by-step guides. Free, no spam, unsubscribe anytime.

Did this work for you?

What's next

Related collections

Curated theme pages that include this tutorial.

Similar tutorials

Hand-picked next reads based on the one you just finished.

Liked this crafts tutorial?

Pick the crafts you want to hear about. One email every Sunday with new step-by-step tutorials. No spam, easy to unsubscribe.

Get more like this in your inbox

Weekly digest. Pick the categories you want. Unsubscribe anytime.

Send me tutorials about

We only email about new tutorials. Easy unsubscribe anytime.