How to Make a Bow for a Wreath

CraftsEasy15:5811 stepsBrowse more →
The finished result: How to Make a Bow for a Wreath

By CraftingStepByStepPublished

Based on a video by Julie’s Wreath Boutique.

A store-bought greenery wreath costs twenty dollars and looks like a store-bought greenery wreath. Add a handmade bow and it stops looking bought. That is the whole trick, and it takes about five minutes once you have made two or three.

Julie from Julie's Wreath Boutique makes two bows here: a straightforward six-loop bow, then a layered version that stacks two ribbons for something fuller. Both are the same move repeated over and over.

Buy wired ribbon, and buy the good stuff

Wired ribbon has a thin wire running down each edge. That wire is what lets a loop hold its shape instead of flopping, so a bow made from unwired ribbon will never look like the one in the photo no matter how carefully you fold it.

Two and a half inches is the width that works for most wreaths. Cheap ribbon fights you: it creases where you want a curve, and the wire kinks instead of bending. If your bows keep coming out sad, blame the ribbon before you blame your hands.

The grid on your mat is a ruler

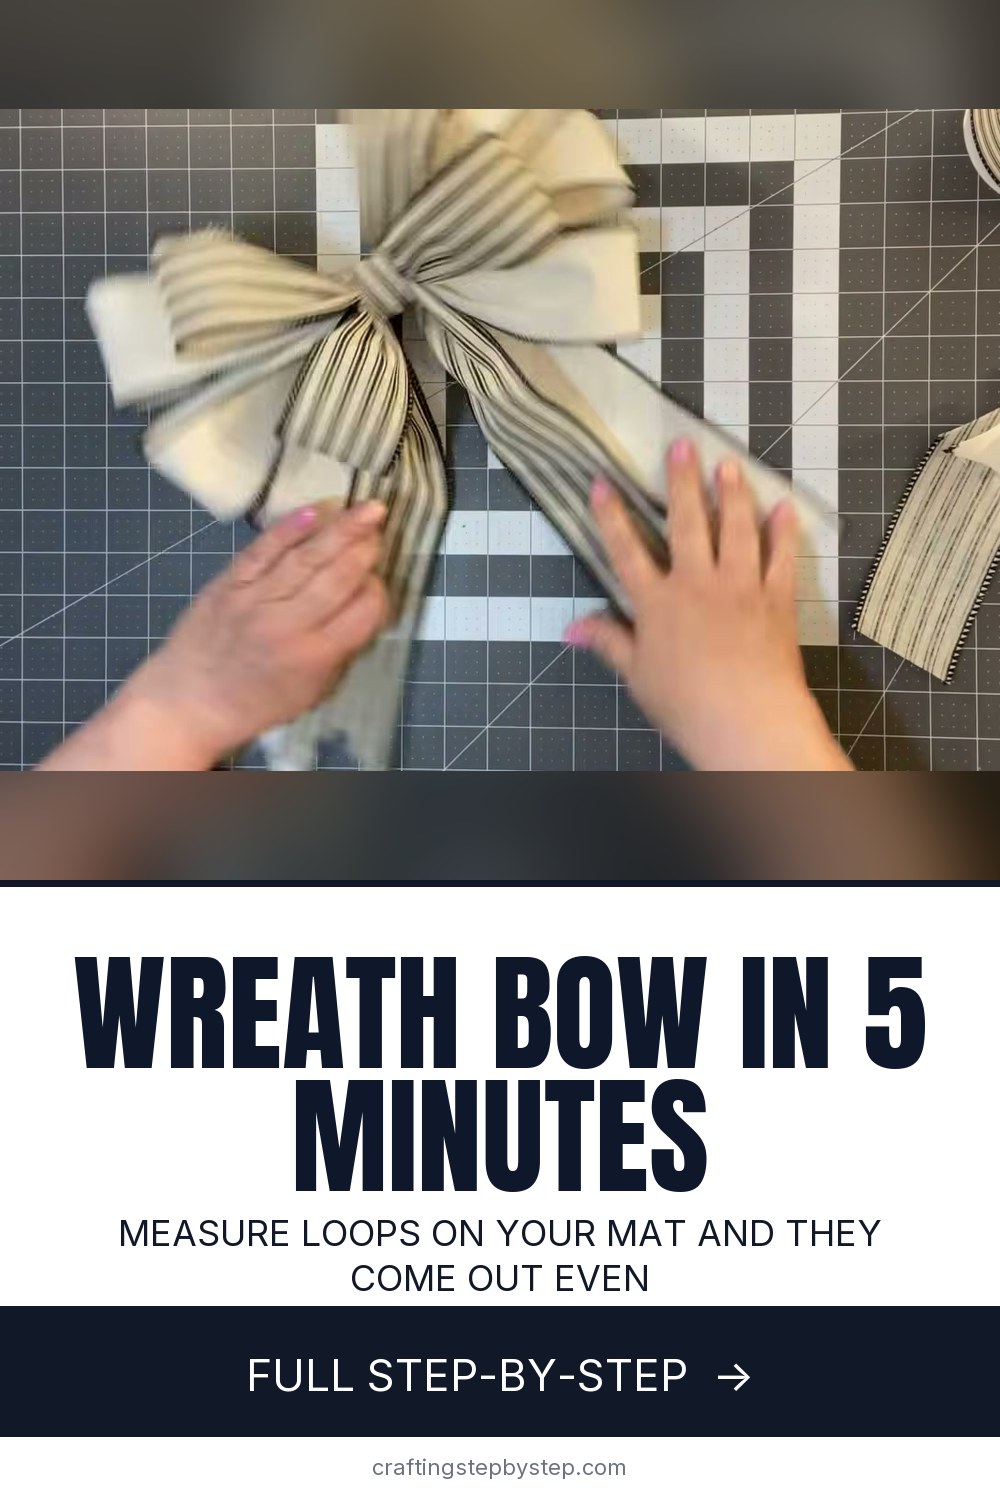
Every loop in a good bow matches its opposite number, and eyeballing that is harder than it sounds. Lay the ribbon across a gridded cutting mat and measure. Eight inches of ribbon makes a four-inch loop. Ten inches makes a five-inch loop for the outer layer.

You do not need a bow maker. It holds the loops for you while you work, which is genuinely nice, but two hands and a mat get the job done.

Why you twist between every loop

Most ribbon has a right side and a wrong side. Without a twist at the centre, every second loop shows you the back of the ribbon. One half-twist each time you come back to the middle keeps the good face pointing out the whole way round. It feels fussy for the first two loops and then goes automatic.

Cut the tails long

Twelve inches per tail, minimum. You can always shorten a tail once the bow is on the wreath and you can see how it hangs. You cannot add ribbon back. Cut the ends at an angle or into a V so they do not fray straight across.

Fixing a lopsided bow

Do not take it apart. Pull each loop out one at a time, turn it so it faces a different direction than its neighbour, and push the whole thing wider than looks right. Bows compress when you attach them. A bow that looks slightly overdone on the table looks correct on a door.

Step-by-Step Guide

11 steps · about 16 minutes.Check off each step as you go and your progress saves automatically.

1

Start With Wired Ribbon and Fold the First Loop

0:50
Step 1: Start With Wired Ribbon and Fold the First Loop - How to Make a Bow for a Wreath

Unroll a length of 2.5-inch wired ribbon and fold the end back on itself to make your first loop. Size it however you like, because this one sets the scale for every loop after it. Wired ribbon matters here: the wire in the edges is what holds a loop open. Unwired ribbon collapses the moment you let go.

Tip

Leave the ribbon on the roll while you work. Cutting a length first almost always means cutting it too short.

2

Twist at the Centre So the Right Side Shows

1:18
Step 2: Twist at the Centre So the Right Side Shows - How to Make a Bow for a Wreath

Most ribbon has a printed face and a plain back. Every time you come back to the middle, give the ribbon a half twist so the printed side keeps facing out on the next loop. Skip it and every other loop shows you the back of the ribbon, which is the most common reason a homemade bow looks homemade.

Tip

Double-sided ribbon skips this step entirely. It costs more and it is worth it on your first few bows.

Used in this stepdouble sided wired ribbon
3

Measure Eight Inches Against the Mat

1:52
Step 3: Measure Eight Inches Against the Mat - How to Make a Bow for a Wreath

Lay the ribbon flat across the grid and count off eight inches, then bring it back to the centre. That gives you a four-inch loop. Using the mat instead of your eye is what makes the finished bow symmetrical, and it costs about two seconds per loop.

Tip

Pick your number and stick to it. Whether it is eight inches or ten matters far less than every loop matching.

4

Build Three Loops on Each Side

3:10
Step 4: Build Three Loops on Each Side - How to Make a Bow for a Wreath

Keep going: measure out, come back to the middle, twist, repeat. Alternate sides so the loops stack evenly left and right. Three on each side makes a good full bow for a standard wreath. Hold everything pinched at the centre with your thumb and forefinger as you go, and do not worry that the bundle looks like a mess at this stage.

Tip

They do not have to be perfect. Small differences disappear once you fluff the loops at the end.

Used in this step2.5 inch wired ribbon
5

Add a Longer Loop Either Side

3:52
Step 5: Add a Longer Loop Either Side - How to Make a Bow for a Wreath

Measure ten inches instead of eight for the last loop on each side. Those two larger loops sit behind the others and frame the bow, which stops it reading as one flat cluster. This is the point where a bow maker earns its keep, because you are now holding a lot of ribbon in one hand.

Tip

If your hand cramps, lay the bundle on the mat and pin it with a chip clip while you reposition.

Used in this stepbow maker tool for ribbon
6

Wire the Centre and Pull It Tight

4:32
Step 6: Wire the Centre and Pull It Tight - How to Make a Bow for a Wreath

Push a length of floral wire down through the middle of the gathered loops, bring it back up the other side, and pull hard in one direction before twisting the ends together. Pull harder than feels polite. A loose centre is why bows sag, and the wire disappears completely once the loops are fluffed.

Tip

Leave the wire ends long. They are what ties the bow onto the wreath, so do not trim them flush.

Used in this stepgreen floral wire
7

Catch Two Long Tails Under the Wire

5:00
Step 7: Catch Two Long Tails Under the Wire - How to Make a Bow for a Wreath

Cut a separate length of ribbon about twenty-four inches long, find its centre, and trap it under the same wire so it hangs as two twelve-inch tails. Doing the tails separately rather than working them into the loops lets you set their length and angle on their own, which is much easier to get right.

Tip

Want three tails instead of two? Add a third length the same way. It reads fuller on a large wreath.

Used in this step2.5 inch wired ribbon
8

Trim the Tails and Fluff Every Loop

5:45
Step 8: Trim the Tails and Fluff Every Loop - How to Make a Bow for a Wreath

Cut the tail ends at a sharp angle or into a V so they do not fray in a straight line. Then work around the bow pulling each loop out and turning it so no two face the same way. Push it wider than looks right. A bow flattens once it is tied to a wreath, so overdo it now.

Tip

Cut the tails last, on the wreath if you can. Length that looks right on the table often hangs too long on a door.

Used in this stepfabric scissors
9

For a Layered Bow, Start With a Long Tail

7:20
Step 9: For a Layered Bow, Start With a Long Tail - How to Make a Bow for a Wreath

The second style stacks two bows. Start this one differently: pull off ten to twelve inches before your first loop so the tail is built in from the start. Then loop as before, meeting in the middle each time. This ribbon reads the same on both faces, so there is no twisting to do.

Tip

Twelve-inch loops on the bottom bow give a six-inch finished loop, a good base size to layer onto.

Used in this stepwired ribbon assortment
10

Make a Smaller Bow to Sit on Top

11:40
Step 10: Make a Smaller Bow to Sit on Top - How to Make a Bow for a Wreath

Build a second bow the same way in a contrasting ribbon, but size the loops down. Eight inches of ribbon gives a four-inch loop, which sits neatly inside the larger bow rather than competing with it. Four loops each side is plenty on the top layer.

Tip

Pair a pattern with a solid. Two busy ribbons stacked together read as noise from across a room.

Used in this stepstriped wired ribbon
11

Join the Two and Fluff Them Into One

13:20
Step 11: Join the Two and Fluff Them Into One - How to Make a Bow for a Wreath

Lay the small bow over the large one, line up the centres, and hold them together with a zip tie while you work. A second zip tie or a twist of wire locks them for good. Snip the ties off afterwards if you like, or leave them, because nothing shows once the loops are open.

Then fluff the whole stack as one bow rather than two, pulling loops from both layers out in alternating directions.

Tip

Attach the bow to the wreath with the wire tails, then fluff again. It always needs one more pass once it is hanging.

Keep going

How to Make an Autumn Leaf Lantern

Products Used

The Checklist

How to Make a Bow for a Wreath

Tools
5
Materials
3
Steps
11
Video
16 min

Tools we recommend

Your Guide

Julie’s Wreath Boutique

As an Amazon Associate we earn from qualifying purchases. Links on this page may be affiliate links - clicking them and buying doesn't change your price, but helps support CraftingStepByStep.

Tags

Sunday How-To

New crafts tutorials, every Sunday

One short email with the week's best step-by-step guides. Free, no spam, unsubscribe anytime.

Did this work for you?

What's next

Related collections

Curated theme pages that include this tutorial.

Weekly Digest

Liked this crafts tutorial?

Pick the categories you want to hear about. Weekly digest of new step-by-step tutorials. No spam, easy unsubscribe.

Send me tutorials about

We only email about new tutorials. Easy unsubscribe anytime.