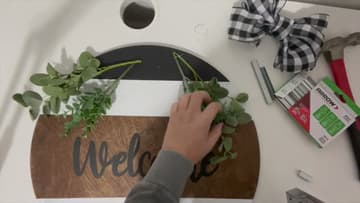
How to Make a Wooden Door Hanger (Stained Welcome Sign)
Source: Craft n' Creations • Full tutorial: www.craftingstepbystep.com/crafts/how-to-make-a-wooden-door-hanger
- Difficulty
- Easy
- Hands-on time
- About 1 hour 30 minutes
- Wait time
- 4 hours
- Cost
- About $20 to $40
- Makes
- 1 door hanger

Tools
- foam brushes
- painters tape
- cutting machine (optional)
- weeding tool
- staple gun or hot glue gun
- gloves
- rags
Materials
- pre-cut wood round
- walnut wood stain
- black chalk paint
- white chalk paint
- stencil vinyl
- transfer tape
- Mod Podge
- wired ribbon
- faux eucalyptus stems
- sawtooth hook
Steps
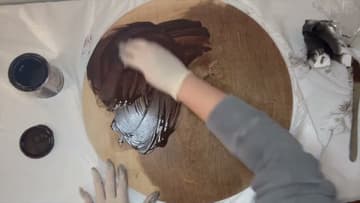
1. Stain the Wooden Door Hanger Round With Walnut Stain
Pick a pre-cut wood round for your door hanger. Put on gloves and apply a thick coat of walnut wood stain with a rag, rubbing it into the grain all over.
Tip: Lay a plastic drop cloth down first. Stain is hard to get off a table.
2. Plan the Door Hanger Layout With the Stencil and Tape
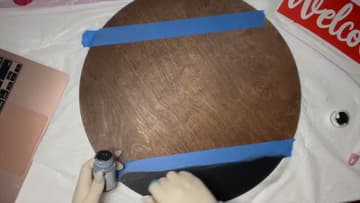
Before painting, lay your stencil and any decorations on the stained round to see how everything fits. Then use painters tape to divide the round into sections.
Tip: Use a ruler so the stripes come out the same width on both sides.

3. Paint the Top and Bottom of the Door Hanger Black
With the tape in place, paint the top and bottom edges of the round black. Chalk paint dries faster than regular acrylic and covers well.
Tip: Paint away from the tape edge, not into it, to keep the line crisp.
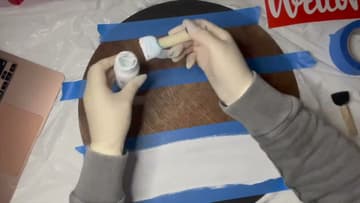
4. Tape and Paint the White Stripes on the Door Hanger
Tape off the next section so the white stripes sit between the black edges and the stained middle. Brush on white chalk paint with a foam brush.
Tip: Press the tape edges down firmly with a fingernail so paint cannot creep under.
5. Peel the Tape to Reveal the Door Hanger Stripes
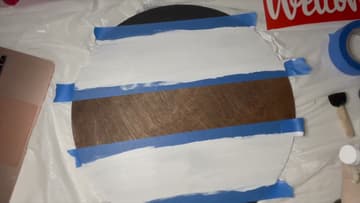
When the white paint is dry, pull off all the tape. You should now have a black top and bottom, two white stripes and a stained wood band across the middle.
Tip: Pull the tape back at a low angle, folding it over itself, for clean edges.
6. Apply the Vinyl Welcome Stencil to the Door Hanger
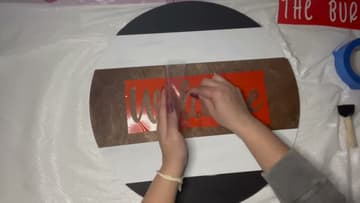
Cut your Welcome stencil from vinyl on a cutting machine, or use a ready-made stencil. Pick it up with transfer tape, center it on the stained band, and smooth it down.
Tip: Prefer no painting? Cut the word in solid vinyl and stick it on instead.
7. Seal the Stencil Edges With Mod Podge
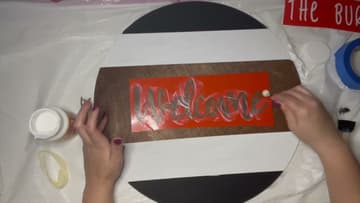
Brush a thin layer of Mod Podge over the open letters of the stencil. This seals the stencil edges so the paint you add next cannot bleed underneath.
Tip: A thin coat is plenty. Thick Mod Podge can leave a ridge around the letters.
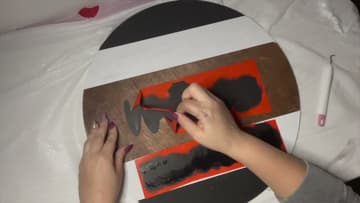
8. Dab Black Paint Through the Door Hanger Stencil
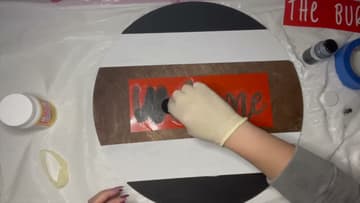
Load a little black paint onto a foam pouncer or a gloved fingertip and dab it straight down through the stencil. Dabbing pushes paint into the letters without sliding it under the edges.
Tip: Blot most of the paint off on a paper towel first. Less paint means sharper letters.
9. Peel the Stencil Off the Wooden Door Hanger
While the last coat is still a little soft, start peeling the vinyl stencil away. Go slowly and pull at a low angle.
Tip: If paint starts lifting with the vinyl, stop and let it dry a little longer.
10. Add a Hanger, Bow and Greenery to the Door Hanger
Fix a small hook to the back for hanging. A light round only needs a sawtooth hook.
Tip: For a heavy board outdoors, use a D ring and a ribbon over a wreath hanger.