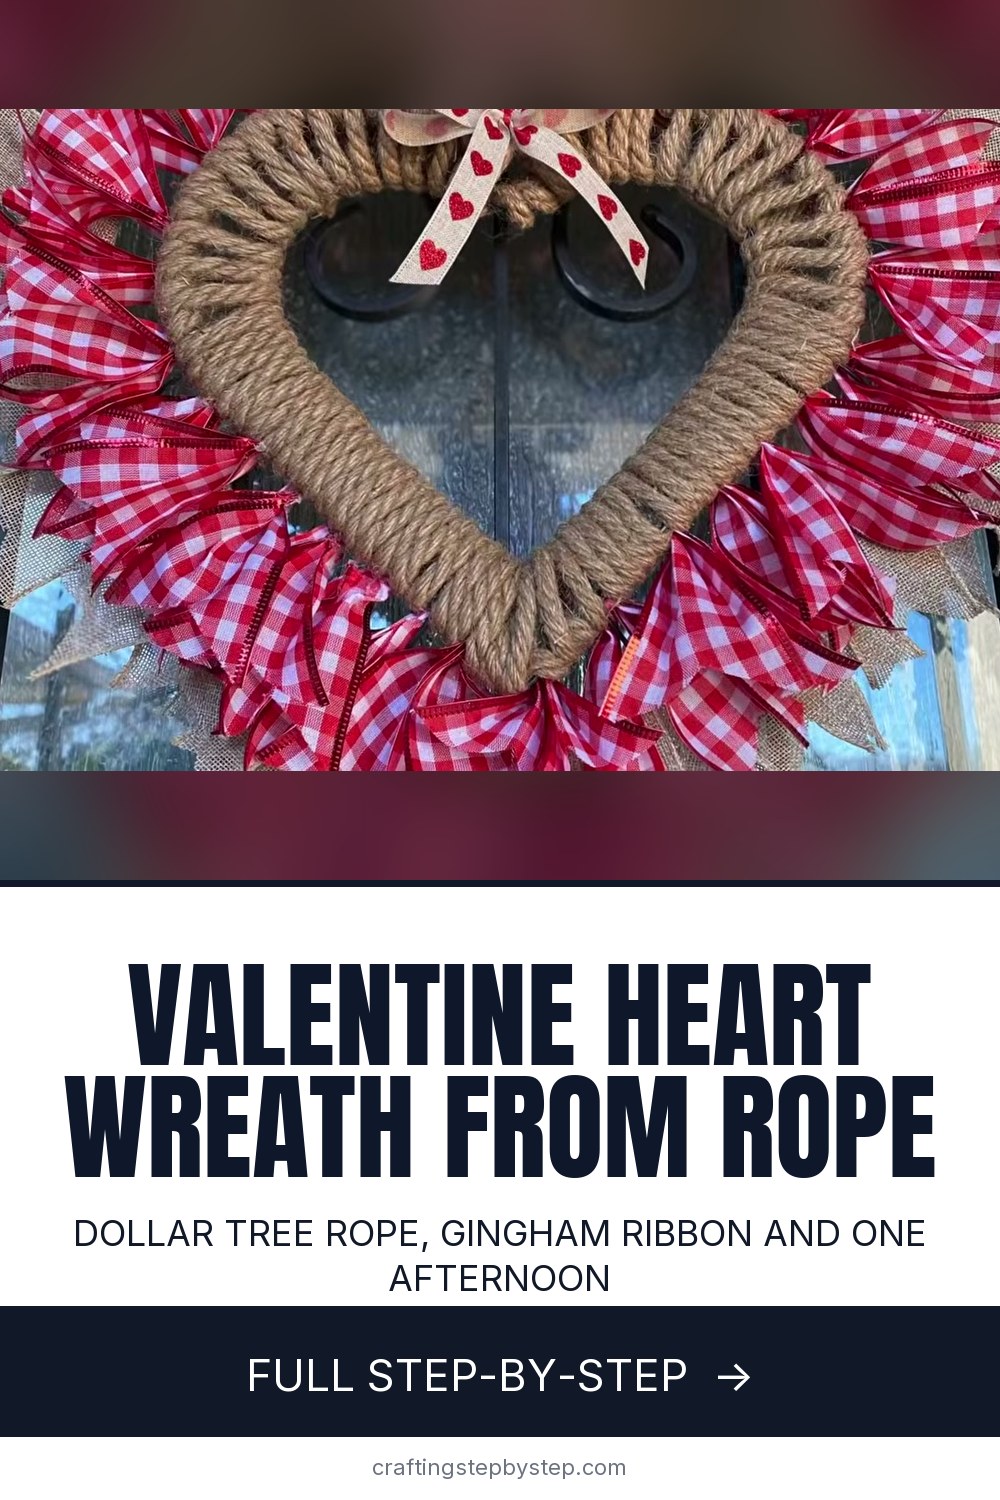
How to Make a Valentine's Heart Wreath

The finished result: How to Make a Valentine's Heart Wreath
  • Difficulty: Easy
  • 10 steps

You tapped Save

Save this project for later

We'll email you a link, no password.

How to Make a Valentine's Heart Wreath

  • Your saved projects in one list
  • Your ticked steps on any device

Check your inbox for an email from us. Not there? Look in your spam folder.

Print

Steps written out by Crafting Step by Step from Melanie Ferguson - DIY Home Decor's video (opens YouTube) (11:05). Published .

This Valentine heart wreath starts as a plain wire heart and a few packs of rope. By the end of an afternoon it is a full, fluffy wreath in red gingham and burlap, ready for the front door. The design comes from Melanie Ferguson of the Melanie Ferguson - DIY Home Decor channel, and nearly every supply came from Dollar Tree.

Valentine heart wreath supplies and swaps

You need a wire heart wreath frame, about three packs of jute or nautical rope, two spools of red gingham wired ribbon, one spool of burlap ribbon, a short piece of heart print ribbon for the bow, jute twine for the hanger, a hot glue gun and sharp scissors.

No rope? Wrap the frame in strips of an old flannel shirt or a fat yarn. Any wired ribbon about 2.5 inches wide works in place of the gingham. Leftover Christmas plaid in red works too.

Sizes and measurements

The frame Melanie used is about 14 inches across. Cut the ribbon pieces about 8 inches long. Glue them roughly an inch apart, or every second or third rope wrap. Cut the burlap the same length. If your frame is smaller, cut 6 inch pieces so the ruffle stays in proportion.

How long it takes

Plan on two to three hours. The rope wrap takes about an hour. The ribbon loops take another hour, and the burlap, bow and hanger go fast. You can stop after the rope and finish another day.

Who it suits

It is a cheerful front door wreath from late January to Valentine's Day. It also makes a sweet gift for a daughter, a neighbor or a spouse. A smaller one hangs well over a grandchild's bed or on a classroom door for the party.

Heart wreath variations

  • Colours. Pink and white gingham reads softer. Red and pink together look playful.
  • A message. Hang a small wood sign that says XOXO or Be Mine in the middle.
  • Kid-friendly. Let a child cut the notches in the ribbon tails while you do the glue. Or skip glue on the gingham and tie the pieces on with a single knot.
  • Year round. Swap the gingham for green in March or blue in summer.

For a fuller bow on top, see how to make a bow for a wreath.

Troubleshooting

  • Ran out of rope. You likely wrapped too tight. Glue the new piece on the back and carry on.
  • Ribbon loops sag. Wired ribbon holds its shape. Plain ribbon droops, so switch to wired.
  • Gaps in the ruffle. Cut one or two more pieces and tuck them in. Melanie did the same at the bottom tip.
  • Glue on your fingers. A low temp glue gun and silicone finger caps save a lot of sore thumbs.

Storing it for next year

Hang it under a covered porch so rain does not flatten the ribbon. After the holiday, slip it into a large bag or a wreath box and store it flat. Fluff the loops again next January and it looks new.

Want more wreaths? Start with how to make a wreath, try an everyday door wreath, or make a quick paper wreath with the grandkids.

Free printable

Print the steps and supply list for this project

One page you can take to the table. Free with a free account, no password.

Get the free printable

What you'll need

Free, for this project

Get this checklist by email

  • All 11 tools and materials, with tick boxes
  • A link to print all 10 steps on paper, to keep by you while you craft

No password. The whole tutorial stays free on this page.

Quick answer

Make a Valentine heart wreath with jute rope, gingham ribbon loops and burlap. An easy project. You need 11 things, including heart wire wreath frame, jute or nautical rope and red gingham wired ribbon. The 10 steps start with hot Glue the Jute Rope End to the Heart Wreath Frame, wrap the Jute Rope Around the Straight Sides of the Heart Wreath and wrap the Arched Top of the Heart Wreath With the Rope Knot Pattern.

Step-by-step guide

10 steps, about 11 minutes. Tap a picture to jump to that step. Your progress saves automatically.

Tick each step off as you go.

  1. Step 1: Hot Glue the Jute Rope End to the Heart Wreath Frame

    Watch this step · 0:42

    Lay the wire heart frame flat with the curved side up. Pick a spot on one of the straight sides near the bottom point. Put a dab of hot glue on the inner wires and press the end of the rope into it. Hold it a few seconds until it sets. This anchor keeps the rope from slipping when you start wrapping. Keep the rest of the rope loose beside you so it does not tangle.

    Tip:

    A low temp glue gun is kinder to your fingers and still holds rope well.

    Back to all steps

  2. Step 2: Wrap the Jute Rope Around the Straight Sides of the Heart Wreath

    Watch this step · 2:26

    Feed the rope from the inside of the frame to the outside, over and over. Cover the inner two rings of wire only and leave the outer ring bare for now. Pull each wrap snug against the last one. Do not pull too hard, though. Tight wraps eat up rope fast. One pack of rope covers about half the heart. When a pack runs out, glue the new end on the back.

    Tip:

    Push the wraps together with your thumb every few turns so no wire shows.

    Back to all steps

  3. Step 3: Wrap the Arched Top of the Heart Wreath With the Rope Knot Pattern

    Watch this step · 2:56

    The two rounded humps at the top get a slightly different wrap. Loop the rope once around the middle wire on its own, like a short knot. Then bring it back around both the inner and middle wires as before. Repeat that pattern all the way across the arch. It gives the curve a neat, ribbed look. When you reach your starting point, cut the rope and glue the end to the back.

    Tip:

    Tuck the cut end behind a wrap before you glue it so it never shows from the front.

    Back to all steps

  4. Step 4: Cut the Red Gingham Ribbon Into Pieces for the Heart Wreath

    Watch this step · 4:10

    Unroll the gingham wired ribbon and cut it into pieces about 8 inches long. Cut several layers at once to save time. Fold each stack in half lengthwise and snip a V into both ends. This dovetail cut keeps the ribbon from fraying and looks tidy. You will need around two spools of ribbon for a 14 inch heart, so cut a big pile before you start gluing.

    Tip:

    Sharp fabric scissors cut wired ribbon cleanly. Dull ones chew the edges.

    Back to all steps

  5. Step 5: Pinch a Notched Gingham Ribbon Piece Into the Heart Wreath Ropes

    Watch this step · 4:40

    Fold one ribbon piece in half so the notched tails line up. Pinch it tight in the middle. Work from the back of the wreath and push the pinched center down between two rope wraps. When you turn the wreath over, the ribbon pops up through the front as a loop. The tails stay behind. Try a couple before you glue, so you can see how they sit.

    Tip:

    The arched sections have more room between wraps, so ribbon goes in easier there.

    Back to all steps

  6. Step 6: Hot Glue Gingham Ribbon Loops Around the Heart Wreath

    Watch this step · 5:08

    Add a line of glue between two ropes and press a pinched ribbon into it. Hold it a moment. Move about an inch along and add the next one, skipping two or three rope wraps each time. Keep going all the way around the heart. Wiggle the rope a little if a gap is too tight. It gets messy, so pick dried glue off your thumb between pieces.

    Tip:

    Silicone finger caps stop hot glue from sticking to your fingertips.

    Back to all steps

  7. Step 7: Add Notched Burlap Ribbon to the Outer Wire of the Heart Wreath

    Watch this step · 7:44

    Now use the bare outer wire. Cut the burlap ribbon into pieces about 8 inches long and notch the ends the same way as the gingham. Fold each one, pinch it and glue it onto the outer ring. Spread them a bit farther apart than the gingham so the ribbon goes further. The burlap makes a soft natural border behind the red loops.

    Tip:

    Burlap sheds. Trim stray threads with scissors once all the pieces are on.

    Back to all steps

  8. Step 8: Tie a Heart Print Ribbon Bow on the Valentine Heart Wreath

    Watch this step · 9:28

    Cut a length of the heart print ribbon and tie a small bow. Melanie held hers with a red zip tie while she shaped the loops, then snipped the tie off. Set the bow at the top center of the heart, where the two humps meet. Glue it to the rope. Trim the tails to an angle so they hang neatly.

    Tip:

    If a hand-tied bow is fiddly, glue two loops and a center wrap of ribbon instead.

    Back to all steps

  9. Step 9: Tie a Twine Hanger on the Back of the Heart Wreath

    Watch this step · 9:52

    Turn the wreath face down. Tie one end of the jute twine to the rope on one side of the top dip. Tie the other end to the rope on the other side, leaving a loop long enough to slip over a wreath hook. Add a dab of hot glue to each knot so it cannot work loose. Give the loop a firm tug to test it.

    Tip:

    Hang it on a hook for a minute and check that it hangs straight before you glue the knots.

    Back to all steps

  10. Step 10: Fluff the Gingham Ribbon Loops on the Finished Heart Wreath

    Watch this step · 10:14

    Flip the wreath face up. This is the fun part. Spread each wired ribbon loop open with your fingers and turn it so the gingham faces out. Fluff the burlap too. Look for any bare spots, especially at the bottom point. Glue in an extra piece of ribbon wherever it looks thin. Then hang it on the door.

    Tip:

    Stand back a few steps and look at it from across the room to spot thin areas.

    Back to all steps

How to Layer SVG Files in Cricut

Keep going

How to Layer SVG Files in Cricut

Keep going with crafts

More on this topic, picked for this valentine's heart wreath.

You reached the last step

Save this project to come back to it

Your ticked steps, the free printable and your other saved makes, together in My Projects. Free, no password.

You tapped Save

Save this project for later

We'll email you a link, no password.

How to Make a Valentine's Heart Wreath

  • Your saved projects in one list
  • Your ticked steps on any device

Check your inbox for an email from us. Not there? Look in your spam folder.

Free printable

Printable sheet and shopping list for this project

The bonus is hidden until you sign up.

Free with a free account, no password. Every step above stays open to everyone.

Products Used

The Checklist

How to Make a Valentine's Heart Wreath

Tools
3
Materials
8
Steps
10
Video
11 min

Tools we recommend

As an Amazon Associate we earn from qualifying purchases. Links on this page may be affiliate links - clicking them and buying doesn't change your price, but helps support Crafting Step by Step.

Tags

The Crafter's Weekly

New crafts tutorials, every Sunday

One short email with the week's best step-by-step guides. Free, no spam, unsubscribe anytime.

Did this work for you?

What's next

Related collections

Curated theme pages that include this tutorial.

Similar tutorials

Hand-picked next reads based on the one you just finished.

Liked this crafts tutorial?

Pick the crafts you want to hear about. One email every Sunday with new step-by-step tutorials. No spam, easy to unsubscribe.

Get more like this in your inbox

Weekly digest. Pick the categories you want. Unsubscribe anytime.

Send me tutorials about

We only email about new tutorials. Easy unsubscribe anytime.