How to Make a Paper Wreath

Paper CraftsEasy14:169 stepsBrowse more →
The finished result: How to Make a Paper Wreath
Also in:Crafts

By CraftingStepByStepPublished

Based on a video by Sandy Risi.

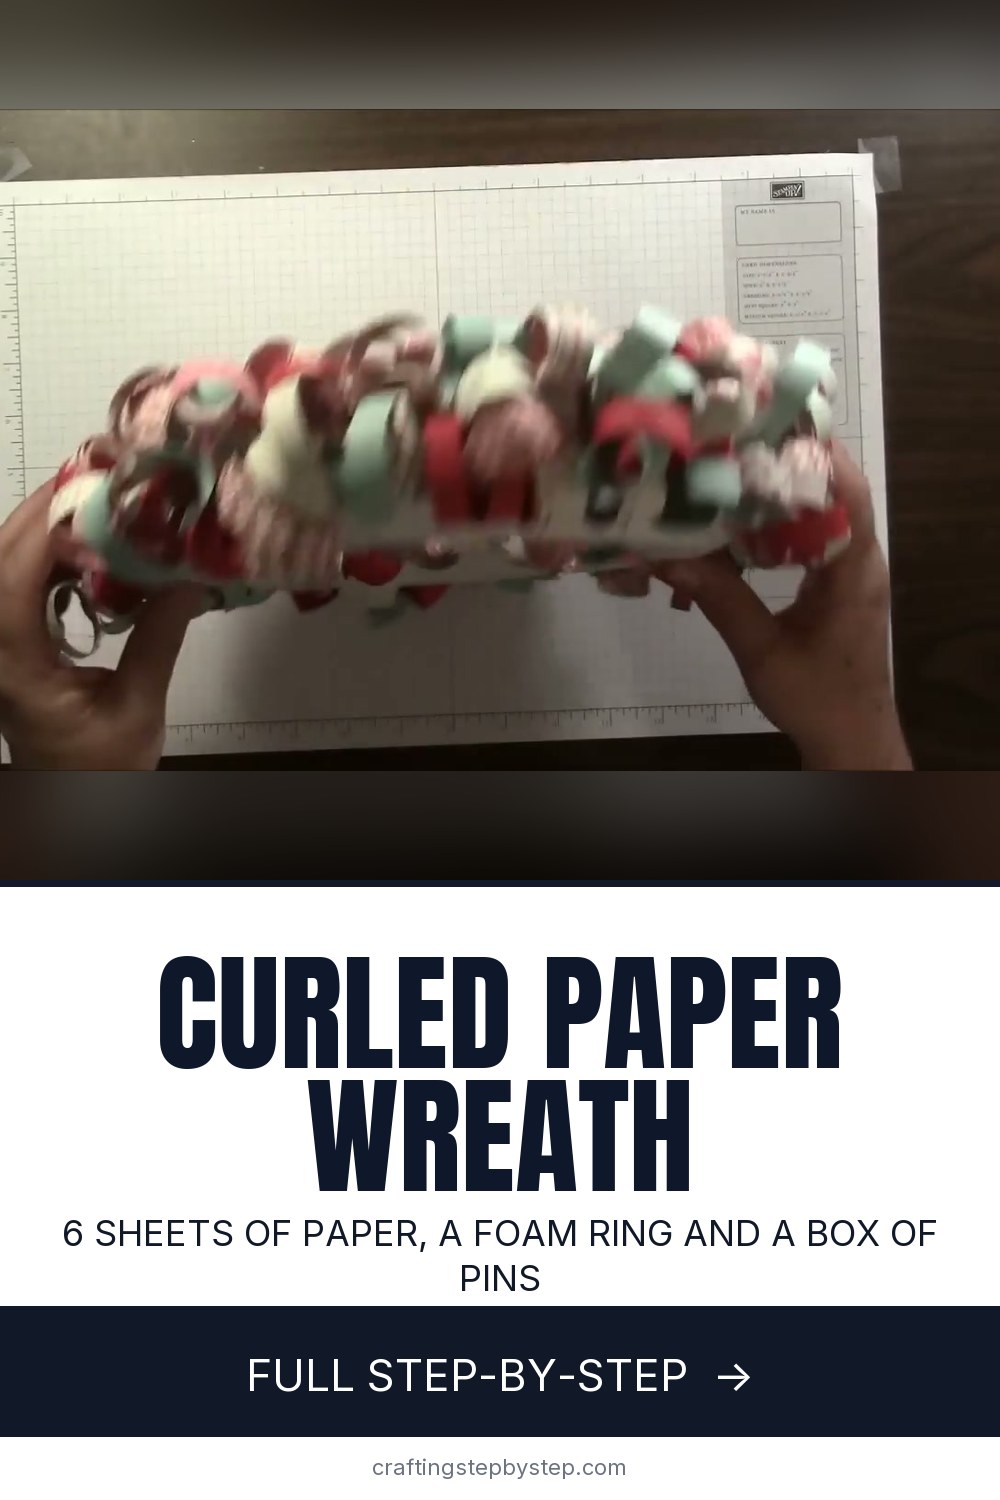
This one is mostly repetition, and that is why it works. You cut paper into strips, bend each strip into a loop, and pin the loop to a foam ring. Do that a couple of hundred times and you have a wreath. No glue on the base, no wiring, no floral tape.

Sandy Risi builds hers in about fourteen minutes of video. Expect an evening in real time, because the curling is the slow part and you will want to sit down for it.

What you need

A solid extruded foam wreath form, not the crumbly white kind that sheds beads everywhere. A 10-inch form takes roughly six 12x12 sheets. Go up to a 12 or 14-inch form and you are into a full pack of twelve.

The pins matter more than you would think. You want short flat-head pins, about three quarters of an inch, like sequin pins. Round-headed pins sit proud of the paper and catch the light, and you will see every one of them.

Choosing paper

Mix patterns with plain. A pack of coordinated designer paper does the work for you, but any patterned scrapbook paper works as long as the colours sit together. Keep one or two solids in the mix so the eye has somewhere to rest. Double-sided paper is worth buying here, because the inside of every loop shows.

How tight to pack it

Tighter than you think. Gaps show as white foam and there is no fixing that later without pulling loops back out. Push each new loop up against its neighbour and alternate the direction they face so the surface stays uneven and full.

Making it yours

The centre embellishment in the video is a stamped oval on layered doilies, which reads as Valentine's. Swap it and the whole wreath changes season: a plain monogram, a sprig of greenery, a paper bow, or nothing at all. The curled base is neutral, so pick your paper colours for the season you want and leave the middle simple.

Step-by-Step Guide

9 steps · about 14 minutes.Check off each step as you go and your progress saves automatically.

1

Gather the Form, Paper and Pins

0:30
Step 1: Gather the Form, Paper and Pins - How to Make a Paper Wreath

Start with a solid extruded foam wreath form. Squeeze it: if it crunches and sheds little white beads, it is the wrong kind and pins will not hold in it. A 10-inch form needs about six sheets of 12x12 paper. Set out short flat-head pins alongside it, around three quarters of an inch long.

Tip

Buy more pins than you think you need. A packed 10-inch wreath eats a couple of hundred of them.

2

Trim the Sheets Into Strips

2:55
Step 2: Trim the Sheets Into Strips - How to Make a Paper Wreath

Run each sheet through a paper trimmer into long even strips. Even is what matters here, not exact, because a strip that tapers will curl lopsided and stand out on the finished wreath. Keep the width consistent across all six sheets and cut them all before you start curling. Batching the cutting saves you swapping between tools two hundred times.

Tip

A guillotine trimmer beats scissors for this. Two hundred hand-cut strips is how a fun project turns into a chore.

3

Sort the Strips by Pattern

3:20
Step 3: Sort the Strips by Pattern - How to Make a Paper Wreath

Fan the cut strips out across your mat and group them by pattern. You are going to be grabbing these without looking for the next hour, so having the piles separated means you can alternate colours as you go instead of ending up with all the red in one quarter of the wreath.

Tip

Count your piles. If one pattern is running short you want to know now, not with a quarter of the form still bare.

4

Curl Each Strip Into a Loop

5:10
Step 4: Curl Each Strip Into a Loop - How to Make a Paper Wreath

Bring the two ends of a strip together to form a loop and pinch them between your fingers. Do not crease the fold at the top, because a sharp crease makes a flat teardrop instead of a round curl. If the paper is stiff, draw it over the edge of a bone folder first to soften it, the same way you would curl ribbon.

Tip

Curl a big batch before you pin any of them. Switching between curling and pinning constantly is what makes this feel endless.

Used in this stepbone folder
5

Pin the First Loops to the Form

6:50
Step 5: Pin the First Loops to the Form - How to Make a Paper Wreath

Hold a loop against the foam with both ends together and push a pin straight through both ends into the form. One pin holds one loop. Press it all the way down so the flat head sits against the paper. Start anywhere on the ring and work in one direction so you always have a clean edge to butt the next loop against.

Tip

Angle the pin slightly into the form rather than straight down. It grips better and the head pulls the paper tight.

Used in this stepsequin pins flat head
6

Pack the Loops Tight All the Way Round

7:20
Step 6: Pack the Loops Tight All the Way Round - How to Make a Paper Wreath

Keep going around the ring, pushing each loop against the one before it and varying the angle so they do not all lean the same way. Cover the inner and outer edges of the form too, not only the top, or the wreath will look flat on the wall.

Check for white gaps as you go by holding it up at arm's length. Foam showing through is the one mistake that is genuinely annoying to fix later.

Tip

Mix your patterns as you go rather than working through one pile at a time. Clumps of a single paper are obvious from across the room.

7

Cut a Label for the Centre

10:40
Step 7: Cut a Label for the Centre - How to Make a Paper Wreath

Cut an oval or a circle from coordinating cardstock for the middle of the wreath, then cut a slightly larger one in a second colour to sit behind it. Stamp or write on the top layer if you want a message. Keep it small: the curled paper is doing the work and a big centrepiece fights it.

Tip

A plain monogram or a sprig of greenery keeps the wreath usable year round. A holiday message locks it to a few weeks.

8

Layer the Embellishment

13:20
Step 8: Layer the Embellishment - How to Make a Paper Wreath

Stack the label onto a paper doily, then onto a larger die-cut shape, gluing between each layer. Offsetting the layers slightly rather than centring them makes the stack look deliberate. Let the glue set before you pick the whole thing up, because doilies tear if you lift them by an edge.

Tip

Add a couple of small paper flowers or buttons where the layers meet. It hides any glue that squeezed out.

9

Attach It and Hang the Wreath

13:55
Step 9: Attach It and Hang the Wreath - How to Make a Paper Wreath

Glue the finished embellishment onto the curled base, either across the middle or off to one side. Press and hold until it grabs. Give the whole wreath a last look from a few feet back for bare patches, push a few spare loops into any you find, and hang it from a ribbon looped through the back.

Tip

Paper fades in direct sun. Hang it on an interior door or a sheltered porch rather than a south-facing front door.

Keep going

How to Make Christmas Gift Tags

8 steps · about 7 minutes

Products Used

The Checklist

How to Make a Paper Wreath

Tools
4
Materials
5
Steps
9
Video
14 min

Tools we recommend

Your Guide

Sandy Risi

As an Amazon Associate we earn from qualifying purchases. Links on this page may be affiliate links - clicking them and buying doesn't change your price, but helps support CraftingStepByStep.

Tags

Sunday How-To

New paper crafts tutorials, every Sunday

One short email with the week's best step-by-step guides. Free, no spam, unsubscribe anytime.

Did this work for you?

What's next

Related collections

Curated theme pages that include this tutorial.

Weekly Digest

Liked this paper crafts tutorial?

Pick the categories you want to hear about. Weekly digest of new step-by-step tutorials. No spam, easy unsubscribe.

Send me tutorials about

We only email about new tutorials. Easy unsubscribe anytime.