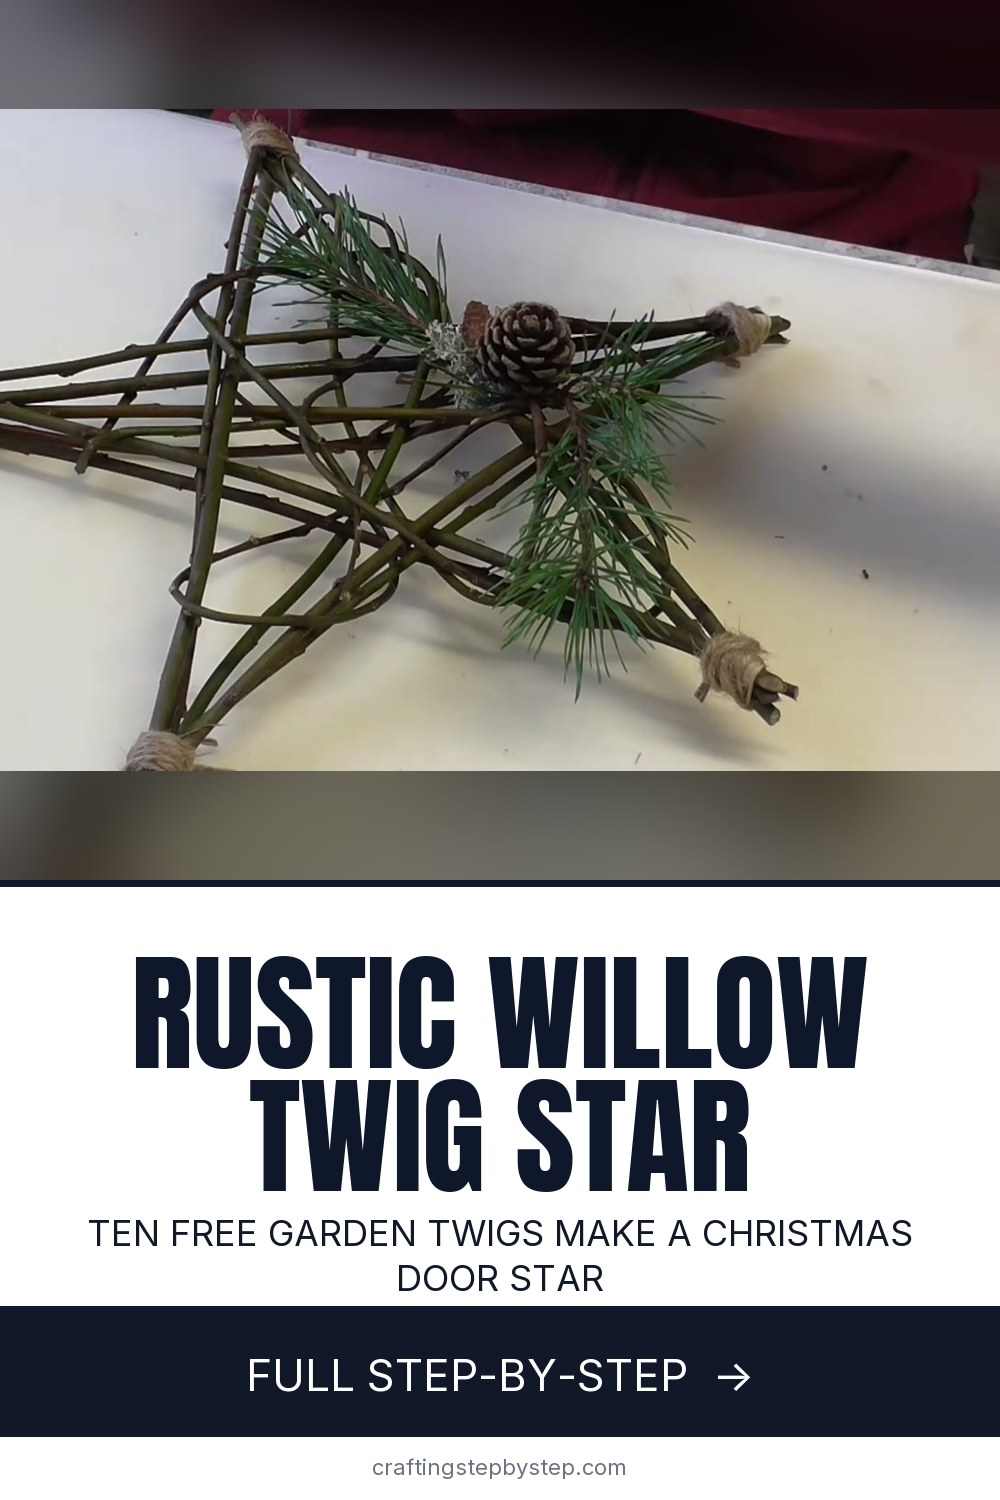
How to Make a Twig Star From Willow

The finished result: How to Make a Twig Star From Willow
  • Difficulty: Easy
  • About 1 hour, plus 24 hours to dry or set
  • 10 steps

You tapped Save

Save this project for later

We'll email you a link, no password.

How to Make a Twig Star From Willow

  • Your saved projects in one list
  • Your ticked steps on any device

Check your inbox for an email from us. Not there? Look in your spam folder.

Print

Steps written out by Crafting Step by Step from Alison Yeates' video (opens YouTube) (10:45). Published .

A twig star is one of the easiest natural Christmas decorations you can make, and the twigs cost nothing. Alison Yeates weaves ten willow twigs into a double star, threads long bendy wands through it, binds the points with jute and finishes it with a little fir, a pine cone and a few berries. Hang it on a door, a wall or a window. The bare star also looks good on its own.

How to make a twig star: the short version

  • Cut ten thick willow or hazel twigs to about 15 inches and keep them damp.
  • Weave five over and under into a star, holding the points with rubber bands.
  • Weave five more alongside to double the frame.
  • Thread long, thin willow wands through in loose curls.
  • Bind each point with jute, add a hanging loop and glue on the decoration.

Which twigs work

Willow is ideal because it bends without snapping. Hazel works too, and so does dogwood. The twigs have to be damp and flexible. Alison soaks hers in her garden pond. A bathtub or a bucket of water for a few hours does the same job. Freshly cut twigs in winter are usually bendy enough without soaking. Dry twigs from the woodpile crack the moment you weave them.

Why the rubber bands

Rubber bands hold each point while you work, and you can slide a new twig under one without undoing anything. Once the star is built and the wands are woven in, you wrap twine over the bands to hide them. Use small bands, joined two together if one is too short to reach around the twigs.

Let it dry before decorating

Damp willow dries in the shape you leave it, which is why the curls stay put. Give the finished star a day or two somewhere warm before you glue anything on. Hot glue does not hold well on wet bark, and Alison expects to redo hers once it dries. Lay it flat on a towel while it dries so the points do not twist.

Size and display

A star comes out about as wide as its twigs are long, so 15 inch twigs make a star roughly 15 inches across, a good size for a front door. Cut the twigs to 8 or 10 inches for a small star to hang in a window or on the tree. A trio of stars in different sizes looks lovely along a mantel. Outdoors, willow weathers to a soft gray and lasts for several seasons, though the greenery will need replacing each year.

Ways to decorate it

  • Fir or pine sprigs with a small pine cone, as Alison does.
  • Moss from the garden and a beech nut or acorn cap.
  • A string of warm white fairy lights wound through the woven wands.
  • Dried orange slices and a cinnamon stick tied on with twine.

Common problems

  • The twigs snap. They are too dry. Soak them longer.
  • The star looks lopsided. Pull the points out to even them before you bind them.
  • The weave is too open. Add another wand or two.

More natural Christmas decorations: a pinecone wreath, a dried orange garland and a classic Christmas wreath. For smaller stars, try a folded paper star or other handmade Christmas ornaments.

Free printable

Print the steps and supply list for this project

One page you can take to the table. Free with a free account, no password.

Get the free printable

What you'll need

Free, for this project

Get this checklist by email

  • All 11 tools and materials, with tick boxes
  • A link to print all 10 steps on paper, to keep by you while you craft

No password. The whole tutorial stays free on this page.

Quick answer

Weave a rustic Christmas twig star from ten damp willow twigs. An easy project: about 1 hour, plus 24 hours to dry or set. Materials cost about $3 to $8. You need 11 things, including long thin willow wands, small rubber bands and jute twine. The 10 steps start with cut Ten Willow Twigs for the Twig Star, lay the First Twig Star Twigs in a V and join the Twig Star Points With Rubber Bands.

Step-by-step guide

10 steps, about 11 minutes. Tap a picture to jump to that step. Your progress saves automatically.

Tick each step off as you go.

  1. Step 1: Cut Ten Willow Twigs for the Twig Star

    Watch this step · 0:50

    Gather thick, straight willow or hazel twigs and cut ten of them to about 15 inches, or 38 centimeters, with pruning shears. They need to be damp, so cut them after rain or soak them in water for a few hours. Set out some small rubber bands and a ball of jute twine too. You will also need a handful of longer, thinner wands later.

    Tip:

    Keep the twigs in water until you use them so they stay bendy.

    Back to all steps

  2. Step 2: Lay the First Twig Star Twigs in a V

    Watch this step · 1:07

    Lay two twigs on the table in a V shape, the points touching at the bottom. Slip a rubber band over the joined ends to hold them. Take a third twig and lay it across the top of the V, passing it over one twig and under the other. That crossing bar becomes the top two arms of the star.

    Tip:

    Join two rubber bands together if one is too small to wrap the twigs.

    Back to all steps

  3. Step 3: Join the Twig Star Points With Rubber Bands

    Watch this step · 1:52

    Add the fourth twig so it passes under the crossing bar and meets the end of another twig at a point. Hold the two ends together and wrap a rubber band around them. Every point of the star gets a band like this. Keep checking that each twig goes over one and under the one after it, so the star lockstogether as it grows.

    Tip:

    Do not worry if the shape is rough. You straighten it later.

    Back to all steps

  4. Step 4: Weave the Fifth Twig to Close the Twig Star

    Watch this step · 2:50

    The fifth twig closes the star. Weave it under one twig and over the following one, then band it at both points. Now pull and push the points gently until it looks like a reasonably even star. Lift the top point a little and spread the lower legs. The rubber bands let the twigs slide, so you can adjust without starting over.

    Tip:

    Stand back and look at it from above before you move on.

    Back to all steps

  5. Step 5: Weave the Second Set of Twigs Into the Twig Star

    Watch this step · 3:00

    Take the next five twigs and lay one beside each side of the star, weaving it the opposite way to the twig it sits next to. Catch each end under the rubber bands at the points. They will not all interweave neatly, and one may go straight across the top. That is fine as long as the frame feels strong when you lift it.

    Tip:

    Doubling the frame makes the star sturdy enough to hang on a door.

    Back to all steps

  6. Step 6: Weave Long Willow Wands Through the Twig Star

    Watch this step · 5:20

    Take a long, thin willow wand and trim off the stiff thick end. Give it a gentle bend first. Tuck the end under a rubber band, then weave it in and out of the frame in loose curls, through the middle and around the points. Add more wands until you like how full it looks. The damp willow will dry in these curves.

    Tip:

    Save the trimmed ends. A 15 inch piece can start your next star.

    Back to all steps

  7. Step 7: Bind the Twig Star Points With Jute Twine

    Watch this step · 6:30

    Leave a short tail of jute so you can tie a knot. Wrap the twine tightly around a point of the star, covering the rubber band completely. Tie the two ends in a knot and trim them close. Repeat on four of the five points. The twine holds everything for good once the bands perish, and it looks neat and rustic.

    Tip:

    Wrap tightly. Loose twine slides off as the willow dries and shrinks.

    Back to all steps

  8. Step 8: Tie a Twine Hanging Loop on the Twig Star

    Watch this step · 7:20

    On the top point, bind the twine the same way but leave a long end when you start. Wrap the point securely and tie it off. The long tail becomes the hanger. Tie it into a loop at the length you want, so the star hangs at the right height on your door or wall hook.

    Tip:

    Hang it for a moment to check that it sits straight before you trim the knot.

    Back to all steps

  9. Step 9: Hot Glue Fir Sprigs Onto the Twig Star

    Watch this step · 8:45

    Warm up your glue gun. Lay a small sprig of fir along one arm near the center so it curves naturally, then glue it in place. Add a second sprig on the opposite side. Press a little moss into the middle to hide the stems. Keep the decoration simple. The woven twigs are the main attraction, so you only need a small cluster.

    Tip:

    Hot glue is very hot. Press the greenery down with a pencil, not your fingers.

    Back to all steps

  10. Step 10: Add a Pine Cone and Berries to the Twig Star

    Watch this step · 10:15

    Glue a small pine cone on top of the fir, then tuck a beech nut or an acorn cap underneath it. For a bit of color, add a few small artificial berries on wire. Bend the wire around a twig to hold them, no glue needed. Hang your twig star and let it dry. Once it is dry, re-glue anything that came loose.

    Tip:

    Real holly berries shrivel fast, so artificial ones last all season.

    Back to all steps

How to Make a Fabric Gnome (Free Sewing Pattern)

Keep going

How to Make a Fabric Gnome (Free Sewing Pattern)

Keep going with crafts

More on this topic, picked for this twig star from willow.

You reached the last step

Save this project to come back to it

Your ticked steps, the free printable and your other saved makes, together in My Projects. Free, no password.

You tapped Save

Save this project for later

We'll email you a link, no password.

How to Make a Twig Star From Willow

  • Your saved projects in one list
  • Your ticked steps on any device

Check your inbox for an email from us. Not there? Look in your spam folder.

Free printable

Printable sheet and shopping list for this project

The bonus is hidden until you sign up.

Free with a free account, no password. Every step above stays open to everyone.

Products Used

The Checklist

How to Make a Twig Star From Willow

Tools
3
Materials
8
Steps
10
Video
11 min

Tools we recommend

As an Amazon Associate we earn from qualifying purchases. Links on this page may be affiliate links - clicking them and buying doesn't change your price, but helps support Crafting Step by Step.

Tags

The Crafter's Weekly

New crafts tutorials, every Sunday

One short email with the week's best step-by-step guides. Free, no spam, unsubscribe anytime.

Did this work for you?

What's next

Related collections

Curated theme pages that include this tutorial.

Similar tutorials

Hand-picked next reads based on the one you just finished.

Liked this crafts tutorial?

Pick the crafts you want to hear about. One email every Sunday with new step-by-step tutorials. No spam, easy to unsubscribe.

Get more like this in your inbox

Weekly digest. Pick the categories you want. Unsubscribe anytime.

Send me tutorials about

We only email about new tutorials. Easy unsubscribe anytime.