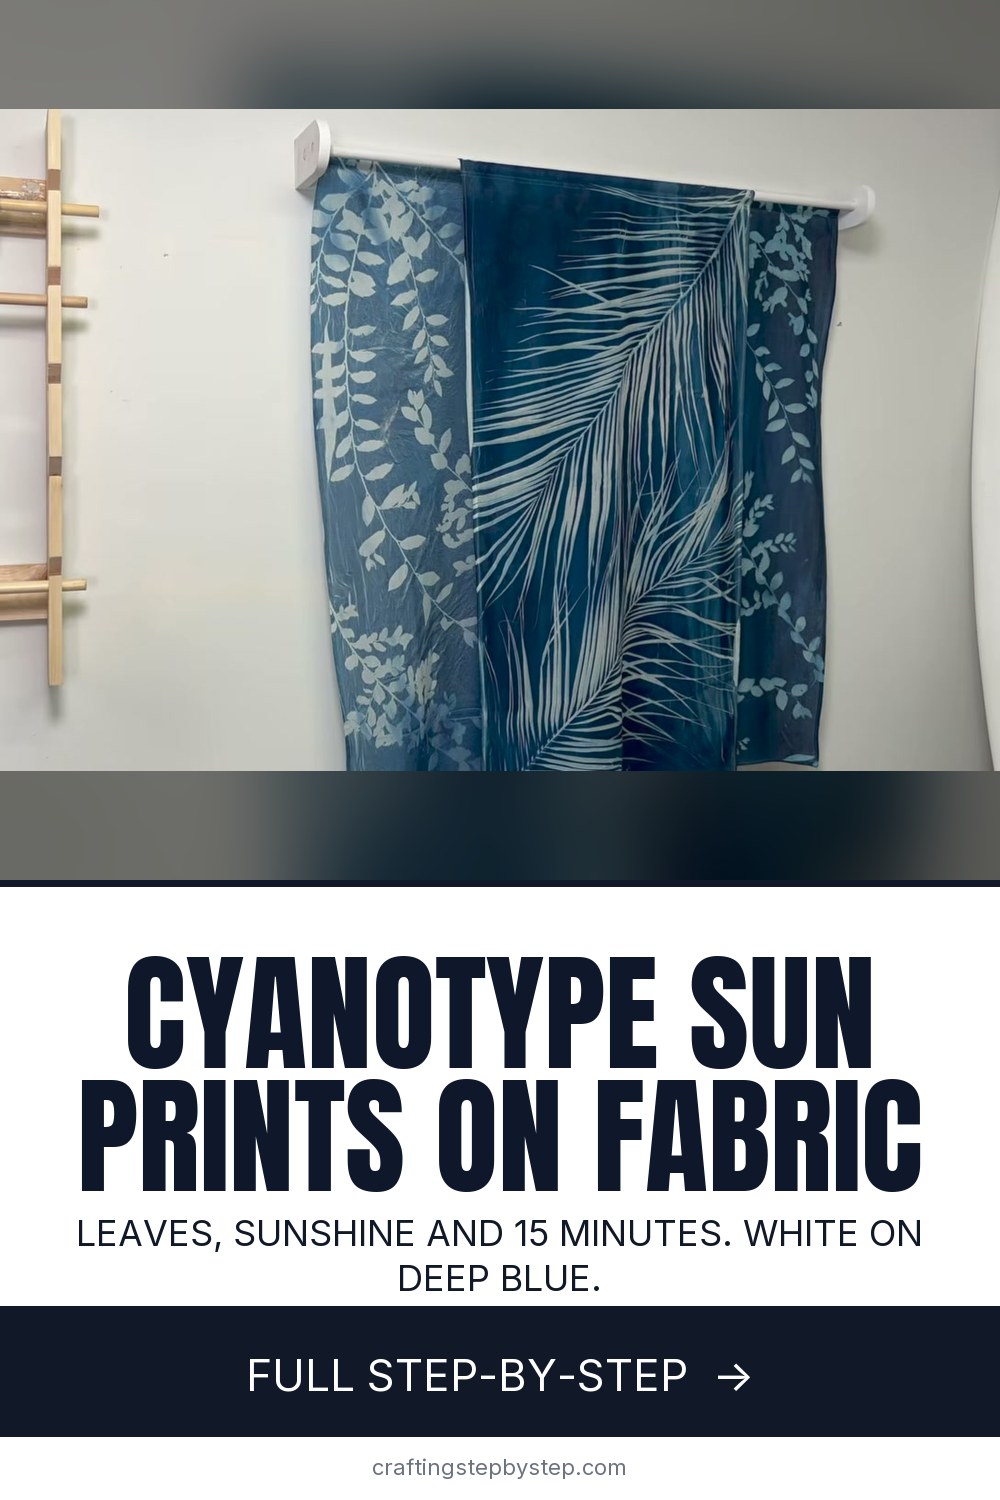
How to Make a Cyanotype Sun Print on Fabric

The finished result: How to Make a Cyanotype Sun Print on Fabric
  • Difficulty: Easy
  • About 1 hour, plus 4 hours to dry or set
  • 9 steps

You tapped Save

Save this project for later

We'll email you a link, no password.

How to Make a Cyanotype Sun Print on Fabric

  • Your saved projects in one list
  • Your ticked steps on any device

Check your inbox for an email from us. Not there? Look in your spam folder.

Print

Steps written out by Crafting Step by Step from Justine Silva's video (opens YouTube) (6:37). Published .

A cyanotype sun print turns leaves and flowers into crisp white silhouettes on deep Prussian blue. The sun does the work. You coat fabric or paper with a light-sensitive solution, lay your plants on top, set it in sunlight and rinse it in water. Justine Silva shows the method on large cotton gauze panels printed with palm fronds and trailing vines.

How to make a cyanotype sun print: the short version

  • Pick a natural fabric or a heavy paper.
  • Mix cyanotype part A and part B in dim light and coat the fabric.
  • Dry it in the dark and keep it covered until you print.
  • Lay leaves flat under glass or plexiglass and expose in sun for 10 to 20 minutes.
  • Rinse in cold water until the water runs clear, then hang to dry.

Fabric or paper?

Natural fibres hold the solution evenly: cotton, linen, silk or rayon. Synthetics take it in patches. Wash new fabric first to remove sizing. For paper, use watercolor paper or heavy drawing paper that will not fall apart in the rinse. If you want to skip mixing chemicals, pre-coated sun print paper works for kids and small pieces.

Working in the dark

Once part A and part B are mixed, the solution reacts to UV light. Coat and dry your fabric in a dim room. Justine works in a bathroom at night with a string of warm copper lights, which give enough light to see without exposing the fabric. Store coated pieces in a sealed box or a black bag until you print.

How long to expose

Bright midday sun takes about 10 to 20 minutes. Cloudy days can take an hour or more. The coated fabric starts yellow green, turns blue green, then a dusty grey blue when it is done. The print always looks paler before rinsing. Flat, solid objects give the sharpest edges. Lacy ferns and thin petals give soft, see-through shapes.

Choosing plants

Palm fronds, ferns, ivy, Queen Anne's lace and grasses all print well. Pick them the day you print so they are still supple, or press them flat a few days ahead. Thick stems hold the glass up, so trim them or set them at the edge.

Why hydrogen peroxide?

A splash of 3 percent peroxide in the rinse water oxidises the print, so it reaches its full deep blue right away instead of over a day or two. It is optional. Plain cold water works too. The colour develops more slowly.

Ideas and care

Print tea towels, pillow covers, tote bags, wall hangings or a set of cards. Kids love collecting leaves for this. Wash finished fabric by hand in cold water with a phosphate-free soap. Detergents with phosphates or bleach can fade the blue to yellow.

Common problems

  • Blurry edges. The leaves lifted. Weigh them down with glass and tape.
  • Pale print. Too short an exposure, or the coating was too thin.
  • Blue all over, no image. The fabric saw light before printing. Keep it boxed until the last second.

More fabric printing ideas: try block printing on fabric, ice dyeing or a tie-dye shirt. Collect your plants ahead of time with how to press flowers so they lie flat.

Free printable

Print the steps and supply list for this project

One page you can take to the table. Free with a free account, no password.

Get the free printable

What you'll need

Free, for this project

Get this checklist by email

  • All 11 tools and materials, with tick boxes
  • A link to print all 9 steps on paper, to keep by you while you craft

No password. The whole tutorial stays free on this page.

Quick answer

How to make a cyanotype sun print: coat fabric in the dark, lay leaves under plexiglass, expose in sun for 15 minutes, then rinse to deep blue. An easy project: about 1 hour, plus 4 hours to dry or set. Materials cost about $10 to $25. You need 11 things, including cyanotype kit, cotton or linen fabric and fresh leaves or flowers. The 9 steps start with hem the Cotton Fabric Panel for the Cyanotype Print.

Step-by-step guide

9 steps, about 7 minutes. Tap a picture to jump to that step. Your progress saves automatically.

Tick each step off as you go.

  1. Step 1: Hem the Cotton Fabric Panel for the Cyanotype Print

    Watch this step · 0:36

    Start with a natural fabric. Cotton, linen and silk take the cyanotype solution evenly, while synthetics give patchy results. Justine uses a soft cotton gauze cut into panels about two by three feet. Wash it to remove any sizing. If the finished piece will hang or be used, hem the edges on a sewing machine now. Skip this if you are only experimenting.

    Tip:

    Pre-wash and dry the fabric so the solution soaks in evenly.

    Back to all steps

  2. Step 2: Mix the Cyanotype Solution and Coat the Fabric in the Dark

    Watch this step · 1:00

    A cyanotype kit comes as two bottles, part A and part B. Follow the bottle directions to prepare them. When you are ready to print, go into a dark room and mix equal parts A and B in a bowl or bucket. Dip the fabric, wring it out well and hang it to dry in the dark. The mixed solution is sensitive to light, so work by dim warm light.

    Tip:

    Wear gloves. The solution stains skin and counters.

    Back to all steps

  3. Step 3: Arrange Leaves on Plexiglass for the Sun Print

    Watch this step · 2:26

    Collect leaves, fronds or flowers with interesting shapes. For a large panel, lay a sheet of plexiglass on a table and arrange the plants on it in the layout you want. Tape them down in a few spots with clear packing tape so they cannot shift. Clear tape lets the sun through and will not show in the print. For small pieces, a glass panel from an old frame works.

    Tip:

    Flat, solid leaves give the crispest white shapes.

    Back to all steps

  4. Step 4: Keep the Treated Cyanotype Fabric Sealed From Light

    Watch this step · 2:54

    Once the coated fabric is dry, keep it out of the light until the moment you print. Justine sandwiches it inside a cardboard box and seals the seams with painter's tape so no light leaks in. Carry the box outside along with your prepared plate. Any light that reaches the fabric early will start the reaction and fog the print.

    Tip:

    Have the plate ready before you open the box. Speed matters here.

    Back to all steps

  5. Step 5: Lay the Plexiglass Plate Over the Cyanotype Fabric

    Watch this step · 3:12

    Pick a sunny spot and set the box on a flat surface. Open it, and right away lower the plexiglass plate over the treated fabric with the leaves facing down. Press it flat so the plants touch the fabric all over. Any gap between leaf and fabric lets light creep under and softens the edges of the print.

    Tip:

    Tape the plate edges to the box so wind cannot move it.

    Back to all steps

  6. Step 6: Expose the Cyanotype Sun Print for 15 to 20 Minutes

    Watch this step · 3:26

    Leave the print in direct sun for about 15 to 20 minutes. You will see the fabric change colour as it reacts, from yellow green to a greyish blue around the leaves. Cloudier days need longer. While it sits, set up a wash station: a tub or bucket of cold water with a splash of hydrogen peroxide.

    Tip:

    Do not move the plate during exposure or the edges will double.

    Back to all steps

  7. Step 7: Rinse the Cyanotype Fabric in Cold Water

    Watch this step · 3:50

    When the time is up, lift off the plexiglass and get the fabric into the water straight away. The rinse stops the reaction and washes out the unexposed solution. Swish and agitate the fabric well so every part gets rinsed. Keep going until the water runs clear and the white areas look bright.

    Tip:

    Change the water if it turns very yellow.

    Back to all steps

  8. Step 8: Reveal the White Leaf Shapes on the Blue Cyanotype

    Watch this step · 4:24

    Lift the fabric out of the tub and open it up. The covered areas are now crisp white leaf shapes on deep blue. The hydrogen peroxide in the water brings the blue to full strength right away instead of over the next day. Gently squeeze out the extra water without wringing hard, which can crease the cloth.

    Tip:

    The blue keeps deepening a little as the fabric dries.

    Back to all steps

  9. Step 9: Hang the Cyanotype Sun Print to Dry

    Watch this step · 4:36

    Hang the panel somewhere airy to dry. Once one print is done, the rest go quickly. Swap in a new plate of vines or flowers and repeat with the next panel. Justine hung the finished set from a dowel as a wall piece, but the same method works for tea towels, pillow covers, tote bags or paper cards.

    Tip:

    Wash finished fabric in cold water with phosphate-free soap so the blue lasts.

    Back to all steps

How to Copper Foil Stained Glass

Keep going

How to Copper Foil Stained Glass

Keep going with crafts

More on this topic, picked for this cyanotype sun print on fabric.

You reached the last step

Save this project to come back to it

Your ticked steps, the free printable and your other saved makes, together in My Projects. Free, no password.

You tapped Save

Save this project for later

We'll email you a link, no password.

How to Make a Cyanotype Sun Print on Fabric

  • Your saved projects in one list
  • Your ticked steps on any device

Check your inbox for an email from us. Not there? Look in your spam folder.

Free printable

Printable sheet for this project

The bonus is hidden until you sign up.

Free with a free account, no password. Every step above stays open to everyone.

Products Used

The Checklist

How to Make a Cyanotype Sun Print on Fabric

Tools
5
Materials
6
Steps
9
Video
7 min

Tools we recommend

As an Amazon Associate we earn from qualifying purchases. Links on this page may be affiliate links - clicking them and buying doesn't change your price, but helps support Crafting Step by Step.

Tags

The Crafter's Weekly

New crafts tutorials, every Sunday

One short email with the week's best step-by-step guides. Free, no spam, unsubscribe anytime.

Did this work for you?

What's next

Related collections

Curated theme pages that include this tutorial.

Similar tutorials

Hand-picked next reads based on the one you just finished.

Liked this crafts tutorial?

Pick the crafts you want to hear about. One email every Sunday with new step-by-step tutorials. No spam, easy to unsubscribe.

Get more like this in your inbox

Weekly digest. Pick the categories you want. Unsubscribe anytime.

Send me tutorials about

We only email about new tutorials. Easy unsubscribe anytime.