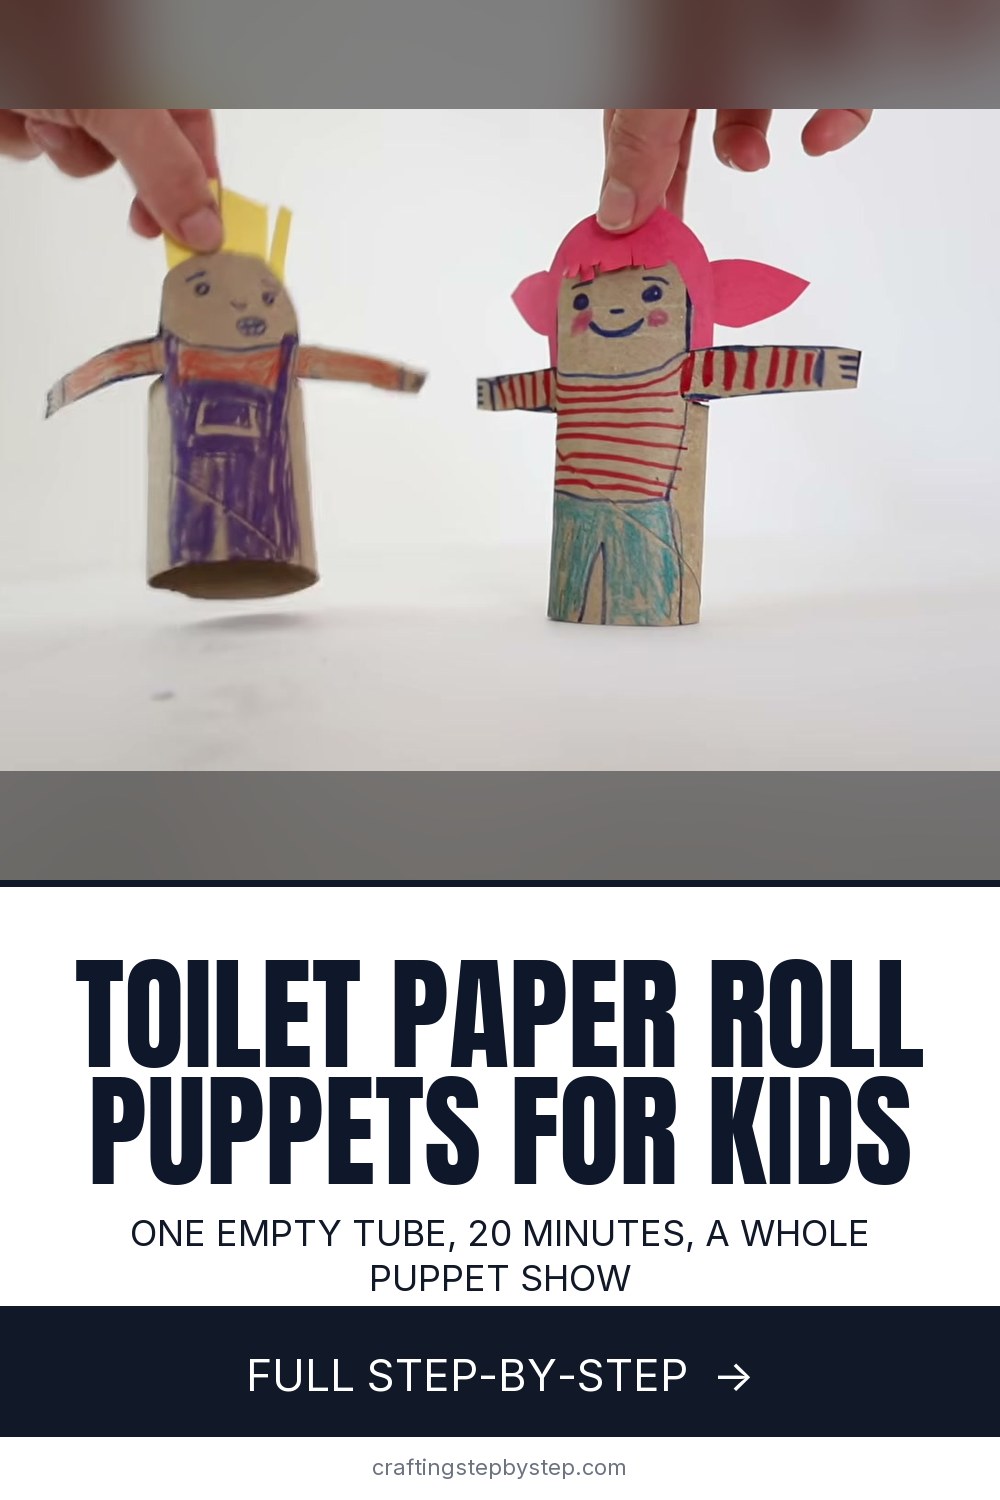
How to Make a Cardboard Tube Puppet (Easy Kids Craft)

The finished result: How to Make a Cardboard Tube Puppet (Easy Kids Craft)
  • Difficulty: Easy
  • About 20 minutes
  • 10 steps

You tapped Save

Save this project for later

We'll email you a link, no password.

How to Make a Cardboard Tube Puppet (Easy Kids Craft)

  • Your saved projects in one list
  • Your ticked steps on any device

Check your inbox for an email from us. Not there? Look in your spam folder.

Print

Steps written out by Crafting Step by Step from Black Cherry Puppet Theater's video (opens YouTube) (7:24). Published .

Also in:Paper Crafts

A cardboard tube puppet starts as an empty toilet paper roll and ends up as a little character with arms that sits on your fingers. This version comes from Black Cherry Puppet Theater in Baltimore, a puppet company that teaches kids how to build and perform with puppets. You cut a face tab and two arms right out of the tube, so there is nothing to attach except the hair. A child can make one in about 20 minutes, and a grandparent can make the second one alongside so the two puppets have someone to talk to.

How to make a cardboard tube puppet: the short version

  • Draw a tab at the top of the tube and cut it out. That tab is the face.
  • Draw a line down the back and across each side, then cut out two arms.
  • Trim the top corners so the head is round.
  • Draw a face and clothes, then color them in.
  • Glue paper hair behind the head. Add pigtails, bangs or ears if you like.

Picking the right tube

A standard toilet paper roll is the right size for a child's hand. Two fingers fit up inside and the arms sit about where a real puppet's shoulders would be. A paper towel tube works too. Cut it down to toilet roll height first, and you get two or three puppets from one tube. Look for plain brown cardboard. Glossy or printed tubes resist markers and the color smears.

Flatten nothing. A crushed tube cuts unevenly and the arms tear at the fold. If your tubes have glue residue from the toilet paper, peel it off before you start drawing.

Getting the cuts right

The two face lines go about an inch and a half apart and about an inch deep. That gives a head big enough to draw on. The arm lines start at the center back and run around to the front, stopping where the face is. If you cut too far and an arm falls off, a small piece of tape on the inside puts it back. Kid scissors with a blunt tip handle cardboard fine, but very small hands may need a grown-up to start each cut.

Ideas for characters

  • Your family. Make a puppet for each person and match hair colors.
  • Storybook characters. Act out a favorite book with the cast you made.
  • Animals. Cut ears into the top of the head and add a paper tail. A notch between the legs still lets the puppet stand.
  • No colored paper? Cut hair from an old magazine, or draw it on.

Putting on a puppet show

Slip two fingers up inside the tube and the puppet stands on your hand. You can also work the puppets from above on a tabletop, holding the top of the head. A cardboard box on its side, or a blanket over a table, turns into a stage in seconds. Kids who are shy about talking often chatter away when a puppet does the talking.

Common problems

  • The arms flop down. They are cut too thin. Leave them at least half an inch wide.
  • The hair will not stick. Glue sticks dry fast. Rub on a fresh coat and hold the hair in place for a few seconds.
  • The markers look faint. Go over the color twice, or use crayons on top of marker outlines.

More easy crafts for kids

Make a paper crown for your new puppet king, or fold a paper bag to store the cast in. On a rainy afternoon, mix a batch of homemade playdough or cut a paper snowflake together.

Free printable

Print the steps and supply list for this project

One page you can take to the table. Free with a free account, no password.

Get the free printable

What you'll need

Free, for this project

Get this checklist by email

  • All 7 tools and materials, with tick boxes
  • A link to print all 10 steps on paper, to keep by you while you craft

No password. The whole tutorial stays free on this page.

Quick answer

Turn an empty toilet paper roll into a hand puppet with arms, a face and paper hair. An easy project: about 20 minutes. You need 7 things, including empty toilet paper tubes, scraps of colored paper and clear tape. The 10 steps start with mark the Face Tab on the Toilet Paper Tube, cut Out the Face Tab From the Toilet Paper Tube and draw the Arm Lines on the Back of the Puppet Tube.

Step-by-step guide

10 steps, about 7 minutes. Tap a picture to jump to that step. Your progress saves automatically.

Tick each step off as you go.

  1. Step 1: Mark the Face Tab on the Toilet Paper Tube

    Watch this step · 0:38

    Pick up an empty toilet paper tube and hold it upright. With a marker, draw two lines down from the top rim. Space them about an inch and a half apart and make them about an inch long. Then draw a line across the back of the tube to connect the two lines at the bottom. The space between the lines becomes the puppet's face.

    Tip:

    Draw lightly at first. The lines get cut away, so a pencil works fine too.

    Back to all steps

  2. Step 2: Cut Out the Face Tab From the Toilet Paper Tube

    Watch this step · 1:04

    Squeeze the tube a little at the top so the scissors can get in. Cut down one of the short lines, then across the back along the connecting line, and up the other side. The ring of cardboard around the back falls away and you are left with a tall tab standing up at the front. That tab is the face and the front of your puppet.

    Tip:

    Save the cut-off ring. It makes a handy stand while you draw.

    Back to all steps

  3. Step 3: Draw the Arm Lines on the Back of the Puppet Tube

    Watch this step · 1:26

    Turn the tube so the face tab is at the back. Draw a line from the top edge straight down the center back. Stop about where the bottom of the face sits on the front. From there, draw a line across and around the side until you reach the front of the puppet. Do the same on the other side. These lines mark the two arms.

    Tip:

    Keep the arms at least half an inch wide so they do not flop.

    Back to all steps

  4. Step 4: Cut the Puppet Arms Free From the Tube

    Watch this step · 1:40

    Cut down the center back line first. Then turn and cut across along the side line until you reach the front of the puppet. One arm swings loose. Go back and do the same thing on the other side for the second arm. If you cut too far and an arm comes off, tape it back on from the inside and keep going.

    Tip:

    Little hands may need a grown-up to start each cut in the cardboard.

    Back to all steps

  5. Step 5: Round Off the Corners of the Tube Puppet Head

    Watch this step · 2:02

    The face tab is still a square, which looks more like a box than a head. Snip the two top corners off at an angle. Trim a little more if you want a rounder shape. Stop and hold the puppet up. With the arms out and a round head, it already looks like a little person standing on the table.

    Tip:

    For an animal, skip the rounding and cut ears into the top instead.

    Back to all steps

  6. Step 6: Draw the Face and Clothes on the Tube Puppet

    Watch this step · 2:18

    Now give your puppet some features. Draw eyes, a nose and a mouth on the face tab. Then draw a line across the body for the top of a shirt and another lower down for pants. Add sleeves on the arms and tiny fingers at the ends. Keep the outlines simple. You will color them in next.

    Tip:

    A dark fine-tip marker makes the face easy to see from across the room.

    Back to all steps

  7. Step 7: Color the Tube Puppet Shirt With Markers

    Watch this step · 2:38

    Fill in the clothes with markers or crayons. Stripes are fun and easy to do on a round tube. Color the shirt, the sleeves and the pants in different colors so the outfit stands out. Give the cheeks a little pink. Turn the tube as you work so you reach all the way around the back.

    Tip:

    Crayon over marker gives a soft, textured look on brown cardboard.

    Back to all steps

  8. Step 8: Glue Paper Hair Behind the Tube Puppet Head

    Watch this step · 3:08

    Pick a scrap of colored paper for the hair. Cut a half circle a little wider than the head. Rub glue stick on the lower edge and press it onto the back of the head so some of it peeks out around the top. Hold it for a few seconds. You can stop here, or add more hair in the next step.

    Tip:

    Any shape works. The hair only has to show around the edges of the head.

    Back to all steps

  9. Step 9: Cut Paper Fringe Bangs for the Tube Puppet

    Watch this step · 3:38

    For pigtails, cut two almond shapes and glue one to each side of the head. For bangs, cut a small rectangle and snip slits along one long edge to make a fringe. Glue it across the forehead. A wider fringe on top makes spiky hair instead. You can even give your puppet a haircut with the scissors once it is glued on.

    Tip:

    Paper from an old magazine makes fun patterned hair.

    Back to all steps

  10. Step 10: Cut Cat Ears Into the Top of a Second Tube Puppet

    Watch this step · 5:54

    Make a second tube the same way so your puppet has a friend. This time, turn it into a cat. Instead of rounding the head, draw two small triangles at the top corners and cut around them to leave pointed ears. Draw cat eyes, a nose and stripes. For a tail, draw one on scrap paper, cut it out, fold a small tab at the end and glue the tab to the back.

    Tip:

    A notch cut between the legs still lets the puppet stand up.

    Back to all steps

How to Make a Valentine's Day Box

Keep going

How to Make a Valentine's Day Box

Keep going with crafts

More on this topic, picked for this cardboard tube puppet.

You reached the last step

Save this project to come back to it

Your ticked steps, the free printable and your other saved makes, together in My Projects. Free, no password.

You tapped Save

Save this project for later

We'll email you a link, no password.

How to Make a Cardboard Tube Puppet (Easy Kids Craft)

  • Your saved projects in one list
  • Your ticked steps on any device

Check your inbox for an email from us. Not there? Look in your spam folder.

Free printable

Printable sheet and shopping list for this project

The bonus is hidden until you sign up.

Free with a free account, no password. Every step above stays open to everyone.

Products Used

The Checklist

How to Make a Cardboard Tube Puppet (Easy Kids Craft)

Tools
4
Materials
3
Steps
10
Video
7 min

Tools we recommend

As an Amazon Associate we earn from qualifying purchases. Links on this page may be affiliate links - clicking them and buying doesn't change your price, but helps support Crafting Step by Step.

Tags

The Crafter's Weekly

New crafts tutorials, every Sunday

One short email with the week's best step-by-step guides. Free, no spam, unsubscribe anytime.

Did this work for you?

What's next

Related collections

Curated theme pages that include this tutorial.

Similar tutorials

Hand-picked next reads based on the one you just finished.

Liked this crafts tutorial?

Pick the crafts you want to hear about. One email every Sunday with new step-by-step tutorials. No spam, easy to unsubscribe.

Get more like this in your inbox

Weekly digest. Pick the categories you want. Unsubscribe anytime.

Send me tutorials about

We only email about new tutorials. Easy unsubscribe anytime.