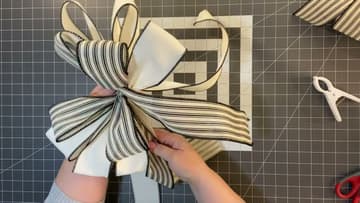
How to Make a Bow for a Wreath
Source: Julie’s Wreath Boutique • Full tutorial: www.craftingstepbystep.com/crafts/how-to-make-a-bow-for-a-wreath
- Difficulty
- Easy
- Hands-on time
- About 40 minutes
- Cost
- About $8 to $15
- Makes
- 1 large wreath bow

Tools
- gridded cutting mat
- scissors
- floral wire
- zip ties
- chip clip
Materials
- 2.5-inch wired ribbon
- a second coordinating wired ribbon
- greenery wreath
Steps
1. Start the Ribbon Bow With Wired Ribbon and Fold the First Loop
Unroll a length of 2.5-inch wired ribbon and fold the end back on itself to make your first loop. Size it however you like, because this one sets the scale for every loop after it.
Tip: Leave the ribbon on the roll while you work. Cutting a length first almost always means cutting it too short.
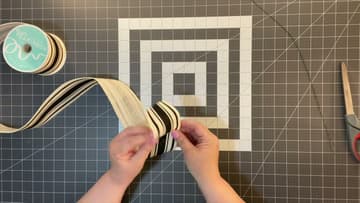
2. Twist at the Centre So the Right Side Shows
Most ribbon has a printed face and a plain back. Every time you come back to the middle, give the ribbon a half twist so the printed side keeps facing out on the next loop.
Tip: Double-sided ribbon skips this step entirely. It costs more and it is worth it on your first few bows.
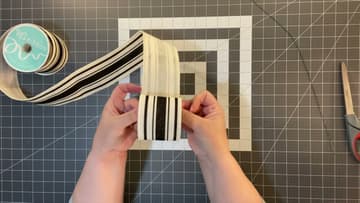
3. Measure Eight Inches Against the Mat
Lay the ribbon flat across the grid and count off eight inches, then bring it back to the centre. That gives you a four-inch loop.
Tip: Pick your number and stick to it. Whether it is eight inches or ten matters far less than every loop matching.
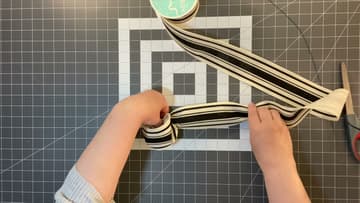
4. Build Three Ribbon Bow Loops on Each Side
Keep going: measure out, come back to the middle, twist, repeat. Alternate sides so the loops stack evenly left and right.
Tip: They do not have to be perfect. Small differences disappear once you fluff the loops at the end.
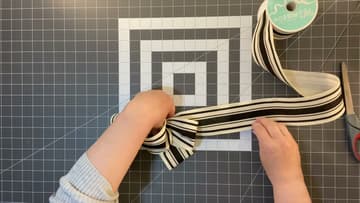
5. Add a Longer Loop Either Side
Measure ten inches instead of eight for the last loop on each side. Those two larger loops sit behind the others and frame the bow, which stops it reading as one flat cluster.
Tip: If your hand cramps, lay the bundle on the mat and pin it with a chip clip while you reposition.
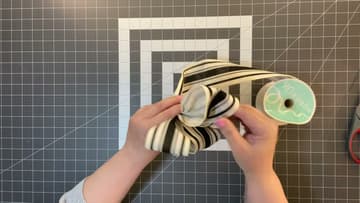
6. Wire the Centre and Pull It Tight
Push a length of floral wire down through the middle of the gathered loops, bring it back up the other side, and pull hard in one direction before twisting the ends together. Pull harder than feels polite.
Tip: Leave the wire ends long. They are what ties the bow onto the wreath, so do not trim them flush.
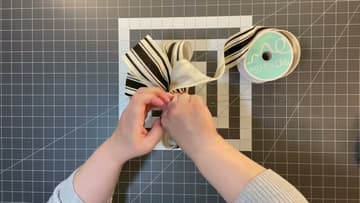
7. Catch Two Long Tails Under the Wire
Cut a separate length of ribbon about twenty-four inches long, find its centre, and trap it under the same wire so it hangs as two twelve-inch tails. Doing the tails separately rather than working them into the loops lets you set their length and angle on their own, which is much easier to get right.
Tip: Want three tails instead of two? Add a third length the same way. It reads fuller on a large wreath.
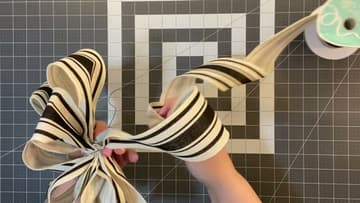
8. Trim the Tails and Fluff Every Loop
Cut the tail ends at a sharp angle or into a V so they do not fray in a straight line. Then work around the bow pulling each loop out and turning it so no two face the same way.
Tip: Cut the tails last, on the wreath if you can. Length that looks right on the table often hangs too long on a door.
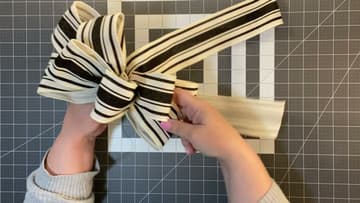
9. For a Layered Double Loop Ribbon Bow, Start With a Long Tail
The second style stacks two bows. Start this one differently: pull off ten to twelve inches before your first loop so the tail is built in from the start.
Tip: Twelve-inch loops on the bottom bow give a six-inch finished loop, a good base size to layer onto.
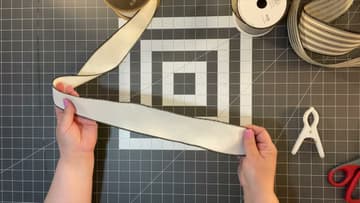
10. Make a Smaller Bow to Sit on Top
Build a second bow the same way in a contrasting ribbon, but size the loops down. Eight inches of ribbon gives a four-inch loop, which sits neatly inside the larger bow rather than competing with it.
Tip: Pair a pattern with a solid. Two busy ribbons stacked together read as noise from across a room.
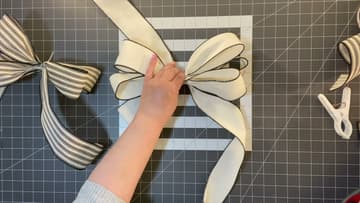
11. Join the Two and Fluff Them Into One
Lay the small bow over the large one, line up the centres, and hold them together with a zip tie while you work. A second zip tie or a twist of wire locks them for good.
Tip: Attach the bow to the wreath with the wire tails, then fluff again. It always needs one more pass once it is hanging.