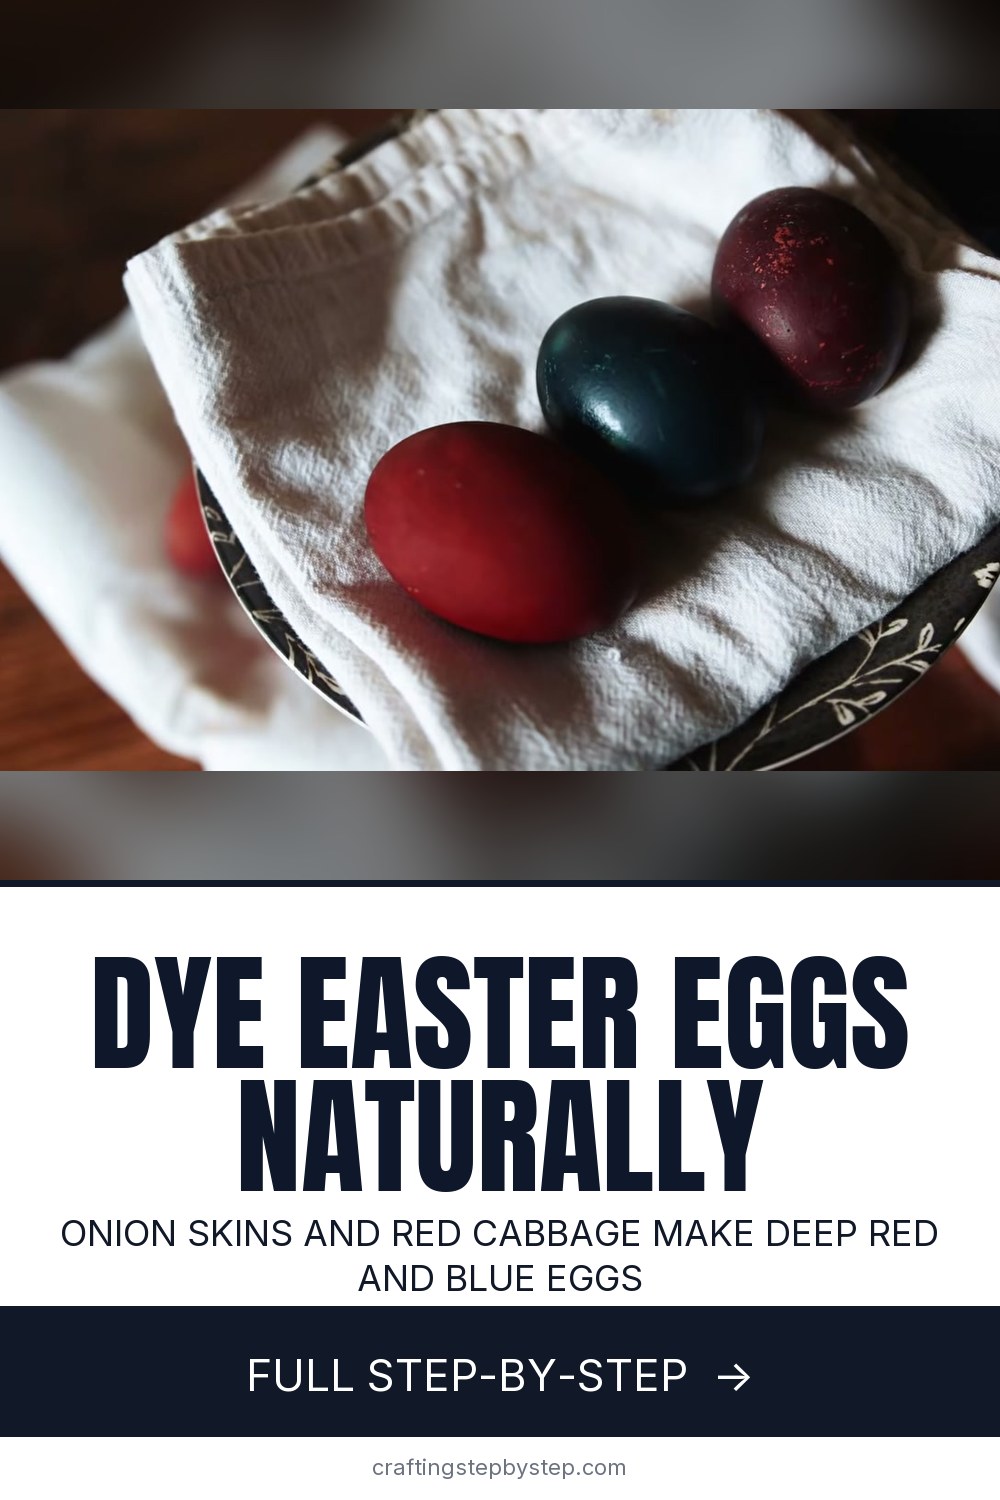
How to Dye Easter Eggs Naturally

The finished result: How to Dye Easter Eggs Naturally
  • Difficulty: Easy
  • 10 steps

You tapped Save

Save this project for later

We'll email you a link, no password.

How to Dye Easter Eggs Naturally

  • Your saved projects in one list
  • Your ticked steps on any device

Check your inbox for an email from us. Not there? Look in your spam folder.

Print

Steps written out by Crafting Step by Step from A Wooden Nest's video (opens YouTube) (3:27). Published .

You can dye Easter eggs with three things from the produce drawer: red onion skins, yellow onion skins and a head of red cabbage. No kit, no tablets. The colours come out deep and earthy, with a brick red, a dark plum and a moody blue. This method comes from the A Wooden Nest channel, where the creator dyes her own hens' eggs in three pots on the stove the week before Easter.

Why dye Easter eggs naturally

Plant dyes give softer, speckled colour that no two eggs share. You use scraps you would throw away, and children can help without stained fingers from tablet dye. It also makes a good kitchen science lesson. Red cabbage turns eggs lilac, and the colour shifts toward blue as the eggs dry.

Materials and swaps from home

  • Onion skins. Save the papery outer skins for a week or two in a paper bag. Ask the grocer if you can take the loose skins from the onion bin.
  • Cabbage. One head of red (purple) cabbage fills a big pot.
  • Vinegar. Plain white vinegar. About 2 tablespoons per pot is plenty.
  • Eggs. White eggs give the brightest colour. Light brown eggs give darker, richer shades, as in the video.
  • Other dyes to try. Turmeric for yellow, beet for pink, strong coffee for tan.

Amounts in plain words

Use a large stock pot for the cabbage and a saucepan each for the onion skins. Two big handfuls of onion skins colour a saucepan of water well. A little goes a long way. Keep the water deep enough to cover the eggs by an inch.

How long it takes

The dye simmers for about 30 minutes and the eggs cook in it for 10. Allow an hour on the day. An overnight soak in the fridge deepens every colour, and two days is even darker.

Food safety

Use eggs that end up hard-boiled. In this method the raw eggs cook in the hot dye, which hard-boils them. Or start with eggs you boiled already. If anyone will eat them, keep them in the fridge and do not eat eggs left out for more than two hours, such as after an egg hunt.

Who it suits

This is a nice afternoon with a grandchild. You handle the knife and the hot pots. They can tear onion skins, drop in skins and pick their favourite colour. A bowl of these eggs also makes a pretty Easter table centrepiece.

Easter egg variations

  • Patterns. Press a small leaf or flower on the egg, wrap it tight in a piece of old nylon stocking and tie it before it goes in the dye.
  • Kid-friendly. Let them draw on the eggs with a white crayon first. The wax keeps the dye off.
  • Spring display. Set the eggs in a nest or a crocheted basket beside a crochet bunny.

Troubleshooting

  • The colour is pale. Soak longer in the fridge, or use white eggs.
  • Blotchy spots. Plant bits stuck to the shell. Strain the dye first if you want even colour.
  • Eggs cracked. Lower them in gently on a spoon.

Saving ideas for next year

Dyed eggs do not keep, but the method does. Start a bag of onion skins in February. For an Easter craft that lasts, try an egg carton butterfly from the empty cartons, or a spring wreath for the door.

Free printable

Print the steps and supply list for this project

One page you can take to the table. Free with a free account, no password.

Get the free printable

What you'll need

Free, for this project

Get this checklist by email

  • All 15 tools and materials, with tick boxes
  • A link to print all 10 steps on paper, to keep by you while you craft

No password. The whole tutorial stays free on this page.

Quick answer

Dye Easter eggs naturally with onion skins, red cabbage and vinegar. An easy project. You need 15 things, including eggs, red cabbage and red onion skins. The 10 steps start with chop the Red Cabbage for the Natural Easter Egg Dye, cover the Chopped Red Cabbage With Water in a Large Pot, cover the Onion Skins With Water for the Red and Orange Dyes and add White Vinegar to Each Easter Egg Dye Pot.

Step-by-step guide

10 steps, about 3 minutes. Tap a picture to jump to that step. Your progress saves automatically.

Tick each step off as you go.

  1. Step 1: Chop the Red Cabbage for the Natural Easter Egg Dye

    Watch this step · 0:23

    Set a head of red cabbage on a cutting board and slice it into rough strips. The more cut edges you make, the more colour the water can pull out, so do not leave it in big chunks. Stems and outer leaves go in too. Nothing here needs to look neat. Red cabbage stains wood and hands a little, so rinse the board soon after.

    Tip:

    Older, slightly limp cabbage works as well as fresh. This is a good use for one at the back of the fridge.

    Back to all steps

  2. Step 2: Cover the Chopped Red Cabbage With Water in a Large Pot

    Watch this step · 0:29

    Scrape the chopped cabbage into a large stock pot. Fill it with water until the cabbage is covered, plus enough depth for your eggs to sit under the surface later. A big pot gives the eggs room so they do not knock together. This pot makes the blue dye, even though the water looks purple now.

    Tip:

    Leave room at the top. You will add eggs later and the water rises.

    Back to all steps

  3. Step 3: Cover the Onion Skins With Water for the Red and Orange Dyes

    Watch this step · 0:36

    Put a couple of big handfuls of red onion skins in a saucepan and cover them with water. Do the same with the yellow onion skins in a second saucepan. Keep the two kinds apart, because red skins give a deep plum and yellow skins give a rusty orange red. Onion skins are strong, so you need far less of them than cabbage.

    Tip:

    Only the dry papery skins are needed. Save the onions for dinner.

    Back to all steps

  4. Step 4: Add White Vinegar to Each Easter Egg Dye Pot

    Watch this step · 0:54

    Set all three pots on the stove. Add a splash of white vinegar to each one, about 2 tablespoons. The vinegar evens out the water so the dye takes to the shell more evenly. Stir it in with a spoon. Then turn the heat up and bring each pot to a boil.

    Tip:

    Do not skip the vinegar in the cabbage pot. It helps the colour grab the shell.

    Back to all steps

  5. Step 5: Simmer the Cabbage and Onion Skin Dyes for 30 Minutes

    Watch this step · 1:00

    Once the pots boil, turn the heat down and let them simmer for about 30 minutes. The water darkens as the colour leaves the plants. The cabbage pot turns a deep purple and the onion pots go dark red and amber. If you want smooth, even colour on the eggs, strain out the plant bits now. Leave them in for a speckled look.

    Tip:

    Keep a lid half on so the water does not cook down too far.

    Back to all steps

  6. Step 6: Lower the Eggs Into the Natural Dye Pots

    Watch this step · 1:26

    Lower the eggs into the dye one at a time on a slotted spoon. Spread them across the three pots. In the video they go in raw and cook in the dye for 10 minutes, which hard-boils them. If you prefer, use eggs you hard-boiled already and simmer them in the dye for the same time. Keep the heat at a gentle simmer so they do not crack.

    Tip:

    White eggs come out brighter. Light brown eggs give darker, richer colours.

    Back to all steps

  7. Step 7: Lift the Dyed Easter Eggs Out of the Pots

    Watch this step · 1:37

    After 10 minutes, turn off the heat and let the pots cool for a while. Then fish the eggs out into a bowl. The onion eggs come out a strong red and the cabbage eggs a pale lilac. Do not worry if the cabbage eggs look light. As they dry and the colour reacts with the air, they turn more blue.

    Tip:

    Let the pots cool before you reach in. A slotted spoon keeps your fingers out of hot dye.

    Back to all steps

  8. Step 8: Soak the Dyed Eggs in Jars of Dye Overnight in the Fridge

    Watch this step · 2:04

    For deeper colour, put each batch of eggs in its own glass jar and pour dye from the matching pot over them until they are covered. Close the lids, write the dye on each lid and set the jars in the fridge. Overnight is good. The creator left hers two days, and the cabbage eggs changed the most, from lilac to a deep blue.

    Tip:

    Keep one egg back from the soak so you can compare the two shades side by side.

    Back to all steps

  9. Step 9: Drain the Naturally Dyed Eggs in a Strainer

    Watch this step · 2:21

    Take the jars out of the fridge and pour each one through a mesh strainer over the sink. The dye goes down the drain and the eggs stay in the strainer. Do one colour at a time so you can keep the batches apart. Rinse the cabbage dye off quickly, as it can stain a light sink or counter.

    Tip:

    Handle the eggs gently while they are wet. The colour can rub off until they dry.

    Back to all steps

  10. Step 10: Dry the Naturally Dyed Easter Eggs on Towels

    Watch this step · 2:36

    Lay the eggs out on paper towels or an old cloth, each colour in its own group. Let them dry completely before you stack them in a bowl. Set them in good daylight and you will see the speckles and shading that make plant-dyed eggs special. Keep them in the fridge if anyone will eat them.

    Tip:

    For a soft shine, rub a dry egg with a drop of cooking oil on a paper towel.

    Back to all steps

How to Layer SVG Files in Cricut

Keep going

How to Layer SVG Files in Cricut

Keep going with crafts

More on this topic, picked for this project.

You reached the last step

Save this project to come back to it

Your ticked steps, the free printable and your other saved makes, together in My Projects. Free, no password.

You tapped Save

Save this project for later

We'll email you a link, no password.

How to Dye Easter Eggs Naturally

  • Your saved projects in one list
  • Your ticked steps on any device

Check your inbox for an email from us. Not there? Look in your spam folder.

Free printable

Printable sheet and shopping list for this project

The bonus is hidden until you sign up.

Free with a free account, no password. Every step above stays open to everyone.

Products Used

The Checklist

How to Dye Easter Eggs Naturally

Tools
8
Materials
7
Steps
10
Video
3 min

Tools we recommend

As an Amazon Associate we earn from qualifying purchases. Links on this page may be affiliate links - clicking them and buying doesn't change your price, but helps support Crafting Step by Step.

Tags

The Crafter's Weekly

New crafts tutorials, every Sunday

One short email with the week's best step-by-step guides. Free, no spam, unsubscribe anytime.

Did this work for you?

What's next

Related collections

Curated theme pages that include this tutorial.

Similar tutorials

Hand-picked next reads based on the one you just finished.

Liked this crafts tutorial?

Pick the crafts you want to hear about. One email every Sunday with new step-by-step tutorials. No spam, easy to unsubscribe.

Get more like this in your inbox

Weekly digest. Pick the categories you want. Unsubscribe anytime.

Send me tutorials about

We only email about new tutorials. Easy unsubscribe anytime.