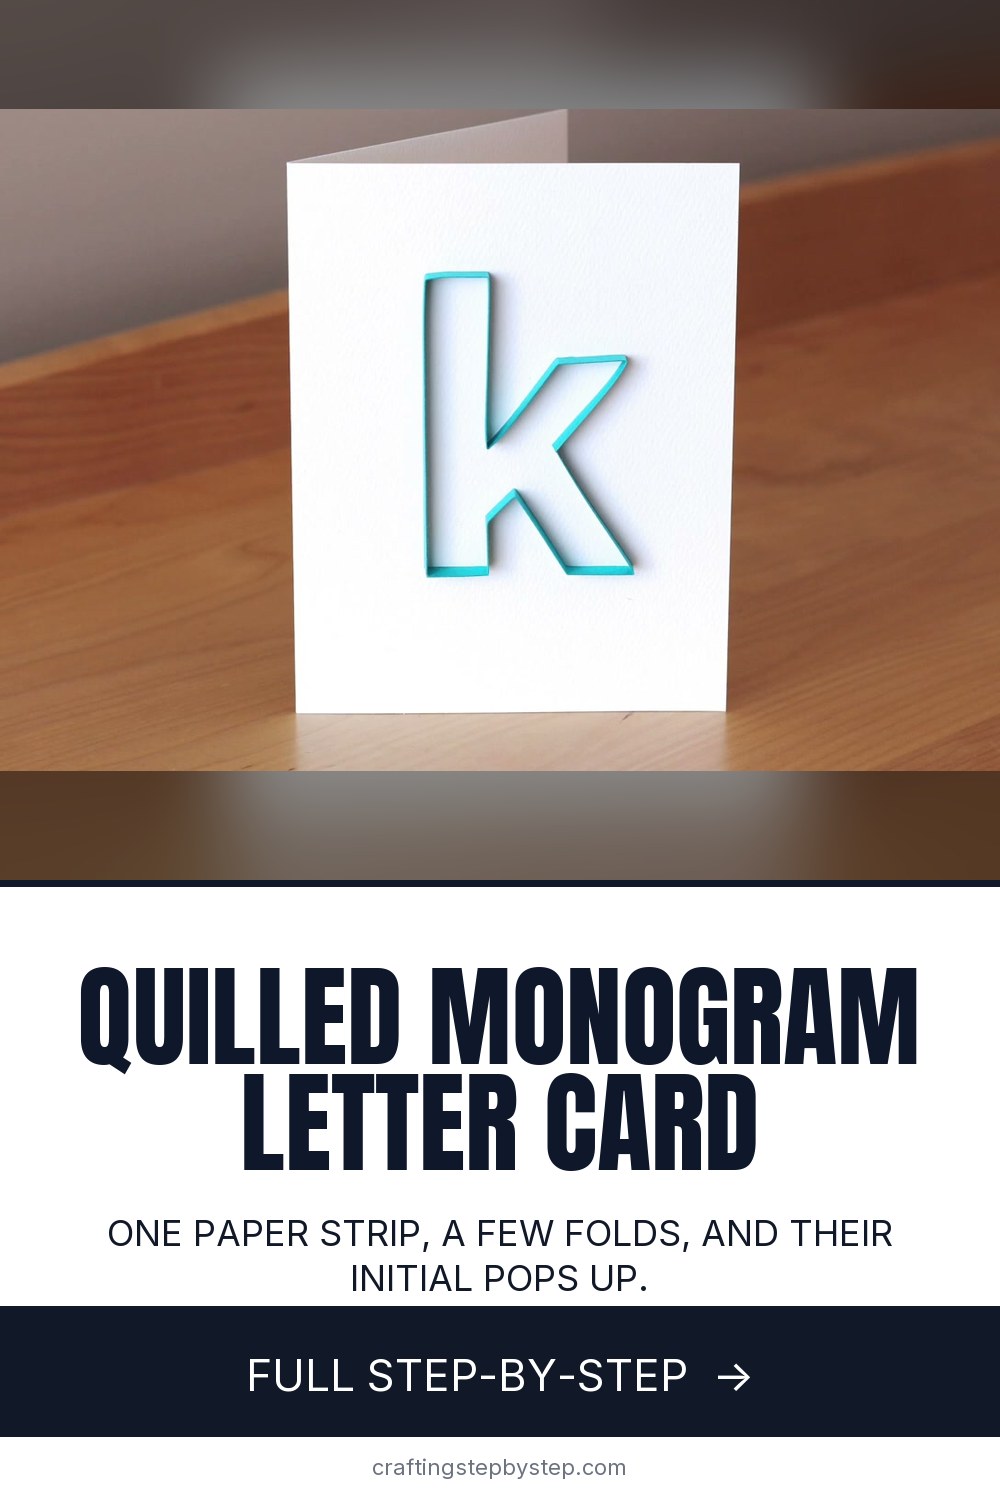
How to Make a Quilled Monogram Letter

The finished result: How to Make a Quilled Monogram Letter
  • Difficulty: Easy
  • About 30 minutes
  • 9 steps

You tapped Save

Save this project for later

We'll email you a link, no password.

How to Make a Quilled Monogram Letter

  • Your saved projects in one list
  • Your ticked steps on any device

Check your inbox for an email from us. Not there? Look in your spam folder.

Print

Steps written out by Crafting Step by Step from Paper Zen - Cecelia Louie's video (opens YouTube) (7:44). Published .

Also in:Card Making

A quilled monogram letter turns a plain card into something people keep. You stand a narrow strip of paper on its edge, bend it around the outline of a letter, and glue it down so the letter rises off the page. Cecelia Louie of Paper Zen shows the whole outline on a lowercase k, with a clever trick for keeping every straight side straight.

How to make a quilled monogram letter: the short version

  • Print or trace your letter onto a card or a template.
  • Fold the strip along the outline, making a sharp crease at every corner.
  • Check the folded shape against the template before any glue goes on.
  • Tape a stiff plastic card down as a straight edge.
  • Glue a few segments at a time, lifting the rest out of the way.
  • Join the last corners and let it dry flat.

Picking a letter and a font

Chunky, simple fonts are the easiest place to start. Straight sides and clean corners are far easier to bend than tight curves or thin serifs. A lowercase k like this one has lots of corners but no curves, so it is good practice. Print the letter at the size of your card front. A 4.25 x 5.5 inch card or a 6 inch square both work well. If you plan to frame the monogram, go bigger so the outline has room to breathe.

Folding the outline

Lay the strip right on the template and follow the line. Crease each corner with your fingernail so it is crisp. If you lose track of which way the next bend goes, set the strip back down on the letter and look. A strip cut from a letter-size sheet may not reach all the way around. That is fine. Plan one or two joins and hide them at a corner where the seam disappears.

The plastic card trick

An old gift card or transit card with a clean edge makes a ruler that also holds the paper up. Tape it down along one straight side of the letter with removable tape. Push the strip against it while the glue grabs, and that side stays dead straight. Move the card for each long edge.

Gluing without a mess

Pour a small puddle of tacky glue and dip only the bottom edge of the section you are placing. Lift the rest of the strip away so it does not drag through the glue and smear the card. Glue the anchor segments first. Once they hold, the floating parts are much easier to set. For the final corners, pick up a dot of glue on a needle tool and run it along the edge before you press the two ends together.

Ways to use a quilled letter

Leave the outline plain for a clean modern look, or fill it with tight coils, scrolls and tiny flowers. Make a birthday card with the person's initial, a framed nursery monogram, a wedding card or a gift tag. Grandchildren love seeing their own letter.

Common problems

  • Wobbly sides. Use the card edge, and give the strip a gentle tug as you press it down.
  • Glue showing. Too much glue. Dip less and wipe the tip.
  • Corners that do not meet. Recheck the folds on the template before gluing.

New to quilling? Start with paper quilling for beginners, then add a quilled daisy inside your letter. Turn it into a card with how to make a card or a handmade thank you card.

Free printable

Print the steps and supply list for this project

One page you can take to the table. Free with a free account, no password.

Get the free printable

What you'll need

Free, for this project

Get this checklist by email

  • All 9 tools and materials, with tick boxes
  • A link to print all 9 steps on paper, to keep by you while you craft

No password. The whole tutorial stays free on this page.

Quick answer

How to make a quilled monogram letter: fold a paper strip around the outline, then glue it on edge with a card trick for straight sides. An easy project: about 30 minutes. Materials cost about $1 to $5. You need 9 things, including quilling paper strips, tacky glue and white cardstock or blank card. The 9 steps start with lay the Quilling Strip Along the Monogram Letter Template and fold Sharp Creases Around the Quilled Letter Outline.

Step-by-step guide

9 steps, about 8 minutes. Tap a picture to jump to that step. Your progress saves automatically.

Tick each step off as you go.

  1. Step 1: Lay the Quilling Strip Along the Monogram Letter Template

    Watch this step · 0:16

    Print your letter and set it on your work surface, or transfer it onto the card you will glue to. Take a long quilling strip and lay it flat along the outline so you can see where it needs to go. Cecelia starts at the base of the k, where the first fold turns toward the right. Have a second strip nearby in case the first one runs short.

    Tip:

    A guide box around the letter helps you center it on the card later.

    Back to all steps

  2. Step 2: Fold Sharp Creases Around the Quilled Letter Outline

    Watch this step · 0:44

    Work your way around the letter, bending the strip at every corner. Pinch each fold firmly so the crease is crisp and the angle matches the template. If you are not sure which way the next bend goes, put the strip down on the outline and follow it with your eye. If the strip is too short, plan a join at a corner and carry on with a new piece.

    Tip:

    Crease with a fingernail for sharper corners than fingertips alone give.

    Back to all steps

  3. Step 3: Check the Folded Strip Against the Letter Template

    Watch this step · 1:02

    Before any glue goes on, stand the folded strip on its edge right over the template. Every side should line up with the printed outline. If one leg is too long or a corner is off, now is the time to adjust it. Small fixes are easy at this stage and almost impossible once the strip is glued down on the card.

    Tip:

    Fold a little longer than you need. Trimming is easier than stretching.

    Back to all steps

  4. Step 4: Tape a Plastic Card as a Straight Edge for the Letter

    Watch this step · 1:30

    Find a stiff plastic card with a clean edge, like an old gift card or transit card. Line its edge up with the bottom of the letter and hold it in place with removable tape. When you press the paper strip against that edge, the side of the letter will come out straight. Your eye will not catch any dips or bumps.

    Tip:

    Removable tape lifts off the card without tearing the surface.

    Back to all steps

  5. Step 5: Glue the Bottom of the Quilled Letter Against the Card

    Watch this step · 2:08

    Start with the bottom parts of the k. Dip only the lower edge of those segments in a little tacky glue, keeping the rest of the strip lifted. Set them on the outline with tweezers and push them against the card edge until they grab. Gluing these anchor sections first gives the whole letter a base, and the free parts are easier to place after that.

    Tip:

    Pour a small puddle of glue and dip into it. A bottle tip puts on too much.

    Back to all steps

  6. Step 6: Turn the Card and Glue the Next Letter Segment

    Watch this step · 3:20

    Lift the plastic card and move it to the next straight side. Turn your work around if that makes the glue easier to reach. Lift the next segment out of the way, dip its edge, and set it down along the outline. Lifting each part before you dip it keeps glue from smearing on the sides of the strip or the card.

    Tip:

    Corners are easy to move aside, so you can reach the segment behind them.

    Back to all steps

  7. Step 7: Guide the Long Strip Into the Corner of the Letter

    Watch this step · 4:12

    Bring the card back to guide the long diagonal of the k into its corner. As you press down with one hand, give the strip a gentle tug toward the corner with the other. That keeps it taut so it lies straight instead of bowing. Hold it for a few seconds until the glue sets enough to stay put.

    Tip:

    A taut strip dries straight. A loose one dries wavy.

    Back to all steps

  8. Step 8: Set the Top Arm of the Quilled Monogram in Place

    Watch this step · 5:16

    Move on to the top arm of the letter. Put glue only on the base of that part and set it on the outline with tweezers. Keep lifting and gluing one short section at a time. Some corners are too tight to fit the card into, so do your best by eye and glue both sides of that corner at the same time.

    Tip:

    Nudge the strip against the outline with a fingertip to butt edges together.

    Back to all steps

  9. Step 9: Glue the Final Corners to Finish the Quilled Letter

    Watch this step · 6:16

    Pick up a small dot of glue on a needle tool. Push the last loose end aside, run the glue up the edge, and bring the two corners together. Add a touch of glue under any spot still lifting off the card. Let the outlined letter dry flat. You can leave it plain or fill it with coils and scrolls later.

    Tip:

    Wipe the needle tool often so dried glue does not build up on the tip.

    Back to all steps

How to Make a Wrapping Paper Bow

Keep going

How to Make a Wrapping Paper Bow

Keep going with paper crafts

More on this topic, picked for this quilled monogram letter.

You reached the last step

Save this project to come back to it

Your ticked steps, the free printable and your other saved makes, together in My Projects. Free, no password.

You tapped Save

Save this project for later

We'll email you a link, no password.

How to Make a Quilled Monogram Letter

  • Your saved projects in one list
  • Your ticked steps on any device

Check your inbox for an email from us. Not there? Look in your spam folder.

Free printable

Printable sheet for this project

The bonus is hidden until you sign up.

Free with a free account, no password. Every step above stays open to everyone.

Products Used

The Checklist

How to Make a Quilled Monogram Letter

Tools
6
Materials
3
Steps
9
Video
8 min

Tools we recommend

As an Amazon Associate we earn from qualifying purchases. Links on this page may be affiliate links - clicking them and buying doesn't change your price, but helps support Crafting Step by Step.

Tags

The Crafter's Weekly

New paper crafts tutorials, every Sunday

One short email with the week's best step-by-step guides. Free, no spam, unsubscribe anytime.

Did this work for you?

What's next

Related collections

Curated theme pages that include this tutorial.

Similar tutorials

Hand-picked next reads based on the one you just finished.

Liked this paper crafts tutorial?

Pick the crafts you want to hear about. One email every Sunday with new step-by-step tutorials. No spam, easy to unsubscribe.

Get more like this in your inbox

Weekly digest. Pick the categories you want. Unsubscribe anytime.

Send me tutorials about

We only email about new tutorials. Easy unsubscribe anytime.