How to Emboss Paper With Heat and Embossing Powder

Save it for later. We'll email you a link, no password.

Find it again on your phone or computer, with your finished steps ticked.

You tapped Save

Save this project for later

We'll email you a link, no password.

How to Emboss Paper With Heat and Embossing Powder

  • Your saved projects in one list
  • Your ticked steps on any device

Check your inbox for an email from us. Not there? Look in your spam folder.

Based on a video by JR Creations

Opens their YouTube channel

Steps written out by Crafting Step by Step · Published

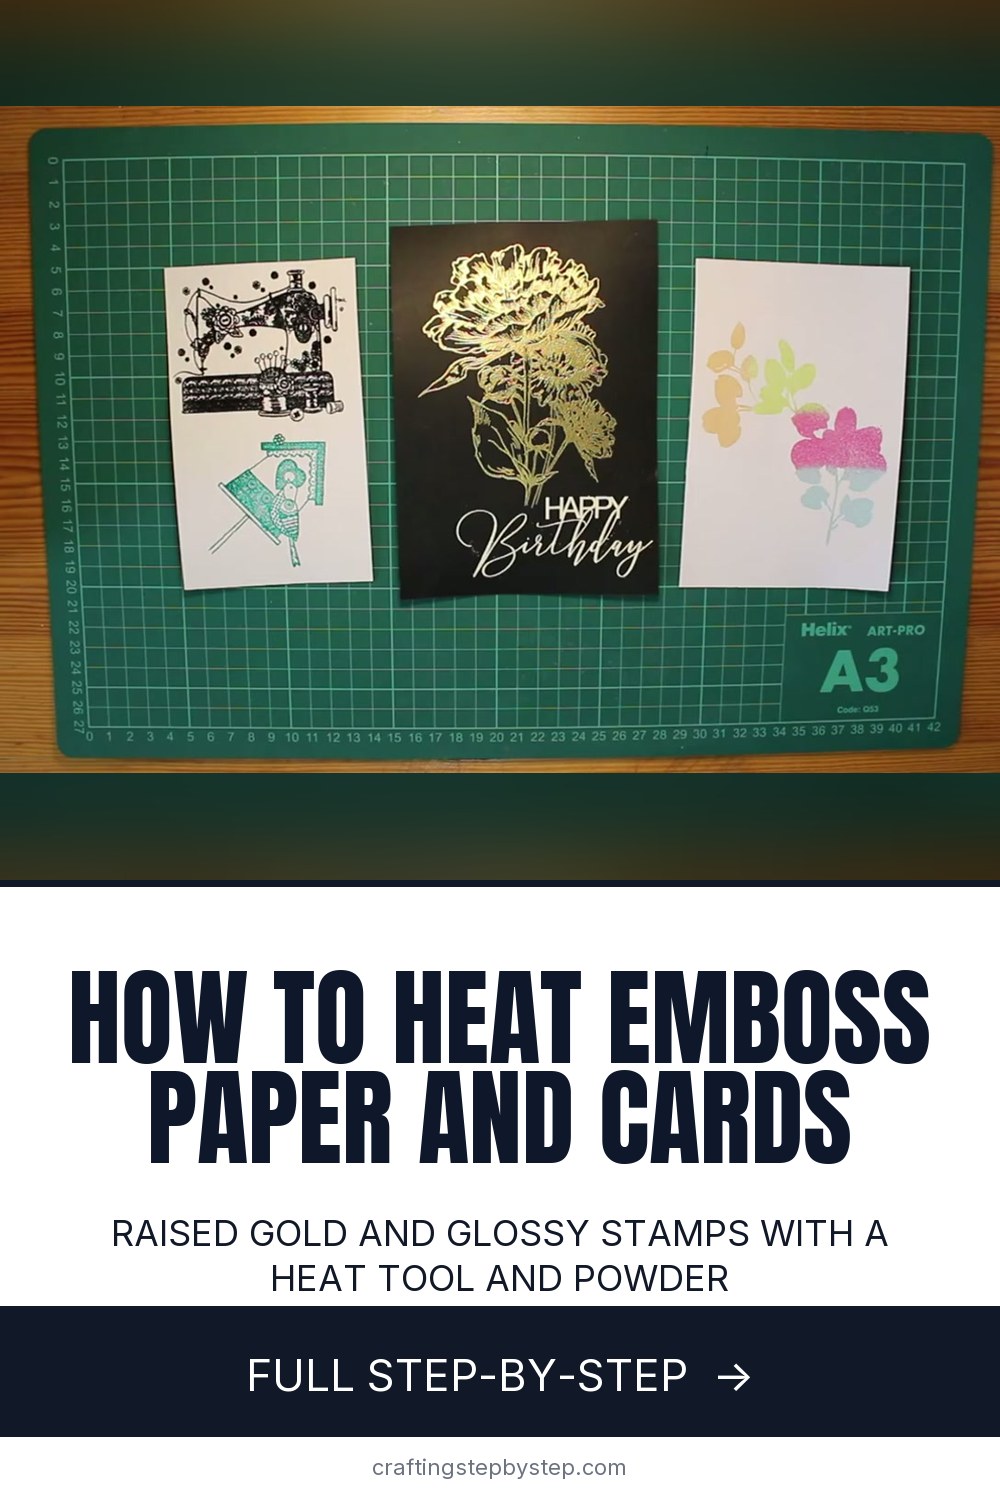
The finished result: How to Emboss Paper With Heat and Embossing Powder
Also in:Card Making

Heat embossing turns an ordinary rubber stamp into a raised, glossy image that looks printed by a pro. You stamp in sticky ink, pour powder over it, and melt the powder with a heat tool. Jessica of JR Creations walks through the tools and the basic method, then shows clear powder over colored ink, gold on black cardstock and a rainbow of colors on one stamp.

How to emboss paper with heat and powder: what you need

  • Embossing ink. A clear, slow-drying pad. Any pigment ink works too, since it stays wet long enough. Dye ink dries too fast.
  • Embossing powder. If you buy one, buy clear. It works over any colored ink.
  • A heat tool. A hair dryer will not do. It blows the powder away and never gets hot enough.
  • An anti-static bag, a scrap of copy paper, a small soft brush, cardstock and a stamp.

Clear powder or colored powder?

Clear powder picks up the color of the ink below it, so one jar plus your ink pads gives you every color. Opaque colored powders, like white, gold and black, cover completely. Use them with clear embossing ink. White or gold on black cardstock is the classic card sentiment look.

How hot and how long

Let the heat tool warm up for a few seconds before you point it at the card. Hold it a few inches away and keep it moving. You will see the powder go from dull and grainy to smooth and shiny. Stop the moment the whole image has changed. Too much heat makes the powder bubble, sink into the paper or lose its shine, and it can scorch the card.

Keeping cardstock flat

Big images take a lot of heat, and thin card can curl. Use heavy cardstock, 80 lb or more. Jessica sometimes heats large areas from the back of the card. If the card warps, let it cool, then set a heavy book on it for a while.

Stray specks and smudges

Powder sticks to fingerprints and static as well as ink. That is the job of the anti-static bag. Brush or blow off any specks before heating. They show up most on black cardstock. A spot of powder on the stamped image that fell off? Re-sprinkle. The ink is still wet.

When it goes wrong

Grainy or patchy finish? It needs a few more seconds of heat. Powder will not stick? The ink dried, so stamp again and pour sooner. Image looks blurry? Too much ink, or the stamp moved. A stamping platform fixes both.

Ideas to try

  • Clear powder over a colored dye or pigment stamp to make a matching raised image.
  • Gold flower on black for an elegant birthday card.
  • A white sentiment on a dark panel.
  • Several colors on one big stamp, one small section at a time, for a rainbow image.
  • Heat embossed outlines, then color inside with watercolor. The raised line stops the paint bleeding.

Ready to use it? Put an embossed sentiment on a handmade thank you card, add gold to a shaker card, or start with the card making basics. For lettering without stamps, try faux calligraphy.

Free printable

Print the steps and supply list for this project

One page you can take to the table. Free with a free account, no password.

Get the free printable

What you'll need

Free, for this project

Get this checklist by email

  • All 10 tools and materials, with tick boxes
  • A link to print all 10 steps on paper, to keep by you while you craft

No password. The whole tutorial stays free on this page.

Quick answer

Heat emboss paper for beginners: stamp in clear ink, pour embossing powder and melt it with a heat tool. An easy project. You need 10 things, including clear embossing ink pad, embossing powder and cardstock. The 10 steps start with gather the Heat Embossing Supplies, wipe the Cardstock With an Anti-Static Bag, stamp the Image in Clear Embossing Ink, pour Embossing Powder Over the Stamped Card and brush Stray Embossing Powder Off the Card.

Step-by-step guide

10 steps, about 9 minutes. Tap a picture to jump to that step. Your progress saves automatically.

Tick each step off as you go.

  1. Step 1: Gather the Heat Embossing Supplies

    Watch this step · 0:24

    Set out everything before you start, because embossing ink stays wet and you want to move quickly. Jessica uses a stamping platform, though an acrylic block works fine. You also need a clear embossing ink pad, an anti-static bag, embossing powder and a heat tool. Add a sheet of scrap copy paper to catch the extra powder and a small soft paintbrush.

    Tip:

    Plug in the heat tool now so the cord is out of the way when you need it.

    Back to all steps

  2. Step 2: Wipe the Cardstock With an Anti-Static Bag

    Watch this step · 0:45

    Rub the anti-static bag over the whole front of your cardstock. It leaves a fine dusting that stops the embossing powder from clinging to static, skin oils and fingerprints. Without it, powder sticks in random spots outside your image and melts there too. This matters most on dark cardstock, where every stray speck shows.

    Tip:

    No anti-static bag? Dust the card with a little cornstarch in a scrap of cloth.

    Back to all steps

  3. Step 3: Stamp the Image in Clear Embossing Ink

    Watch this step · 1:10

    Ink your stamp on the clear embossing pad and press it onto the card. The ink is sticky and almost invisible, so it is hard to tell if you missed a spot. A stamping platform helps here. You can stamp the same spot two or three times without moving the image, so the whole design gets a good coat of ink.

    Tip:

    Tilt the card toward a light. The wet ink shows as a faint sheen.

    Back to all steps

  4. Step 4: Pour Embossing Powder Over the Stamped Card

    Watch this step · 1:52

    Lay a piece of scrap paper down and hold the card over it. Pour the embossing powder over the whole stamped image so it is fully covered. Jessica uses black powder here. Tip the card and tap the edge so the loose powder falls onto the paper. The powder clings only where the sticky ink is, and the design appears.

    Tip:

    For a small stamp, dip the card face down into a tub of powder instead of pouring.

    Back to all steps

  5. Step 5: Brush Stray Embossing Powder Off the Card

    Watch this step · 2:06

    Look closely at the card before heating. Any specks outside the image will melt into little bumps. Use a small, dry paintbrush to flick them away. A gentle puff of breath works too. If a patch of the image lost its powder when you tapped it off, sprinkle a little more on. The ink is still wet and picks it up.

    Tip:

    Keep one soft brush only for embossing so it stays dry and clean.

    Back to all steps

  6. Step 6: Funnel the Extra Embossing Powder Back Into the Jar

    Watch this step · 2:32

    Fold the scrap paper in half to make a crease, then lift it and let the loose powder slide down the fold into the open jar. Do this every time. It keeps your work area clean, stops colors getting mixed and means a single jar of powder lasts a long time.

    Tip:

    Put the lid back on before you start heating. The heat tool can blow powder everywhere.

    Back to all steps

  7. Step 7: Melt the Embossing Powder With the Heat Tool

    Watch this step · 2:52

    Switch on the heat tool and give it a few seconds to warm up. Hold it a few inches from the card and move it slowly over the image. The powder darkens slightly and turns glossy as it melts. That change shows you which parts are done. Keep going until the whole image is smooth and raised, then stop.

    Tip:

    Hold the card by its edge, not under the image. The paper gets hot.

    Back to all steps

  8. Step 8: Heat Emboss Colored Ink With Clear Powder

    Watch this step · 4:00

    Clear embossing powder works over any ink pad that stays wet a little while. Stamp in your colored ink, pour clear powder over it, tap off the excess and heat it. Jessica stamps a green image this way. It comes out as a raised, shiny green without buying green powder. That is why clear is the one powder she suggests buying first.

    Tip:

    Pigment inks stay wet longest and emboss most easily.

    Back to all steps

  9. Step 9: Pour Gold Embossing Powder on Black Cardstock

    Watch this step · 4:56

    For a dramatic card, wipe black cardstock with the anti-static bag, stamp a large image in clear embossing ink and cover it with gold embossing powder. Even before heating, the gold shows up clearly against the black. Tap the excess back into its jar and check closely for specks, since dark card shows every one.

    Tip:

    Use the heat tool's airflow, before it gets hot, to blow away tiny specks.

    Back to all steps

  10. Step 10: Heat the Gold Embossing Powder Until It Shines

    Watch this step · 5:45

    Melt the gold the same way, moving the heat tool slowly over the image. On black card you can see exactly where the powder has melted, as the dull gold turns bright and smooth. A large image means a lot of heat, which can curl the card. Jessica sometimes heats from the back. If the card bends, press it flat under something heavy once it cools.

    Tip:

    Add a white embossed sentiment underneath for a finished birthday card.

    Back to all steps

How to Make a Wrapping Paper Bow

Keep going

How to Make a Wrapping Paper Bow

You reached the last step

Save this project to come back to it

Your ticked steps, the free printable and your other saved makes, together in My Projects. Free, no password.

You tapped Save

Save this project for later

We'll email you a link, no password.

How to Emboss Paper With Heat and Embossing Powder

  • Your saved projects in one list
  • Your ticked steps on any device

Check your inbox for an email from us. Not there? Look in your spam folder.

Free printable

Printable sheet for this project

The bonus is hidden until you sign up.

Free with a free account, no password. Every step above stays open to everyone.

Products Used

The Checklist

How to Emboss Paper With Heat and Embossing Powder

Tools
5
Materials
5
Steps
10
Video
9 min

Tools we recommend

As an Amazon Associate we earn from qualifying purchases. Links on this page may be affiliate links - clicking them and buying doesn't change your price, but helps support Crafting Step by Step.

Tags

The Crafter's Weekly

New paper crafts tutorials, every Sunday

One short email with the week's best step-by-step guides. Free, no spam, unsubscribe anytime.

Did this work for you?

What's next

Related collections

Curated theme pages that include this tutorial.

Similar tutorials

Hand-picked next reads based on the one you just finished.

Liked this paper crafts tutorial?

Pick the crafts you want to hear about. One email every Sunday with new step-by-step tutorials. No spam, easy to unsubscribe.

Get more like this in your inbox

Weekly digest. Pick the categories you want. Unsubscribe anytime.

Send me tutorials about

We only email about new tutorials. Easy unsubscribe anytime.