How to Mattress Stitch Two Knitted Pieces Together

KnittingEasy8:178 stepsPart of DIY Crafts for BeginnersBrowse more →
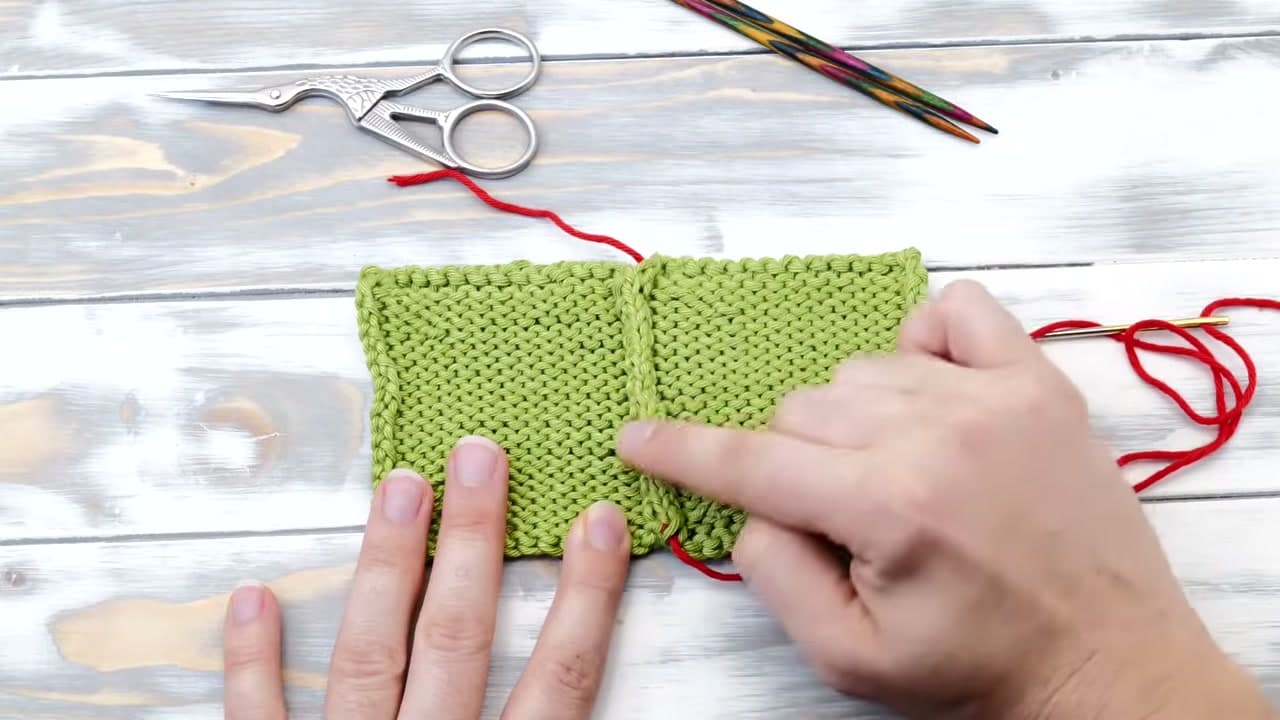
The finished result: How to Mattress Stitch Two Knitted Pieces Together

By CraftingStepByStepPublished

Based on a video by NimbleNeedles.

Two finished knitted pieces and no idea how to put them together is where a lot of projects stall. Mattress stitch is the join that solves it. Worked from the right side, it pulls two edges together so tightly that the seam disappears into the fabric, and there is nothing to see from the front.

The whole technique comes down to one decision: which bar you pick up. One stitch column in from the edge, between the first and second columns, sits a ladder of small horizontal bars. You go under one bar on the right, one on the left, alternating your way up, and you pull the thread snug every few rungs. Grab the edge stitch instead of the bar and you get a thick lumpy line down the join. That single mistake is the difference between an invisible seam and an obvious one.

This one follows Norman of NimbleNeedles, who seams green swatches with bright red yarn so you can see exactly where the needle goes. On your own work you would use the project yarn and the red path would not exist at all.

Worth doing before you start: block the pieces so the edges lie flat and the bars are easy to count, and check that both edges are bound off cleanly. When the seam is closed, weave in the ends and the join is finished. This is the stitch that turns a stack of panels into a blanket.

What you'll need

Step-by-Step Guide

8 steps · about 8 minutes.Check off each step as you go and your progress saves automatically.

1

Lay the Two Stockinette Pieces Side by Side

0:56
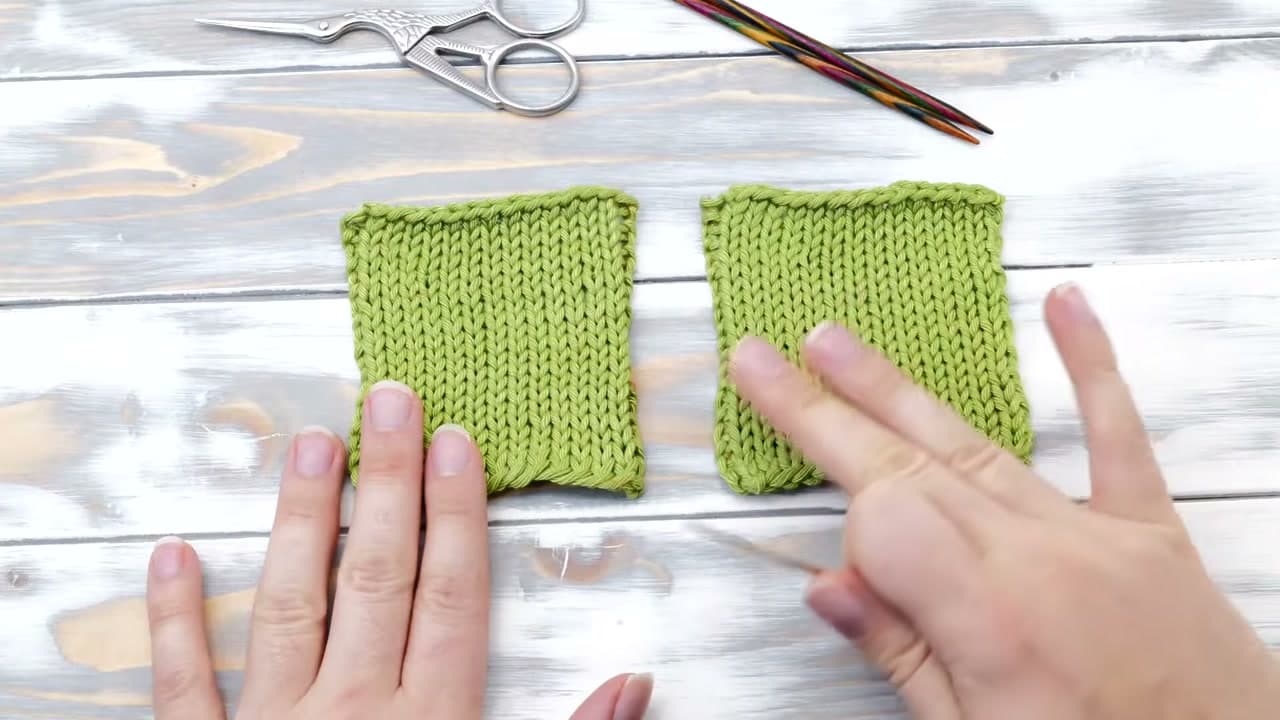
Step 1: Lay the Two Stockinette Pieces Side by Side - How to Mattress Stitch Two Knitted Pieces Together

Put both pieces flat on the table with the knit side facing up and the two edges you plan to join sitting next to each other. Keep them the same way round. If you flip one over you will be seaming a knit edge to a purl edge and the join will not close cleanly.

Mattress stitch needs a knit-stitch edge on both sides, so stocking stitch, ribbing and cables are all fine. Garter and reverse stocking stitch need a different join. Give the pieces a quick block before you start if you want the edges to sit flat.

Tip

Blocking first is worth the wait. Damp edges relax and lie straight, and straight edges make the bars underneath much easier to count.

2

Hold the Two Edges Together in Your Hands

1:44
Step 2: Hold the Two Edges Together in Your Hands - How to Mattress Stitch Two Knitted Pieces Together

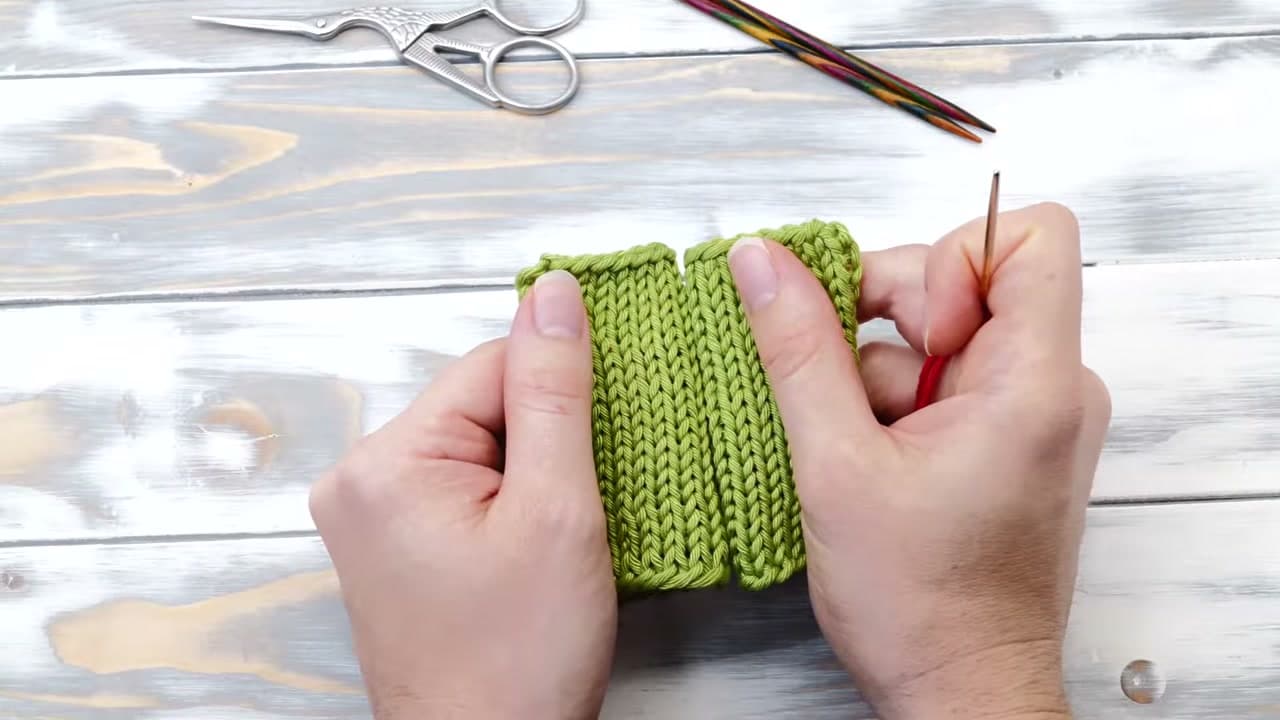
Pick both pieces up and pinch the two edges together between your thumbs, with the columns of stitches running vertically in front of you. Norman from NimbleNeedles works this way for the whole seam rather than leaving the pieces flat on the table.

There is a reason for it. Held up close to your face, the small horizontal bars you are about to sew through stand out clearly. Flat on a table they hide in the fabric and you end up guessing. Guessing is how bars get skipped.

Tip

Holding the work in your hands also lets you check the alignment as you go. If one side starts running ahead of the other, you will see it before you have sewn six inches of it.

3

Thread the Seaming Yarn onto a Tapestry Needle

2:10
Step 3: Thread the Seaming Yarn onto a Tapestry Needle - How to Mattress Stitch Two Knitted Pieces Together

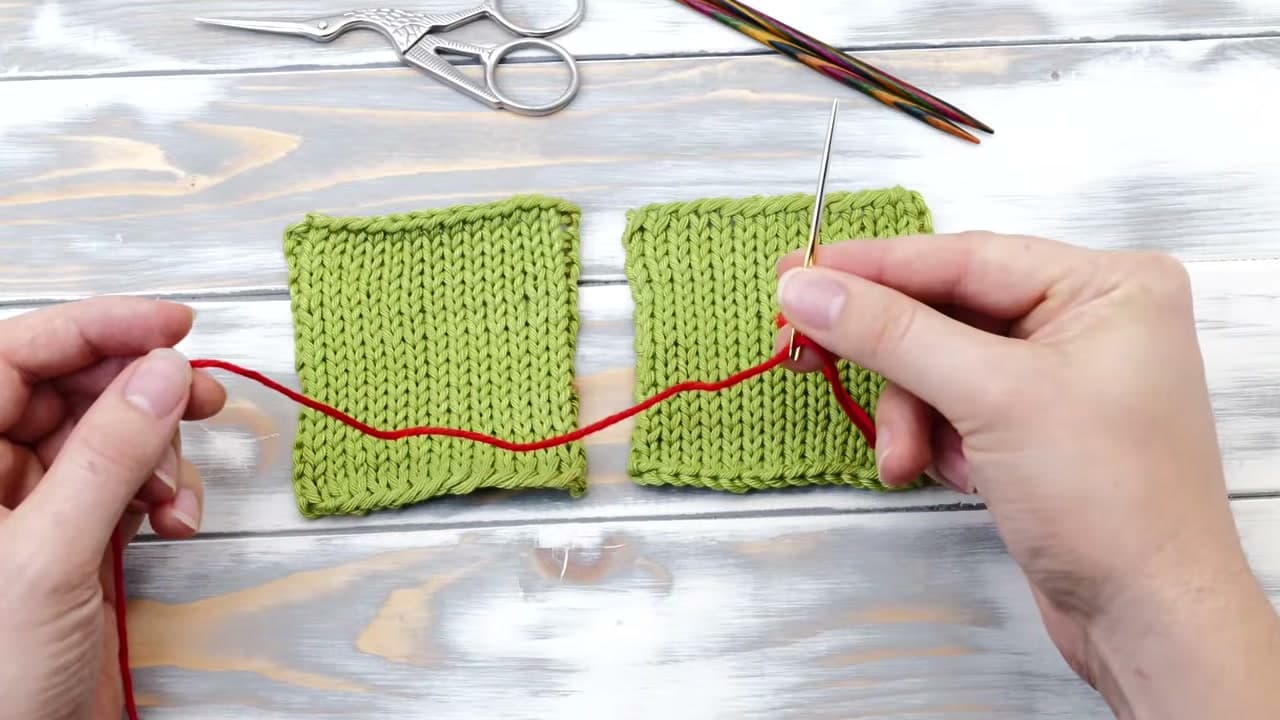
Cut a length of yarn and thread it onto a blunt tapestry needle. The long cast-on tail works too if you left yourself enough of one. Use the same yarn the pieces are knitted in so the seam disappears into the fabric.

The blunt tip is the part that matters. A sharp point pierces the strands of the yarn and drags the fabric out of shape. A blunt one slides between them. NimbleNeedles uses a contrasting red yarn in the video so you can follow the path, which is not what you want on a real project.

Tip

If your yarn is thick and fuzzy, thread it by folding a loop over the needle and pushing the fold through the eye rather than fighting the cut end in.

4

Find the First Bar Between the Stitch Columns

2:25
Step 4: Find the First Bar Between the Stitch Columns - How to Mattress Stitch Two Knitted Pieces Together

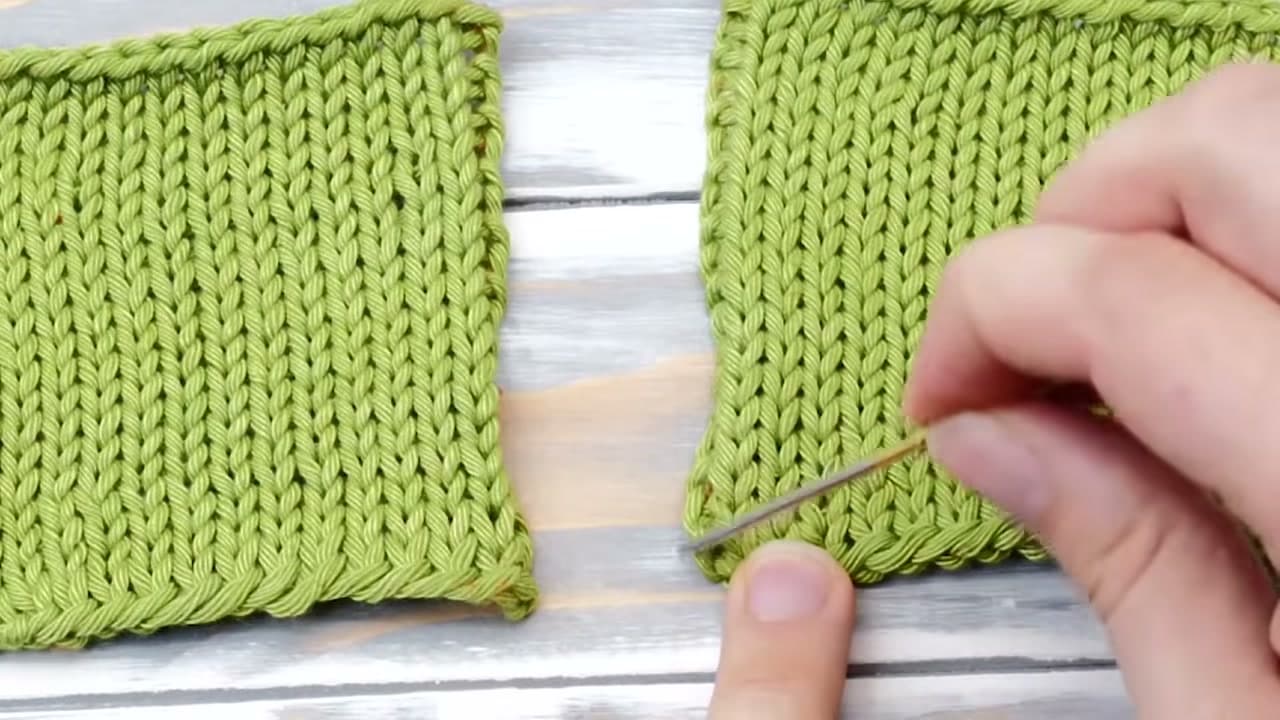
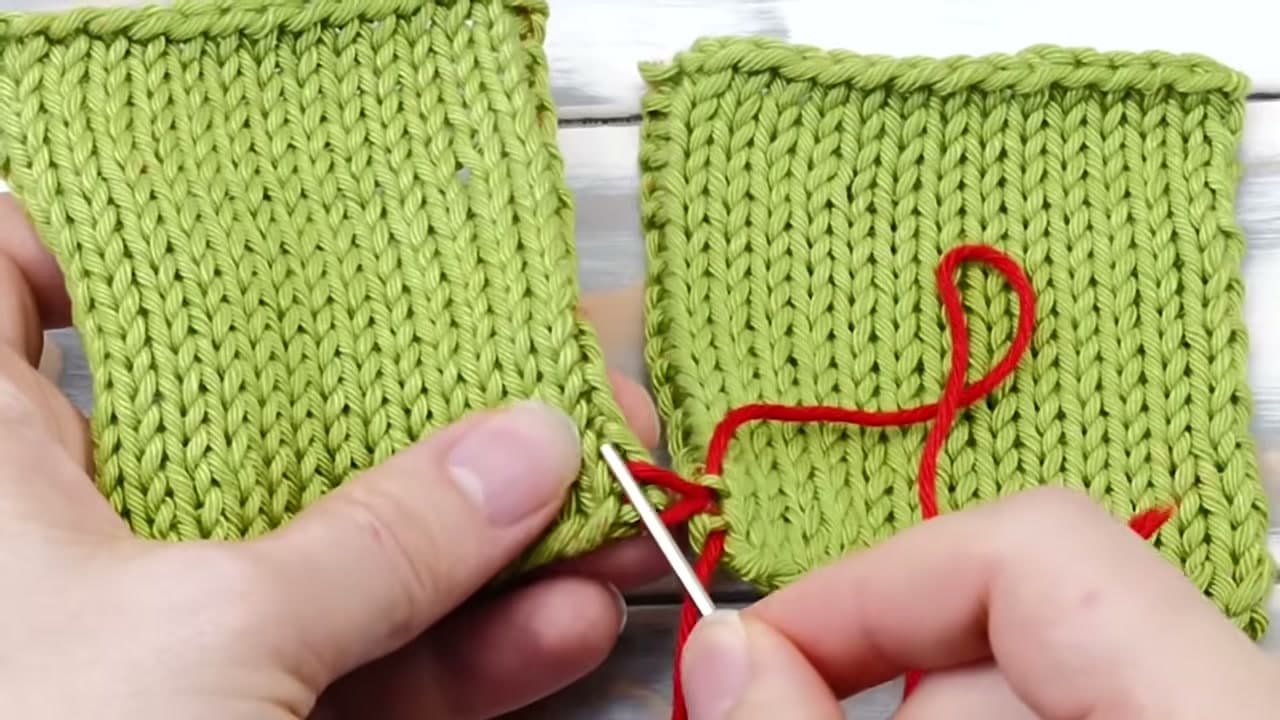
Look at the right-hand piece and count in one full column of stitches from the edge. Between that first column and the second one runs a ladder of tiny horizontal bars, one for every row. Those bars are what you sew through.

This is the part people get wrong. Picking up the edge stitch itself leaves a thick lumpy line down the join that no amount of tugging will flatten. Go one column in, find the lowest bar sitting right above the cast-on, slide the needle under it and pull the yarn through. Leave a tail hanging.

Tip

Pick up the cast-on loop along with that first bar on both sides. It closes the small gap at the very bottom of the seam that otherwise stays open.

5

Cross to the Other Piece and Pick Up the Matching Bar

2:52
Step 5: Cross to the Other Piece and Pick Up the Matching Bar - How to Mattress Stitch Two Knitted Pieces Together

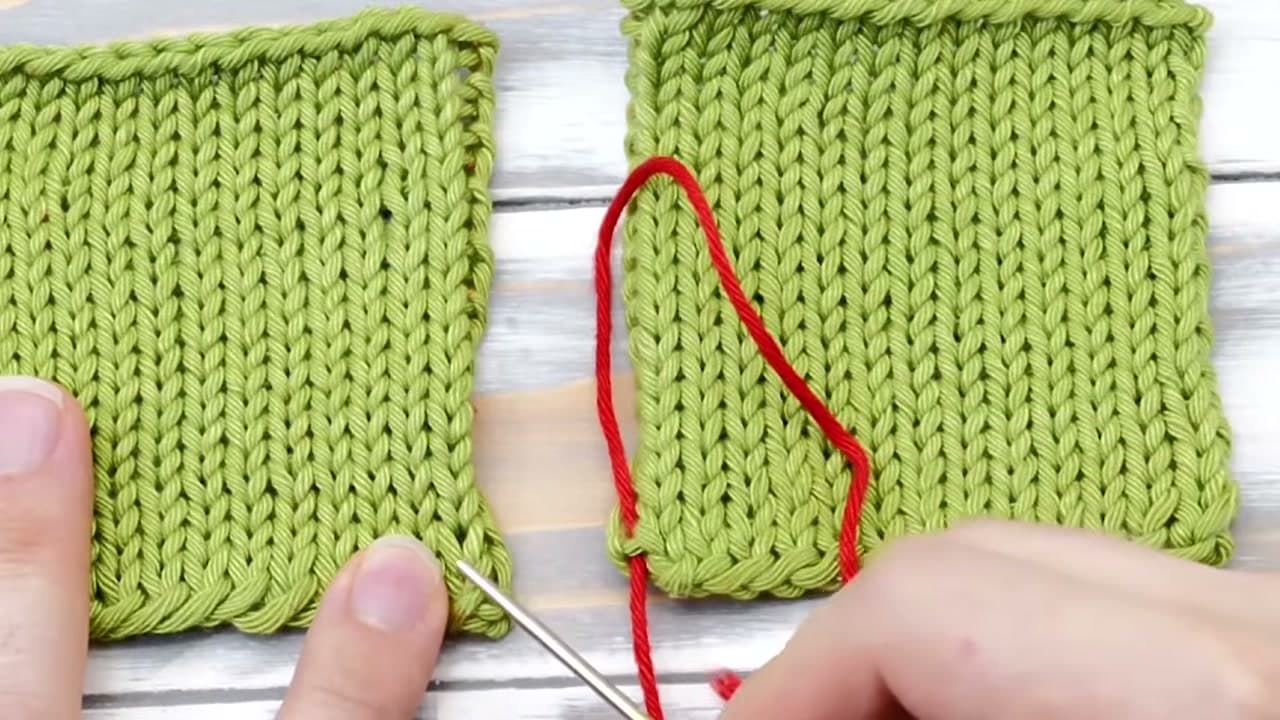
Take the needle across to the left-hand piece and find the same ladder there, one column in from its edge. Go under the bar sitting at the same height as the one you just used on the right, and pull the yarn through.

Leave it loose. Do not tighten anything yet. The yarn should lie slack across the gap between the two pieces, because you need to be able to see where the next bar is and a tight thread hides it. Tension comes later and it comes all at once.

Tip

Matching the heights is what keeps the rows lined up. If you take a bar one row higher on one side, every row after it sits crooked and the fabric pulls on a diagonal.

6

Pick Up the Next Bar Directly Above the Last One

3:39
Step 6: Pick Up the Next Bar Directly Above the Last One - How to Mattress Stitch Two Knitted Pieces Together

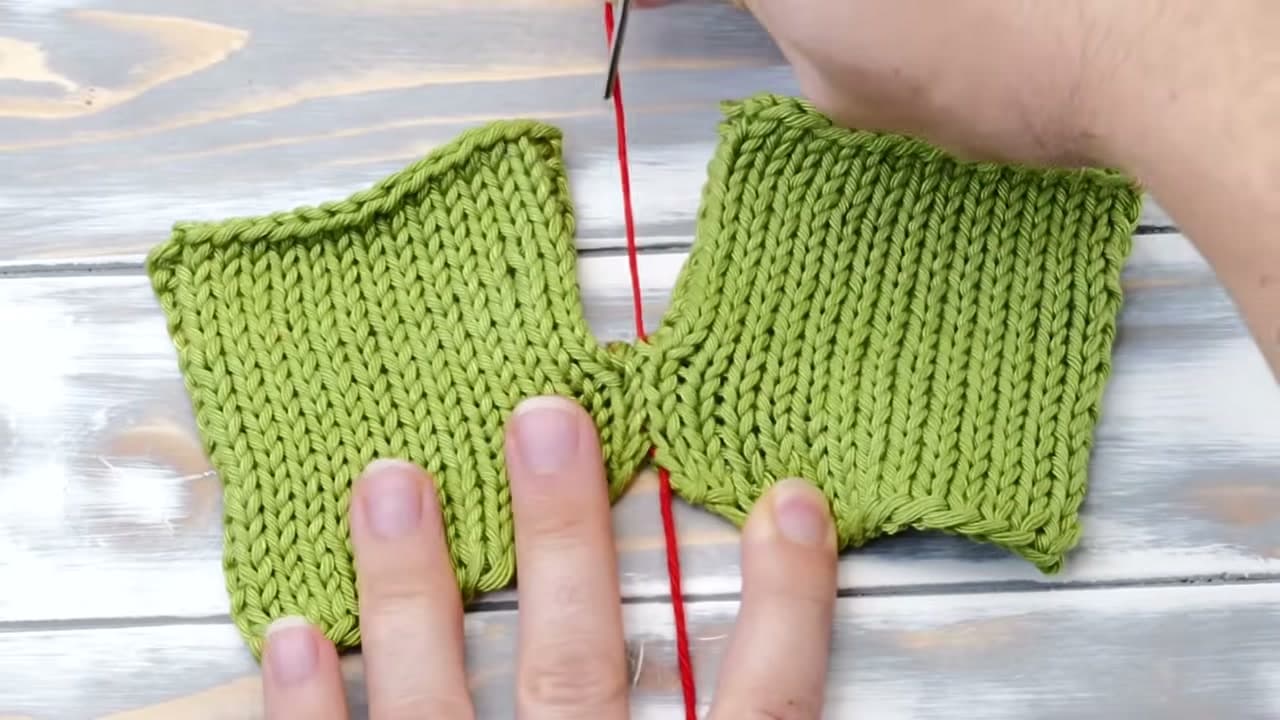
Go back to the right-hand piece and slide the needle under the bar directly above the one you last used. Pull through, swap to the left, and take the bar above there. Keep alternating, one bar from each side, always moving up by exactly one rung.

The seaming yarn now zigzags across the gap like the rungs of a ladder. Do not skip a bar and do not double back. A missed rung shows up later as a small pucker that you can only fix by pulling the whole seam out.

Tip

On fine yarn knitted with size 0 to 2 needles you can take two bars at a time to speed things up. Do not try it on chunky yarn or 10mm needles, where the shortcut leaves a visible gap.

7

Pull the Tail Snug and Watch the Seam Close

4:17
Step 7: Pull the Tail Snug and Watch the Seam Close - How to Mattress Stitch Two Knitted Pieces Together

Once you have worked an inch or so, hold the fabric steady and pull the tail. The red rungs vanish into the fabric and the two edges snap together into one piece. This is the moment the stitch earns its reputation. Done right there is no ridge on the front and no visible line.

Carry on up the seam, tugging every inch or so rather than waiting until the very end. Stop pulling the moment the edges meet. If you keep going the seam buckles and gathers, and you fix that by massaging the fabric back out with your fingers.

Tip

If the seam went wrong, pull hard on the tail and the whole thing comes undone in one go. That only works on short seams. Anything long has to be unpicked one stitch at a time.

8

Check the Ridge on the Wrong Side of the Seam

5:56
Step 8: Check the Ridge on the Wrong Side of the Seam - How to Mattress Stitch Two Knitted Pieces Together

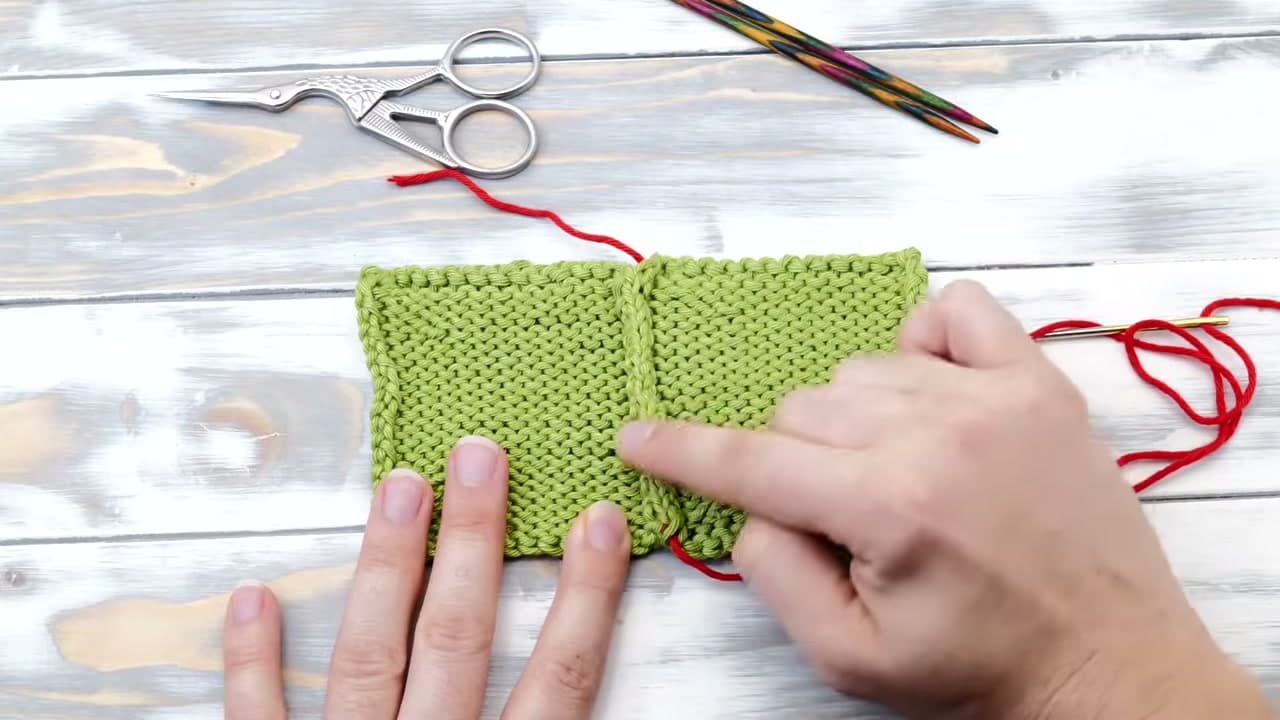
Turn the work over and run a finger down the join. Mattress stitch leaves a narrow ridge on the wrong side. That is normal and it sits flat inside a sweater or a cushion cover, where nobody sees it.

How fat that ridge gets depends on how far in you seamed. One column in gives the thinnest ridge. Seaming two or three columns in makes a heavier one, which is worth knowing because it is a quiet way to take half an inch out of a garment that came out too wide. Trim and weave the tail in and you are done.

Tip

The same bars sit inside the V of a single knit stitch, not only between two columns. You can seam through those instead. Just pick the same kind of bar on both sides or the join will pull unevenly.

Used in this stepembroidery scissors

Keep going

How to Knit in the Round (Beginner Step-by-Step)

Products Used

The Checklist

How to Mattress Stitch Two Knitted Pieces Together

Tools
3
Materials
2
Steps
8
Video
8 min

Tools we recommend

Your Guide

NimbleNeedles

As an Amazon Associate we earn from qualifying purchases. Links on this page may be affiliate links - clicking them and buying doesn't change your price, but helps support CraftingStepByStep.

Tags

Sunday How-To

New knitting tutorials, every Sunday

One short email with the week's best step-by-step guides. Free, no spam, unsubscribe anytime.

Did this work for you?

What's next

Related collections

Curated theme pages that include this tutorial.

Weekly Digest

Liked this knitting tutorial?

Pick the categories you want to hear about. Weekly digest of new step-by-step tutorials. No spam, easy unsubscribe.

Send me tutorials about

We only email about new tutorials. Easy unsubscribe anytime.