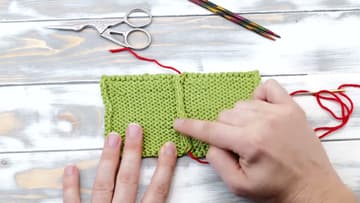
How to Mattress Stitch Two Knitted Pieces Together
Source: NimbleNeedles • Full tutorial: www.craftingstepbystep.com/knitting/how-to-mattress-stitch
- Difficulty
- Easy
- Hands-on time
- About 15 minutes

Tools
- Blunt tapestry needle with a large eye
- Small sharp scissors
- Foam blocking mats and rustproof pins (optional)
Materials
- Two knitted pieces worked in stocking stitch, ribbing or cables
- A length of the same yarn the pieces are knitted in, or a long cast-on tail
Steps
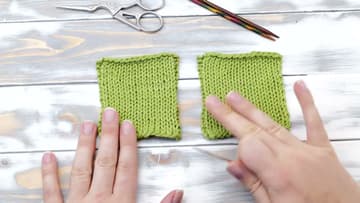
1. Lay the Two Stockinette Pieces Side by Side
Put both pieces flat on the table with the knit side facing up and the two edges you plan to join sitting next to each other. Keep them the same way round.
Tip: Blocking first is worth the wait. Damp edges relax and lie straight, and straight edges make the bars underneath much easier to count.
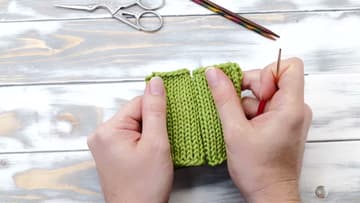
2. Hold the Two Edges Together in Your Hands
Pick both pieces up and pinch the two edges together between your thumbs, with the columns of stitches running vertically in front of you. Norman from NimbleNeedles works this way for the whole seam rather than leaving the pieces flat on the table.
Tip: Holding the work in your hands also lets you check the alignment as you go. If one side starts running ahead of the other, you will see it before you have sewn six inches of it.
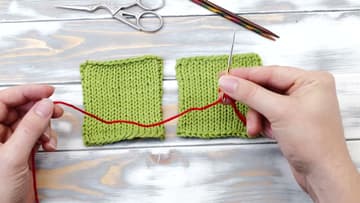
3. Thread the Seaming Yarn onto a Tapestry Needle
Cut a length of yarn and thread it onto a blunt tapestry needle. The long cast-on tail works too if you left yourself enough of one.
Tip: If your yarn is thick and fuzzy, thread it by folding a loop over the needle and pushing the fold through the eye rather than fighting the cut end in.
4. Find the First Bar Between the Stitch Columns
Look at the right-hand piece and count in one full column of stitches from the edge. Between that first column and the second one runs a ladder of tiny horizontal bars, one for every row.
Tip: Pick up the cast-on loop along with that first bar on both sides. It closes the small gap at the very bottom of the seam that otherwise stays open.
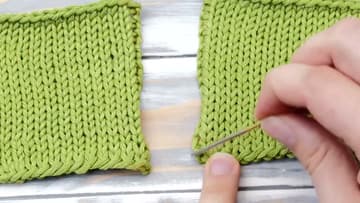
5. Cross to the Other Piece and Pick Up the Matching Bar
Take the needle across to the left-hand piece and find the same ladder there, one column in from its edge. Go under the bar sitting at the same height as the one you just used on the right, and pull the yarn through.
Tip: Matching the heights is what keeps the rows lined up. If you take a bar one row higher on one side, every row after it sits crooked and the fabric pulls on a diagonal.
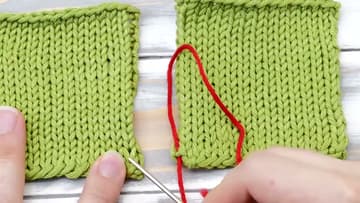
6. Pick Up the Next Bar Directly Above the Last One
Go back to the right-hand piece and slide the needle under the bar directly above the one you last used. Pull through, swap to the left, and take the bar above there.
Tip: On fine yarn knitted with size 0 to 2 needles you can take two bars at a time to speed things up.
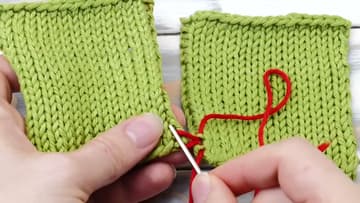
7. Pull the Tail Snug and Watch the Seam Close
Once you have worked an inch or so, hold the fabric steady and pull the tail. The red rungs vanish into the fabric and the two edges snap together into one piece.
Tip: If the seam went wrong, pull hard on the tail and the whole thing comes undone in one go. That only works on short seams. Anything long has to be unpicked one stitch at a time.
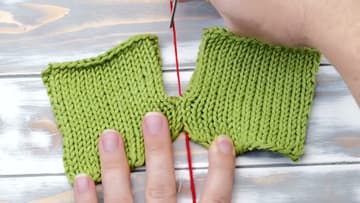
8. Check the Ridge on the Wrong Side of the Seam
Turn the work over and run a finger down the join. Mattress stitch leaves a narrow ridge on the wrong side.
Tip: The same bars sit inside the V of a single knit stitch, not only between two columns. You can seam through those instead.