How to Make a Leather Bracelet With Barrel Knots

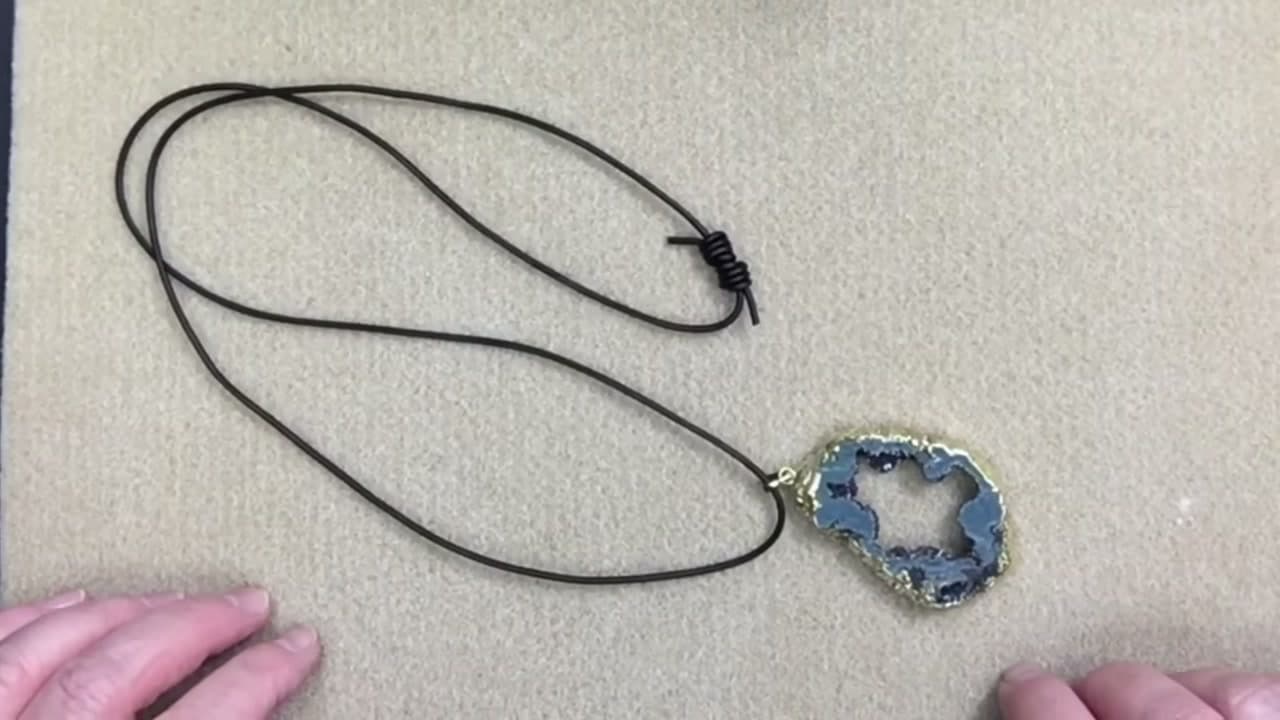
The finished result: How to Make a Leather Bracelet With Barrel Knots
  • Difficulty: Easy
  • About 45 minutes, plus 15 minutes to dry or set
  • 10 steps

You tapped Save

Save this project for later

We'll email you a link, no password.

How to Make a Leather Bracelet With Barrel Knots

  • Your saved projects in one list
  • Your ticked steps on any device

Check your inbox for an email from us. Not there? Look in your spam folder.

Print

Steps written out by Crafting Step by Step from Kellie's Bead Boutique's video (opens YouTube) (11:02). Published .

Barrel knots are the neat little coils you see on boho leather bracelets. Each one is three wraps of leather around a second strand, cinched tight so it looks like a tiny barrel. Kellie of Kellie's Bead Boutique ties four of them on doubled 2 mm leather, with two white howlite beads and a tree of life charm in between, then finishes the ends with crimp caps and a toggle clasp. It takes an afternoon at most and looks like something from a boutique.

What you need

  • About 30 inches of 2 mm round leather cord
  • Two 8 mm beads with a large hole, plus one charm
  • Two crimp end caps sized for two strands of 2 mm leather
  • A toggle clasp and four small jump rings
  • A barrel knot tube, a ruler, sharp scissors, chain nose pliers and a dab of jewelry glue

The barrel knot tube is a short curved metal tube. You wrap the leather around it, feed the end back through, and slide the tube out. A plastic coffee stirrer or drinking straw cut to 3 inches works in a pinch.

Getting barrel knots neat and even

Always wrap in the same direction. Kellie works toward her left hand. Left-handers can go the other way, as long as they stay consistent. Hold the coils with your thumb as you pull the tube out, or the knot falls apart. Then tighten with a push and a pull: push the coils with a thumbnail and pull the leather back and forth until it locks. Yanking hard in one go gives a lumpy knot. For more knot practice, see how to tie a bracelet knot.

Sizing the bracelet

Kellie makes a 7 inch bracelet. The end caps and clasp add about an inch, so the leather section is trimmed to 6 inches with the charm centered. For a different size, measure your wrist snugly and add half an inch for comfort. Subtract an inch for the hardware and that is your leather length.

Make it your own

Swap the howlite for turquoise, wood or glass beads, as long as the hole fits the leather. Dark brown leather with bronze findings looks rustic. Gray with silver feels softer. Use an initial charm for a gift, or skip the charm and tie a cluster of three knots in the center instead. If you like this style, try a charm bracelet or a beaded bracelet next.

Common mistakes

  • Bead will not go on. Cut the leather on a very sharp angle to make a point.
  • Knots creep along the cord. Tighten each knot right against its bead before tying the next.
  • Too much glue. A drop is enough. Extra squeezes out over the leather.
  • Toggle hard to close. Add a third jump ring on the bar end so it has room to turn.

Caring for a leather bracelet

Take it off before washing your hands, swimming or showering. Water darkens leather and can stiffen the knots. If it gets wet, let it dry flat at room temperature, not on a heater. A tiny bit of leather conditioner once in a while keeps the cord supple.

Want a no-hardware option? A paracord bracelet uses knots alone.

Free printable

Print the steps and supply list for this project

One page you can take to the table. Free with a free account, no password.

Get the free printable

What you'll need

Free, for this project

Get this checklist by email

  • All 11 tools and materials, with tick boxes
  • A link to print all 10 steps on paper, to keep by you while you craft

No password. The whole tutorial stays free on this page.

Quick answer

Make a boho leather bracelet with barrel knots, beads and a charm. An easy project: about 45 minutes, plus 15 minutes to dry or set. Materials cost about $6 to $15. You need 11 things, including two 8 mm large-hole beads, charm and toggle clasp. The 10 steps start with cut and Line Up the Two Leather Cords for the Bracelet, wrap the Leather Three Times Around the Barrel Knot Tube and tighten the First Barrel Knot on the Leather Bracelet.

Step-by-step guide

10 steps, about 11 minutes. Tap a picture to jump to that step. Your progress saves automatically.

Tick each step off as you go.

  1. Step 1: Cut and Line Up the Two Leather Cords for the Bracelet

    Watch this step · 1:12

    Cut about 10 inches from your 30 inch length of 2 mm leather and trim the ends clean. Lay the two pieces together with the short one on top and the long one underneath. Line up the ends. The short piece is the core of the bracelet. The long piece does all the wrapping, which is why it needs the extra length.

    Tip:

    Leave yourself extra leather. It is easier to tie barrel knots with plenty to hold.

    Back to all steps

  2. Step 2: Wrap the Leather Three Times Around the Barrel Knot Tube

    Watch this step · 1:32

    Measure about 3 inches in from the end and mark the spot with your fingers. Lay the barrel knot tube along the leather there. Take the long strand behind and wrap it around the tube and the short strand three times, always working toward your left hand. Then feed the end back through the far end of the tube and pull it through.

    Tip:

    Left-handed? Wrap toward your right hand instead. Stay consistent on every knot.

    Back to all steps

  3. Step 3: Tighten the First Barrel Knot on the Leather Bracelet

    Watch this step · 1:56

    Hold the coils with your thumb and slide the tube out. Keep holding, or the wraps fall loose. Line up the leather ends again, then tighten with a push and a pull. Push the coils with your thumbnail and pull the strand back and forth until the knot locks into a neat little barrel. Keep the short strand on top as you work.

    Tip:

    Do not yank. Small push-and-pull moves give a smoother, rounder knot.

    Back to all steps

  4. Step 4: Cut the Leather Tip at an Angle to Thread the Bead

    Watch this step · 2:40

    Slide your first 8 mm bead onto both strands and push it up against the knot. If the hole is tight, trim the leather end on a very sharp angle, almost a point. The narrow tip slips through the bead much more easily than a square end. Choose beads with a large drill hole so the doubled leather fits.

    Tip:

    Use sharp scissors. Dull blades crush the leather and fray the tip.

    Back to all steps

  5. Step 5: Slide On the Bead and Tie a Barrel Knot Beside It

    Watch this step · 3:06

    With the bead snug against the first knot, lay the tube on the far side of the bead. Wrap the long strand three times, thread it back through the tube and pull it out. It may look awkward with the bead in the way, and it will be loose at first. Push the coils over one strand at a time, then push and pull until it locks.

    Tip:

    Snug the knot right against the bead so nothing slides around later.

    Back to all steps

  6. Step 6: Add the Tree of Life Charm Between Barrel Knots

    Watch this step · 3:50

    Slip the charm onto the leather so it hangs down below the bracelet. Check that it faces the right way before moving on. Leave a gap of about half an inch, or more if you like, then tie the next barrel knot. Wrap three times, feed through the tube, pull the tube out and tighten slowly. Take your time here. The center knots show the most.

    Tip:

    Hold the knot as you pull the tube. You can remove the tube first or after, whichever is easier.

    Back to all steps

  7. Step 7: Add the Last Bead and Tie the Final Barrel Knot

    Watch this step · 4:45

    Slide the second bead on and push it over against the last knot. Place the tube on the other side and tie one more barrel knot: three wraps, through the tube, tube out, push and pull tight. That gives you a matching pattern, knot, bead, knot, charm, knot, bead, knot. The extra leather left over is trimmed in the next step.

    Tip:

    Compare both sides of the charm. Even gaps make the bracelet look balanced.

    Back to all steps

  8. Step 8: Measure and Trim the Leather Bracelet to Length

    Watch this step · 5:26

    Kellie aims for a 7 inch bracelet. The end caps add about an inch, so the leather is cut to 6 inches. Find the center by setting the charm on the 3 inch mark of your ruler. Mark the 6 inch point with a thumbnail and trim. Turn it around and trim the other end the same way, so the charm stays centered.

    Tip:

    Measure your wrist first and adjust. Wrist plus half an inch, minus an inch, is your leather length.

    Back to all steps

  9. Step 9: Glue and Crimp the End Caps on the Leather Bracelet

    Watch this step · 7:02

    Put a small drop of glue inside one end cap. Too much will ooze out over the leather. Line the two strands up flat and side by side, push them into the cap, and check everything is even before you squeeze. Crimp with smooth-jawed chain nose pliers, working down each side rather than at the very top. Repeat on the other end.

    Tip:

    Use pliers without serrated jaws so you do not scratch the metal caps.

    Back to all steps

  10. Step 10: Attach the Toggle Clasp With Jump Rings

    Watch this step · 8:22

    Open a jump ring with two pairs of pliers, twisting sideways instead of pulling apart. Link it to one end cap and the round part of the toggle, then close it until it clicks. On the other end, add three jump rings in a chain before the toggle bar. The extra length lets the bar slip through the ring easily, so the bracelet goes on without a fight.

    Tip:

    Wiggle each jump ring closed until the ends meet flush. Gaps snag on sweaters.

    Back to all steps

How to Make a Kumihimo Bracelet

Keep going

How to Make a Kumihimo Bracelet

Keep going with jewelry making

More on this topic, picked for this leather bracelet with barrel knots.

You reached the last step

Save this project to come back to it

Your ticked steps, the free printable and your other saved makes, together in My Projects. Free, no password.

You tapped Save

Save this project for later

We'll email you a link, no password.

How to Make a Leather Bracelet With Barrel Knots

  • Your saved projects in one list
  • Your ticked steps on any device

Check your inbox for an email from us. Not there? Look in your spam folder.

Free printable

Printable sheet and shopping list for this project

The bonus is hidden until you sign up.

Free with a free account, no password. Every step above stays open to everyone.

Products Used

The Checklist

How to Make a Leather Bracelet With Barrel Knots

Tools
4
Materials
7
Steps
10
Video
11 min

Tools we recommend

As an Amazon Associate we earn from qualifying purchases. Links on this page may be affiliate links - clicking them and buying doesn't change your price, but helps support Crafting Step by Step.

Tags

The Crafter's Weekly

New jewelry making tutorials, every Sunday

One short email with the week's best step-by-step guides. Free, no spam, unsubscribe anytime.

Did this work for you?

What's next

Related collections

Curated theme pages that include this tutorial.

Similar tutorials

Hand-picked next reads based on the one you just finished.

Liked this jewelry making tutorial?

Pick the crafts you want to hear about. One email every Sunday with new step-by-step tutorials. No spam, easy to unsubscribe.

Get more like this in your inbox

Weekly digest. Pick the categories you want. Unsubscribe anytime.

Send me tutorials about

We only email about new tutorials. Easy unsubscribe anytime.