How to Embroider a Bee (Beginner Hand Embroidery, Step by Step)

EmbroideryEasy4:027 stepsBrowse more →

By CraftingStepByStepPublished

Based on a video by ThatembroideryGirl.

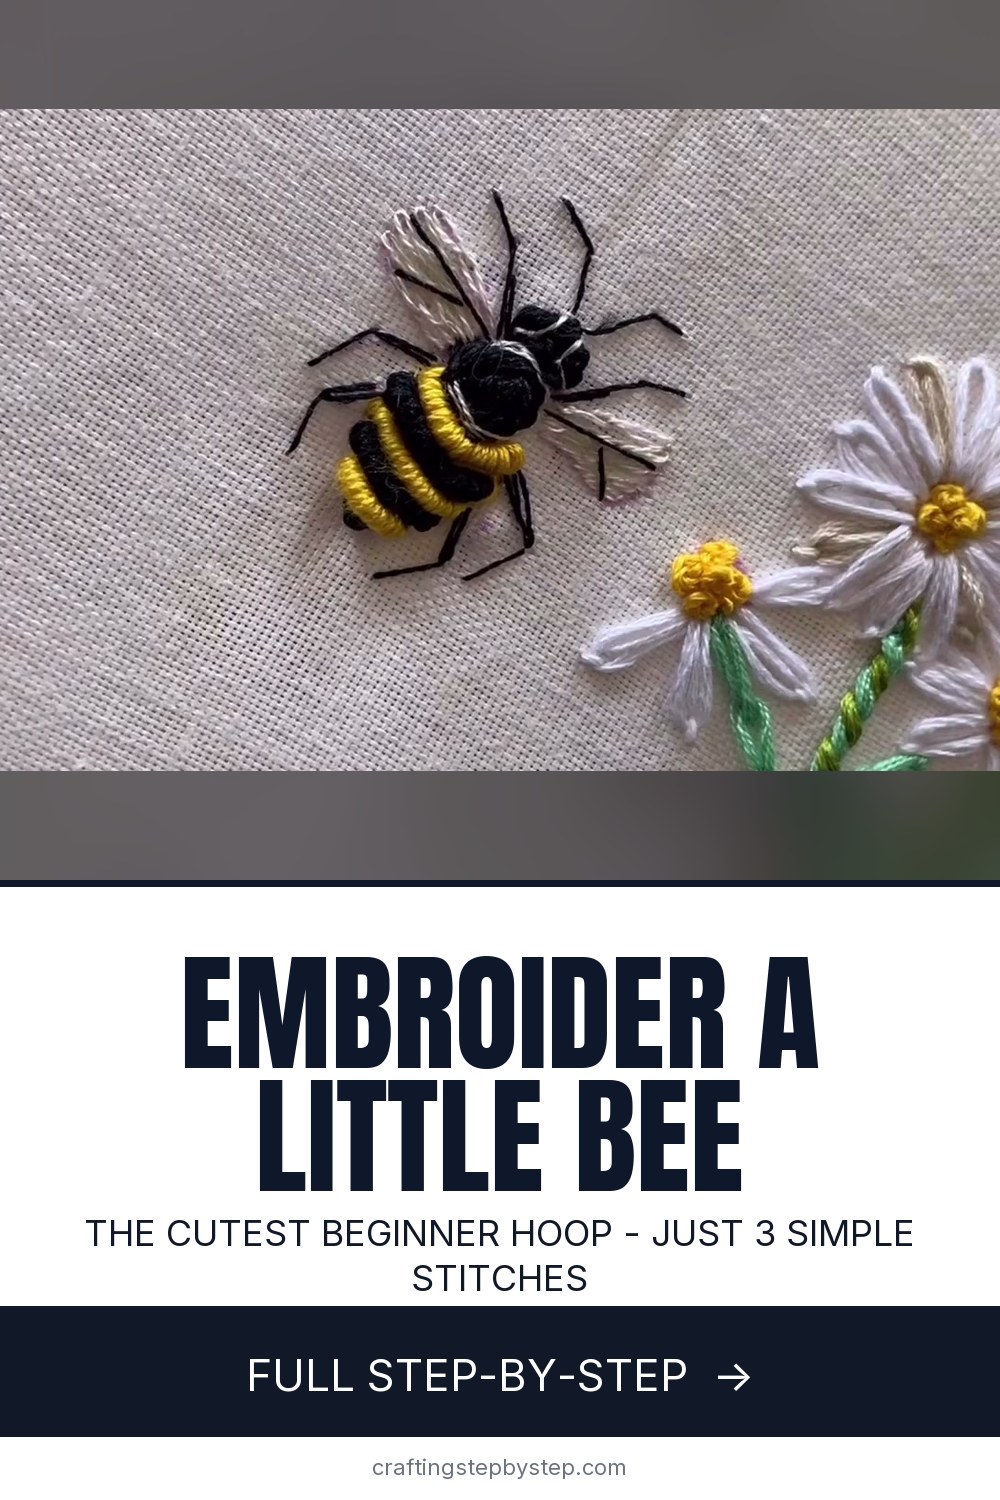
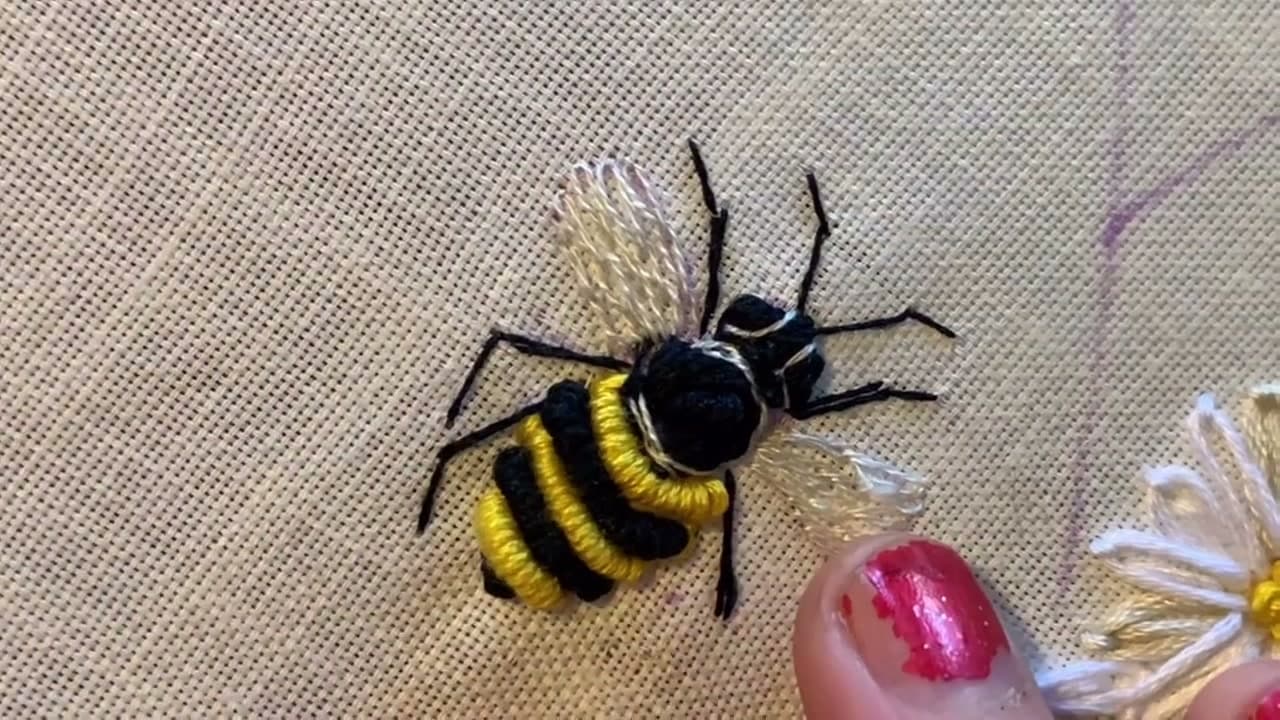
A hand-embroidered bee is one of those little motifs that looks fussy and turns out to be a friendly weekend make. That Embroidery Girl designed this one for beginners, and the whole bug comes together from a handful of stitches you can learn as you go: chain stitch for the outlines, French knots to pack in solid color, and fat bullion knots for that rounded, striped body. Work it on plain cotton or linen inside a hoop and you have a keepsake you can frame or stitch onto a bag.

The clever part is how the body gets its dimension. Instead of flat satin bands, you coil the black and yellow stripes as chunky bullion knots and couch each one down so it sits proud of the fabric. That raised texture is what makes the bee read as soft and fuzzy instead of printed. If bullion knots are new to you, a couple of practice coils on scrap fabric first will save you some frustration, and once you can lay a smooth one, the rest of the bee is quick.

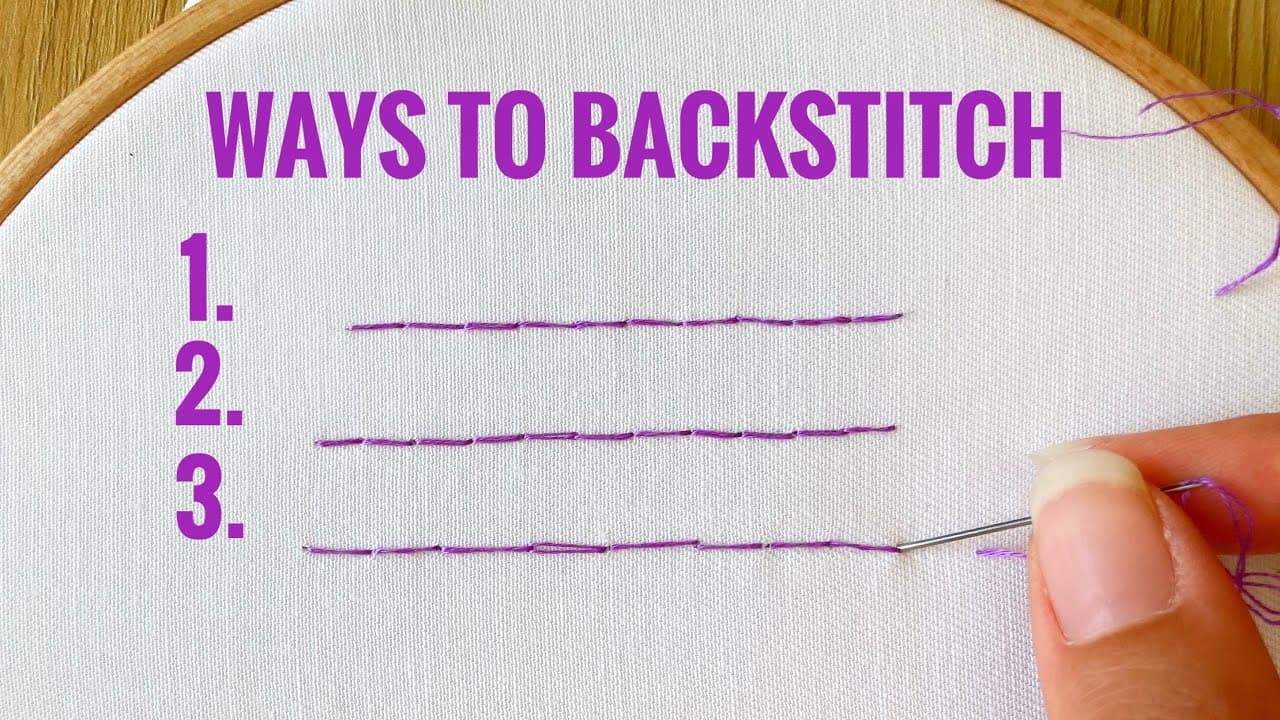
Two skills do a lot of the heavy lifting here, and both are worth a quick refresher. A tidy backstitch gives you clean antennae and legs, and if you would rather fill the wings or stripes with a flatter look, satin stitch is an easy swap. Once you have a bee under your belt, the same layered approach scales up to bigger blooms like an embroidered rose.

Step-by-Step Guide

7 steps · about 4 minutes.Check off each step as you go and your progress saves automatically.

1

Step 1: Transfer the Design and Outline the Head

0:40
Step 1: Step 1: Transfer the Design and Outline the Head

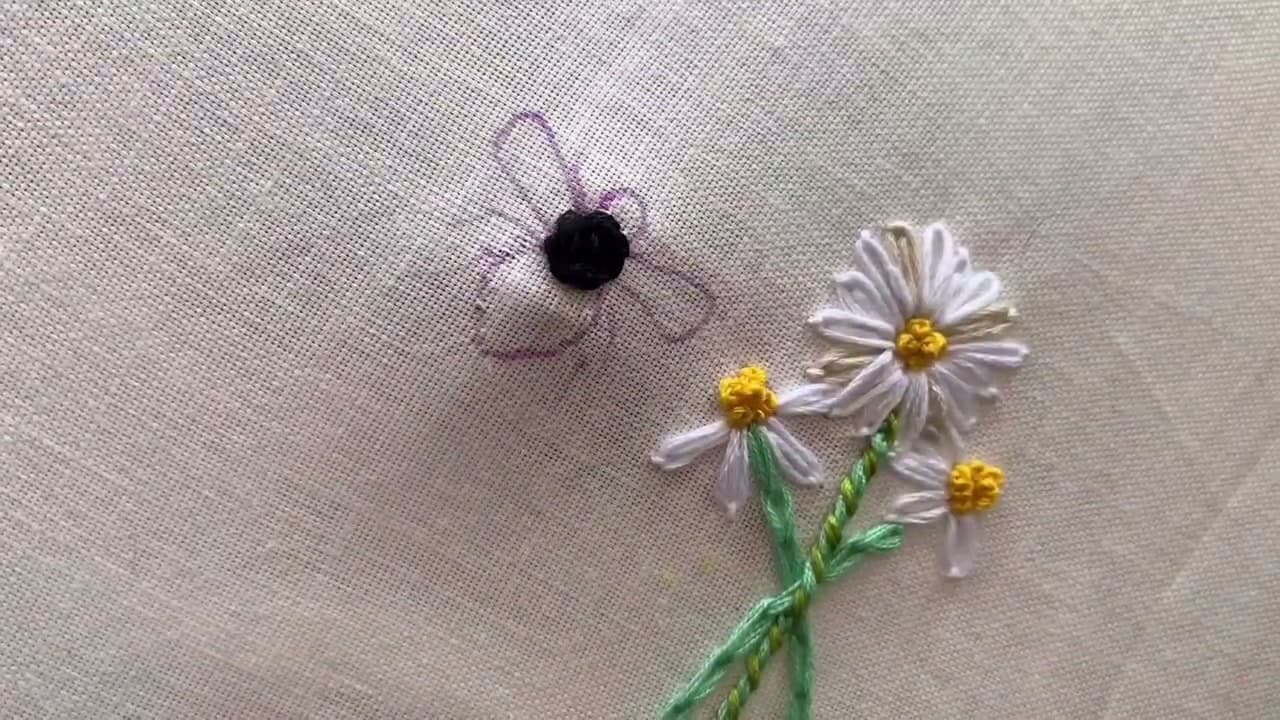
Trace the bee onto your fabric with a water-soluble pen. A simple shape with a round head, a rounded body, and two little wings is all you need. Get it centered in your hoop so you have fabric to grip on every side.

Start the black head with a small chain stitch. Come up, go back down in the same hole to make a loop, and catch that loop on your needle before you pull. Follow the traced circle all the way around so you end up with a neat black ring ready to fill.

Tip

Watch this step Use a water-soluble pen, not a regular marker. Any stray transfer lines rinse away with a damp cotton bud once the stitching is done.
2

Step 2: Fill the Head with French Knots

1:02
Step 2: Step 2: Fill the Head with French Knots

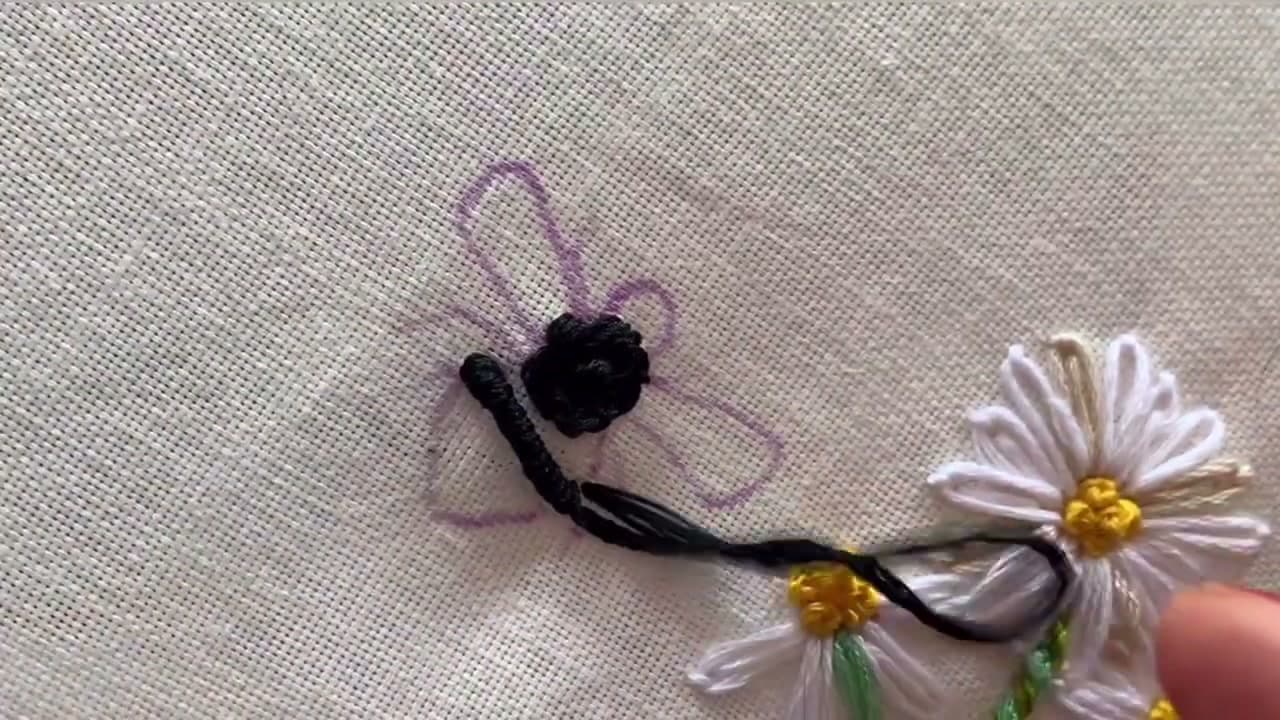
Now pack the head solid with chunky French knots. Come up through the fabric, wrap the black floss around your needle a few times, hold the wraps snug against the fabric, then push the needle back down close to where it came up and pull through slowly.

Keep working knots side by side until no white fabric peeks between them. Crowd them together on purpose. That density is what gives the head its rounded, slightly fuzzy look instead of a flat patch of thread.

Tip

Watch this step Hold the working thread taut with your free hand as you pull the knot down. A slack thread is what turns a French knot into a loose tangle.

3

Step 3: Coil the Black Body with Bullion Knots

1:35
Step 3: Step 3: Coil the Black Body with Bullion Knots

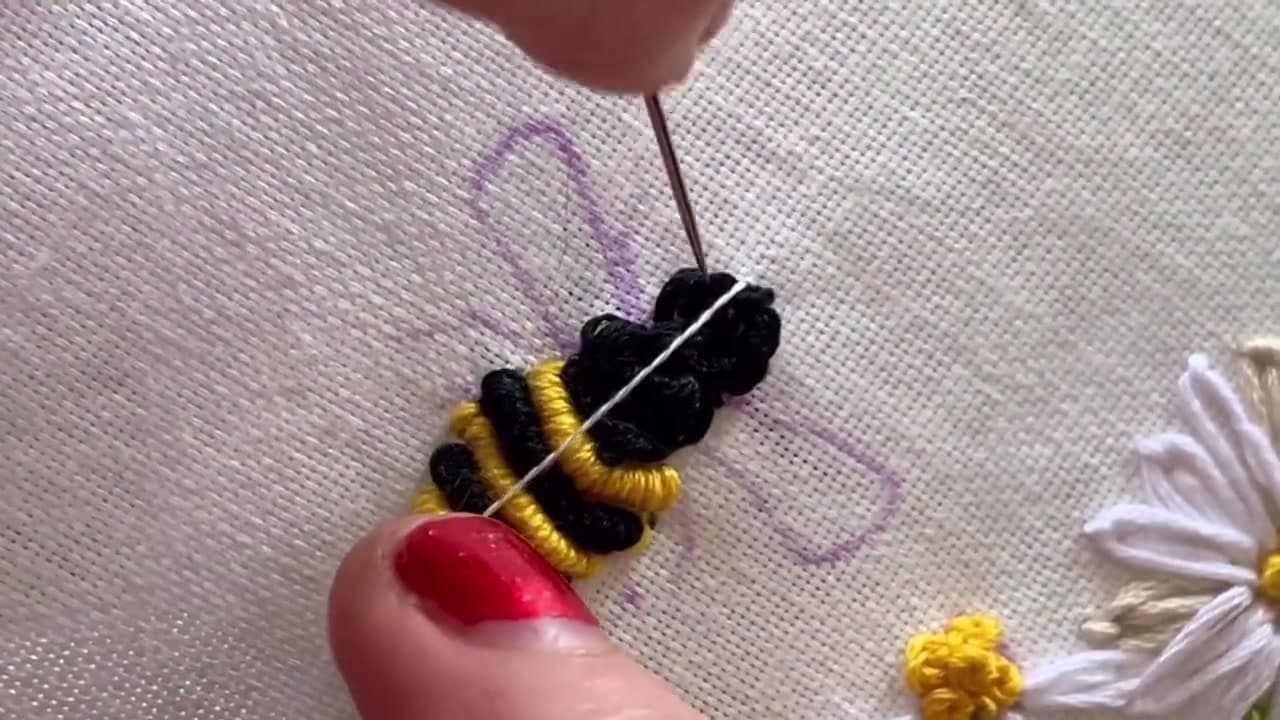
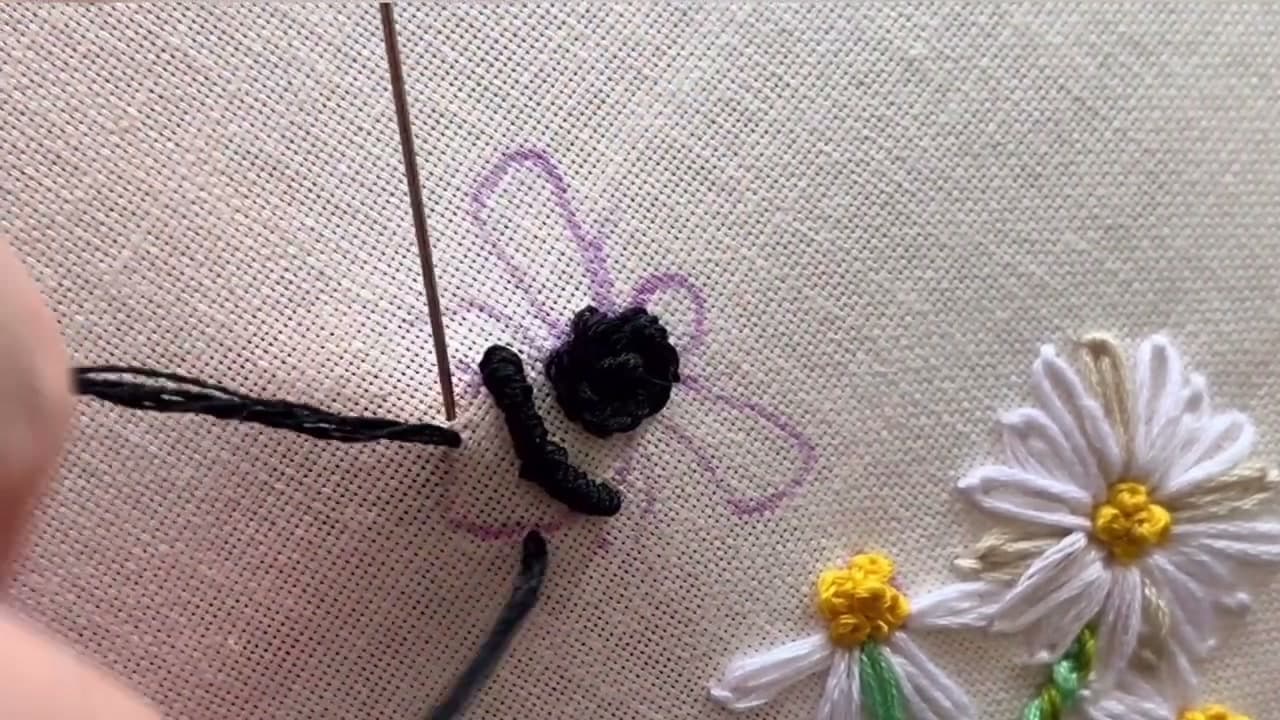
The body is built from bullion knots, which are the coiled stitches that give the bee its plump shape. Come up, go down a stitch-length away, then bring the needle back up in that first hole and wrap the floss around it several times.

Measure the wraps against the gap so the coil will fit, then hold the wraps with your thumb and ease the needle through. Lay the coil flat and add a tiny couching stitch across it to lock that curved shape in place. Build up the black sections this way.

Tip

Watch this step Wrap the same number of times each stitch so your coils match. Count out loud the first few until the rhythm sticks.

4

Step 4: Add the Yellow Stripes

3:10
Step 4: Step 4: Add the Yellow Stripes

Switch to yellow floss and work the stripes as long bullion knots, using a full strand so the bands come out nice and chunky. Wrap in one steady direction so the thread lies smoothly, measure the wraps, then pull the needle through.

Before you set each coil, rearrange the wraps with your needle tip so you do not end up with a skinny end and a fat end. Couch the band down with a small holding stitch, then repeat, alternating yellow bands between the black sections all the way down the body.

Tip

Watch this step Run the needle eye-first through each coil to smooth the wraps. The eye slides through without snagging the twist the way the point can.

5

Step 5: Stitch the White Eyes

3:32
Step 5: Step 5: Stitch the White Eyes

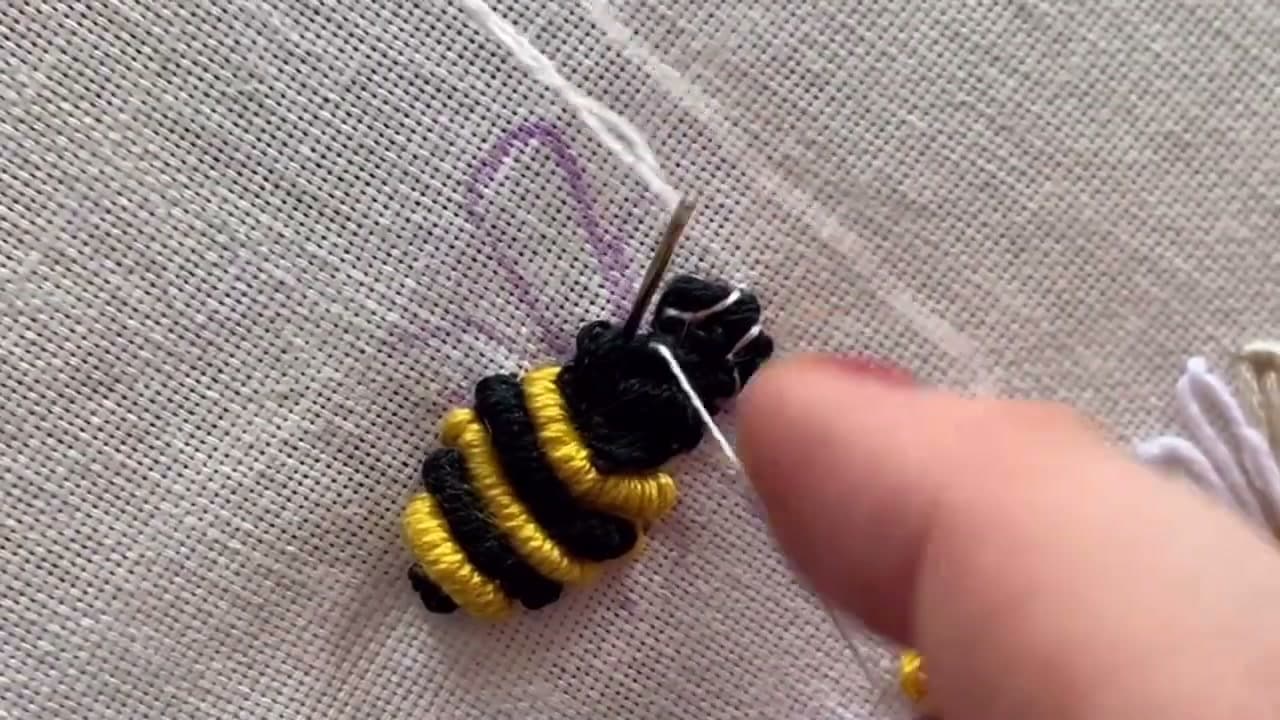
Give the bee its face with a stone-white or pale grey floss. Instead of pulling the thread all the way down, come up through the head and form a small loop on the surface, then catch and tack that loop down with a tiny stitch.

It settles into a neat little eye shape that sits right on top of the black. Work one on each side of the face, keeping them level with each other so your bee looks alert rather than cross-eyed.

Tip

Watch this step Place both eyes before you tighten either one. That way you can nudge them symmetrical while the loops are still loose.

6

Step 6: Fill the Wings

3:45
Step 6: Step 6: Fill the Wings

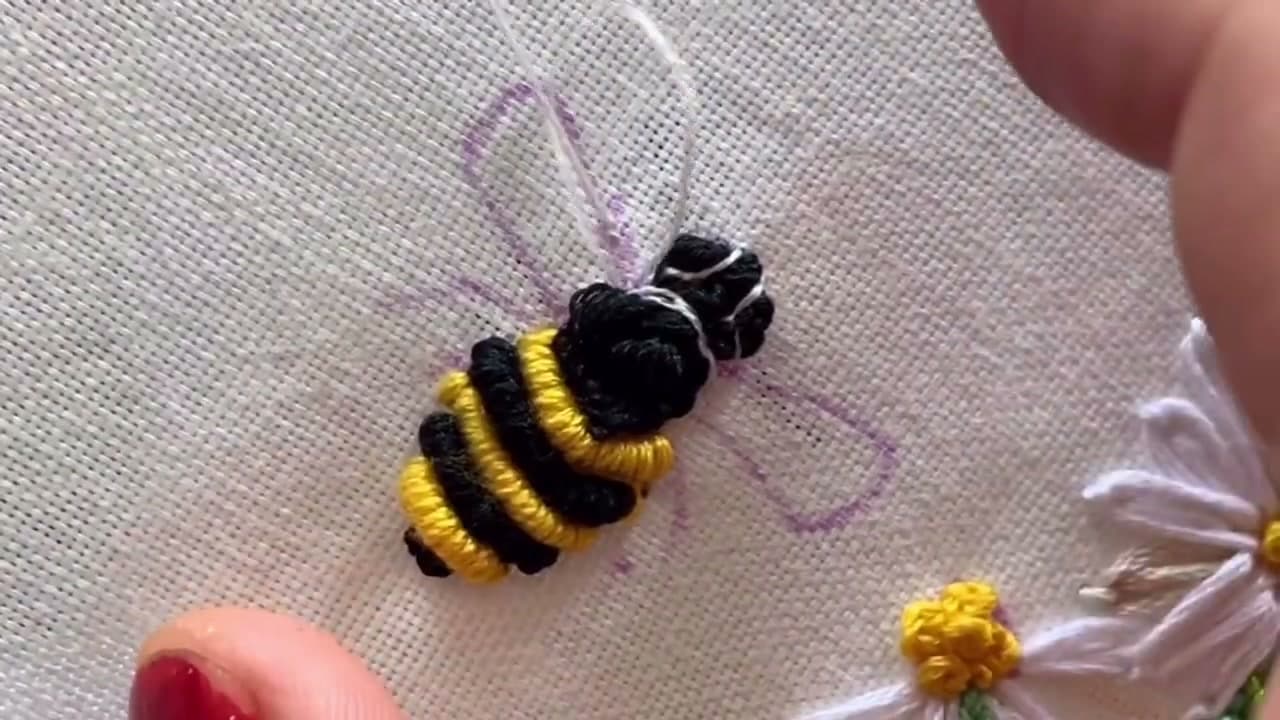
Work the two wings in white or pale grey with fine chain stitches, filling each wing shape you traced earlier. Keep the loops small and even so the wings stay light and papery next to the dense body.

Angle both wings up and back from the bee's shoulders, matching their size and lean so they mirror each other. A slightly open, airy fill reads better here than a packed one, since real wings are see-through.

Tip

Watch this step Stitch the far wing first, then the near one. Working back-to-front keeps loose threads from getting caught under the wing you already finished.

7

Step 7: Add the Antennae and Legs

3:55
Step 7: Step 7: Add the Antennae and Legs

Finish the bee with a thin black thread, using just one or two strands so the lines stay delicate. Outline the two curved antennae coming off the top of the head, then add the slender legs down each side of the body with a small backstitch.

These fine lines are what pull the whole bee together and give it that ready-to-fly look. Once you are happy, rinse away any leftover transfer pen with a damp cotton bud and let it dry in the hoop.

Tip

Watch this step Split the six-strand floss down to two strands for the legs. Full floss makes the legs look clunky next to the fine antennae.

Products Used

☐ The Checklist

How to Embroider a Bee (Beginner Hand Embroidery, Step by Step)

Tools
4
Materials
4
Steps
7
Video
4 min

Tools we recommend

Your Guide

ThatembroideryGirl

As an Amazon Associate we earn from qualifying purchases. Links on this page may be affiliate links - clicking them and buying doesn't change your price, but helps support ShowMeStepByStep.

Tags

Sunday How-To

New embroidery tutorials, every Sunday

One short email with the week's best step-by-step guides. Free, no spam, unsubscribe anytime.

Did this work for you?

What's next

Related collections

Curated theme pages that include this tutorial.

Weekly Digest

Liked this embroidery tutorial?

Pick the categories you want to hear about. Weekly digest of new step-by-step tutorials. No spam, easy unsubscribe.

Send me tutorials about

We only email about new tutorials. Easy unsubscribe anytime.