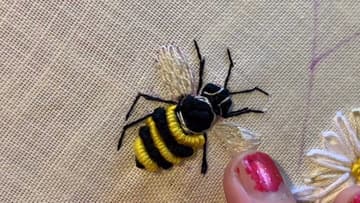
How to Embroider a Bee (Beginner Hand Embroidery, Step by Step)
Source: ThatembroideryGirl • Full tutorial: www.craftingstepbystep.com/embroidery/how-to-embroider-a-bee
- Difficulty
- Easy
- Hands-on time
- About 20 minutes
- Cost
- About $3 to $6
- Makes
- 1 embroidered bee hoop design

Tools
- embroidery hoop
- embroidery needle
- small scissors
- water-soluble transfer pen
Materials
- cotton or linen fabric
- black embroidery floss
- yellow embroidery floss
- white or grey embroidery floss
Steps
1. Transfer the Design and Outline the Head
Trace the bee onto your fabric with a water-soluble pen. A simple shape with a round head, a rounded body, and two little wings is all you need.
Tip: Watch this step Use a water-soluble pen, not a regular marker. Any stray transfer lines rinse away with a damp cotton bud once the stitching is done.
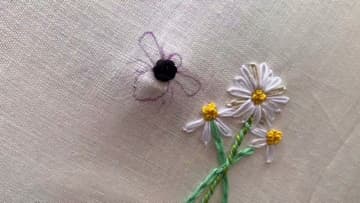
2. Fill the Head with French Knots
Now pack the head solid with chunky French knots. Come up through the fabric, wrap the black floss around your needle a few times, hold the wraps snug against the fabric, then push the needle back down close to where it came up and pull through slowly.
Tip: Watch this step Hold the working thread taut with your free hand as you pull the knot down. A slack thread is what turns a French knot into a loose tangle.
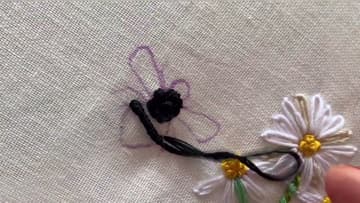
3. Coil the Black Body with Bullion Knots
The body is built from bullion knots, which are the coiled stitches that give the bee its plump shape. Come up, go down a stitch-length away, then bring the needle back up in that first hole and wrap the floss around it several times.
Tip: Watch this step Wrap the same number of times each stitch so your coils match. Count out loud the first few until the rhythm sticks.
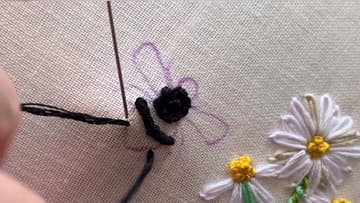
4. Add the Yellow Stripes
Switch to yellow floss and work the stripes as long bullion knots, using a full strand so the bands come out nice and chunky. Wrap in one steady direction so the thread lies smoothly, measure the wraps, then pull the needle through.
Tip: Watch this step Run the needle eye-first through each coil to smooth the wraps. The eye slides through without snagging the twist the way the point can.
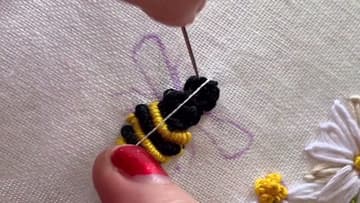
5. Stitch the White Eyes
Give the bee its face with a stone-white or pale grey floss. Instead of pulling the thread all the way down, come up through the head and form a small loop on the surface, then catch and tack that loop down with a tiny stitch.
Tip: Watch this step Place both eyes before you tighten either one. That way you can nudge them symmetrical while the loops are still loose.
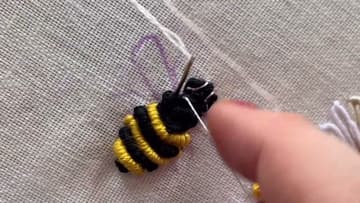
6. Fill the Wings
Work the two wings in white or pale grey with fine chain stitches, filling each wing shape you traced earlier. Keep the loops small and even so the wings stay light and papery next to the dense body.
Tip: Watch this step Stitch the far wing first, then the near one. Working back-to-front keeps loose threads from getting caught under the wing you already finished.
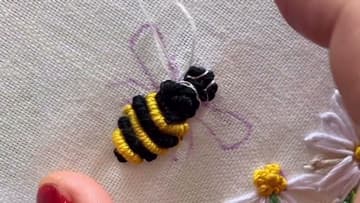
7. Add the Antennae and Legs
Finish the bee with a thin black thread, using just one or two strands so the lines stay delicate. Outline the two curved antennae coming off the top of the head, then add the slender legs down each side of the body with a small backstitch.
Tip: Watch this step Split the six-strand floss down to two strands for the legs. Full floss makes the legs look clunky next to the fine antennae.