How to Draw a Pumpkin - Easy Jack-O'-Lantern in 7 Steps

Save it for later. We'll email you a link, no password.

Find it again on your phone or computer, with your finished steps ticked.

You tapped Save

Save this project for later

We'll email you a link, no password.

How to Draw a Pumpkin - Easy Jack-O'-Lantern in 7 Steps

  • Your saved projects in one list
  • Your ticked steps on any device

Check your inbox for an email from us. Not there? Look in your spam folder.

  • 7 steps
  • 4:32 video
  • Difficulty: Easy
  • About 15 minutes
  • Drawing

Based on a video by Cartooning Club How to Draw

Opens their YouTube channel

Steps written out by Crafting Step by Step · Published · Updated

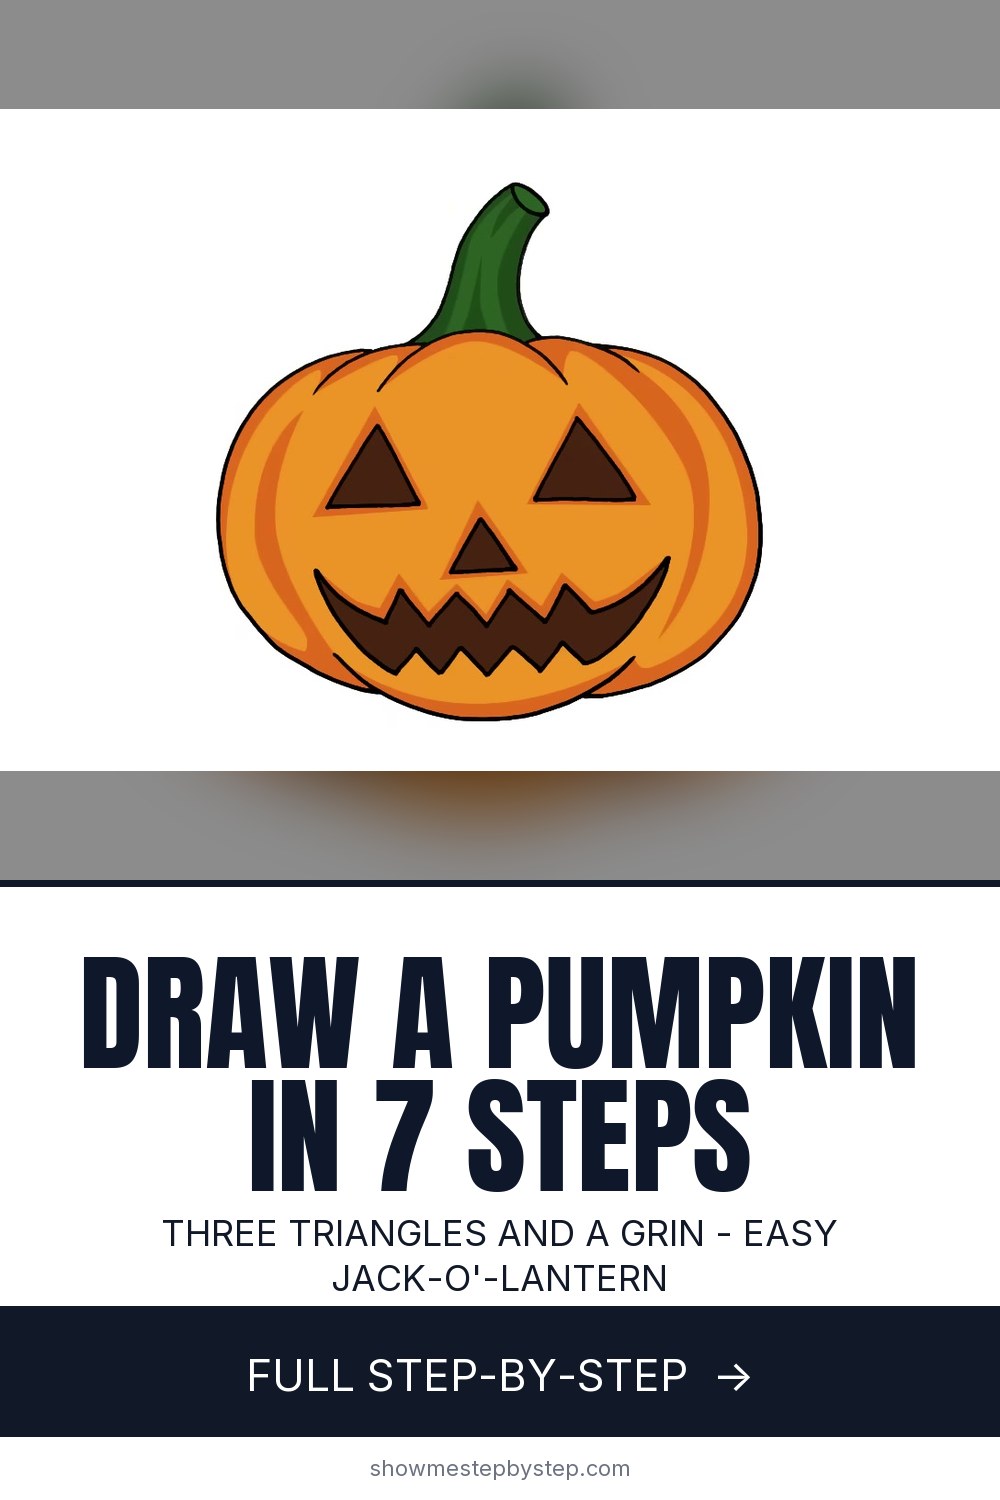
The finished result: How to Draw a Pumpkin - Easy Jack-O'-Lantern in 7 Steps
Also in:Painting

A jack-o'-lantern is built from shapes you already know. Three triangles for the eyes and nose, a row of Vs for the teeth, and a handful of curves for the pumpkin around them. Nothing to measure. Five minutes with a marker and you have one.

The steps below follow Cartooning Club How to Draw's Halloween pumpkin lesson, filmed from overhead so you can see where every line goes. The thing worth copying from it is the order. Face first, pumpkin second. Most people go the other way, draw a big round outline, then find there is no room left for the grin.

The ribs are what make it a pumpkin

A circle with a face on it is a ball. The ribs turn it into a pumpkin - those curved bands running from the stem down the sides. Get them placed right and the shape reads round with no shading at all.

Work from the centre outward. The middle rib sits under the stem and runs close to vertical. The next one on each side leans away and stops higher up the base. The outer pair curve hardest and end short of the bottom, disappearing behind the bands in front. That overlap is the whole illusion. When one band vanishes behind another, your eye decides it is wrapping around the back.

Evenly spaced ribs running straight down read as beach-ball stripes. Tighten the gaps toward the outer edge instead, and the pumpkin swells.

Plain pumpkin or carved face - pick before the first line

The two are drawn in opposite orders. A plain pumpkin goes outline, ribs, stem, because the shape is the subject. A jack-o'-lantern goes face, ribs, outline, because the face sets the scale for everything after it.

Going plain? Skip the triangle steps and lay two light curves across the front where the face would have been, so the surface still bulges toward you. Going carved? Commit on the first mark. A face added to a finished pumpkin lands too small and too high almost every time, and marker does not come off.

The classic triangle face versus a toothier one

Two triangle eyes, a smaller triangle nose, a row of teeth. Everyone recognises it, and it is the most forgiving face to draw: a triangle is three straight lines and none has to be smooth.

Want it mean instead of friendly? Tilt the top point of each eye inward toward the nose. That reads as a scowl with no eyebrows drawn. For a toothier grin, keep the mouth wide and shallow, fill it with narrow pointed Vs rather than three fat ones, and ink the gaps black. Leave a couple of teeth out - a full set looks like a comb.

  • Friendly: level eyes, wide mouth curving up at the corners, three or four big teeth.
  • Mean: eyes tilted inward, narrow mouth, a row of small sharp teeth.
  • Goofy: one eye bigger than the other, a single square tooth.

Shading that sits it on a surface

An outline on white paper floats. Two marks fix that. Hatch a band of shadow down the outer rib on the side away from your light, and carry some under the stem. Then put an oval of shadow on the ground, wider than tall, touching the base on that same side.

The cut-outs do the rest. Lit, the eyes, nose and mouth go yellow and the shading around them stays heavy, so the contrast sells the glow. Unlit, fill the cut-outs solid black and keep the shading light.

Use the drawing as a carving template

The face you just drew is a stencil. Redraw it at the size of the pumpkin on your porch, tape the paper to the front, and poke through the outlines with a pushpin every quarter inch. Peel the paper off and you have a dotted map to cut along. Straight-sided triangles also happen to be what a kitchen knife cuts cleanly.

That same face transfers onto the real thing over in carving a pumpkin, or onto one you paint instead of cutting. For the rest of the season, a bat is two swept wings off a small body, a ghost is one flowing outline, and a skull is a sphere with a jaw box under it. New to drawing? How to draw covers pencil grades and light-line sketching.
Free printable

Print the steps and supply list for this project

One page you can take to the table. Free with a free account, no password.

Get the free printable

What you'll need

Free, for this project

Get this checklist by email

  • All 4 tools and materials, with tick boxes
  • A link to print all 7 steps on paper, to keep by you while you craft

No password. The whole tutorial stays free on this page.

Quick answer

Draw a Halloween pumpkin in 7 easy steps. An easy project: about 15 minutes. You need 4 things, including Drawing or marker paper, Black fine-tip marker and Eraser. The 7 steps start with draw the Left Triangle Eye of the Jack-O'-Lantern, draw the Right Triangle Eye at the Same Height, add the Small Triangle Nose Between the Eyes, draw the Jagged Top Teeth of the Pumpkin Grin and add the Bottom Teeth and Close the Jagged Mouth.

Step-by-step guide

7 steps, about 5 minutes. Tap a picture to jump to that step. Your progress saves automatically.

Tick each step off as you go.

  1. Step 1: Draw the Left Triangle Eye of the Jack-O'-Lantern

    Watch this step · 0:18

    Start with the eyes, not the outline. Put the pen down where the top point of the left eye will be, draw one line angling down to the left, then a second line from the same point angling down to the right. Close it with a straight line across the bottom.

    Working the face first means the pumpkin gets drawn around it, so the features end up centred instead of squeezed into whatever space is left.

    Tip:

    Keep the bottom line level. A tilted base is what makes a triangle eye look like a mistake rather than a design.

    Back to all steps

  2. Step 2: Draw the Right Triangle Eye at the Same Height

    Watch this step · 0:38

    Mark the top point of the right eye level with the first one, then bring the two sides down to the same bottom line and close it. Check the heights before you commit. Matching them is the single thing that makes the face look deliberate.

    Leave a gap between the eyes about as wide as one eye. That space is where the nose goes.

    Tip:

    If one eye comes out bigger, make the nose slightly off-centre toward the smaller one. The face reads as balanced even when the eyes are not.

    Back to all steps

  3. Step 3: Add the Small Triangle Nose Between the Eyes

    Watch this step · 0:58

    Sit the nose just below the line of the eyes, centred between them. Two short sides angling down from a point and a short line across the bottom. Make it noticeably smaller than the eyes or the face crowds up.

    Tip:

    Three triangles of two sizes is the whole classic jack-o'-lantern face. Get these right and the rest is decoration.

    Back to all steps

  4. Step 4: Draw the Jagged Top Teeth of the Pumpkin Grin

    Watch this step · 1:52

    Below the nose, draw a V. Add another V on each side, leaving the outer ones open at the ends. From each end, curve the line upward and outward so the corners of the mouth turn up into a grin.

    Uneven teeth look better than even ones here. Vary the depth of the Vs a little.

    Tip:

    Draw the middle V first and work outward. Starting at one corner makes the mouth drift off-centre.

    Back to all steps

  5. Step 5: Add the Bottom Teeth and Close the Jagged Mouth

    Watch this step · 2:10

    Under the top row, draw the same Vs pointing upward, then connect the outer ends of the bottom row up to the corners of the grin with a curved line on each side. The mouth is now one closed shape with teeth top and bottom.

    Tip:

    Leave a small gap between the top and bottom teeth. A mouth with no gap reads as a zigzag line, not a grin.

    Back to all steps

  6. Step 6: Draw the Top Pumpkin Ribs and the Stem

    Watch this step · 3:05

    Above each eye, draw a curve for the top of a pumpkin segment. Then add a curve on each side, starting a little lower and overlapping the middle ones so the segments look like they tuck behind each other.

    The stem rises from the centre: a line up one side, a short curve across the top, and back down the other side, slightly wider at the base than the top.

    Tip:

    Curve the stem to one side. A straight stem looks like a handle.

    Back to all steps

  7. Step 7: Round the Jack-O'-Lantern Sides Under the Chin

    Watch this step · 3:50

    Under the mouth, draw a curve for the chin. Then from the outer top ridges, bring a curved line down each side of the head and tuck it in beneath the chin with a small overlap, so the pumpkin reads as a rounded, segmented shape rather than a circle.

    Colour it in if you like: orange for the body, green or brown for the stem, and leave the cut-outs white or fill them yellow for a lit-from-inside look.

    Tip:

    Colour with the outline dry. Marker over wet Sharpie smears the black into the orange.

    Back to all steps

How to Draw a Spider - Realistic Orb-Weaver in 8 Steps

Keep going

How to Draw a Spider - Realistic Orb-Weaver in 8 Steps

8 steps · about 14 minutes

You reached the last step

Save this project to come back to it

Your ticked steps, the free printable and your other saved makes, together in My Projects. Free, no password.

You tapped Save

Save this project for later

We'll email you a link, no password.

How to Draw a Pumpkin - Easy Jack-O'-Lantern in 7 Steps

  • Your saved projects in one list
  • Your ticked steps on any device

Check your inbox for an email from us. Not there? Look in your spam folder.

Free printable

Printable sheet for this project

The bonus is hidden until you sign up.

Free with a free account, no password. Every step above stays open to everyone.

Products Used

The Checklist

How to Draw a Pumpkin - Easy Jack-O'-Lantern in 7 Steps

Tools
2
Materials
2
Steps
7
Video
5 min

Tools we recommend

As an Amazon Associate we earn from qualifying purchases. Links on this page may be affiliate links - clicking them and buying doesn't change your price, but helps support Crafting Step by Step.

Tags

The Crafter's Weekly

New drawing tutorials, every Sunday

One short email with the week's best step-by-step guides. Free, no spam, unsubscribe anytime.

Test your knowledge

Did the lesson stick? Start with this one.

5 questions covering what you just read. No signup, no score saved, and you can stop after this one.

Question 1 of 5

What should you draw first on a jack-o-lantern?

Quick reference

Key takeaways from How to Draw a Pumpkin - Easy Jack-O'-Lantern in 7 Steps

5 questions, answers, and one-line explanations. Tap to expand.

  1. 1.What should you draw first on a jack-o-lantern?

    Answer: The left eye as a triangle

    Starting with the face lets you size the pumpkin around it instead of guessing.

  2. 2.What matters most when you add the second eye?

    Answer: That it sits level with the first

    Matching the heights is the single thing that keeps the face from looking crooked.

  3. 3.How big should the nose be?

    Answer: Noticeably smaller than the eyes

    A large nose crowds the face, so keep it well under the size of the eyes.

  4. 4.Why do uneven teeth look better than even ones?

    Answer: They read as carved by hand

    A real carved pumpkin has irregular teeth, so unevenness is what sells it.

  5. 5.How do you make the pumpkin read as rounded rather than flat?

    Answer: Overlap the segments and tuck the sides under

    Overlapping curves tell the eye that segments sit behind one another.

Did this work for you?

What's next

Similar tutorials

Hand-picked next reads based on the one you just finished.

Liked this drawing tutorial?

Pick the crafts you want to hear about. One email every Sunday with new step-by-step tutorials. No spam, easy to unsubscribe.

Get more like this in your inbox

Weekly digest. Pick the categories you want. Unsubscribe anytime.

Send me tutorials about

We only email about new tutorials. Easy unsubscribe anytime.