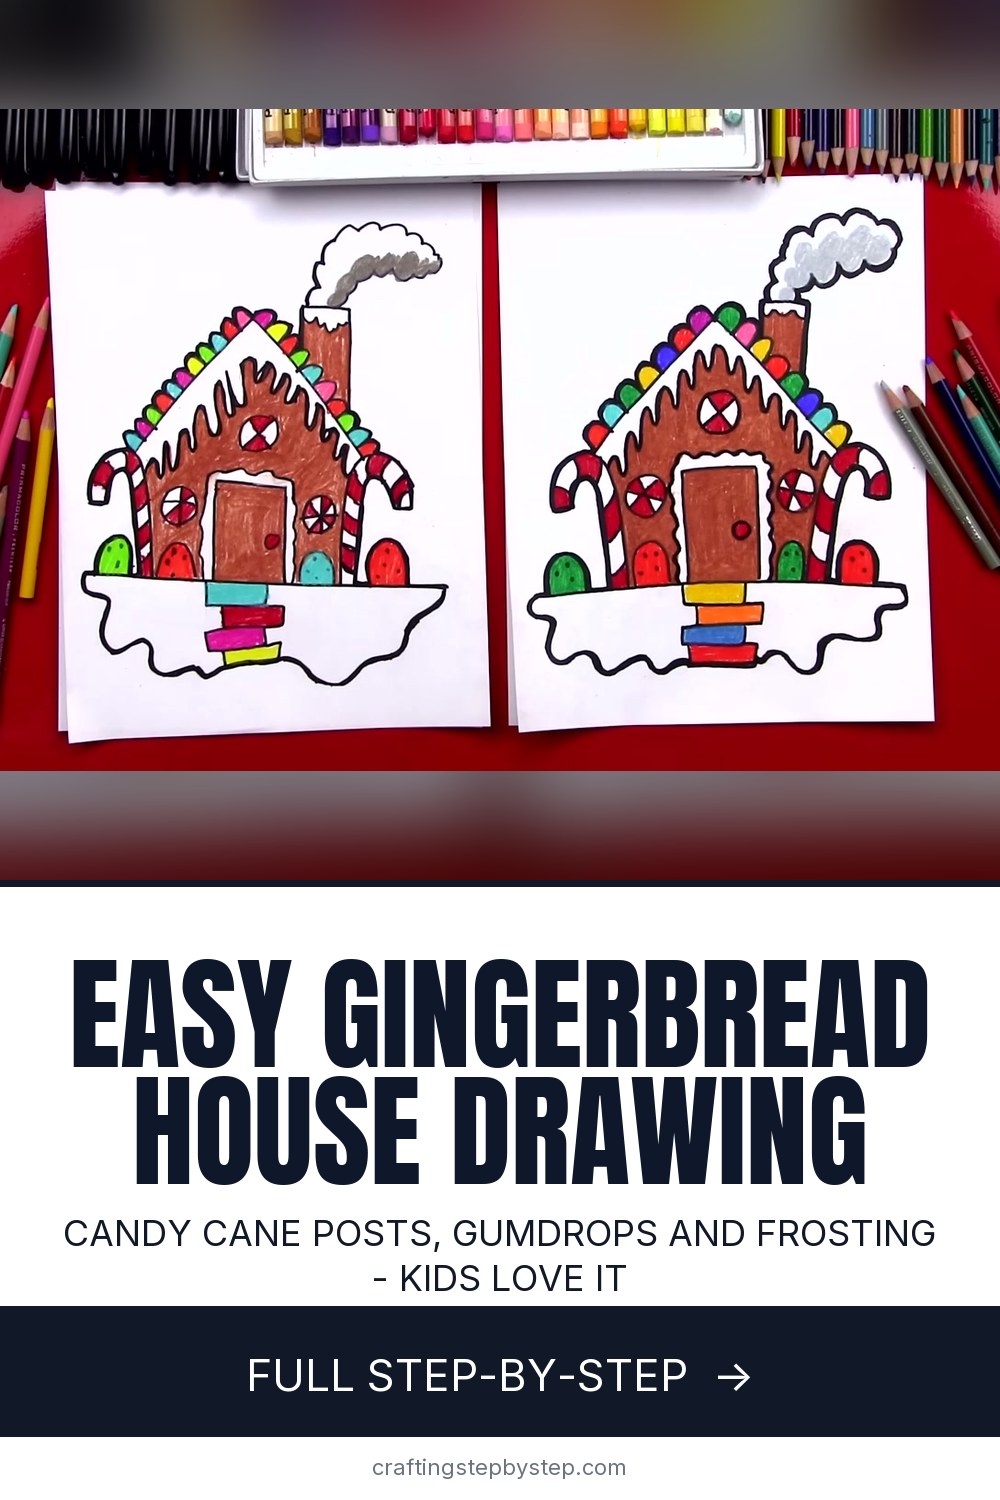
How to Draw a Gingerbread House

Save it for later. We'll email you a link, no password.

Find it again on your phone or computer, with your finished steps ticked.

You tapped Save

Save this project for later

We'll email you a link, no password.

How to Draw a Gingerbread House

  • Your saved projects in one list
  • Your ticked steps on any device

Check your inbox for an email from us. Not there? Look in your spam folder.

  • 10 steps
  • 8:16 video
  • Difficulty: Easy
  • About 40 minutes
  • Drawing

Based on a video by Art for Kids Hub

Opens their YouTube channel

Steps written out by Crafting Step by Step · Published · Updated

Featured inTop 5 Easy Christmas Drawings

The finished result: How to Draw a Gingerbread House

A gingerbread house is the most fun Christmas drawing you can make, because the candy is the whole point. This version comes from the dad-and-son team at Art for Kids Hub. You draw an A-shaped roof held up by two candy canes, drip frosting off the edges, then pile on peppermints, gumdrops and a chimney puffing popcorn smoke. Color it brown and rainbow and you are done in about fifteen minutes.

You need a black marker, a sheet of paper and colored pencils. That's it.

How the gingerbread house drawing is built

The house is only three shapes: a triangle roof, two candy cane hooks and a ground line. Everything else is decoration. That makes it a good drawing for kids who get stuck on straight walls and corners. The candy canes stand in for the side walls, so nothing has to line up exactly.

Once the door is in, the house is finished. The candy is up to you. Pause the video there and decorate your own way if you like. Building a real gingerbread house takes an afternoon and a lot of icing. This one takes a marker and a lot less mess.

Paper, markers and coloring supplies

Plain printer paper is fine for practice. For a piece you want to keep, a heavier drawing paper takes colored pencil better and won't wrinkle when you press hard on the brown. A fine point black permanent marker gives you the bold outline in the video. The coloring is done with colored pencils. Markers are faster for young kids, and crayons work too. Use a medium brown for the gingerbread and save the bright colors for the candy.

Decorating ideas and variations

Swap the peppermints for round windows with frosting crosses. Add a gingerbread man standing by the door. Line the roof with candy canes instead of gumdrops, or draw chocolate bar shingles in a grid. A few snowflakes in the sky and snow piled on the roof turn it into a winter scene. Try a pink and white candy house for a different look.

Christmas ways to use your drawing

Fold a sheet in half and draw the house on the front for a homemade Christmas card. Small ones make sweet Christmas gift tags. Teachers can have a whole class draw one and line the hallway with a gingerbread village. Cut one out and tape it to a window, or hang it on the fridge next to the homemade Christmas ornaments your kids made.

Common gingerbread house drawing problems

  • The candy canes don't match. Draw the left one, then use it as a guide for the right. Turn your paper sideways if that helps.
  • The ground line is crooked. Leave it. Call it a hill and keep going.
  • You run out of room for candy. Draw the house bigger. The roof should fill the middle of the page.
  • The colors look muddy. Color the brown first and leave the candy and frosting white until the end.

Want more Christmas drawings? Try how to draw a gingerbread man to stand by your door, how to draw a candy cane, or how to draw a house for a regular one.

Free printable

Print the steps and supply list for this project

One page you can take to the table. Free with a free account, no password.

Get the free printable

What you'll need

Free, for this project

Get this checklist by email

  • All 4 tools and materials, with tick boxes
  • A link to print all 10 steps on paper, to keep by you while you craft

No password. The whole tutorial stays free on this page.

Quick answer

Draw a gingerbread house in 10 easy steps: candy cane posts, frosting icicles, peppermints, gumdrops and a chimney, then color it in. An easy project: about 40 minutes. You need 4 things, including colored pencils or washable markers, black fine point permanent marker and pencil and eraser. The 10 steps start with draw the A-Shaped Gingerbread House Roof, draw the Candy Cane Posts Under the Gingerbread House Roof and add Curved Stripes to the Gingerbread House Candy Canes.

Step-by-step guide

10 steps, about 8 minutes. Tap a picture to jump to that step. Your progress saves automatically.

Tick each step off as you go.

  1. Step 1: Draw the A-Shaped Gingerbread House Roof

    Watch this step · 1:06

    In the middle of your paper, draw a big A shape with no line across it. Go up to a point and back down the other side. Make it big. The bigger the roof, the more room you have for candy later. Leave space below it, since the candy cane posts and the ground go underneath.

    Tip:

    Start the roof a little above the center of the page so the snow and sidewalk fit at the bottom.

    Back to all steps

  2. Step 2: Draw the Candy Cane Posts Under the Gingerbread House Roof

    Watch this step · 2:26

    Under each end of the roof, draw a candy cane hook that curls up to meet the roof and comes back down. Draw a ground line that runs across the bottom past both posts. Then draw the inside curve of each cane down to the ground and close off the hook end. Try to make both canes the same size so the house looks even.

    Tip:

    If your ground line comes out crooked, call it a hill. It still works.

    Back to all steps

  3. Step 3: Add Curved Stripes to the Gingerbread House Candy Canes

    Watch this step · 2:50

    Draw stripes down each candy cane. Curve every stripe a little instead of drawing a straight line across. That curve makes the cane look round, like a real 3D candy cane. On the left cane, slant them one way. On the right cane, slant them the other way so the two posts mirror each other.

    Tip:

    Space the stripes about a finger apart. Too close and they blur together when you color.

    Back to all steps

  4. Step 4: Draw Frosting Icicles Along the Gingerbread House Roof

    Watch this step · 3:18

    Start at one bottom corner of the roof. Draw a wavy line of little icicles hanging down from the roof line, all the way up to the peak and back down the other side. It looks like frosting dripping off the roof. Some icicles will come out longer than others. That's fine. It makes the icing look melted.

    Tip:

    Keep the drips short near the peak and a little longer near the corners.

    Back to all steps

  5. Step 5: Draw the Gingerbread House Door With Frosting Trim

    Watch this step · 4:04

    Draw two tall lines down the middle of the house to the ground and connect them at the top. Make the door big. Then draw a wobbly frosting line all the way around the outside of the door. It looks like the door is glued shut with icing. Finish with a small circle for the doorknob.

    Tip:

    Keep the door centered under the roof peak so the house looks balanced.

    Back to all steps

  6. Step 6: Draw Peppermint Candies on the Gingerbread House

    Watch this step · 5:00

    Draw a circle above the door for a peppermint candy. Add lines through it like a pinwheel so it looks like a striped mint. Add another peppermint on each side of the door. Three is a good number, but you can add more if you have room. These are the first candy decorations on your house.

    Tip:

    Draw an X and a plus sign through each circle to get even pinwheel stripes.

    Back to all steps

  7. Step 7: Add Gumdrops Along the Gingerbread House Roof and Base

    Watch this step · 5:45

    Draw big upside-down U shapes next to the door and along the bottom for gumdrops. Add a few dots on each one for the sugar coating. Then line the whole roof edge with smaller gumdrops, one connected to the next, from one corner over the peak to the other. These get colored in rainbow colors later, so draw plenty.

    Tip:

    Turn your paper as you go over the roof. It is easier to draw the gumdrops upright.

    Back to all steps

  8. Step 8: Draw the Gingerbread House Chimney and Popcorn Smoke

    Watch this step · 6:26

    On one side of the roof, draw a short line up and a longer line next to it, then connect the top. That's your chimney. Add a little frosting on top. Above it, draw puffy bumps of smoke that look like popcorn, curling up from the chimney. Connect the bottom of the smoke cloud so it is a closed shape.

    Tip:

    Put the chimney on the roof slope, not the peak, so it does not cover your gumdrops.

    Back to all steps

  9. Step 9: Draw the Candy Sidewalk and Snow Under the Gingerbread House

    Watch this step · 7:12

    Below the door, draw a few small rectangles stacked down the page. They make a candy sidewalk leading up to the house. They do not need to be straight. Then draw a wild wobbly line under the ground on each side that connects to the sidewalk. That's a pile of snow, or extra frosting, holding the house up.

    Tip:

    Make the snow line bumpy and uneven. Snowbanks are never flat.

    Back to all steps

  10. Step 10: Color the Gingerbread House Brown With Rainbow Candy

    Watch this step · 7:32

    Color the walls and chimney a medium brown. Leave the icicles, door trim, snow and smoke white so they read as frosting. Color the candy cane stripes and peppermints red. Make the gumdrops every color of the rainbow. Give the sidewalk blocks bright colors too. The brown house with all that candy is what makes it look like gingerbread.

    Tip:

    Color all the brown first. Then go back and add the candy colors so they stay bright.

    Back to all steps

How to Draw an Angel

Keep going

How to Draw an Angel

You reached the last step

Save this project to come back to it

Your ticked steps, the free printable and your other saved makes, together in My Projects. Free, no password.

You tapped Save

Save this project for later

We'll email you a link, no password.

How to Draw a Gingerbread House

  • Your saved projects in one list
  • Your ticked steps on any device

Check your inbox for an email from us. Not there? Look in your spam folder.

Free printable

Printable sheet for this project

The bonus is hidden until you sign up.

Free with a free account, no password. Every step above stays open to everyone.

Products Used

The Checklist

How to Draw a Gingerbread House

Tools
2
Materials
2
Steps
10
Video
8 min

Tools we recommend

As an Amazon Associate we earn from qualifying purchases. Links on this page may be affiliate links - clicking them and buying doesn't change your price, but helps support Crafting Step by Step.

Tags

The Crafter's Weekly

New drawing tutorials, every Sunday

One short email with the week's best step-by-step guides. Free, no spam, unsubscribe anytime.

Test your knowledge

Did the lesson stick? Start with this one.

5 questions covering what you just read. No signup, no score saved, and you can stop after this one.

Question 1 of 5

What shape starts the gingerbread house?

Quick reference

Key takeaways from How to Draw a Gingerbread House

5 questions, answers, and one-line explanations. Tap to expand.

  1. 1.What shape starts the gingerbread house?

    Answer: A big A shape for the roof

    The roof comes first and sets how much room the candy gets later.

  2. 2.Why curve each candy cane stripe instead of drawing it straight?

    Answer: It makes the cane look round

    A curved stripe wraps around the cane, which makes it look 3D.

  3. 3.Which parts stay white when you color?

    Answer: The icicles, trim and snow

    White areas read as frosting and snow against the brown gingerbread.

  4. 4.What does the chimney smoke look like in this drawing?

    Answer: Puffy popcorn bumps

    Round, puffy bumps keep the smoke in the same candy style as the house.

  5. 5.Why make the roof big at the very start?

    Answer: It gives room for candy later

    Icicles, gumdrops and the chimney all hang off the roof line.

Did this work for you?

What's next

Related collections

Curated theme pages that include this tutorial.

Similar tutorials

Hand-picked next reads based on the one you just finished.

Liked this drawing tutorial?

Pick the crafts you want to hear about. One email every Sunday with new step-by-step tutorials. No spam, easy to unsubscribe.

Get more like this in your inbox

Weekly digest. Pick the categories you want. Unsubscribe anytime.

Send me tutorials about

We only email about new tutorials. Easy unsubscribe anytime.