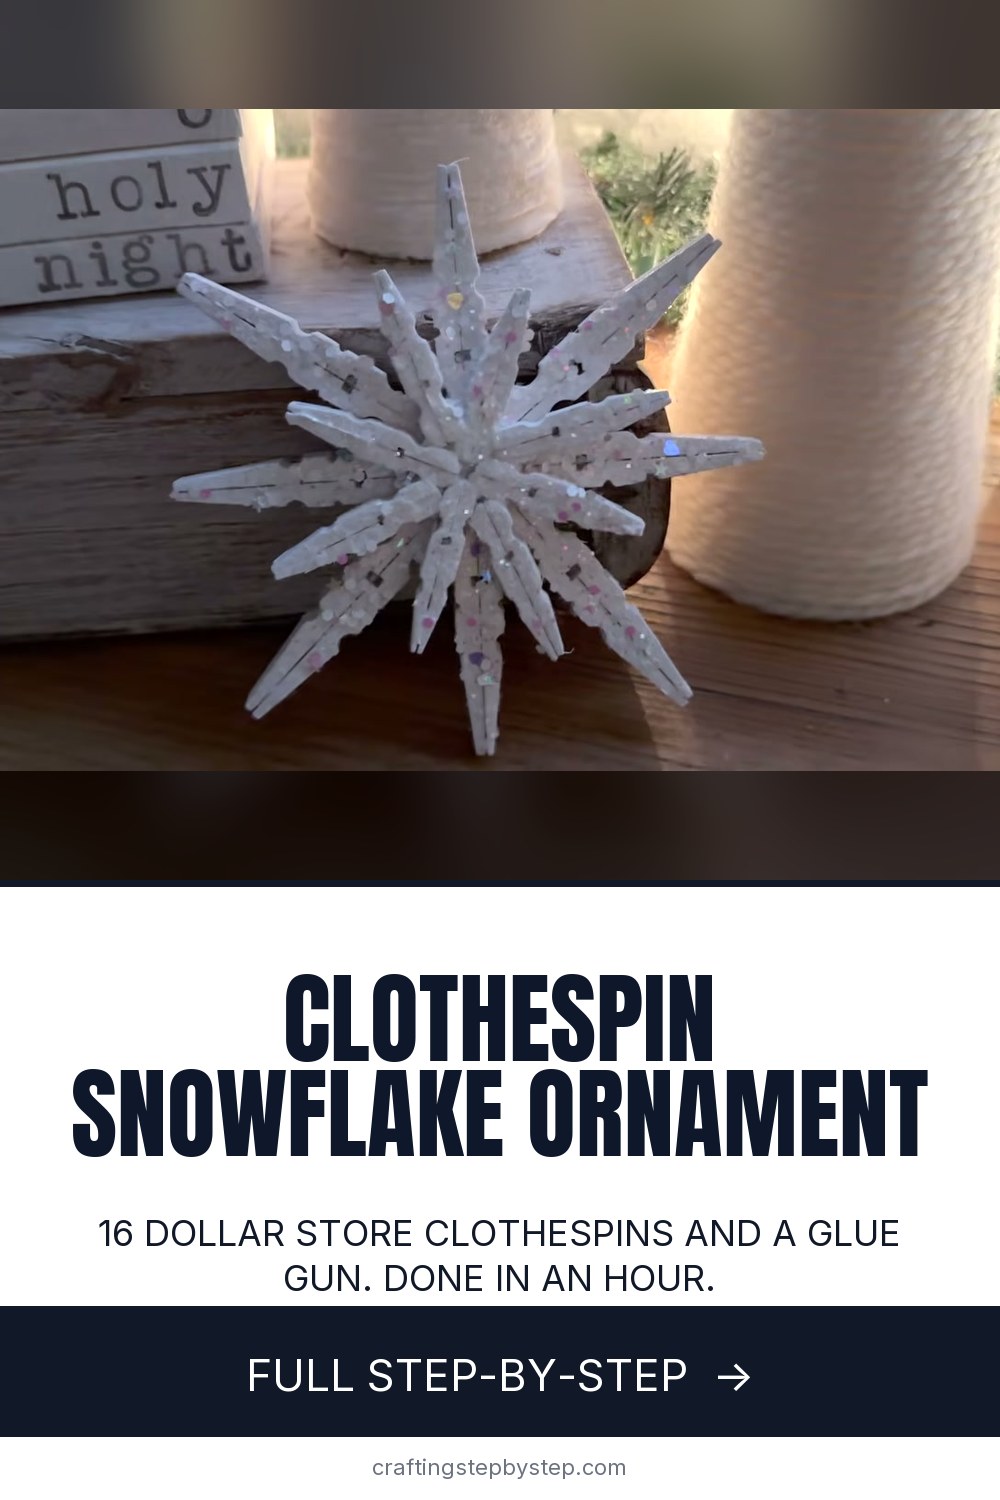
How to Make a Clothespin Snowflake (Easy Christmas Ornament)

The finished result: How to Make a Clothespin Snowflake (Easy Christmas Ornament)
  • Difficulty: Easy
  • About 45 minutes, plus 1 hour to dry or set
  • 9 steps

You tapped Save

Save this project for later

We'll email you a link, no password.

How to Make a Clothespin Snowflake (Easy Christmas Ornament)

  • Your saved projects in one list
  • Your ticked steps on any device

Check your inbox for an email from us. Not there? Look in your spam folder.

Print

Steps written out by Crafting Step by Step from She's Crafty and She Knows It's video (opens YouTube) (7:31). Published .

A clothespin snowflake is one of those Christmas crafts that looks like it took far longer than it did. Sarah from She's Crafty and She Knows It makes hers from 8 regular wooden clothespins and 8 mini ones, a hot glue gun and a paper plate. Two eight point stars, one stacked on the other, give it the layered look. You can leave it plain wood or paint it and cover it in glitter like her girls asked her to.

How to make a clothespin snowflake: the short version

  • Pull the spring off every clothespin.
  • Glue each pair of halves back together, flat side to flat side.
  • Glue four pieces into a cross, then four more between the arms.
  • Make a mini snowflake the same way from mini clothespins.
  • Glue the mini one on top, turned so its arms sit between the big ones.
  • Paint, seal and glitter if you like.

What you need

For one double snowflake you need 8 standard wooden clothespins and 8 mini clothespins. Dollar store packs are fine. Plain unfinished wood takes paint and glue best, so skip any that are coated or coloured. A low temperature glue gun is easier on your fingers than a high temp one, and it still holds wood well.

Keep the glue neat on the mini star

The big star sits underneath, so its center can be a bit messy. The mini star is the one everyone sees. Use small dabs of glue there, wipe away strings while they are warm, and keep the arms straight as you press them. If you plan to leave the wood natural, this matters even more, because paint hides a lot.

Finishing ideas

  • Natural wood. Sarah was tempted to stop here. It has a rustic, farmhouse look.
  • White and distressed. Spray it white, then rub the edges with fine sandpaper so a little wood shows through.
  • Glitter. White paint, a coat of Mod Podge, then fine glitter in the middle and chunky glitter on the arms.
  • Stained. A wood stain gives a warm brown snowflake, like the dark ones you see in shop windows.

Hanging and display

Hot glue a loop of twine, ribbon or thin wire to the back of one arm and it becomes a tree ornament. Without a hanger, a snowflake can stand on a shelf, tie onto a wrapped gift, or join a few others on a wreath. A set of five or six in different finishes makes a nice window garland.

Making them with kids

Taking the springs off and decorating are good jobs for grandchildren. Keep the glue gun with an adult, or give older kids a low temp gun and a paper plate to work on. The glitter step is where kids have the most fun, so lay down newspaper first.

Common problems

  • Crooked arms. Hot glue sets in seconds. Hold each piece straight until it grabs.
  • Snowflake stuck to the table. Work on a paper plate, and lift it off while the back still has glue blobs.
  • Glitter falling off. Shake glitter on while the Mod Podge is wet, then seal with one more light coat once dry.

More snowflakes and ornaments

Try a paper snowflake, a beaded snowflake ornament or a macrame snowflake. For more tree ideas, see homemade Christmas ornaments, and brush up on how to use Mod Podge.

Free printable

Print the steps and supply list for this project

One page you can take to the table. Free with a free account, no password.

Get the free printable

What you'll need

Free, for this project

Get this checklist by email

  • All 12 tools and materials, with tick boxes
  • A link to print all 9 steps on paper, to keep by you while you craft

No password. The whole tutorial stays free on this page.

Quick answer

Turn 16 wooden clothespins into a layered snowflake ornament with hot glue. An easy project: about 45 minutes, plus 1 hour to dry or set. Materials cost about $3 to $8. You need 12 things, including 8 regular wooden clothespins, 8 mini wooden clothespins and hot glue sticks. The 9 steps start with pull the Springs Out of the Wooden Clothespins and hot Glue the Clothespin Halves Flat Side to Flat Side.

Step-by-step guide

9 steps, about 8 minutes. Tap a picture to jump to that step. Your progress saves automatically.

Tick each step off as you go.

  1. Step 1: Pull the Springs Out of the Wooden Clothespins

    Watch this step · 0:28

    Start with 8 regular wooden clothespins and 8 mini ones. Hold a clothespin by both halves and twist them in opposite directions. The wood pops apart and the metal spring comes free. Some springs are stubborn, so give them a firm wiggle. Do this for every clothespin, large and small, and set the springs aside. Then plug in your glue gun so it heats up while you work.

    Tip:

    Keep the large and mini halves in two separate piles so they do not get mixed up.

    Back to all steps

  2. Step 2: Hot Glue the Clothespin Halves Flat Side to Flat Side

    Watch this step · 1:04

    Each clothespin half has a flat side and a notched side. Put a line of hot glue on the flat side of one half and press the flat side of a matching half onto it. The notched sides now face out, and the piece looks like a long diamond. Glue all of them this way. You end with 8 large pieces and 8 mini pieces.

    Tip:

    Only pair a regular half with a regular half, and a mini with a mini.

    Back to all steps

  3. Step 3: Lay Four Clothespin Pieces in a Cross for the Snowflake Base

    Watch this step · 2:24

    Take four of the large pieces. Lay them in a cross so the wide ends touch in the center and the narrow ends point out. Glue them together where they meet. Hold each piece straight until the glue grabs, because the way it sets is the way it stays. If you plan to paint, the center can be a little messy, since another snowflake covers it.

    Tip:

    Work on a paper plate so stray glue does not mark your table.

    Back to all steps

  4. Step 4: Glue Four More Clothespin Pieces Between the Arms of the Snowflake

    Watch this step · 3:16

    Now fill the gaps. Put a good dab of glue on the wide end of another large piece and push it into one of the gaps between the arms of the cross. Hold it a few seconds until it sets. Repeat with the last three pieces. You now have an eight point snowflake. Prop it on a paper plate so the glue on the back does not stick to the table.

    Tip:

    Look at it from above before the glue cools and nudge any arm that is off.

    Back to all steps

  5. Step 5: Build the Mini Clothespin Snowflake the Same Way

    Watch this step · 4:08

    Repeat steps three and four with the eight mini pieces. Glue four into a cross, then add four between the arms. This one sits on top, so be neater. Use small dots of glue, keep the arms straight, and pull away any glue strings. If you plan to leave the wood unpainted, take extra care here, because every blob will show.

    Tip:

    Let the glue cool, then peel any thin strings off with your fingers.

    Back to all steps

  6. Step 6: Stack the Mini Clothespin Snowflake Offset on the Large One

    Watch this step · 5:12

    Set the mini snowflake on top of the large one. Turn it slightly so its arms sit between the big arms instead of right on top of them. That offset gives you the layered, sixteen point look. Put a generous blob of glue on the back of the mini snowflake's center and press it down. Add a twine or wire loop on the back now if you want a hanger.

    Tip:

    Sarah liked it so much at this stage that she nearly left it plain. That is a fine choice.

    Back to all steps

  7. Step 7: Spray Paint the Clothespin Snowflake White

    Watch this step · 5:38

    Take the snowflake outside and lay it on a trash bag or cardboard. Wear gloves. Spray it with flat white paint in light passes, holding the can about a foot away. Get into all the small gaps and notches. Let the front dry, flip it and spray the back. Two thin coats look better than one heavy one, which can drip.

    Tip:

    For a farmhouse look, sand the edges lightly once the paint is dry.

    Back to all steps

  8. Step 8: Brush Mod Podge Over the Painted Clothespin Snowflake

    Watch this step · 6:14

    When the paint is fully dry, set the snowflake on a paper plate. Brush a coat of matte Mod Podge over the front, working into the gaps around the center. The Mod Podge is the glue that holds the glitter, so cover every arm you want to sparkle. Work one section at a time if it starts to dry before you get to the glitter.

    Tip:

    A foam brush spreads Mod Podge without leaving brush marks.

    Back to all steps

  9. Step 9: Sprinkle Glitter Onto the Wet Clothespin Snowflake

    Watch this step · 6:34

    While the Mod Podge is still wet, sprinkle glitter over it. Sarah uses a fine glitter in the center and a chunkier one on the arms for contrast. Pinch it on with your fingers or shake it from the jar. Tap off the extra over the plate and pour it back. Let it dry, then hang it or stand it on a shelf.

    Tip:

    Fold the paper plate into a spout to pour leftover glitter back into the jar.

    Back to all steps

How to Make Felt Leaves - 8 Ways to Wire Felt Leaves

Keep going

How to Make Felt Leaves - 8 Ways to Wire Felt Leaves

Keep going with crafts

More on this topic, picked for this clothespin snowflake.

You reached the last step

Save this project to come back to it

Your ticked steps, the free printable and your other saved makes, together in My Projects. Free, no password.

You tapped Save

Save this project for later

We'll email you a link, no password.

How to Make a Clothespin Snowflake (Easy Christmas Ornament)

  • Your saved projects in one list
  • Your ticked steps on any device

Check your inbox for an email from us. Not there? Look in your spam folder.

Free printable

Printable sheet and shopping list for this project

The bonus is hidden until you sign up.

Free with a free account, no password. Every step above stays open to everyone.

Products Used

The Checklist

How to Make a Clothespin Snowflake (Easy Christmas Ornament)

Tools
4
Materials
8
Steps
9
Video
8 min

Tools we recommend

As an Amazon Associate we earn from qualifying purchases. Links on this page may be affiliate links - clicking them and buying doesn't change your price, but helps support Crafting Step by Step.

Tags

The Crafter's Weekly

New crafts tutorials, every Sunday

One short email with the week's best step-by-step guides. Free, no spam, unsubscribe anytime.

Did this work for you?

What's next

Related collections

Curated theme pages that include this tutorial.

Similar tutorials

Hand-picked next reads based on the one you just finished.

Liked this crafts tutorial?

Pick the crafts you want to hear about. One email every Sunday with new step-by-step tutorials. No spam, easy to unsubscribe.

Get more like this in your inbox

Weekly digest. Pick the categories you want. Unsubscribe anytime.

Send me tutorials about

We only email about new tutorials. Easy unsubscribe anytime.