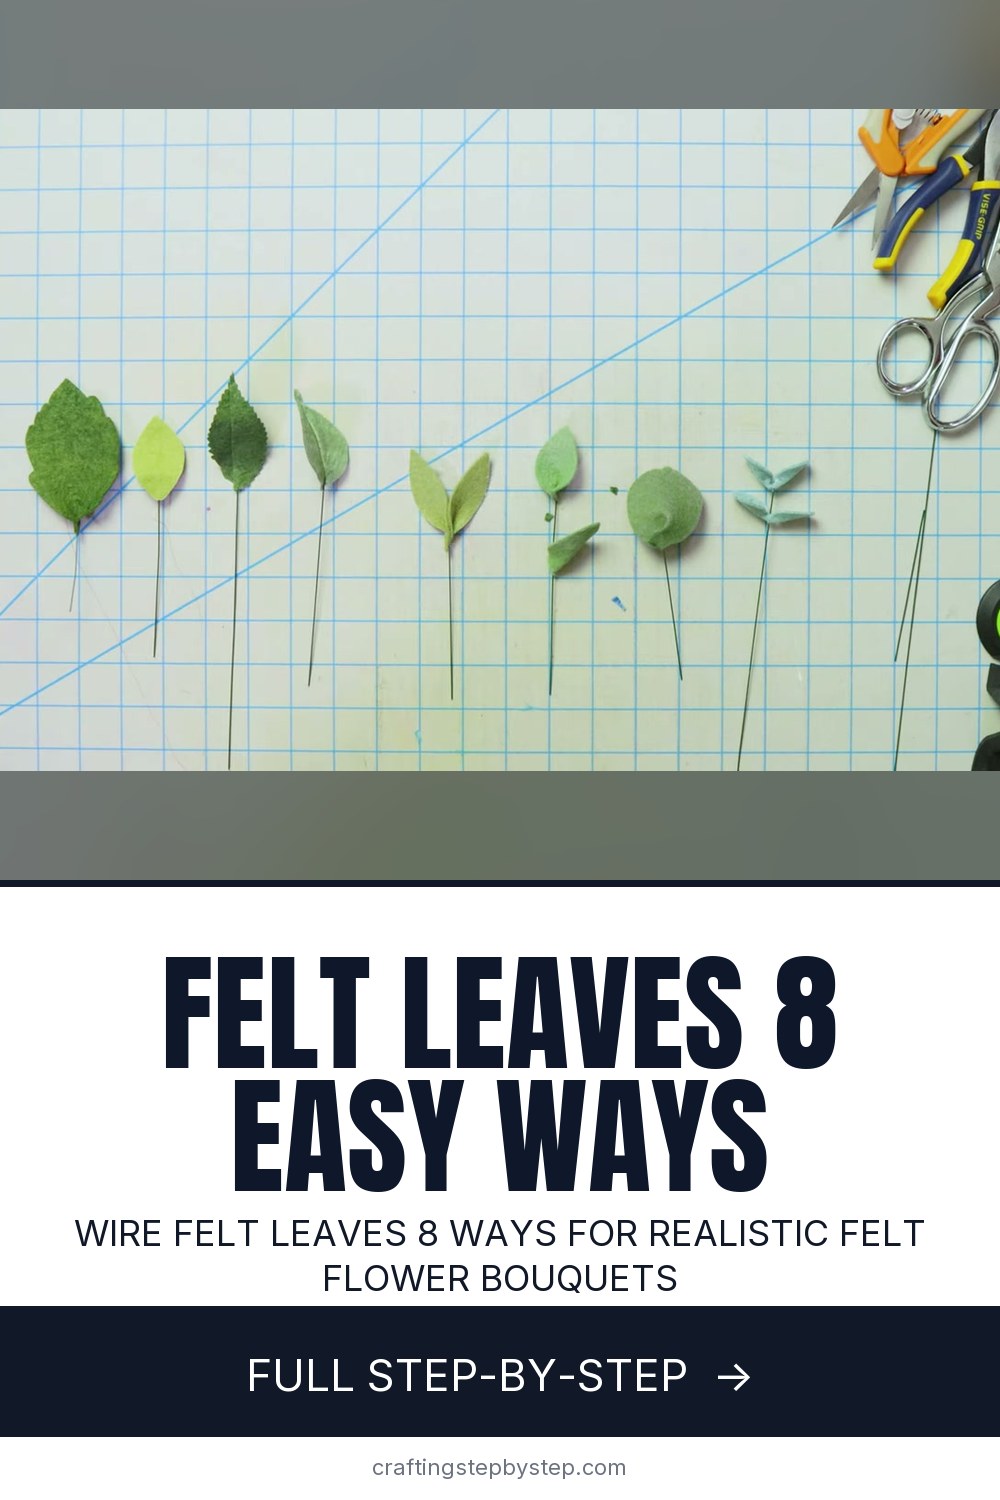
How to Make Felt Leaves - 8 Ways to Wire Felt Leaves

The finished result: How to Make Felt Leaves - 8 Ways to Wire Felt Leaves
  • Difficulty: Easy
  • About 30 minutes
  • 8 steps

You tapped Save

Save this project for later

We'll email you a link, no password.

How to Make Felt Leaves - 8 Ways to Wire Felt Leaves

  • Your saved projects in one list
  • Your ticked steps on any device

Check your inbox for an email from us. Not there? Look in your spam folder.

Print

Steps written out by Crafting Step by Step from The Hardwood Forest's video (opens YouTube) (8:59). Published .

Felt flowers only look real once they have good leaves. The maker behind The Hardwood Forest sells felt flower bouquets, and in this video she walks through eight ways she puts a felt leaf on a wire stem. Some are faster. Some hide the wire completely. Some give the leaf a crease that reads as a vein from across the room. Knowing all eight means your bouquet stops looking like every leaf came off the same stamp.

How to make felt leaves: the short version

  • Cut leaf shapes from felt, or cut them after gluing for the sandwich methods.
  • Put a small amount of hot glue where the wire will sit.
  • Lay floral wire on the glue and pinch, fold or sandwich the felt around it.
  • Hold for a few seconds until the glue sets, then bend the leaf into shape.

Which method to use

MethodWire shows?Best for
PinchAt the baseSpeed, filler leaves
SandwichNoLarge, bendable leaves
Cut in halfNoPre-cut leaves, a center line
Fold-over veinNoA crisp vein, roses and peonies
Double leafAt the baseLeaf pairs at the top of a stem
Side grabNoSeveral leaves down one stem
Bottom snipAt the baseRound eucalyptus-style leaves
Double-sided pinchNoTiny leaves running down a stem

Felt and wire

Wool blend felt is worth the extra cost. It cuts with a clean edge, takes a crease and does not pill when you handle it. Cheap acrylic felt is fine for practice. Buy several greens, plus a dusty blue-gray if you want eucalyptus. Mixing two or three greens in one bouquet looks far more natural than one shade.

For wire, 22 gauge suits single leaves and small stems. Use 18 gauge for a main stem that has to hold several leaves upright. Green paper-wrapped floral wire disappears against the felt better than bare metal.

Hot glue tips

Less glue is better. A big blob seeps through felt, leaves a shiny patch and makes the leaf stiff. A thin bead along the wire line is enough. A low-temp mini glue gun gives you more working time and is kinder to fingertips. Keep a bowl of cold water nearby for burns, and keep little helpers on cutting duty, not glue duty.

Using your leaves

Tuck them around felt roses and peonies, wire a few into a wreath, or bundle a handful of eucalyptus stems in a small jar. Store finished stems standing up in a cup so the leaves keep their bend.

Common problems

  • Glue shows through. Use less, and press the felt down before it cools.
  • The leaf spins on the wire. Glue a longer stretch of wire, or bend a small hook at the tip first.
  • Dull scissors. Never cut through wire with fabric scissors. Keep the wire short of the leaf edge.

More felt and flower projects

Pair these with a no-sew fabric flower or crepe paper flowers. Add them to a fall wreath, or use your felt scraps on felt acorns and a felt garland.

Free printable

Print the steps and supply list for this project

One page you can take to the table. Free with a free account, no password.

Get the free printable

What you'll need

Free, for this project

Get this checklist by email

  • All 9 tools and materials, with tick boxes
  • A link to print all 8 steps on paper, to keep by you while you craft

No password. The whole tutorial stays free on this page.

Quick answer

Learn 8 ways to make felt leaves on floral wire: pinch, sandwich, folded vein, side grab and eucalyptus stems for felt flower bouquets. An easy project: about 30 minutes. Materials cost about $3 to $8. You need 9 things, including blue-gray felt for eucalyptus, 22 gauge floral wire and 18 gauge floral wire. The 8 steps start with glue a Felt Leaf to Wire With the Pinch Method and cut a Felt Leaf From a Glued Felt Sandwich.

Step-by-step guide

8 steps, about 9 minutes. Tap a picture to jump to that step. Your progress saves automatically.

Tick each step off as you go.

  1. Step 1: Glue a Felt Leaf to Wire With the Pinch Method

    Watch this step · 0:32

    This is the easiest way and the one The Hardwood Forest uses most. Put a small dab of hot glue at the bottom of a cut felt leaf. Lay the tip of a piece of floral wire in the glue. Pinch the base of the leaf shut around the wire and hold it for a few seconds. The pinch gives the leaf a soft fold so it looks less flat.

    Tip:

    Pinch right at the base. Pinching too high makes the leaf look like a taco.

    Back to all steps

  2. Step 2: Cut a Felt Leaf From a Glued Felt Sandwich

    Watch this step · 1:20

    Take two small squares of felt. Spread hot glue over one, lay a wire down the middle and press the second square on top. Now cut a leaf shape out of the sandwich with scissors. Feel for the wire through the felt so you cut around it, not through it. No wire shows anywhere, and you can bend the leaf any way you like.

    Tip:

    Stop the wire short of the leaf tip. Cutting wire dulls fabric scissors fast.

    Back to all steps

  3. Step 3: Glue a Wire Between Two Halves of a Felt Leaf

    Watch this step · 2:27

    Cut a pre-cut leaf in half down the middle. Run a thin bead of glue along the straight edge of one half. Lay the wire on the glue, then press the other half against it so the two edges meet over the wire. It uses half the felt of the sandwich method and leaves a neat line down the center that looks like a vein.

    Tip:

    Line the halves up before the glue cools. You only get a few seconds.

    Back to all steps

  4. Step 4: Fold a Felt Leaf Over the Wire to Press a Vein

    Watch this step · 4:00

    Run a bead of glue down the center of a leaf and lay the wire on it. Add a second thin bead on top of the wire. Fold the leaf in half over the glue and pinch hard along the wire to set a crease. Open it back up. You get a sharp fold line down the middle, no exposed wire on the back, and a leaf you can still bend.

    Tip:

    Watch your fingers here. The glue sits right where you pinch.

    Back to all steps

  5. Step 5: Add a Second Felt Leaf to Make a Double Leaf

    Watch this step · 5:14

    Pinch two leaves at the base first, without wire. Each pinch leaves a small flat spot. Glue the wire to the flat spot of the first leaf. Then add a little glue and set the second leaf right beside it on the same wire. The pair sits like the top of a real stem, with the wire sandwiched between the two pinched bases.

    Tip:

    Use two slightly different sizes. Real leaf pairs are rarely twins.

    Back to all steps

  6. Step 6: Rotate a Side Felt Leaf Off the Same Wire Stem

    Watch this step · 6:08

    Start with a pinched leaf on the top of the wire. To keep going down the stem, put a dab of glue lower on the wire and pinch a second leaf onto it, flat against the stem. Before the glue sets, rotate that leaf outward. Now it branches off to the side while still attached to the same wire. Repeat for a longer stem.

    Tip:

    Alternate sides as you go down. It looks more like a real branch.

    Back to all steps

  7. Step 7: Snip and Fold the Base of a Round Felt Leaf

    Watch this step · 6:45

    She jokingly calls this one the bend and snap. Make a small snip into the bottom of a round leaf. Put a thin bead of glue along one side of the cut. Lay the wire there, add a touch more glue and rotate the other flap over it. The leaf cups slightly, which suits eucalyptus. Bend it back, or leave it flatter.

    Tip:

    Keep the snip short, about a quarter of the leaf. Longer and it falls apart.

    Back to all steps

  8. Step 8: Pinch Eucalyptus Felt Leaves on Both Sides of the Wire

    Watch this step · 7:46

    Feed the wire through to the bottom of a small double-sided leaf. Add a dot of glue, then pinch both sides around the wire. That gives you the classic eucalyptus shape. Keep adding leaves the same way all the way down the stem. Use pliers to trim the wire and bend the stem once the last leaf is set.

    Tip:

    Blue-gray felt sells the eucalyptus look better than any green.

    Back to all steps

How to Make a Valentine's Day Box

Keep going

How to Make a Valentine's Day Box

Keep going with crafts

More on this topic, picked for this project.

You reached the last step

Save this project to come back to it

Your ticked steps, the free printable and your other saved makes, together in My Projects. Free, no password.

You tapped Save

Save this project for later

We'll email you a link, no password.

How to Make Felt Leaves - 8 Ways to Wire Felt Leaves

  • Your saved projects in one list
  • Your ticked steps on any device

Check your inbox for an email from us. Not there? Look in your spam folder.

Free printable

Printable sheet and shopping list for this project

The bonus is hidden until you sign up.

Free with a free account, no password. Every step above stays open to everyone.

Products Used

The Checklist

How to Make Felt Leaves - 8 Ways to Wire Felt Leaves

Tools
4
Materials
5
Steps
8
Video
9 min

Tools we recommend

As an Amazon Associate we earn from qualifying purchases. Links on this page may be affiliate links - clicking them and buying doesn't change your price, but helps support Crafting Step by Step.

Tags

The Crafter's Weekly

New crafts tutorials, every Sunday

One short email with the week's best step-by-step guides. Free, no spam, unsubscribe anytime.

Did this work for you?

What's next

Related collections

Curated theme pages that include this tutorial.

Similar tutorials

Hand-picked next reads based on the one you just finished.

Liked this crafts tutorial?

Pick the crafts you want to hear about. One email every Sunday with new step-by-step tutorials. No spam, easy to unsubscribe.

Get more like this in your inbox

Weekly digest. Pick the categories you want. Unsubscribe anytime.

Send me tutorials about

We only email about new tutorials. Easy unsubscribe anytime.