How to Whitewash Wood: 5 Easy Methods

Save it for later. We'll email you a link, no password.

Find it again on your phone or computer, with your finished steps ticked.

You tapped Save

Save this project for later

We'll email you a link, no password.

How to Whitewash Wood: 5 Easy Methods

  • Your saved projects in one list
  • Your ticked steps on any device

Check your inbox for an email from us. Not there? Look in your spam folder.

Based on a video by HomeMadeModern

Opens their YouTube channel

Steps written out by Crafting Step by Step · Published

The finished result: How to Whitewash Wood: 5 Easy Methods

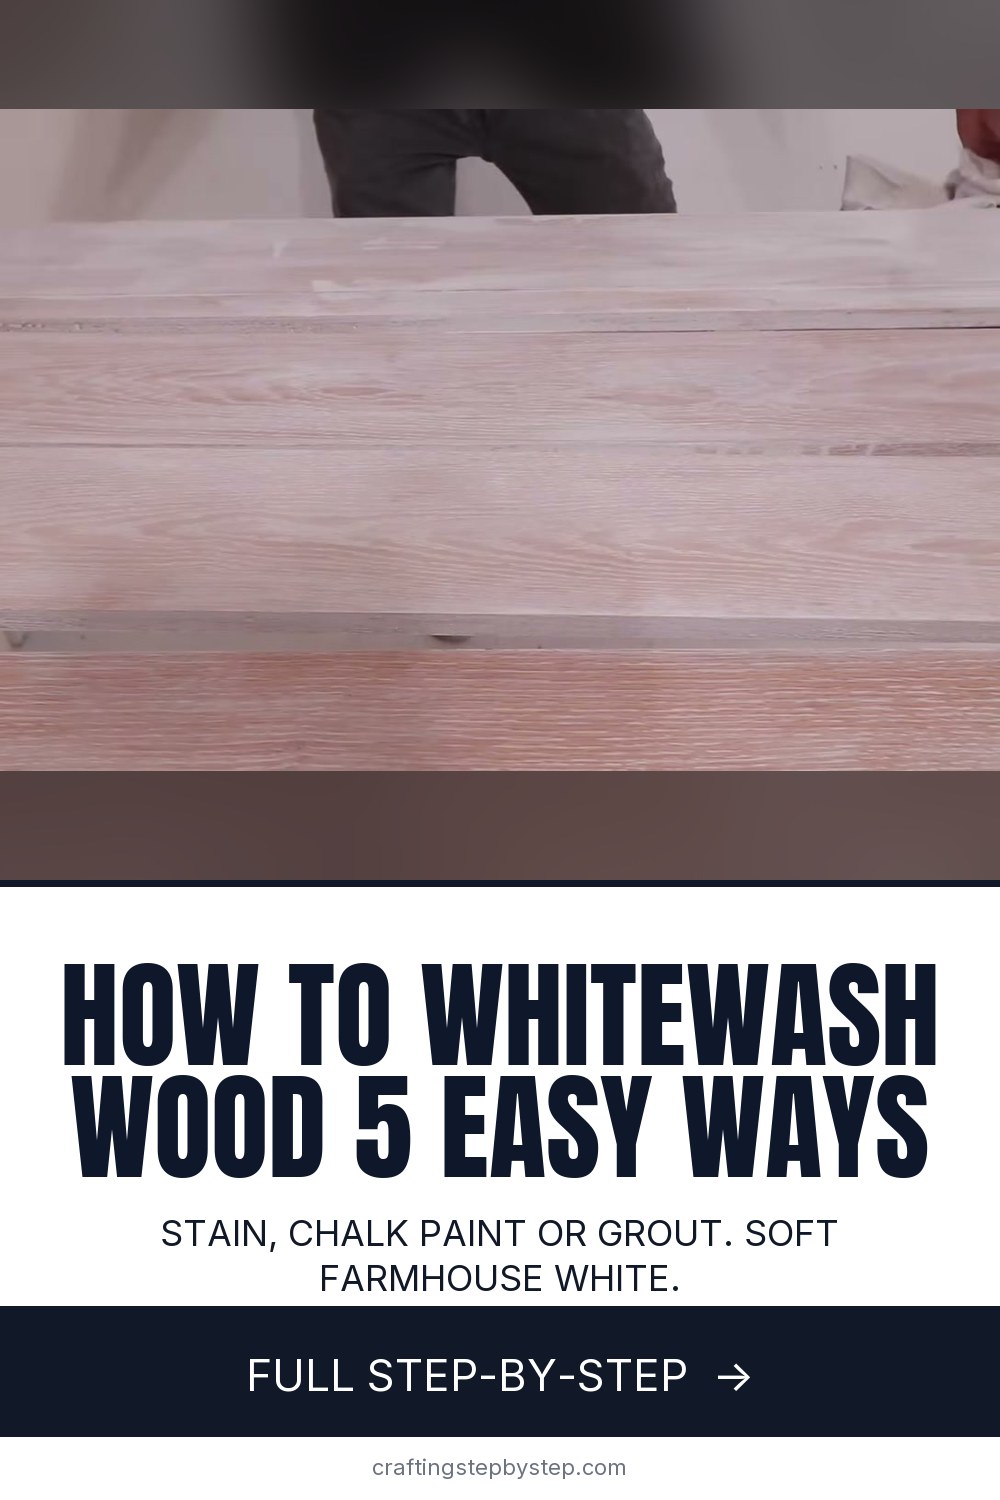
Whitewashed wood has a soft, light, beachy look. The grain still shows, but the warm orange or yellow tones fade under a haze of white. In this video Ben Uyeda of HomeMadeModern shows five ways to get that finish on oak, poplar, rough fir and cedar, using a white wash stain, watered-down chalk paint and even tile grout. Pick the method that suits your wood and the look you want.

How to whitewash wood: pick a method

  • White wash stain, wiped. Best on oak and other open-grain wood. The white settles into the grain for a limed look.
  • Diluted chalk paint, 1 to 1 with water. Best on poplar or pine for a soft, even, very matte haze.
  • Thick chalk paint, then sanded. Best on rough lumber for a rustic, farmhouse look.
  • Grout. Best on cedar or knotty boards for an old-world plaster finish that fills gaps and dents.
  • Stain, then grout. Best on wide or warped boards for the most even, hazy white.

Whitewash paint ratios

The more water, the more grain shows. A 1 to 1 mix of chalk paint and water gives a sheer, subtle wash. A 70 percent paint to 30 percent water mix covers almost completely, ready to be sanded back. Mix a small cup and test it on a scrap or the underside of your piece before you start. You can always add a second coat. Taking one off is much harder.

Prep makes the difference

Sand bare wood to 150 grit and wipe away every bit of dust. On oak, pine and fir, a pre-stain wood conditioner helps the white soak in evenly instead of going blotchy. Whitewash works best on raw wood. If your piece is already stained or sealed, sand back to bare wood first, or use the chalk paint methods, which grip better over old finishes.

Sealing a whitewash finish

Chalk paint and stain alone can scuff. For a tabletop, shelf or anything that gets handled, add two thin coats of a water-based matte or satin polyurethane. Oil-based finishes yellow over time and will tint your white. Grout finishes are already hard wearing and stain resistant, especially premixed single-component grout.

Which wood takes whitewash best?

Open-grain oak shows a crisp limed pattern. Poplar absorbs paint evenly for a smooth haze. Pine and fir go blotchy without conditioner. Cedar's knots and texture love the grout method.

Common mistakes

  • Uneven wiping. How hard you wipe sets how much white stays. Wipe evenly for a uniform look, harder in spots for a worn, aged one.
  • Testing in the wrong light. Judge the finish in the room where it will live.
  • Painting assembled rough boards. Finish three sides of each board first. It is far easier than brushing into the cracks.

Where to use it

Whitewash suits headboards, feature walls, picture frames, shelves, photo backdrops and side tables. Try it on a wooden box or a planter box, or use it when you refinish a table. It also makes a soft background for wood burning designs.

Free printable

Print the steps and supply list for this project

One page you can take to the table. Free with a free account, no password.

Get the free printable

What you'll need

Free, for this project

Get this checklist by email

  • All 13 tools and materials, with tick boxes
  • A link to print all 10 steps on paper, to keep by you while you craft

No password. The whole tutorial stays free on this page.

Quick answer

How to whitewash wood five ways: white wash stain on oak, watered-down chalk paint, sanded rustic boards and grout finishes. An easy project. You need 13 things, including white wash wood stain, pre-stain wood conditioner and white chalk paint. The 10 steps start with sand and Condition the Wood Before Whitewashing, brush a Thick Coat of White Wash Stain on the Wood, wipe Off the Excess Whitewash With a Rag and rub Diluted Chalk Paint Into Poplar for a Hazy Whitewash.

Step-by-step guide

10 steps, about 5 minutes. Tap a picture to jump to that step. Your progress saves automatically.

Tick each step off as you go.

  1. Step 1: Sand and Condition the Wood Before Whitewashing

    Watch this step · 0:23

    Sand the boards to 150 grit, then wipe off all the sawdust with a clean rag. Any dust left behind gets trapped in the finish. Brush on a pre-stain wood conditioner and let it soak in as the can directs. Conditioner prepares the surface so the whitewash stain soaks in evenly, which matters a lot on oak.

    Tip:

    Vacuum the grain too. Oak pores hold a surprising amount of dust.

    Back to all steps

  2. Step 2: Brush a Thick Coat of White Wash Stain on the Wood

    Watch this step · 0:30

    Use a foam brush to lay a generous coat of white wash wood stain over the whole surface, working along the grain. Do not worry about it looking too white. You will wipe most of it off. Let the stain sit and soak into the wood for about 10 minutes.

    Tip:

    Work on one panel at a time so nothing dries before you wipe.

    Back to all steps

  3. Step 3: Wipe Off the Excess Whitewash With a Rag

    Watch this step · 0:38

    Take a clean, lint-free rag and wipe the excess stain off along the grain. This is the step that sets the look. Wipe evenly for a consistent finish, or press harder in some places to pull off more white for a time-worn look. Do this in the same light the finished piece will sit in, so you can judge it.

    Tip:

    Swap to a fresh rag once yours is loaded with stain.

    Back to all steps

  4. Step 4: Rub Diluted Chalk Paint Into Poplar for a Hazy Whitewash

    Watch this step · 1:32

    For an even, very matte finish, mix white chalk paint with water about 1 to 1. Brush it onto sanded poplar, then rub it in with a rag to even it out. The thin paint soaks straight into the wood and leaves a soft haze over the grain. Add more coats if you want less grain to show.

    Tip:

    Chalk paint stays flatter than even a flat latex paint.

    Back to all steps

  5. Step 5: Brush Thick Chalk Paint on Rough Boards for a Rustic Whitewash

    Watch this step · 2:16

    For a rustic look, use rough, unsanded fir boards and a thicker mix, about 70 percent chalk paint to 30 percent water. Brush it on heavily and leave it, no wiping. Paint at least three sides of each board before you assemble a panel. Leave small gaps between rough boards, using popsicle sticks as spacers, in case they move.

    Tip:

    Rough lumber can still shrink and swell, so the gaps matter.

    Back to all steps

  6. Step 6: Sand the Painted Boards to Reveal the Wood Grain

    Watch this step · 2:40

    The boards now look almost solid white. Take a sanding sponge, about 120 grit, and sand over the surface. It knocks the paint off the high points of the grain and lets a little natural wood color show through. Sand more for a weathered look or lightly for a few hints of wood.

    Tip:

    A sponge follows uneven rough boards better than a flat block.

    Back to all steps

  7. Step 7: Spread White Grout Over Cedar for a Plaster Whitewash

    Watch this step · 3:06

    For an old-world look, use tile grout. Dampen the cedar boards with water first. Then spread a thick coat of white grout over the surface with a putty knife, pushing it into the gaps between boards, knot holes and dents. Sanded and unsanded grout both work. Damp wood helps the grout spread and stops it drying too fast.

    Tip:

    Premixed single-component grout gives the toughest, most stain resistant finish.

    Back to all steps

  8. Step 8: Wipe the Grout Back With a Damp Rag

    Watch this step · 3:30

    Use a wet rag or sponge to even out the grout coat. Wipe back until you like how much wood shows. The grout grips the wood fibers and stays in the grain, gaps and knots, which gives a plastered, vintage look. Rinse the rag often so you move grout around rather than smearing it.

    Tip:

    Wipe before the grout starts to set. It gets hard to move fast.

    Back to all steps

  9. Step 9: Whitewash Wide Fir Boards With Stain

    Watch this step · 4:08

    For the most even white, combine two methods. Sand wide fir boards to 150 grit, apply wood conditioner, then apply white wash stain and wipe it back, the same way as the oak. Let the whitewash cure fully before the next layer. Wearing gloves keeps the stain off your hands.

    Tip:

    Wide boards mean fewer seams and less work on big surfaces like walls.

    Back to all steps

  10. Step 10: Add a Layer of Grout Over the Whitewash

    Watch this step · 4:22

    Spread a layer of grout over the cured whitewash and wipe it back with a damp sponge. It fills the recesses in curved or warped boards and adds one more layer of white for a hazy, even finish. This combo works well for headboards, loft floors and feature walls, anywhere wide boards save you time.

    Tip:

    Test the full stack on an offcut before you commit to a whole wall.

    Back to all steps

How to Build a Wooden Planter Box (Simple Straight-Cut Build)

Keep going

How to Build a Wooden Planter Box (Simple Straight-Cut Build)

9 steps · about 12 minutes

You reached the last step

Save this project to come back to it

Your ticked steps, the free printable and your other saved makes, together in My Projects. Free, no password.

You tapped Save

Save this project for later

We'll email you a link, no password.

How to Whitewash Wood: 5 Easy Methods

  • Your saved projects in one list
  • Your ticked steps on any device

Check your inbox for an email from us. Not there? Look in your spam folder.

Free printable

Printable sheet for this project

The bonus is hidden until you sign up.

Free with a free account, no password. Every step above stays open to everyone.

Products Used

The Checklist

How to Whitewash Wood: 5 Easy Methods

Tools
7
Materials
6
Steps
10
Video
5 min

Tools we recommend

As an Amazon Associate we earn from qualifying purchases. Links on this page may be affiliate links - clicking them and buying doesn't change your price, but helps support Crafting Step by Step.

Tags

The Crafter's Weekly

New woodworking crafts tutorials, every Sunday

One short email with the week's best step-by-step guides. Free, no spam, unsubscribe anytime.

Did this work for you?

What's next

Related collections

Curated theme pages that include this tutorial.

Similar tutorials

Hand-picked next reads based on the one you just finished.

Liked this woodworking crafts tutorial?

Pick the crafts you want to hear about. One email every Sunday with new step-by-step tutorials. No spam, easy to unsubscribe.

Get more like this in your inbox

Weekly digest. Pick the categories you want. Unsubscribe anytime.

Send me tutorials about

We only email about new tutorials. Easy unsubscribe anytime.