How to Make an Origami Turtle (Easy, One Cut)

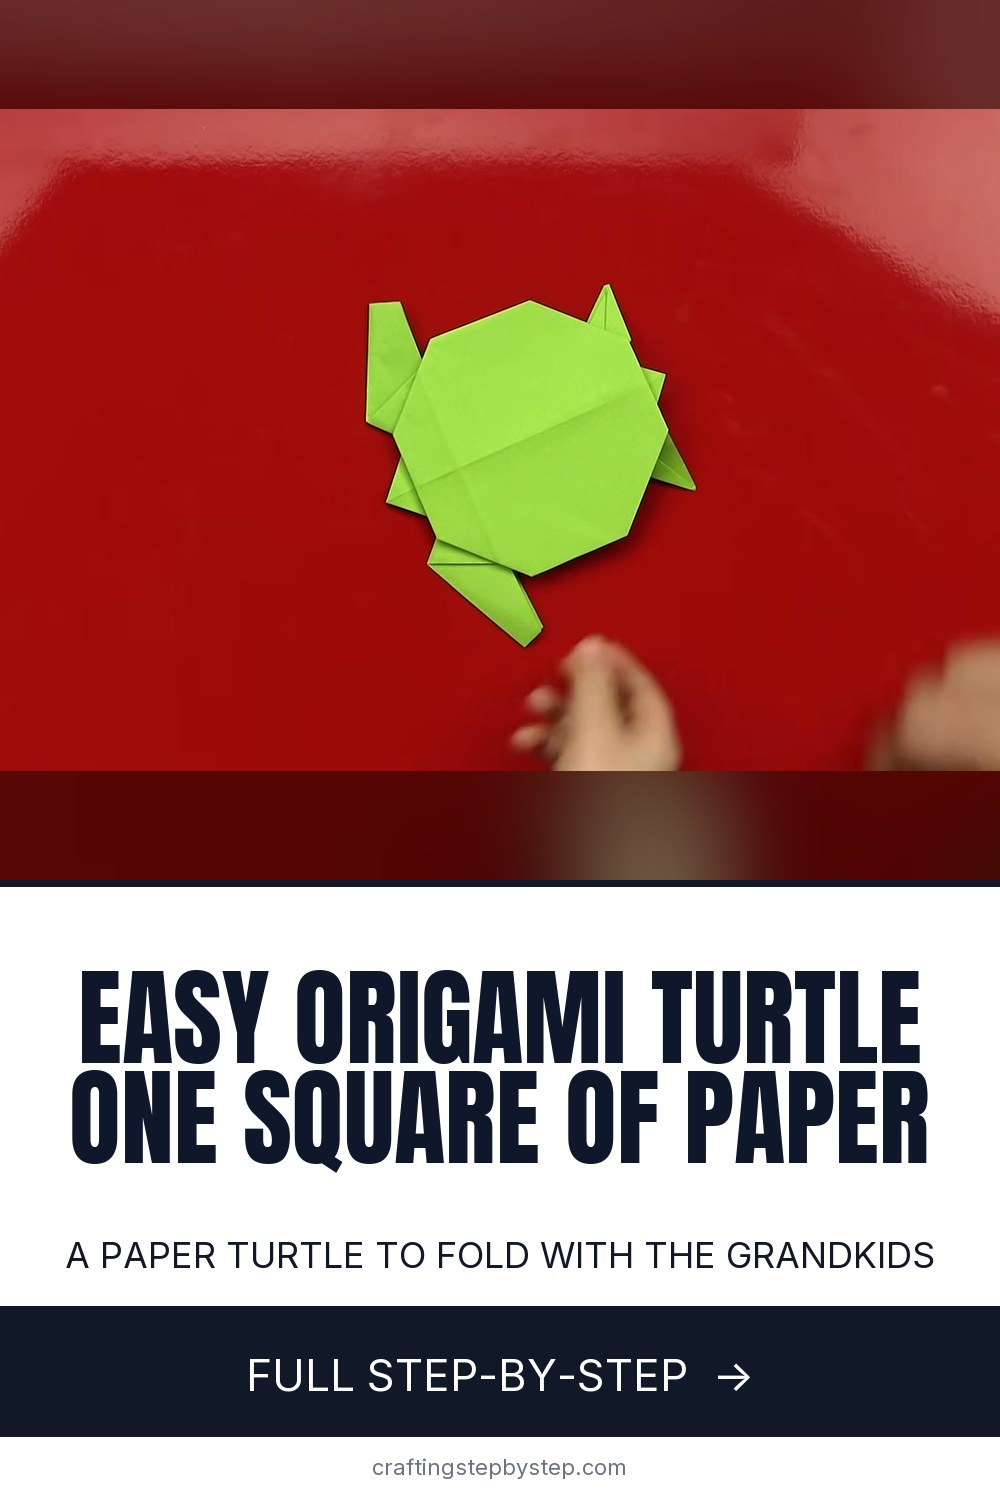
The finished result: How to Make an Origami Turtle (Easy, One Cut)
  • Difficulty: Easy
  • About 15 minutes
  • 10 steps

You tapped Save

Save this project for later

We'll email you a link, no password.

How to Make an Origami Turtle (Easy, One Cut)

  • Your saved projects in one list
  • Your ticked steps on any device

Check your inbox for an email from us. Not there? Look in your spam folder.

Print

Steps written out by Crafting Step by Step from Art for Kids Hub's video (opens YouTube) (11:35). Published .

An origami turtle is a flat paper turtle with a rounded shell, four little flippers, a head and a tail, all folded from one square. This version needs a single snip with scissors, which makes the front flippers much easier than a pure fold. This tutorial follows Rob from Art for Kids Hub, who folds it with three year old Austin helping press the creases, so it is a good one to do with grandchildren.

How to make an origami turtle: the short version

  • Fold a square into a triangle, then a smaller triangle.
  • Squash both flaps into a square base.
  • Fold the sides to the center and open the top layer.
  • Cut the bottom flap up the middle and fold out the front flippers.
  • Pleat the head, fold out the back feet and pleat the tail.
  • Fold in the side points and flip it over.

Choosing paper

Use square origami paper that is colored on both sides. Rob picks green on both sides, so no white shows on the shell or flippers. A 6 inch square makes a turtle about the size of your palm; a larger 8 or 10 inch sheet is easier for small hands. If you only have printer paper, fold one corner down to the opposite edge to make a triangle and cut off the strip below it. When you open it, you have a square.

Folding with kids

Let the adult set up each fold and the child press it flat. Children love running a finger along a crease, and a sharp crease makes every later step easier. Do the scissors step yourself or with child safety scissors and a hand on theirs. The squash fold in steps 2 and 3 is the trickiest part. Rob opens and redoes it once on camera, which is a good reminder that it is fine to unfold and try again.

Origami words you will see

  • Square base. A small layered diamond made from two squash folds. Many origami animals start here, including the crane.
  • Squash fold. Lift a flap, open its pocket and press it flat into a new shape.
  • Petal fold. Lift one layer while its sides fold in along creases you made earlier.
  • Pleat. A fold down and back up that makes a small step.

Ways to use your turtles

Draw a pattern on the shell with markers, or fold a small one from patterned paper for a baby turtle. Glue one to the front of a birthday card, tape a row along a classroom bulletin board, or fold a family of different sizes for an ocean scene with paper fish. A turtle with a small magnet on the back makes a cheerful fridge decoration.

Common problems

  • The squash fold will not lie flat. Open the flap fully, line the center crease up with the edge below, then press.
  • The flippers are uneven. Cut straight up the center crease and fold both sides to the same angle.
  • White paper shows. Use paper colored on both sides.
  • The legs look too pointy. Fold the tips in, as in the last step, to round them off.

More paper animals

Once you have the turtle, try an origami frog that jumps, a paper cat, or the classic origami crane.

Free printable

Print the steps and supply list for this project

One page you can take to the table. Free with a free account, no password.

Get the free printable

What you'll need

Free, for this project

Get this checklist by email

  • All 3 tools and materials, with tick boxes
  • A link to print all 10 steps on paper, to keep by you while you craft

No password. The whole tutorial stays free on this page.

Quick answer

Learn how to make an origami turtle from one square of paper. An easy project: about 15 minutes. You need 3 things, including scissors and bone folder. The 10 steps start with fold the Origami Paper Into a Small Triangle, squash Fold the First Flap of the Origami Turtle, squash the Second Side Into a Square Base, fold the Turtle Sides to the Center Line and open the Top Layer Into a Long Diamond.

Step-by-step guide

10 steps, about 12 minutes. Tap a picture to jump to that step. Your progress saves automatically.

Tick each step off as you go.

  1. Step 1: Fold the Origami Paper Into a Small Triangle

    Watch this step · 2:00

    Start with a square of origami paper, colored side down if it has a white side. Fold it in half corner to corner to make a big triangle and press the crease flat. If the corners do not line up, open it and redo it. Then fold that triangle in half again, corner to corner, to make a smaller triangle.

    Tip:

    Run a fingernail along each crease. Sharp folds now make the squash folds much easier.

    Back to all steps

  2. Step 2: Squash Fold the First Flap of the Origami Turtle

    Watch this step · 2:48

    Lift the top flap of the small triangle so it stands straight up. Open the pocket and press it down flat so it becomes a square, with the center crease lined up with the fold underneath. This is called a squash fold. Press the new edges down firmly before you move on.

    Tip:

    Folding the flap over and back once first makes it easier to open the pocket.

    Back to all steps

  3. Step 3: Squash the Second Side Into a Square Base

    Watch this step · 4:00

    Flip the paper over and do the same thing on the other side. Lift the flap, open the pocket and squash it flat into a square. When both sides are done, you have a square base: a small diamond with an open end at the bottom and layers on both sides.

    Tip:

    If the two sides do not match, open the second one and line it up with the first.

    Back to all steps

  4. Step 4: Fold the Turtle Sides to the Center Line

    Watch this step · 4:24

    Working on the top layer only, fold the right lower edge in so it lines up with the center crease. Do the same with the left edge. It now looks like a kite. Then fold the top point down over those flaps and crease it well. These creases guide the next fold, so press them hard.

    Tip:

    Only fold one side of the model here. The back stays as it is.

    Back to all steps

  5. Step 5: Open the Top Layer Into a Long Diamond

    Watch this step · 5:12

    Unfold the flaps from the last step. Lift the bottom point of the top layer up, using the crease you made as a hinge. As it rises, the sides fold in along the creases. Press them down so the top layer becomes a long diamond. This is a petal fold, and it is the tricky part.

    Tip:

    Go slowly and let the creases do the work. Rob shows it twice in the video.

    Back to all steps

  6. Step 6: Cut the Bottom Flap for the Turtle Front Flippers

    Watch this step · 6:06

    Take scissors and cut up the middle of the long flap you lifted, along the center crease. Stop where the flap meets the body. That single cut splits the flap into two strips. Those strips become the front flippers. This is the only cut in the whole turtle, so take it slow and keep it straight.

    Tip:

    Let an adult start the cut. A child can finish it with safety scissors.

    Back to all steps

  7. Step 7: Fold Down the Origami Turtle Front Flippers

    Watch this step · 6:24

    Fold each cut strip down and out to the side, at a slant, so they stick out like front flippers. Press both flat. Try to fold them to the same angle so the turtle looks even. Now you can start to see the turtle shape, with a point above the flippers that will become the head.

    Tip:

    Look at both flippers side by side before you crease. It is easier to match them now.

    Back to all steps

  8. Step 8: Pleat the Origami Turtle Head

    Watch this step · 6:48

    Fold the top point down, then fold it back up partway so it sits in a little step. This small zigzag is a pleat, and it makes the head stick out from the shell. Press it down well. Turn the model over and you will see the head poking out from the top.

    Tip:

    A smaller pleat makes a longer head; a bigger pleat makes it stubby.

    Back to all steps

  9. Step 9: Fold Out the Back Feet of the Origami Turtle

    Watch this step · 8:00

    Fold in the side points of the front legs so they are not so pointy, then squash them back down. At the bottom, find the two little ends. Fold one out to the side to make a back foot and press hard. Fold the other to the same point so both back feet are the same length.

    Tip:

    Use the front flippers as a guide for how far out to fold the back feet.

    Back to all steps

  10. Step 10: Pleat the Tail and Finish the Origami Turtle

    Watch this step · 8:56

    Fold the bottom point up, then back down in a small pleat, like the head but smaller. That is the tail. Turn the turtle over and check the head and tail stick out. Flip it back, fold the two side points in to touch the center line and press. Turn it over and your turtle is done.

    Tip:

    Draw a shell pattern on top with a marker for a finishing touch.

    Back to all steps

How to Marble Paper With Shaving Cream - Easy Kids Craft

Keep going

How to Marble Paper With Shaving Cream - Easy Kids Craft

Keep going with paper crafts

More on this topic, picked for this origami turtle.

You reached the last step

Save this project to come back to it

Your ticked steps, the free printable and your other saved makes, together in My Projects. Free, no password.

You tapped Save

Save this project for later

We'll email you a link, no password.

How to Make an Origami Turtle (Easy, One Cut)

  • Your saved projects in one list
  • Your ticked steps on any device

Check your inbox for an email from us. Not there? Look in your spam folder.

Free printable

Printable sheet and shopping list for this project

The bonus is hidden until you sign up.

Free with a free account, no password. Every step above stays open to everyone.

Products Used

The Checklist

How to Make an Origami Turtle (Easy, One Cut)

Tools
2
Materials
1
Steps
10
Video
12 min

Tools we recommend

As an Amazon Associate we earn from qualifying purchases. Links on this page may be affiliate links - clicking them and buying doesn't change your price, but helps support Crafting Step by Step.

Tags

The Crafter's Weekly

New paper crafts tutorials, every Sunday

One short email with the week's best step-by-step guides. Free, no spam, unsubscribe anytime.

Did this work for you?

What's next

Related collections

Curated theme pages that include this tutorial.

Similar tutorials

Hand-picked next reads based on the one you just finished.

Liked this paper crafts tutorial?

Pick the crafts you want to hear about. One email every Sunday with new step-by-step tutorials. No spam, easy to unsubscribe.

Get more like this in your inbox

Weekly digest. Pick the categories you want. Unsubscribe anytime.

Send me tutorials about

We only email about new tutorials. Easy unsubscribe anytime.