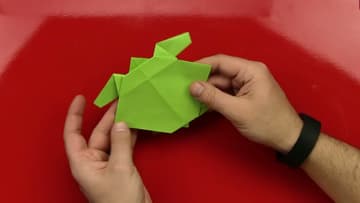
How to Make an Origami Turtle (Easy, One Cut)
Source: Art for Kids Hub • Full tutorial: www.craftingstepbystep.com/paper-crafts/how-to-make-an-origami-turtle
- Difficulty
- Easy
- Hands-on time
- About 15 minutes
- Makes
- 1 paper turtle

Tools
- scissors
- bone folder (optional)
Materials
- square origami paper, colored on both sides
Steps
1. Fold the Origami Paper Into a Small Triangle
Start with a square of origami paper, colored side down if it has a white side. Fold it in half corner to corner to make a big triangle and press the crease flat.
Tip: Run a fingernail along each crease. Sharp folds now make the squash folds much easier.
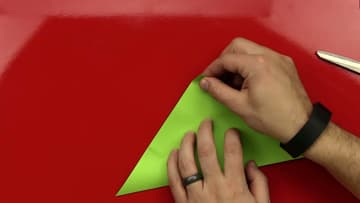
2. Squash Fold the First Flap of the Origami Turtle
Lift the top flap of the small triangle so it stands straight up. Open the pocket and press it down flat so it becomes a square, with the center crease lined up with the fold underneath.
Tip: Folding the flap over and back once first makes it easier to open the pocket.
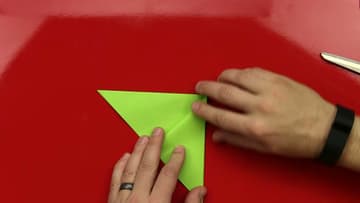
3. Squash the Second Side Into a Square Base
Flip the paper over and do the same thing on the other side. Lift the flap, open the pocket and squash it flat into a square.
Tip: If the two sides do not match, open the second one and line it up with the first.
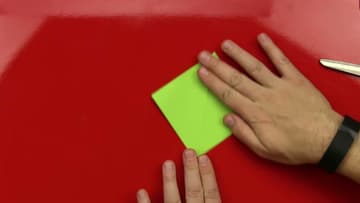
4. Fold the Turtle Sides to the Center Line
Working on the top layer only, fold the right lower edge in so it lines up with the center crease. Do the same with the left edge.
Tip: Only fold one side of the model here. The back stays as it is.
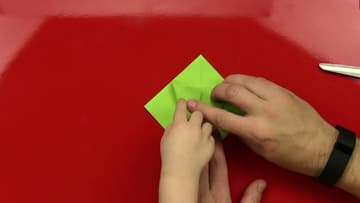
5. Open the Top Layer Into a Long Diamond
Unfold the flaps from the last step. Lift the bottom point of the top layer up, using the crease you made as a hinge.
Tip: Go slowly and let the creases do the work. Rob shows it twice in the video.
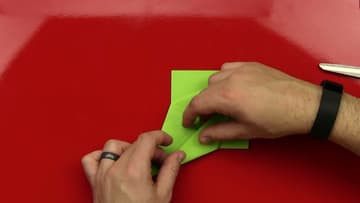
6. Cut the Bottom Flap for the Turtle Front Flippers
Take scissors and cut up the middle of the long flap you lifted, along the center crease. Stop where the flap meets the body.
Tip: Let an adult start the cut. A child can finish it with safety scissors.

7. Fold Down the Origami Turtle Front Flippers
Fold each cut strip down and out to the side, at a slant, so they stick out like front flippers. Press both flat.
Tip: Look at both flippers side by side before you crease. It is easier to match them now.
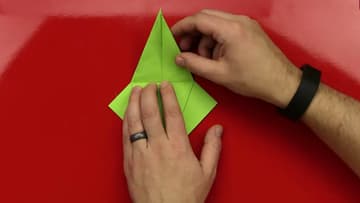
8. Pleat the Origami Turtle Head
Fold the top point down, then fold it back up partway so it sits in a little step. This small zigzag is a pleat, and it makes the head stick out from the shell.
Tip: A smaller pleat makes a longer head; a bigger pleat makes it stubby.
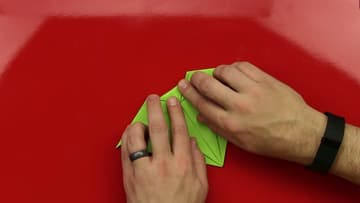
9. Fold Out the Back Feet of the Origami Turtle
Fold in the side points of the front legs so they are not so pointy, then squash them back down. At the bottom, find the two little ends.
Tip: Use the front flippers as a guide for how far out to fold the back feet.
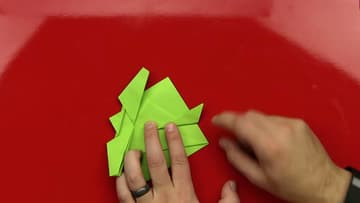
10. Pleat the Tail and Finish the Origami Turtle
Fold the bottom point up, then back down in a small pleat, like the head but smaller. That is the tail.
Tip: Draw a shell pattern on top with a marker for a finishing touch.