How to Make a Paper Bat (Easy Origami for Halloween)

Also in:Other Crafts

By CraftingStepByStepPublished

Based on a video by Art of Fold.

Paper bats are the easiest Halloween decoration you can fold. Kids can make one in five minutes, and a flock of them taped to a window or strung along a mantel looks like a proper spooky garland for almost no money.

This is an origami flapping bat folded from a single square of paper. No cutting, no glue. The wings are accordion-folded so they hold their shape, and the head pinches into a tiny triangle that you can add googly eyes to. Once you have the sequence in your hands you can crank one out every couple of minutes - perfect for a kids' Halloween party where you need a quick craft station.

Black 6-inch origami paper looks the most bat-like, but orange and purple work for a candy-corn palette. If you're making a hanging garland, fold five or six and link them with thin string for instant Halloween decor.

While you have your origami paper out, the same folding skills carry into the origami crane and the origami heart - both use the same diagonal-crease starting point.

Step-by-Step Guide

1

Step 1: Start With a Square and Crease the First Diagonal

0:18
Step 1: Step 1: Start With a Square and Crease the First Diagonal

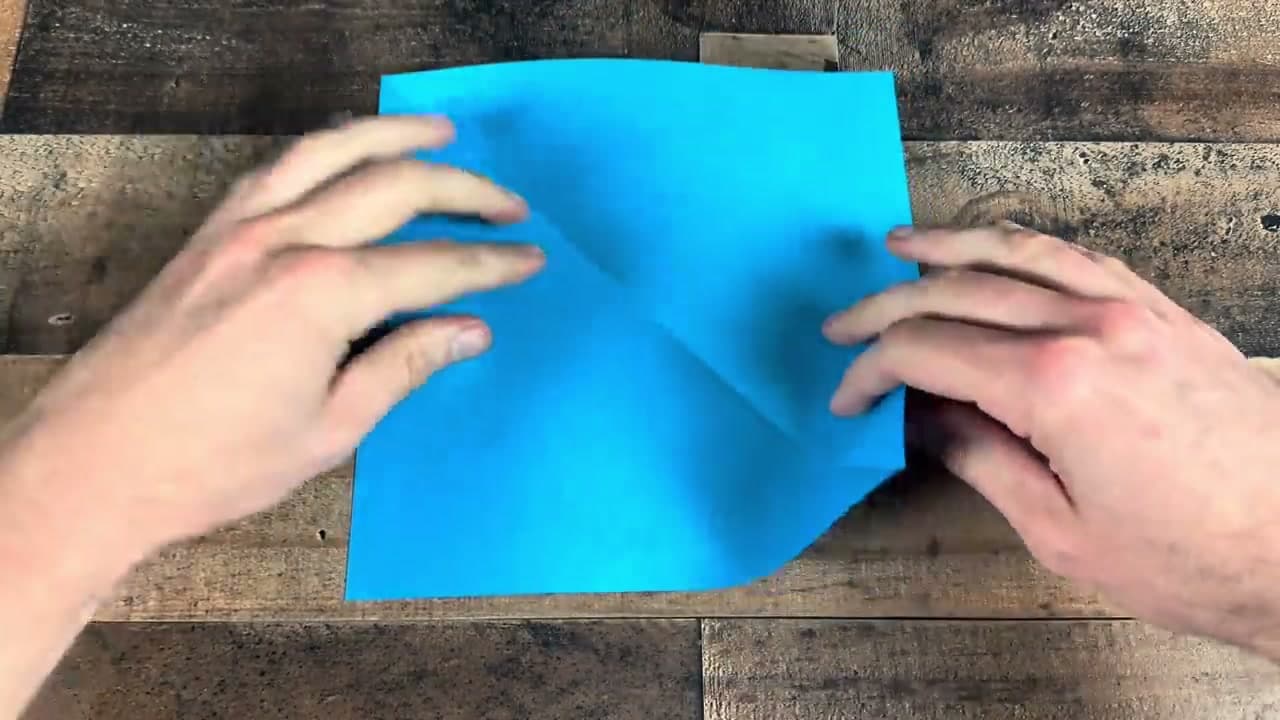
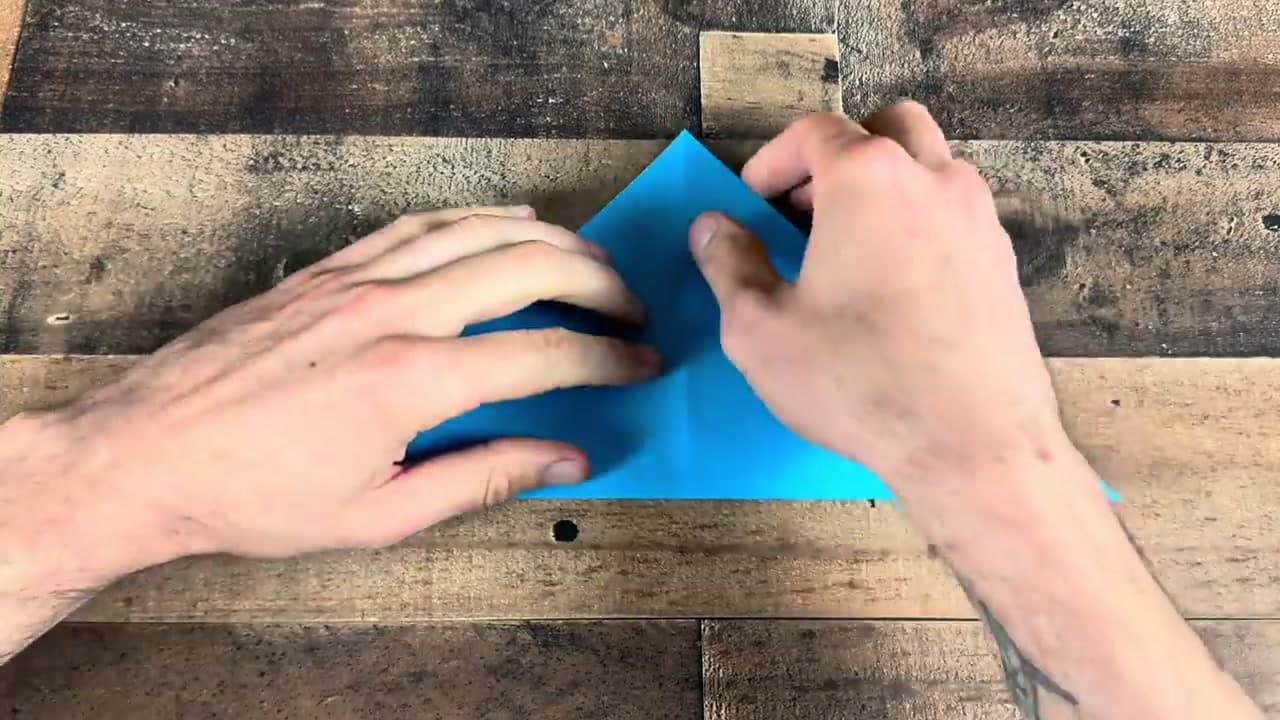
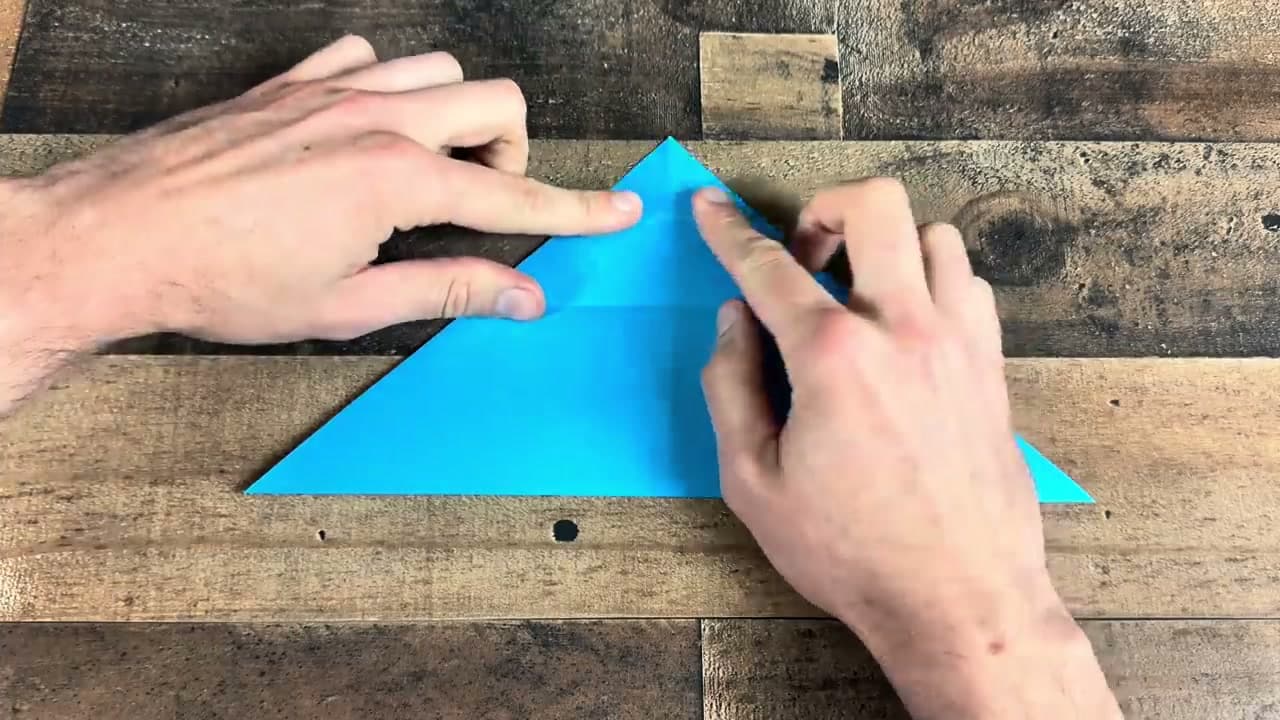
Lay a square of origami paper colored-side down. Fold it in half diagonally, corner to corner, so you have a large triangle. Press the crease flat with your finger or a bone folder, then unfold.

You should now have a flat square with one diagonal crease running through the middle. That crease becomes the centerline of the bat's body, so make it firm.

Tip

Six-inch origami paper is the sweet spot - small enough to handle, large enough to read as a bat shape when finished. Black, orange, or purple all look great. Skip the floral patterns.

Products used in this step

2

Step 2: Crease the Other Diagonal

0:27
Step 2: Step 2: Crease the Other Diagonal

Fold the paper diagonally the other way, corner to corner, then unfold. The two creases should cross in the exact middle of the square, forming an X.

Both creases should go all the way to the corners. These four lines do all the structural work for the next collapse, so a sloppy crease here makes the bat lopsided later.

3

Step 3: Collapse Into a Triangle

0:40
Step 3: Step 3: Collapse Into a Triangle

Flip the paper colored-side up and fold it in half horizontally and vertically, then unfold. You'll have a star pattern of creases.

Now bring the two side corners in to meet at the bottom while the top folds down on itself. The paper collapses naturally along the existing creases into a smaller triangle with the open edge at the bottom. Press it flat.

Tip

If the paper resists collapsing, your creases probably aren't sharp enough. Refold each one over the edge of a table to crisp them up, then try again.

4

Step 4: Fold Into a Long Narrow Band

1:10
Step 4: Step 4: Fold Into a Long Narrow Band

With the triangle's point facing up, fold the two outer corners down to meet the bottom edge. You now have a flatter diamond shape.

Tuck the side points inward along the existing creases so the whole figure flattens into a long, narrow horizontal band with a single peaked ridge through the middle. This becomes the bat's body line.

5

Step 5: Fold the Wings Up

1:35
Step 5: Step 5: Fold the Wings Up

Pick up the band by the center ridge. Lift the left and right sides up so they stand perpendicular to the body, then fold them in toward the middle to create a small kite shape that points up.

The two upward-pointing triangles will become the wings. The narrow vertical line down the middle is the body. Don't worry about a clean look yet - the accordion folds in step 7 will reshape everything.

6

Step 6: Pull the Wings Out to the Sides

2:18
Step 6: Step 6: Pull the Wings Out to the Sides

Open up the two wing flaps and pull them outward and down so they stick out from the body to the left and right. You should now see a recognizable bat silhouette: a small central body with two triangular wings extending out to the sides.

Press the new creases firmly where each wing meets the body. The wings should sit at roughly the same angle - if one is higher than the other, gently adjust.

7

Step 7: Accordion-Fold the Wings

3:25
Step 7: Step 7: Accordion-Fold the Wings

This is the step that gives the bat its signature scalloped wing shape. Starting from the body, make a small fold up, then a small fold down, then up again, working out toward the wing tip. You're making little zig-zag pleats across the wing.

Repeat on the other wing, trying to match the spacing. Press each crease flat as you go. Three or four pleats per wing is plenty - the wing should look like a tiny paper fan when you're done.

Tip

If your pleats are uneven, that's fine. Bats in real life have raggedy wings. Aim for the general accordion look rather than perfect symmetry.

8

Step 8: Pinch the Head and Add Eyes

4:28
Step 8: Step 8: Pinch the Head and Add Eyes

Hold the body in the middle and gently pull the wings apart so they spread to either side. The bottom point pinches into a small triangle - that's the bat's head.

Use a fine black marker to dot two eyes on the head triangle, or stick on two small googly eyes if you have them. Tape a thread to the back of the body to hang it from the ceiling, or stick a strip of double-sided tape on the back to mount it to a window.

Tip

Make a whole flock in different colors and string them together with thin fishing line for an instant Halloween garland. Five or six bats spaced six inches apart looks proper spooky.

Products Used

☐ The Checklist

How to Make a Paper Bat (Easy Origami for Halloween)

Tools
2
Materials
4
Steps
8
Video
5 min

Your Guide

Art of Fold

As an Amazon Associate we earn from qualifying purchases. Links on this page may be affiliate links - clicking them and buying doesn't change your price, but helps support ShowMeStepByStep.

Tags

What's next

Related collections

Curated theme pages that include this tutorial.

Weekly Digest

Liked this paper crafts tutorial?

Pick the categories you want to hear about. Weekly digest of new step-by-step tutorials. No spam, easy unsubscribe.

Send me tutorials about

We only email about new tutorials. Easy unsubscribe anytime.