How to Slip Stitch in Knitting (Purlwise vs Knitwise)

KnittingEasy8:386 steps

By CraftingStepByStepPublished Updated

Based on a video by Studio Knit.

Slip stitch is the move that unlocks half of pattern knitting. Heel turns use it. Slip-stitch edges use it. Mosaic colorwork is built on it. The technique itself is one of the easiest in all of knitting - you don't knit, you don't purl, you just move the stitch from the left needle to the right. The catch is that there are two ways to do it, and most patterns assume you know which is the default.

This walkthrough from Kristen McDonnell at Studio Knit covers both: slip purlwise (the default) and slip knitwise (only when the pattern says so). Once you've also got the knit and purl stitches and joining new yarn down, you can follow almost any pattern that uses slipped stitches.

Step-by-Step Guide

1

Step 1: Set Up a Practice Swatch

0:20
Step 1: Step 1: Set Up a Practice Swatch

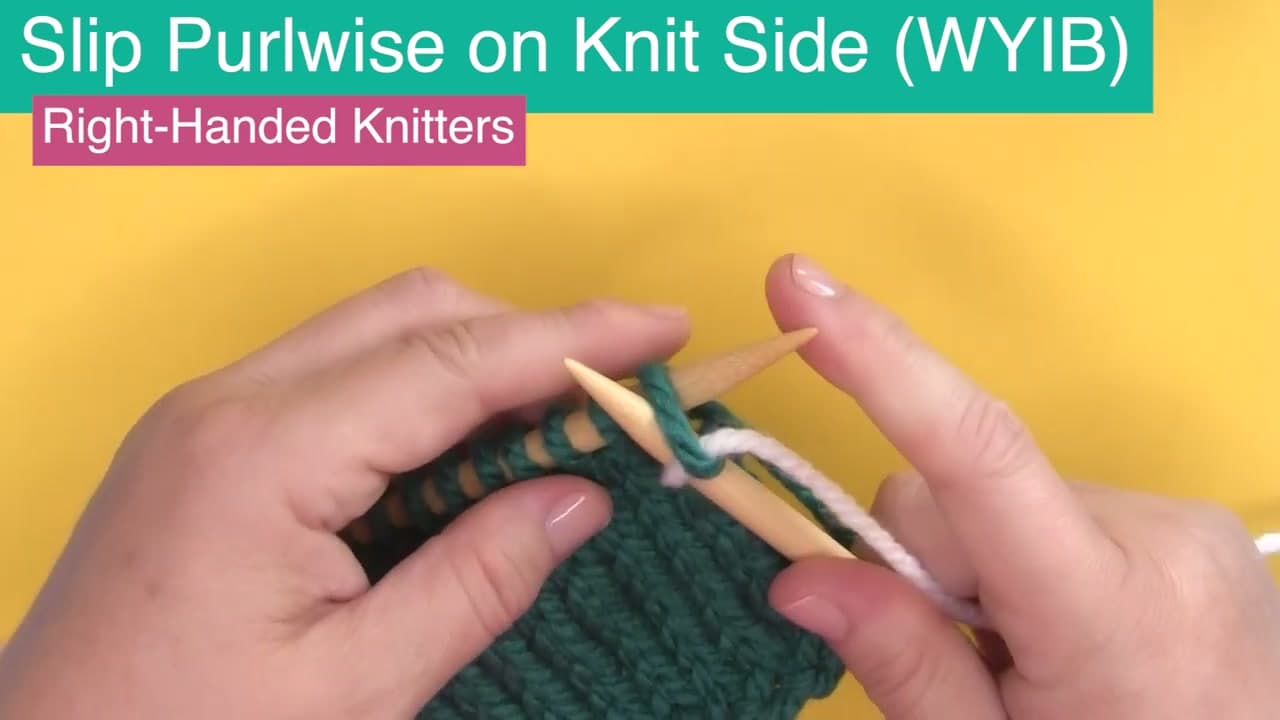
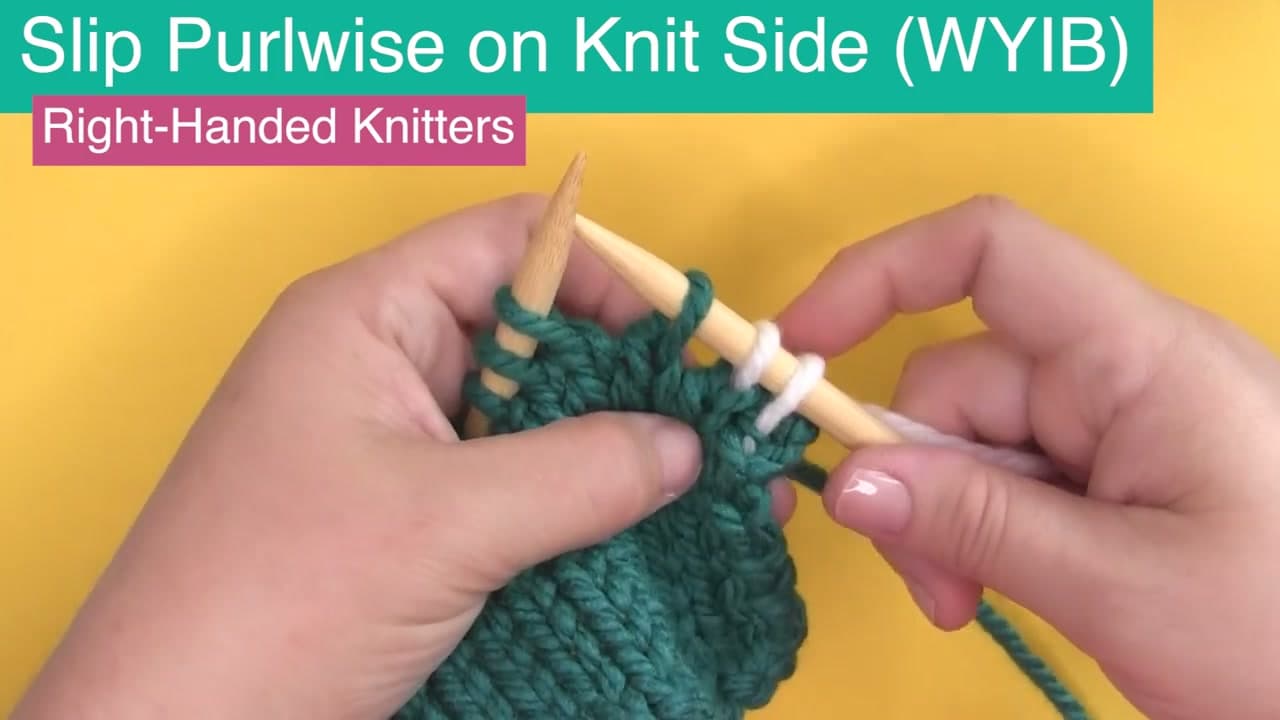
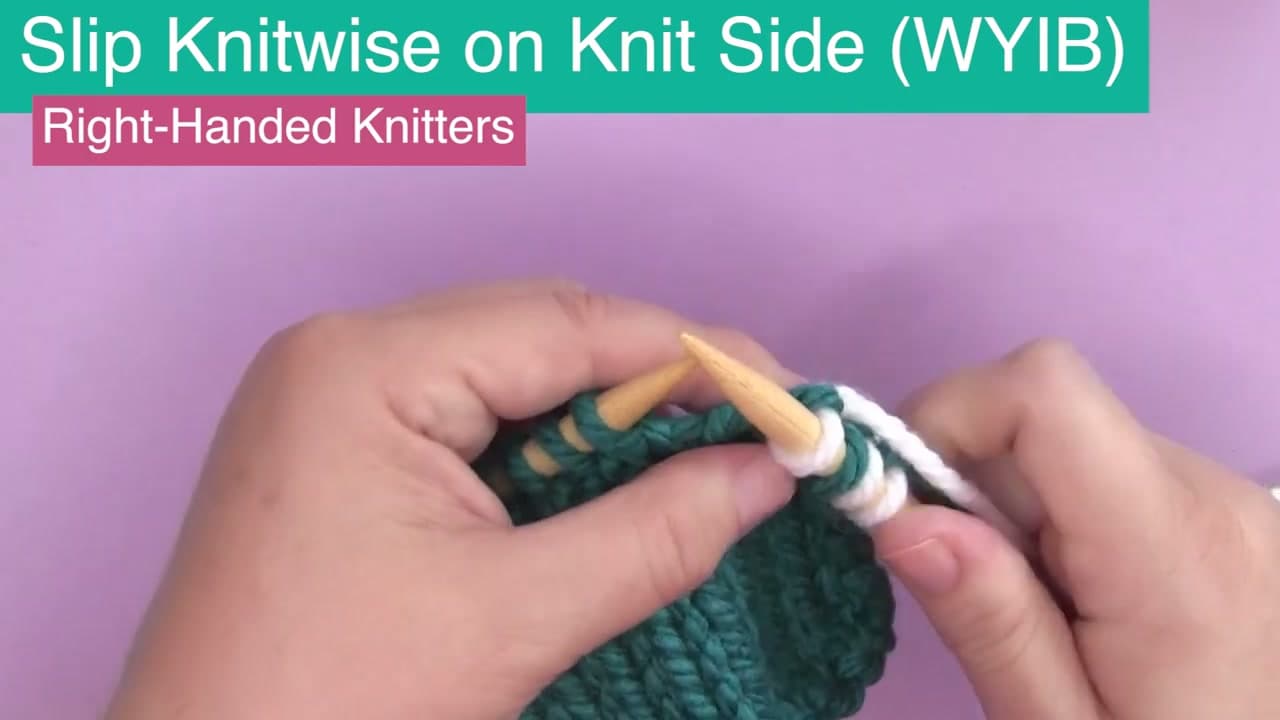
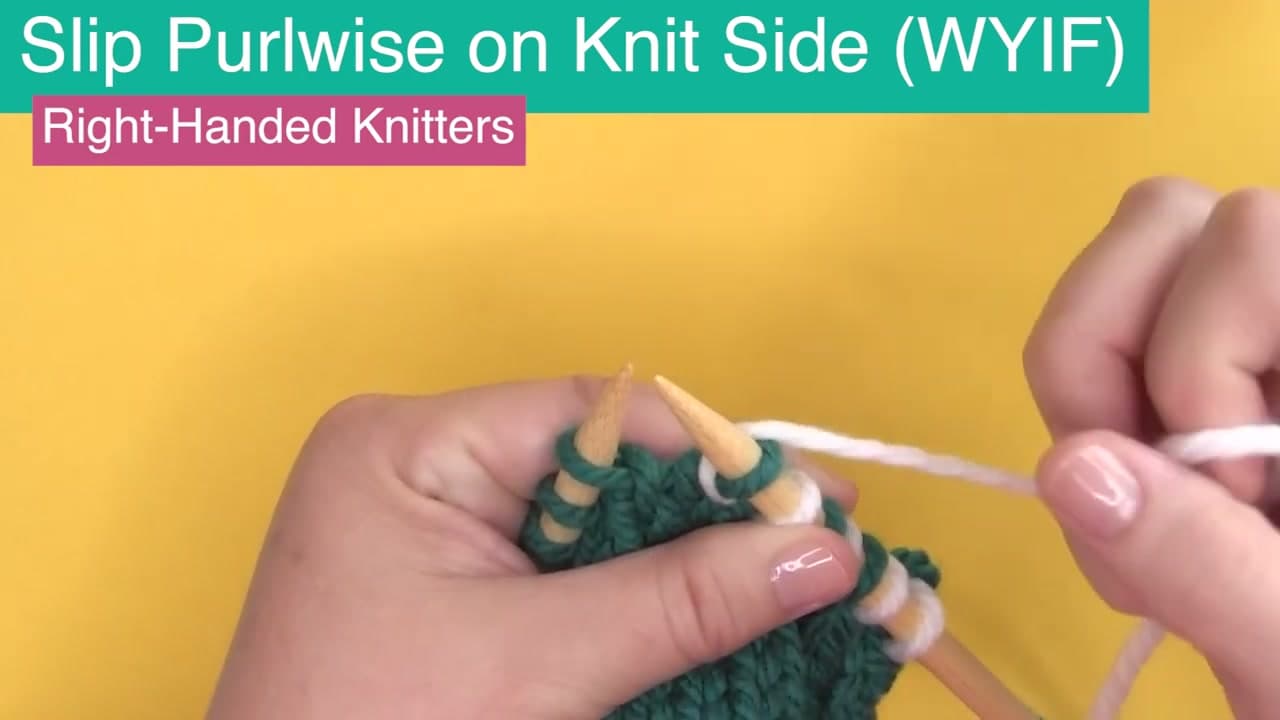
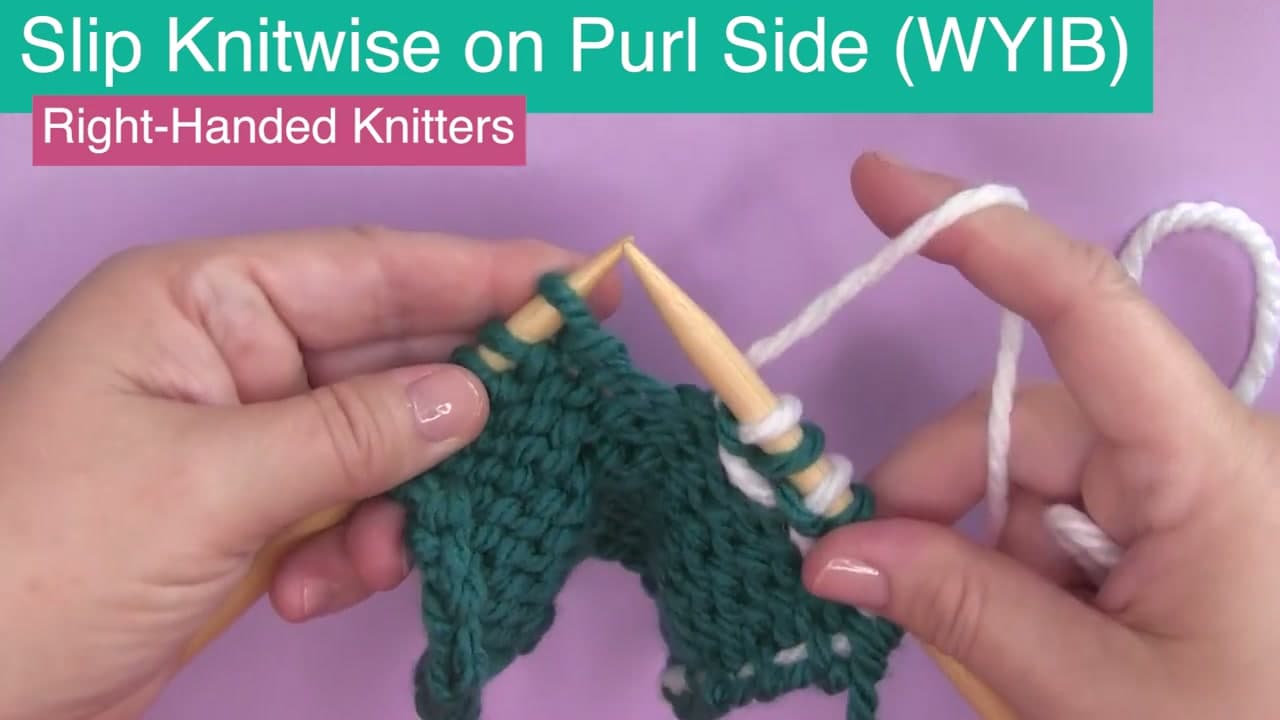
Kristen starts with the rule that saves you every time. A slip stitch means you move the stitch from the left needle to the right needle without working it. Not knit, not purl, just slipped.

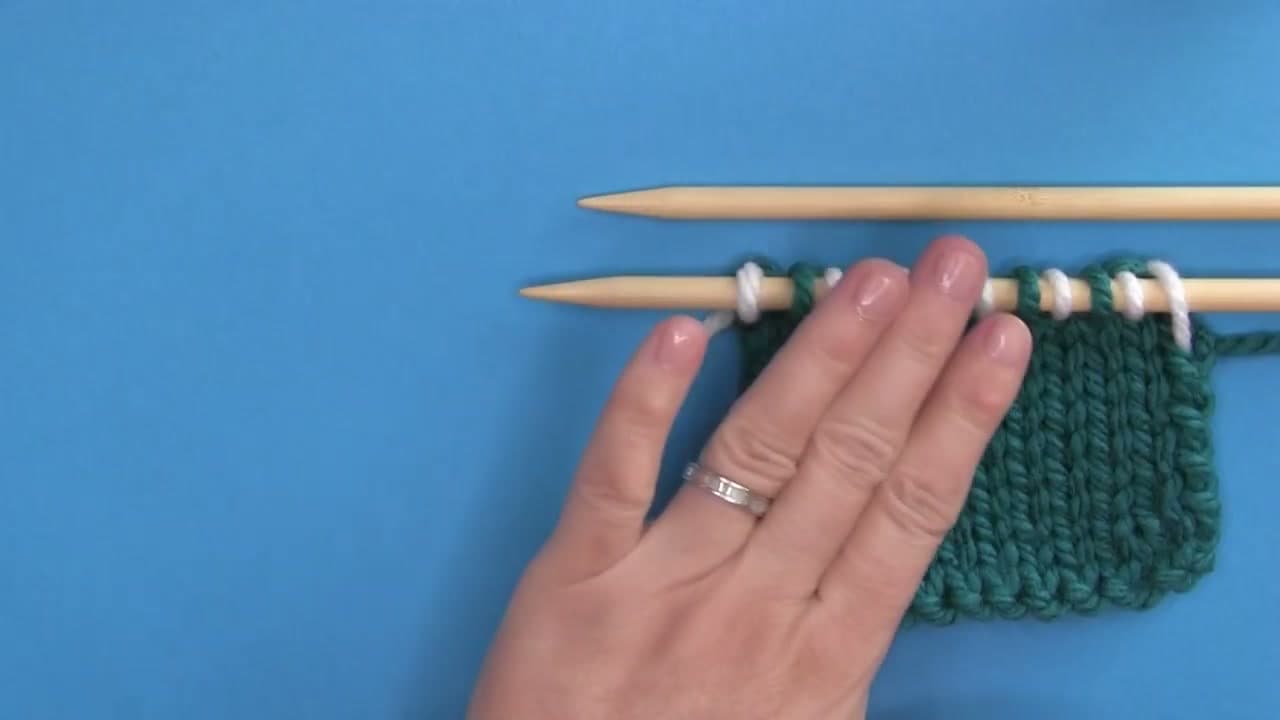
The default is to slip purlwise. So if your pattern says "slip 1" with nothing else next to it, you slip it purlwise. Cast on a small swatch in worsted weight on size 7 (4.5mm) needles and knit a few rows of stockinette before you try it. Having a clean fabric to practice on makes the move easy to see.

Tip

Use two yarns in different colors like Kristen does - one for the working yarn, one already on the needle. The slipped stitch stays the original color, so you can spot every slip you've made and check your work at a glance.

2

Step 2: Slip Purlwise (The Default)

0:55
Step 2: Step 2: Slip Purlwise (The Default)

On the knit side with the yarn in back, insert the right needle into the next stitch as if to purl. That means point to point - the right needle goes in from the right side, sliding under the left needle from front to back. Lift the stitch straight off the left needle onto the right.

You haven't knit it. You haven't purled it. The stitch sits on the right needle untwisted, which is exactly what most patterns want. This is the version you'll use 90% of the time.

Tip

If you ever forget which is which, remember: purlwise looks like you're about to purl the stitch but you don't actually wrap the yarn. Knitwise looks like you're about to knit it. The slip is the same motion, just without working it.

3

Step 3: Slip Knitwise (Twists the Stitch)

3:00
Step 3: Step 3: Slip Knitwise (Twists the Stitch)

Slipping knitwise is the version that twists the stitch. Same setup on the knit side, yarn in back, but this time insert the right needle as if to knit. That's left to right, going through the front of the stitch. Slip it off without wrapping any yarn.

The stitch lands on the right needle with its legs crossed. Patterns only ask for this when they want that twist - usually in textured stitch patterns or as a setup for a decrease like SSK (slip, slip, knit) where the twist is part of the next move.

Tip

If you accidentally slip knitwise on a stitch the pattern wanted purlwise, you'll see a tighter, slightly tilted stitch when you knit it on the next row. Slip the twisted stitch back to the left needle and re-slip it purlwise.

Products used in this step

4

Step 4: Yarn Position - WYIF and WYIB

2:00
Step 4: Step 4: Yarn Position - WYIF and WYIB

Yarn position matters as much as the slip direction. With the yarn in back (WYIB) the slip leaves no float on the public side. With the yarn in front (WYIF) you carry a horizontal bar across the slipped stitch.

That bar is how slip-stitch colorwork and mosaic patterns build their design without ever switching colors mid-row. Bring the yarn between the two needles to move it from back to front, slip the stitch, then move the yarn back if the next stitch needs it. The pattern will always tell you where the yarn lives for each slip.

Tip

WYIF and WYIB are stitch instructions, not row instructions. The yarn can move on every single stitch. Read each slip-stitch line carefully before you start.

Products used in this step

5

Step 5: Slip on the Purl Side

7:30
Step 5: Step 5: Slip on the Purl Side

The same two moves work on the purl side. Slip purlwise on the purl side: insert as if to purl, slip it off. Slip knitwise on the purl side: insert as if to knit, which means coming at the stitch from a different angle than on the knit side, and slip it off.

The yarn-in-front and yarn-in-back rule still controls whether the float bar shows on the public side or the private side. Practice each combination on your swatch and look at both faces of the fabric. That comparison is the fastest way to lock the technique in.

Tip

If your pattern says "slip 1" on a purl-side row, the default still applies - slip it purlwise. Most patterns design their slip-stitch logic from the knit side and just want the slipped column to stay untwisted across both rows.

Products used in this step

6

Step 6: Quick Decision Guide

8:20
Step 6: Step 6: Quick Decision Guide

Quick decision guide.

  • Pattern says "slip 1" with nothing else? Slip purlwise.
  • Pattern specifies "slip 1 knitwise" or "sl1k"? Slip knitwise.
  • Pattern says "with yarn in front" or "wyif"? Move the yarn forward before you slip, then move it back if the next stitch is a knit.
  • Setting up an SSK decrease? Slip both stitches knitwise one at a time.

The most common beginner mistake is slipping knitwise by default. That twists stitches the pattern didn't mean to twist and shows up as a slightly tighter, leaning row in the finished fabric. When in doubt, slip purlwise. You now have everything you need to follow heel turns, slip-stitch edges, and mosaic colorwork patterns.

Tip

Keep this rule on a sticky note near your pattern: purlwise is default, knitwise twists, yarn position decides the float. Three short phrases cover every slip stitch you'll meet for years.

Products used in this step

Products Used

☐ The Checklist

How to Slip Stitch in Knitting (Purlwise vs Knitwise)

Tools
4
Materials
1
Steps
6
Video
9 min

Your Guide

Studio Knit

As an Amazon Associate we earn from qualifying purchases. Links on this page may be affiliate links - clicking them and buying doesn't change your price, but helps support ShowMeStepByStep.

Tags

Related Tutorials