How to Do a Blanket Stitch (Decorative Edging by Hand)
Source: Sarah Homfray Embroidery • Full tutorial: www.craftingstepbystep.com/embroidery/how-to-do-a-blanket-stitch
- Difficulty
- Easy
- Hands-on time
- About 25 minutes

Tools
- embroidery hoop
- embroidery needles
- embroidery scissors
- water-soluble fabric marker
Materials
- embroidery floss
- fabric or felt
Steps
1. Start at the Bottom of the Stitch
Blanket stitch builds along a baseline with little arms standing up from it, so you start at the bottom of where that row will sit. Bring your needle up at the baseline, then stab back down a short diagonal distance away, like reaching for the opposite corner of a small square.
Tip: Watch this step Mark a faint guideline with a water-soluble pen if you want your baseline dead straight. It wipes away with a damp cloth when you are done.

2. Form the Loop and Come Up Inside It
With the needle still down in the fabric, lay the working thread under the tip so it forms a little loop. Now bring the needle up immediately below where you went down and just to the right, catching the corner of that square, and make sure the point comes up inside the loop.
Tip: Watch this step If you lose track of the loop, hold it open with your thumb until the needle is through. A little patience here saves you from picking out stitches later.
3. Pull Down to Shape the Stitch
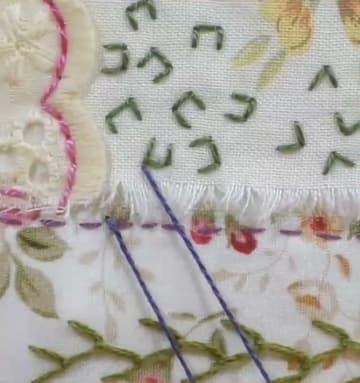
Pull the thread slowly down toward you. As it tightens you will see it form a backward L: a vertical arm coming up from the baseline and a short horizontal bar running along it.
Tip: Watch this step Aim for the same firmness on every pull. Consistent tension matters more than dead-even spacing for a row that reads as neat.

4. Repeat to Build the Row
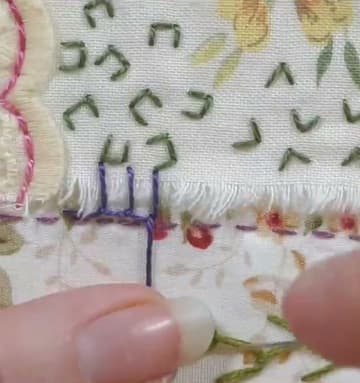
Work the next stitch exactly like the first. Go down into the fabric a short distance along the baseline, loop the thread, come up below inside the loop, and pull.
Tip: Watch this step Keep your stitches evenly spaced by eyeballing the gap against the previous arm. After five or six they start to feel automatic.
5. Vary the Arm Length for a Decorative Edge
You do not have to keep every arm the same height. Alternate a tall stitch with a short one, or work a repeating pattern, and the row turns into a decorative border.
Tip: Watch this step This stitch is the cousin of cross stitch in the beginner toolkit. Learn both and you can edge, outline, and fill almost any small project.

6. Work the Stitch Over a Raw Edge
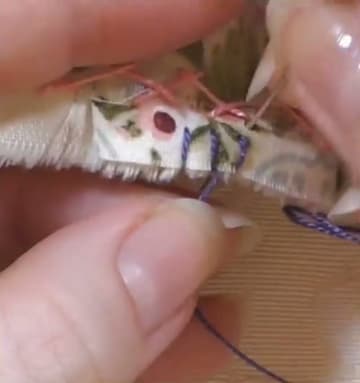
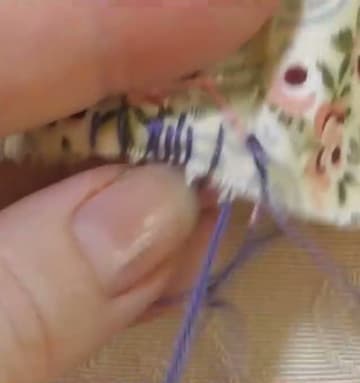
Blanket stitch really shines as an edging. Hold the fabric in your hands or keep it in a hoop, then stab down a little way in from the raw edge and bring the needle through the loop right at the edge itself.
Tip: Watch this step Felt and tightly woven cotton both take this edge well. Looser weaves fray more, so keep your stitches a touch closer together on those.
7. Space It Out, or Pack It Tight for Buttonhole
Spacing is what separates the two stitches in this family. Leave gaps between the arms and you have blanket stitch.
Tip: Watch this step Use blanket stitch for a light decorative edge and buttonhole when you need strength, like binding a buttonhole, a cut applique shape, or a wired three-dimensional...
8. See It on a Finished Piece
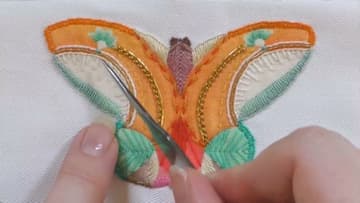
Here is the stitch doing real work. Around this appliqued butterfly, blanket stitch follows every curve and corner cleanly, holding the cut fabric shapes down while adding a decorative outline at the same time.
Tip: Watch this step Try it next on a small felt shape attached to a backing fabric. It is a quick, satisfying first project that shows off the edge to full effect.