How to Crochet the Moss Stitch (Linen Stitch)

The finished result: How to Crochet the Moss Stitch (Linen Stitch)
  • Difficulty: Easy
  • About 30 minutes
  • 9 steps

You tapped Save

Save this project for later

We'll email you a link, no password.

How to Crochet the Moss Stitch (Linen Stitch)

  • Your saved projects in one list
  • Your ticked steps on any device

Check your inbox for an email from us. Not there? Look in your spam folder.

Print

Steps written out by Crafting Step by Step from Ginger Knots' video (opens YouTube) (7:28). Published .

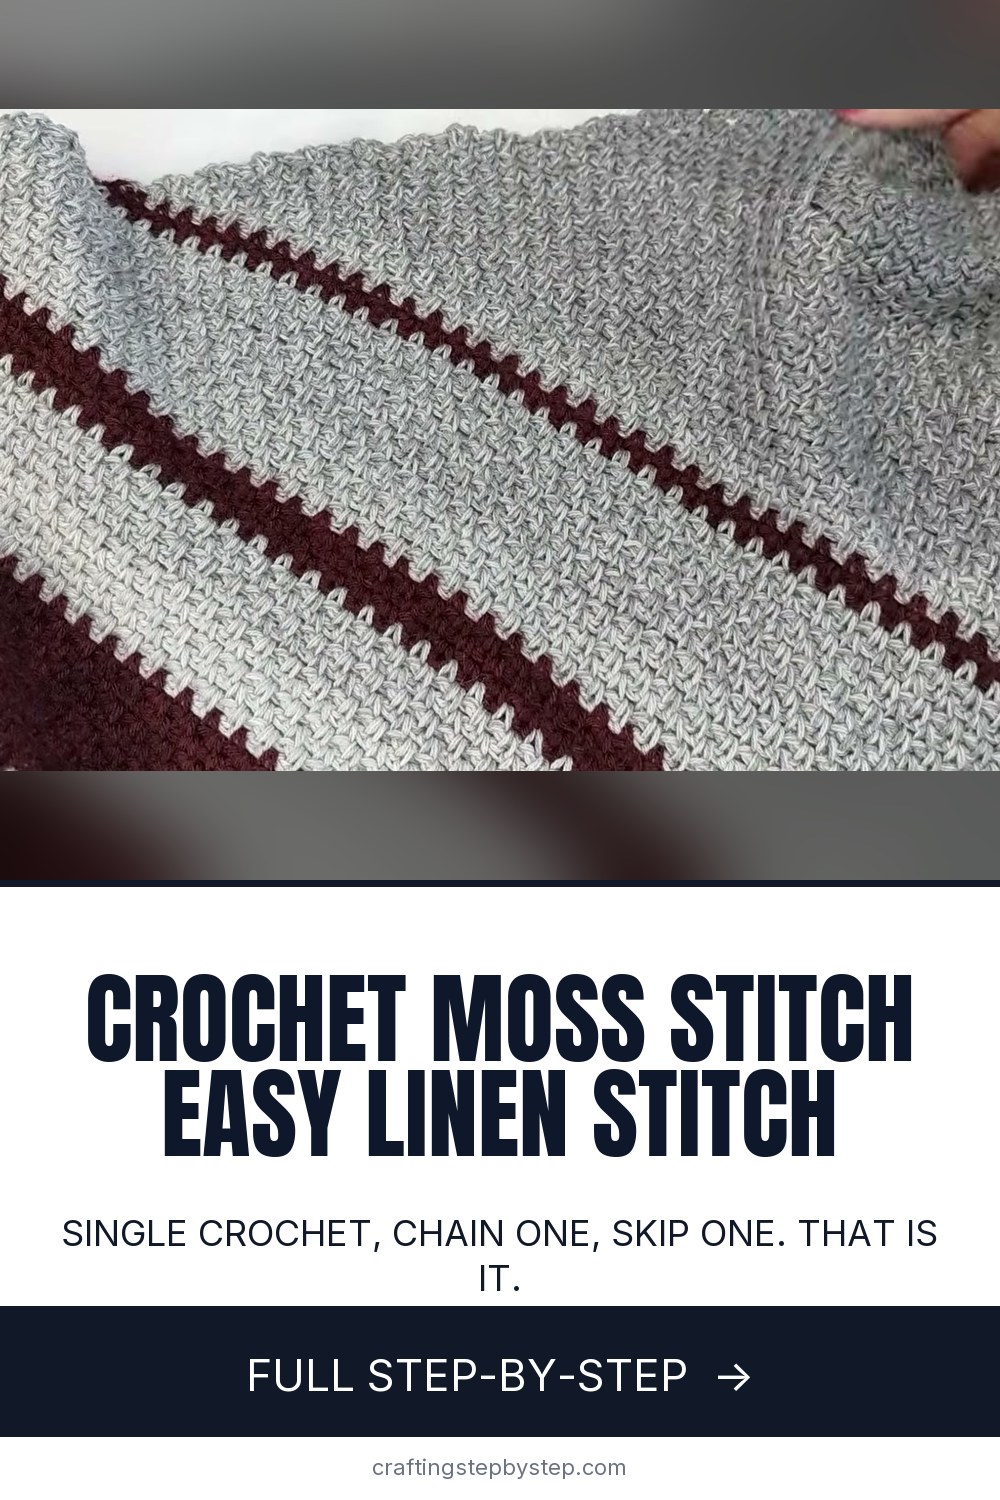
Moss stitch is a single crochet and a chain one, over and over. That is the whole stitch. The result looks woven, almost like knitting, and it lies soft instead of stiff. Ginger of Ginger Knots calls it her favorite stitch and shows it in a jumbo yarn so you can see every loop. You will also hear it called linen stitch, woven stitch or granite stitch. They are the same thing.

What you need

  • Yarn in any weight. Worsted is the easy start.
  • A crochet hook one size bigger than the yarn label suggests
  • A yarn needle for weaving in the ends
  • Scissors

Why use a bigger hook

Moss stitch is short and dense. With the hook size the label suggests, the fabric can come out firm. Go up half a size or a full size and it drapes. Ginger uses a size 3 yarn for her triangle scarf with a larger hook, and the fabric gathers and folds the way a scarf should. For a dishcloth or a bag you want firmer, stay with the label hook.

Moss stitch and color changes

Because each row is so short, color changes blend instead of jumping out. Gradient yarns like Lion Brand Mandala travel from one shade to the next with no hard line. Stripes look crisp and tidy too, which is why the striped blanket in the video works so well. Change color at the end of a row when you chain one and turn.

Counting your chains

Start with an odd number of chains. After the first single crochet row you will have an even number of stitches, and that is what makes every row after it identical. For a baby blanket, try about 101 chains in worsted. For a throw, go to 151. For a scarf, 25 to 35 chains makes a good width.

Moss stitch, knit moss stitch and seed stitch

Knitters have a moss stitch too, and it is a different thing: knit and purl stitches swapped every row. The crochet version only borrows the name because the bumpy texture looks alike. If a pattern says linen stitch or woven stitch, it means this same single crochet and chain one combination. Crochet seed stitch is a cousin that alternates single and double crochet, so it comes out thicker and more textured.

How much yarn moss stitch uses

Moss stitch eats a little less yarn than plain single crochet, because every other stitch is a chain. Plan on roughly the same amount you would buy for a single crochet project, and the fabric will come out lighter.

Moss stitch mistakes to watch for

  • Edges that slant. You lost or added a stitch. Every row should start with a single crochet in the first stitch and end with one in the last.
  • Working into a stitch, not a space. Look for the two little lines on the back of a single crochet. Ginger calls them pants. Go between them, into the hole.
  • Tight fabric. Go up a hook size and relax your yarn hand.

What to make with moss stitch

It suits scarves, blankets, pillow covers, dishcloths and even sweaters. You do not have to count once the first rows are set, so it is a good project to work while you chat or watch TV. If single crochet is new, start with how to single crochet. Then try the stitch in a scarf or a blanket. For stripes, changing colors in crochet shows the neat way to switch yarn.

Free printable

Print the steps and supply list for this project

One page you can take to the table. Free with a free account, no password.

Get the free printable

What you'll need

Free, for this project

Get this checklist by email

  • All 5 tools and materials, with tick boxes
  • A link to print all 9 steps on paper, to keep by you while you craft

No password. The whole tutorial stays free on this page.

Quick answer

Crochet the moss stitch, or linen stitch, in easy steps: single crochet, chain one, skip one. An easy project: about 30 minutes. You need 5 things, including yarn needle, scissors and stitch markers. The 9 steps start with chain an Odd Number for the Moss Stitch Foundation, work a Row of Single Crochet Across the Moss Stitch Chain, chain One and Turn the Moss Stitch Work and chain One and Skip a Stitch in the Moss Stitch Row.

Step-by-step guide

9 steps, about 7 minutes. Tap a picture to jump to that step. Your progress saves automatically.

Tick each step off as you go.

  1. Step 1: Chain an Odd Number for the Moss Stitch Foundation

    Watch this step · 2:10

    Make a slip knot and chain an odd number of stitches. The video uses 9 for a small sample. For a blanket you might chain 101 or 151. The odd number matters. You skip the first chain on the next row, which leaves an even number of stitches, and an even count is what keeps every moss stitch row the same.

    Tip:

    Use jumbo yarn and a big hook for your first sample so you can see each loop.

    Back to all steps

  2. Step 2: Work a Row of Single Crochet Across the Moss Stitch Chain

    Watch this step · 3:08

    Skip the first chain and single crochet into each chain across. To single crochet, insert the hook, yarn over, pull up a loop, yarn over again and pull through both loops. Ginger likes this solid foundation row because it gives the bottom edge of a blanket more structure. Her sample ends with 8 stitches.

    Tip:

    Count your stitches at the end of this row. You want an even number.

    Back to all steps

  3. Step 3: Chain One and Turn the Moss Stitch Work

    Watch this step · 3:22

    Chain one and turn your work. Single crochet into the very first stitch, under both loops, the ones Ginger calls the bunny ears. Every row of moss stitch starts this way from now on. That first single crochet keeps the edge straight and gives the row a firm start before the pattern begins.

    Tip:

    Do not skip the first stitch. Skipping it makes the edge pull in.

    Back to all steps

  4. Step 4: Chain One and Skip a Stitch in the Moss Stitch Row

    Watch this step · 3:42

    Now the pattern begins. Chain one, skip the next stitch and single crochet into the stitch after it. Repeat across the row: chain one, skip one, single crochet. The chain one sits over the stitch you skipped. That little bridge is what gives moss stitch its woven look, row after row.

    Tip:

    Say it out loud for the first row: chain, skip, single.

    Back to all steps

  5. Step 5: Finish the Moss Stitch Row With Two Single Crochets

    Watch this step · 4:10

    When you reach the end, only one stitch is left. There is nothing to skip, so do not chain one. Work a single crochet into that last stitch, so the row ends with two single crochets side by side. This sets up the next row. When you turn, the extra stitch becomes one you can skip.

    Tip:

    Pop a stitch marker in the last stitch if you lose track of the row end.

    Back to all steps

  6. Step 6: Start the Next Moss Stitch Row in the First Stitch

    Watch this step · 4:32

    Chain one and turn. Single crochet into the first stitch, the same as the last row. Then chain one, skip the next stitch and single crochet into the chain-one space from the row below. From here on, every single crochet goes into a space and every chain one sits over a single crochet.

    Tip:

    The single crochets stack in a checkerboard, offset by one each row.

    Back to all steps

  7. Step 7: Tug the Moss Stitch Fabric to Find the Chain-One Spaces

    Watch this step · 4:55

    The spaces can be hard to see, especially in thin yarn. Give the edge of your work a gentle tug upward. The holes open up and show you where to put the hook. Ginger shows this on a finished scarf. It is the most common question she gets about moss stitch, so do not worry if it takes a few rows to see them.

    Tip:

    Lighter yarn colors make the spaces much easier to spot than dark ones.

    Back to all steps

  8. Step 8: Single Crochet Into Each Moss Stitch Chain-One Space

    Watch this step · 5:42

    Insert your hook into the chain-one space, not into a stitch. Look at the back of the single crochets: each one has two little lines that look like a pair of pants. Go between the pants. Single crochet, chain one, skip one, and keep going. At the end, single crochet into the last space and then once more into the final stitch.

    Tip:

    If a row ends with a stitch left over, count back. You missed a space.

    Back to all steps

  9. Step 9: Repeat the Moss Stitch Rows Until Your Piece Is Done

    Watch this step · 6:52

    That is all of it. Chain one, turn, single crochet in the first stitch, then chain one, skip one and single crochet across. Repeat until your piece is the size you want. No counting is needed once the rhythm sets in. Fasten off and weave in the ends with a yarn needle.

    Tip:

    Block the finished piece lightly with steam. Moss stitch relaxes and drapes even better.

    Back to all steps

How to Crochet a Gingerbread Man Ornament

Keep going

How to Crochet a Gingerbread Man Ornament

Keep going with crochet

More on this topic, picked for this moss stitch.

You reached the last step

Save this project to come back to it

Your ticked steps, the free printable and your other saved makes, together in My Projects. Free, no password.

You tapped Save

Save this project for later

We'll email you a link, no password.

How to Crochet the Moss Stitch (Linen Stitch)

  • Your saved projects in one list
  • Your ticked steps on any device

Check your inbox for an email from us. Not there? Look in your spam folder.

Free printable

Printable sheet and shopping list for this project

The bonus is hidden until you sign up.

Free with a free account, no password. Every step above stays open to everyone.

Products Used

The Checklist

How to Crochet the Moss Stitch (Linen Stitch)

Tools
4
Materials
1
Steps
9
Video
7 min

Tools we recommend

As an Amazon Associate we earn from qualifying purchases. Links on this page may be affiliate links - clicking them and buying doesn't change your price, but helps support Crafting Step by Step.

Tags

The Crafter's Weekly

New crochet tutorials, every Sunday

One short email with the week's best step-by-step guides. Free, no spam, unsubscribe anytime.

Did this work for you?

What's next

Related collections

Curated theme pages that include this tutorial.

Similar tutorials

Hand-picked next reads based on the one you just finished.

Liked this crochet tutorial?

Pick the crafts you want to hear about. One email every Sunday with new step-by-step tutorials. No spam, easy to unsubscribe.

Get more like this in your inbox

Weekly digest. Pick the categories you want. Unsubscribe anytime.

Send me tutorials about

We only email about new tutorials. Easy unsubscribe anytime.