How to Crochet an Elephant (Beginner Amigurumi Pattern)

CrochetEasy11:498 stepsBrowse more →

By CraftingStepByStepPublished

Based on a video by hello stitches.

This amigurumi elephant from hello stitches is a great first animal to crochet. It stands on four legs, fits nicely in your hand, and comes together with stitches you probably already know, mostly single crochet, increases, and decreases. The clever part is that the legs and body are worked as one piece, so there's less sewing than you'd expect from a shape like this.

You'll start each leg from a magic ring, join all four into a single base, then build the body up and over the top in a spiral. After the body is stuffed and closed, you make the head, ears, and trunk separately and sew them on. Safety eyes give it that friendly face. If a few of these techniques are new, we've linked out to short guides for the magic ring and for attaching safety eyes so you can follow along at your own pace.

Finished, this little elephant makes a lovely handmade baby-shower or nursery gift, and it works up in an afternoon or two. Grab some grey worsted yarn and a hook, and follow the steps below. hello stitches also has a free written pattern linked under the video if you like reading along while you stitch.

Step-by-Step Guide

1

Step 1: Start the First Leg from a Magic Ring

1:30
Step 1: Step 1: Start the First Leg from a Magic Ring

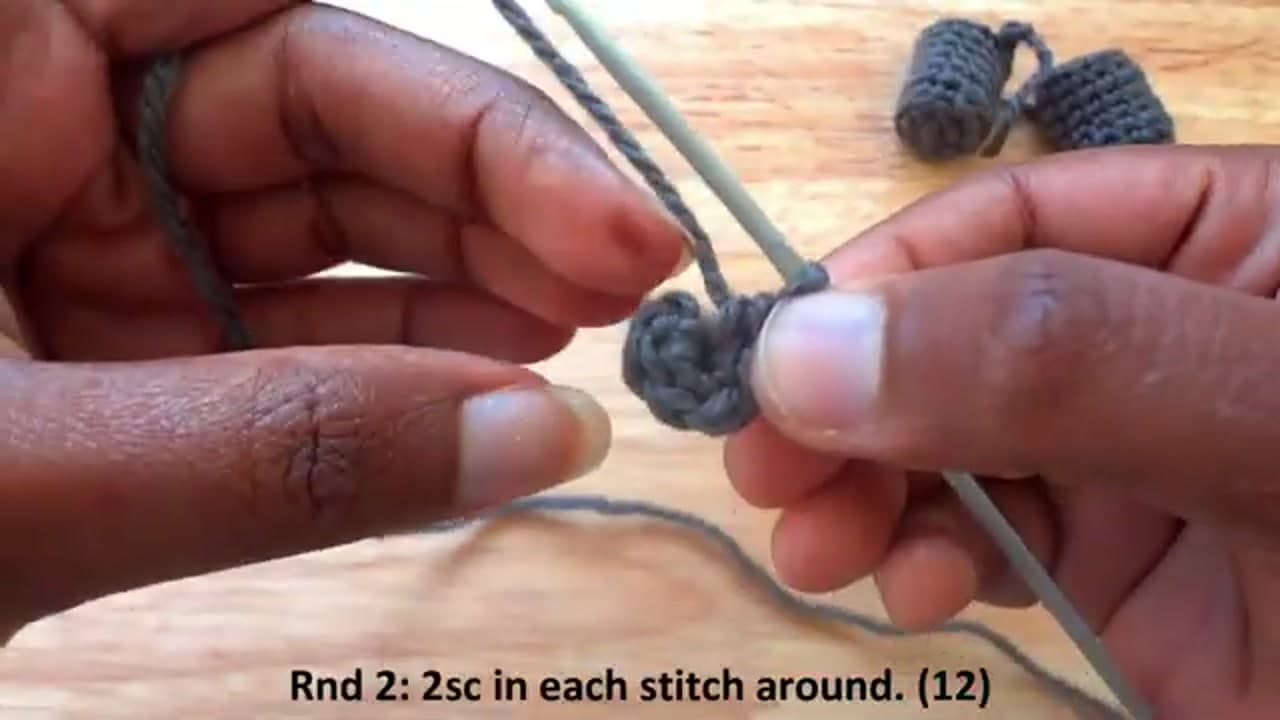
Every amigurumi piece starts the same way, and this elephant is no different. Make a magic ring and work 6 single crochet into it, then pull the ring tight so there's no hole in the center. If the magic ring is new to you, our magic ring guide walks through it slowly.

Round two is 2 single crochet in each stitch, which brings you to 12. Keep working in a continuous spiral to build up the little tube shape of the first leg. Drop a stitch marker in the first stitch of each round so you don't lose your place.

Tip

Watch this step Amigurumi is worked in a spiral, not joined rounds, so the seam stays hidden. A marker in the first stitch is the one habit that saves you from miscounting.
2

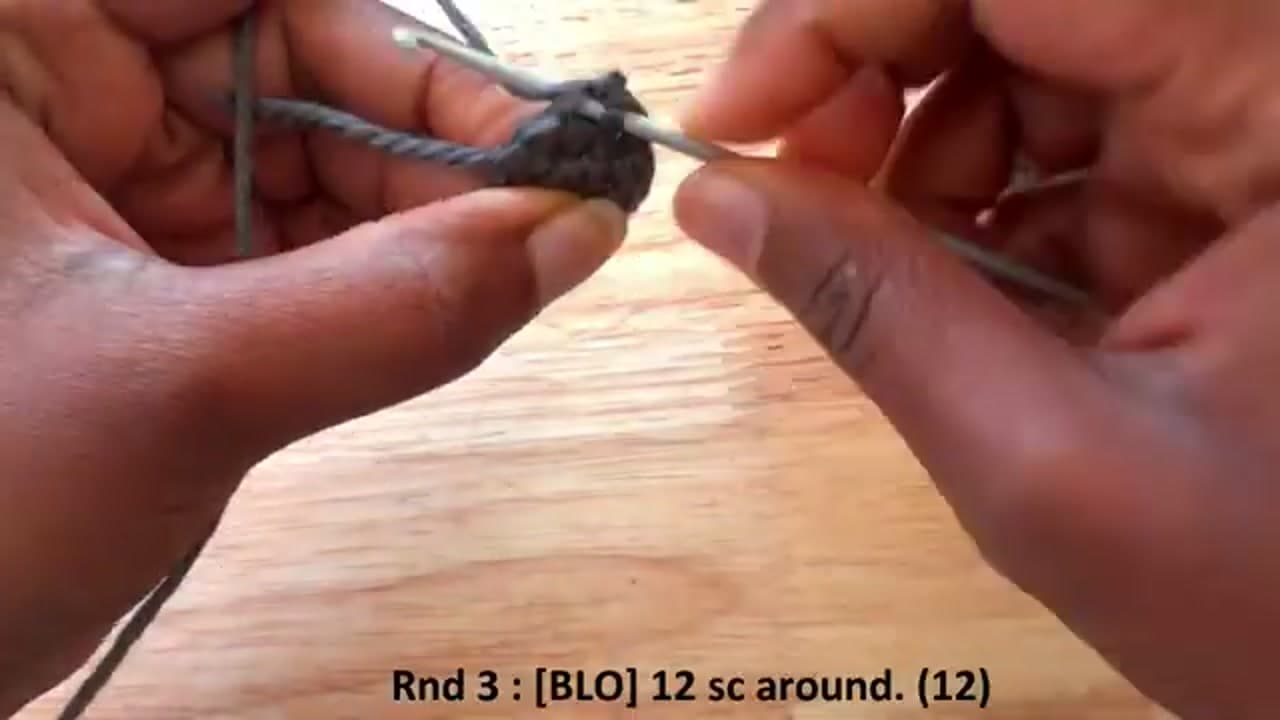
Step 2: Crochet All Four Legs the Same Way

2:30
Step 2: Step 2: Crochet All Four Legs the Same Way

You need four matching legs, so repeat the same little tube four times. Round three is worked in the back loops only, which leaves a small ridge that becomes the foot. After that, single crochet straight up the sides until each leg is the same height.

Fasten off three of the legs and weave the tails in. Leave the fourth leg attached with a long working tail still on the hook, because that's the one you'll use to start joining everything together.

Tip

Watch this step Count the rounds on your first leg and write the number down, then match the other three to it exactly. Uneven legs are the main reason an amigurumi ends up leaning.

3

Step 3: Join the Four Legs Together

6:20
Step 3: Step 3: Join the Four Legs Together

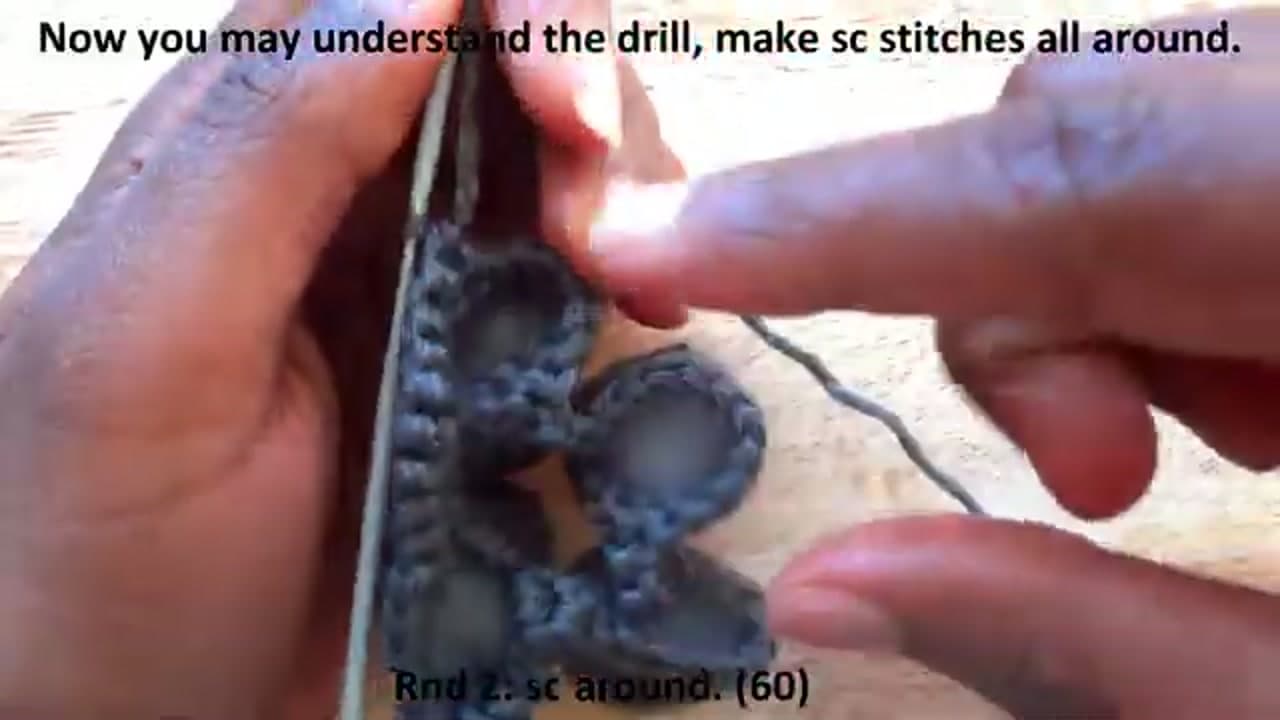
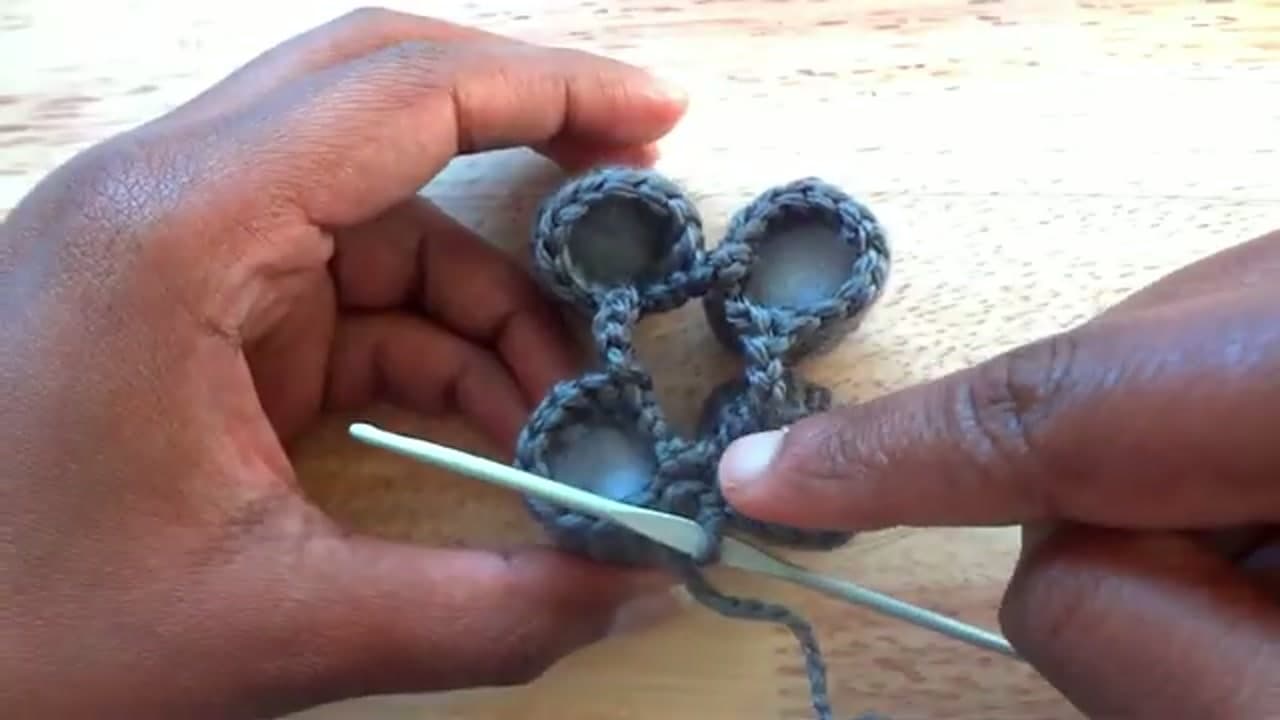
This is the part that makes the standing shape work. With the fourth leg still on your hook, line the legs up in pairs. Work 12 single crochet around the first leg, chain a few stitches to bridge the gap, then 12 single crochet around the next leg.

Keep going until all four legs are connected into one clover-shaped base. It looks a little awkward at this stage, which is completely normal. The gaps between the legs close up as soon as you start working the body over the top.

Tip

Watch this step Keep the toes pointing the same direction as you join so the elephant stands square. If a chain bridge feels loose, snug it up before you crochet the next round over it.

4

Step 4: Work the Body Up from the Legs

8:00
Step 4: Step 4: Work the Body Up from the Legs

Now the shape starts to appear. Single crochet all the way around the top of the joined legs, working across those chain bridges too so the gaps disappear. This first full round lands you around 60 stitches, which is the widest part of the body.

Work a few even rounds here without increasing or decreasing. The body grows up and outward, and you'll start to see the round belly of the elephant take shape as you go.

Tip

Watch this step If you've never worked a shape in the round before, our crocheting in the round tutorial covers the spiral technique this step relies on.

5

Step 5: Shape the Body with Decrease Rounds

8:40
Step 5: Step 5: Shape the Body with Decrease Rounds

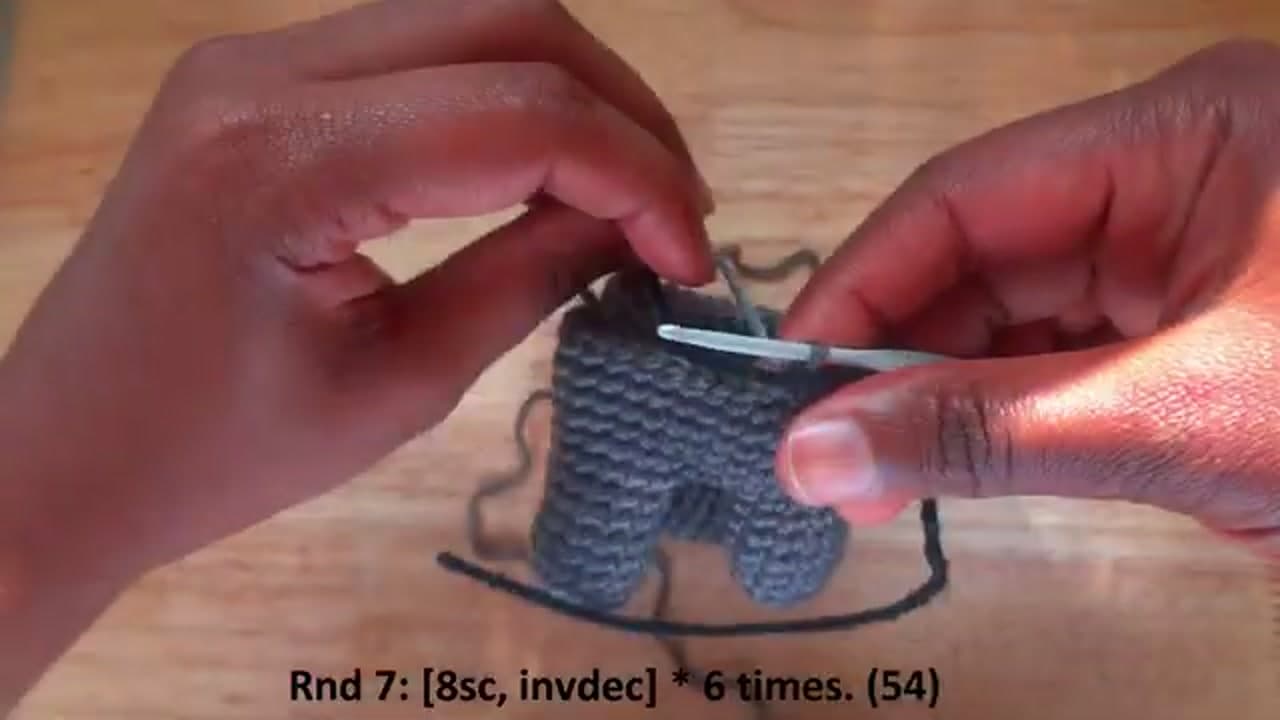
To round off the back and top, you alternate plain rounds with decrease rounds. A typical round reads something like 8 single crochet, then an invisible decrease, repeated around. Each decrease round pulls the body in a little more.

Use the invisible decrease rather than a standard one. It works into the front loops of the next two stitches and leaves a much smoother surface, so the finished body looks tidy instead of lumpy.

Tip

Watch this step The invisible decrease is worth learning once and using forever. Our decrease guide shows the front-loop method that keeps amigurumi smooth.

6

Step 6: Stuff the Body and Close It Up

10:40
Step 6: Step 6: Stuff the Body and Close It Up

Before the opening gets too small, stuff the body firmly with polyester fiberfill. Push small amounts in at a time and work it into the legs and corners with the back of your hook. Firm stuffing holds the shape and keeps the elephant from going floppy over time.

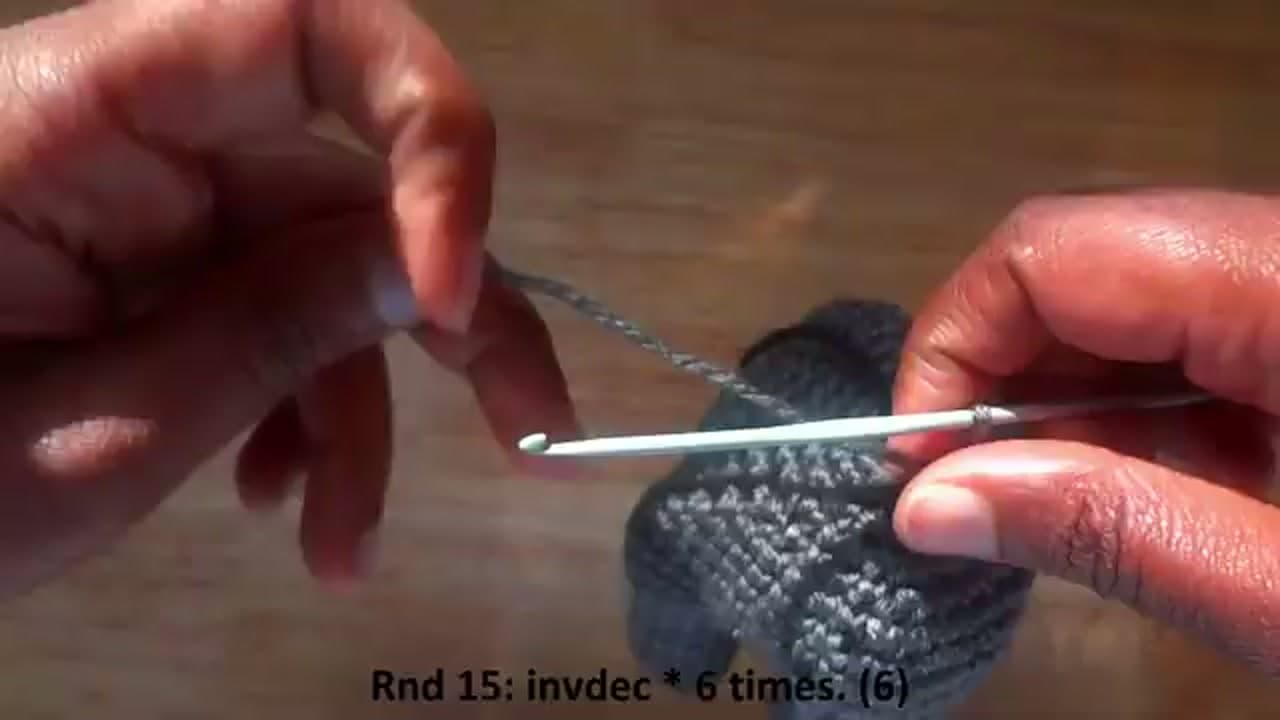
Keep working the decrease rounds until you're down to about 6 stitches. Cut the yarn, thread the tail through those last loops, and pull it tight to cinch the top closed. Weave the end back inside the body to hide it.

Tip

Watch this step Add a little more stuffing than feels right, since it settles. If the stitches start to gap and show white fiberfill, you've gone slightly too far, so ease a bit back out.

7

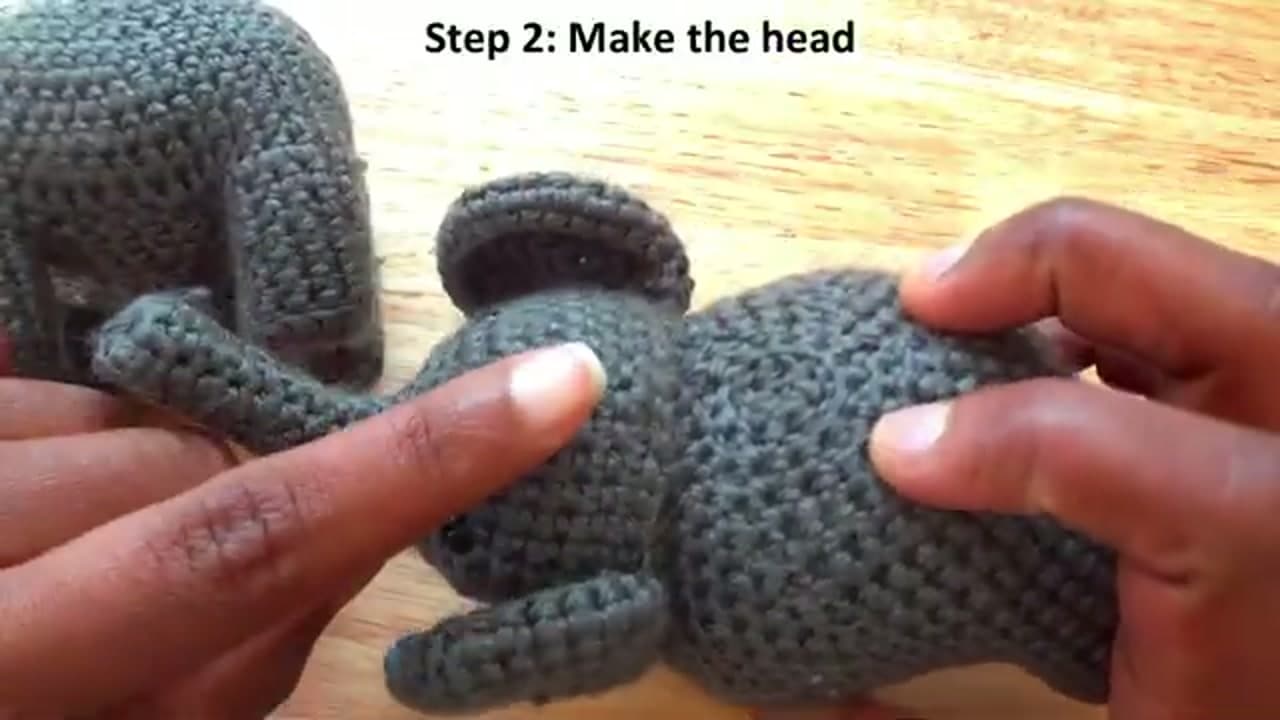
Step 7: Make the Head, Ears, and Trunk

0:37
Step 7: Step 7: Make the Head, Ears, and Trunk

The head, ears, and trunk are worked as separate pieces. The head is a small stuffed ball with the trunk shaped straight off the front, worked in rounds and stuffed lightly so the trunk still bends. The ears are two flat rounded pieces left unstuffed so they lie against the head.

Once each piece is made, hold them up against the body to check placement before you sew anything. Pin the head to the front of the body and set the ears just behind it so the whole thing reads as an elephant.

Tip

Watch this step Stuff the head firmly but leave the trunk soft, so it keeps that gentle curve. Pinning every piece first, before a single stitch, is what gives amigurumi animals a friendly face instead of a lopsided one.

8

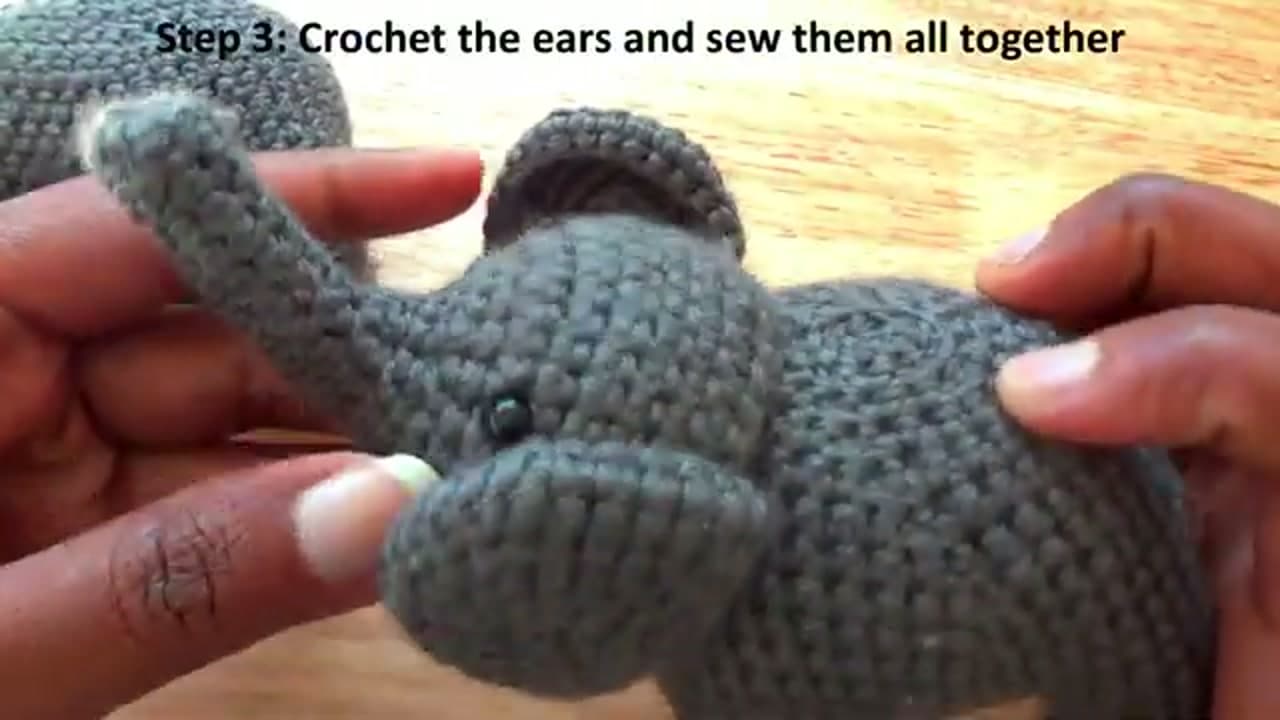
Step 8: Add the Safety Eyes and Sew It Together

0:40
Step 8: Step 8: Add the Safety Eyes and Sew It Together

Position the safety eyes on the head before you sew it on, since you can't reach the backs once everything is closed. Push each post through the fabric and snap the washer on tight. Our safety eyes guide covers spacing so the face looks right.

Thread the long tails onto a tapestry needle and sew the head, ears, and trunk firmly to the body. Go around each piece twice for strength, then weave in every remaining end and trim it close. Your elephant is finished and ready to stand on its own four feet.

Tip

Watch this step Place the eyes low and fairly close together for a cuter, baby-elephant look. If you're gifting this to a small child, embroider the eyes with black yarn instead of using safety eyes.

Products Used

☐ The Checklist

How to Crochet an Elephant (Beginner Amigurumi Pattern)

Tools
4
Materials
4
Steps
8
Video
12 min

Your Guide

hello stitches

As an Amazon Associate we earn from qualifying purchases. Links on this page may be affiliate links - clicking them and buying doesn't change your price, but helps support ShowMeStepByStep.

Tags

Free printable

Get the Crochet Cheat Sheet

Every basic stitch on one printable page. No spam, one-click unsubscribe.

Did this work for you?

What's next

Related collections

Curated theme pages that include this tutorial.

Weekly Digest

Liked this crochet tutorial?

Pick the categories you want to hear about. Weekly digest of new step-by-step tutorials. No spam, easy unsubscribe.

Send me tutorials about

We only email about new tutorials. Easy unsubscribe anytime.