How to Make a Money Lei: 2 Easy Methods for Graduation

Save it for later. We'll email you a link, no password.

Find it again on your phone or computer, with your finished steps ticked.

You tapped Save

Save this project for later

We'll email you a link, no password.

How to Make a Money Lei: 2 Easy Methods for Graduation

  • Your saved projects in one list
  • Your ticked steps on any device

Check your inbox for an email from us. Not there? Look in your spam folder.

  • 11 steps
  • 6:18 video
  • Difficulty: Easy
  • About 20 minutes
  • Materials about $2 to $5
  • Crafts

Based on a video by Press Print Party!

Opens their YouTube channel

Steps written out by Crafting Step by Step · Published · Updated

The finished result: How to Make a Money Lei: 2 Easy Methods for Graduation

Cap-and-gown season is here and you want to hand the new graduate something they will actually use. Cash works. A money lei is how you hand them cash so it shows up at the ceremony, not crumpled in a thank-you card. Drape it around their neck during the family photo and you have done the gift and the prop in one move.

This tutorial walks through two methods from Press Print Party. The first one uses a $1 flower lei from the dollar store as the base - you fold 34 dollar bills, tape one to each plastic separator, and you are done in about 20 minutes. The whole lei costs you about $35 total and looks like a tropical bouquet of cash. The second method uses construction paper in the graduate's school colors and a length of cotton string. It takes longer but stretches your dollar count further and lets you personalize the colors. Pick gold and black for the local high school, garnet and gold for Florida State, maize and blue for Michigan - whatever your graduate is heading toward in the fall.

Both leis are wearable, both photograph well, both cost less than a department store gift card. Decide based on time: the dollar store method if graduation is tomorrow, the paper method if you have a quiet weekend.

For another graduation-friendly handmade gift, the money rose tutorial turns a single $5 bill into a flower you can tape to the lei or hand over separately. If you have leftover construction paper after this project, the paper flowers tutorial uses the same accordion-fold technique on a larger scale.

Free printable

Print the steps and supply list for this project

One page you can take to the table. Free with a free account, no password.

Get the free printable

What you'll need

Free, for this project

Get this checklist by email

  • All 11 tools and materials, with tick boxes
  • A link to print all 11 steps on paper, to keep by you while you craft

No password. The whole tutorial stays free on this page.

Quick answer

Make a money lei for graduation two ways. An easy project: about 20 minutes. Materials cost about $2 to $5. You need 11 things, including 34 one-dollar bills, cellophane or Scotch tape and construction paper in school colors. The 11 steps start with gather Materials for Method 1 - the Dollar Store Lei, fold a Dollar Bill in Half, Three Times, accordion-Fold the Bill and Tape the Center and tape Each Folded Bill Onto a Lei Separator.

Step-by-step guide

11 steps, about 6 minutes. Tap a picture to jump to that step. Your progress saves automatically.

Tick each step off as you go.

  1. Step 1: Gather Materials for Method 1 - the Dollar Store Lei

    Watch this step · 0:22

    For the dollar store method you need three things: a plastic flower lei from a dollar store, a stack of crisp one-dollar bills, and a tape dispenser. Count the plastic separators between the flowers on your lei first. The lei in this video has 34 separators so it needs $34. Smaller leis exist - if yours has 24 separators, grab 24 bills instead. Hit an ATM the day before if you do not already have singles on hand. Crisp bills fold cleaner and the finished fan holds its shape longer.

    Tip:

    Most dollar stores carry flower leis in the party aisle near the luau supplies year-round, not just before graduation. Walmart and Party City stock them too if your local dollar store sells out in May.
    Back to all steps

  2. Step 2: Fold a Dollar Bill in Half, Three Times

    Watch this step · 0:33

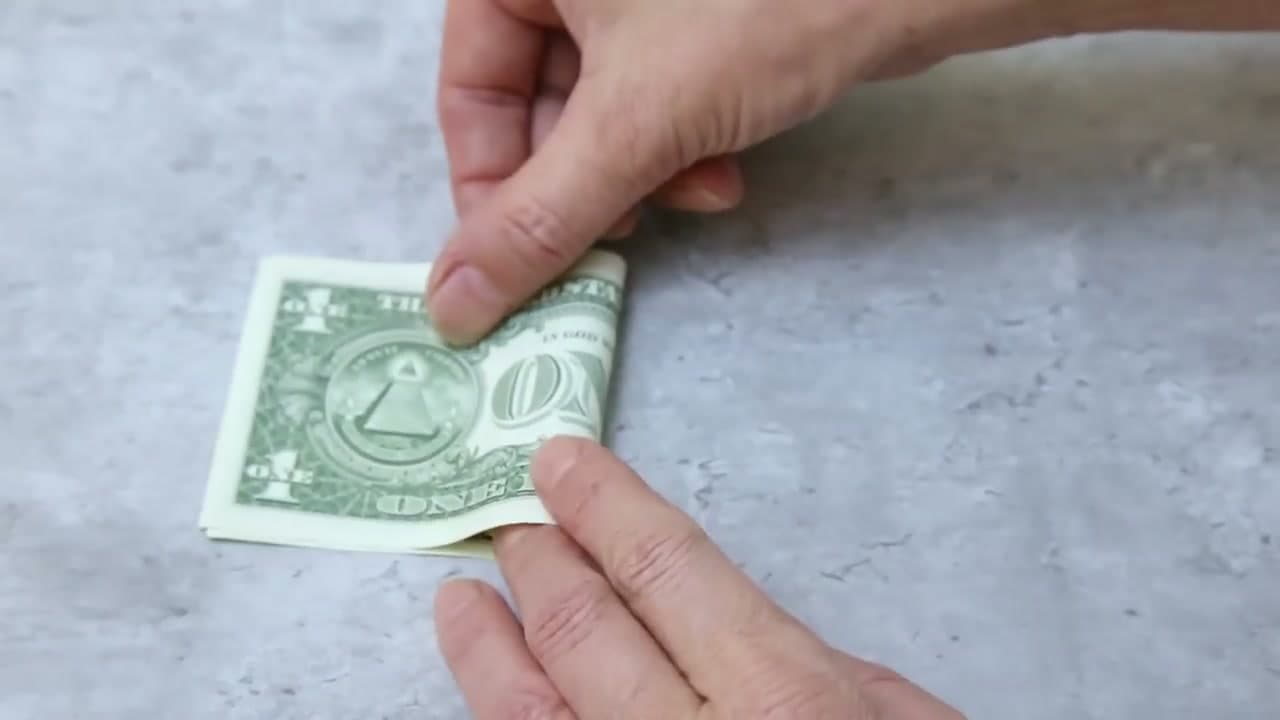
    Take one bill and fold it in half lengthwise, lining up the long edges. Press the crease with your fingernail until it lays flat. Fold in half again the same direction. Then fold in half one more time. Three folds total. The bill is now a thin strip about an inch wide. Sharp creases matter here - they are what give the finished bill its fanned shape later. Open the bill back up. Across George Washington you will see a row of parallel creases ready for the next step.

    Tip:

    If your bills are limp or wrinkled, press them flat under a heavy book for a few hours before folding. Crisp paper holds creases better than tired paper.

    Back to all steps

  3. Step 3: Accordion-Fold the Bill and Tape the Center

    Watch this step · 1:05

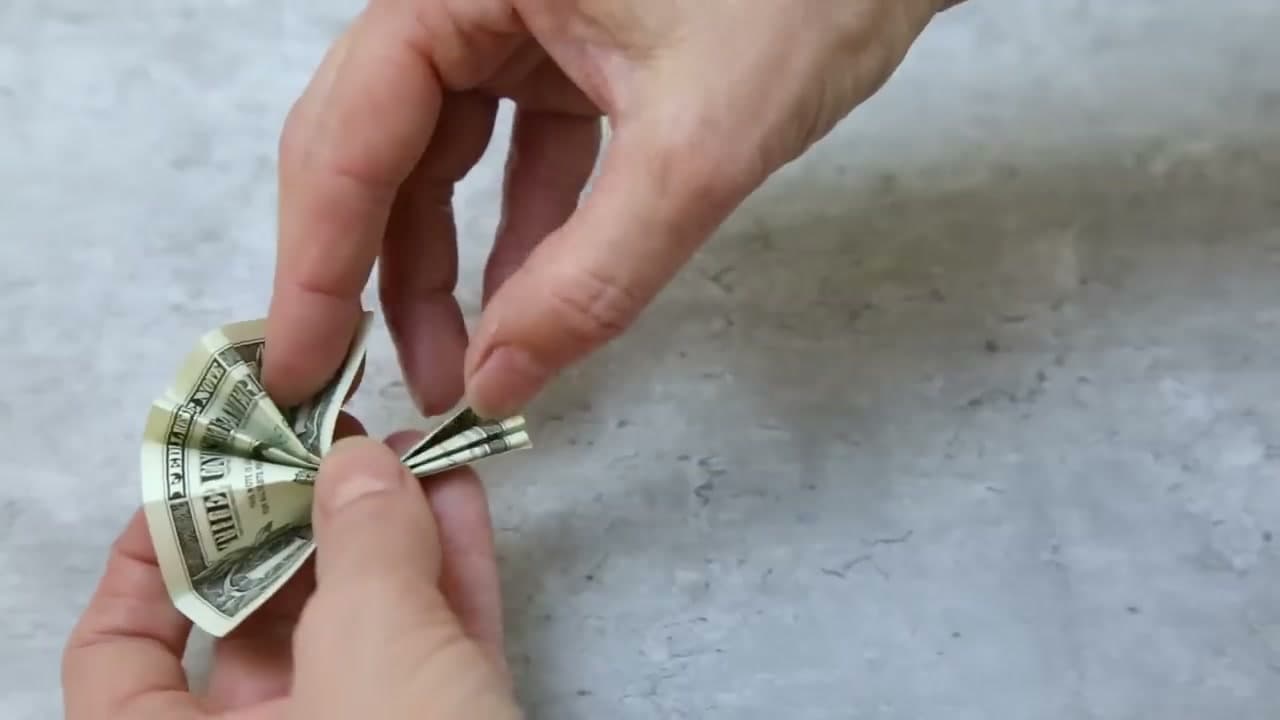
    Open the creased bill flat. Now fold along the existing creases in an accordion pattern: ridge up, ridge down, ridge up, ridge down. Push each crease in the opposite direction from the one next to it. When you are done you have a tight pleated strip that looks like a tiny green fan when squeezed in the middle. Pinch the center to gather the pleats and wrap a small piece of cellophane tape around it to lock the shape. The bill now stays in a bowtie or fan shape on its own. Repeat for all 34 bills.

    Tip:

    Set up an assembly line. Fold all 34 bills first, then accordion-fold all 34, then tape all 34. Batching is faster than completing one bill at a time.

    Back to all steps

  4. Step 4: Tape Each Folded Bill Onto a Lei Separator

    Watch this step · 1:37

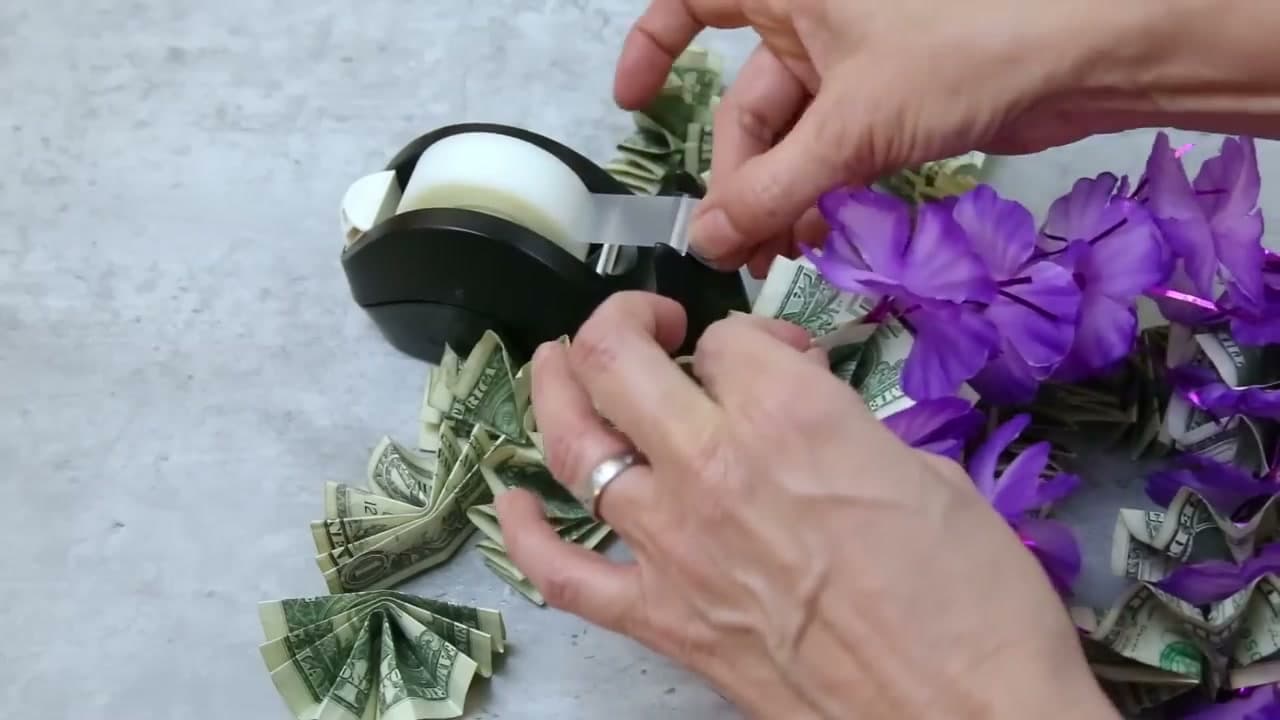
    Pick up the flower lei and find the first plastic separator - the little plastic ring between two flowers that holds them in place on the cord. Take a fan-folded bill, slip the center behind the separator, and bring the two folded ends around to meet in front. Tape the two ends together so the bill wraps around the separator like a green bow. Done. Move to the next separator and repeat. The bill sits like a fanned green flower nestled next to each plastic flower. Work your way all the way around the lei.

    Tip:

    If your tape keeps sticking to your fingers, switch to a tape dispenser with a built-in cutter. The serrated edge gives you small pieces fast.

    Back to all steps

  5. Step 5: Admire the Finished Dollar Store Money Lei

    Watch this step · 1:55

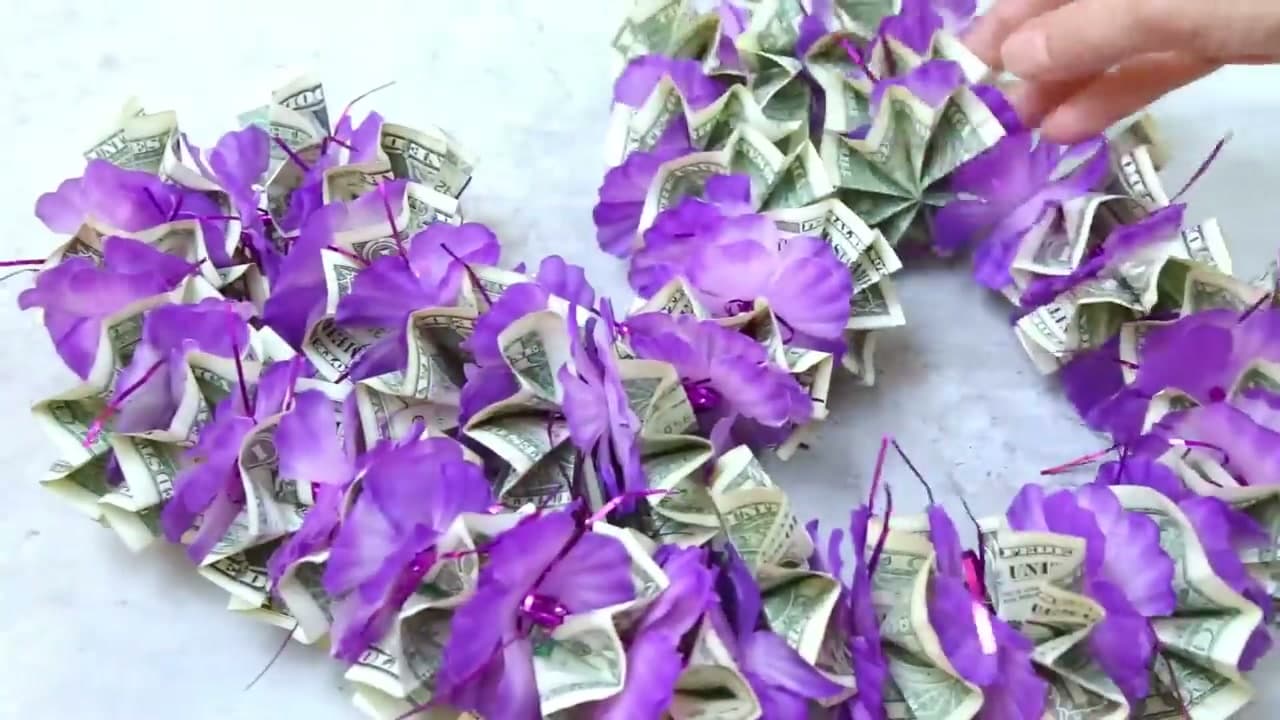
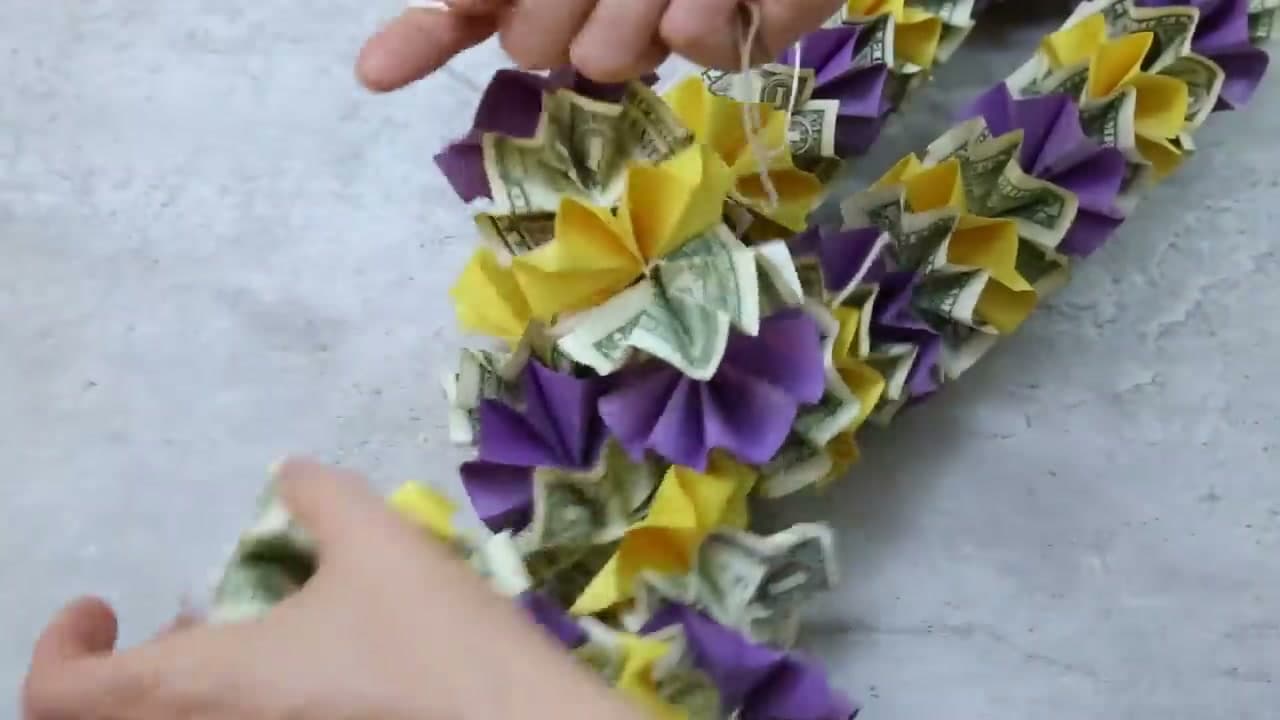
    That is Method 1 done. The fanned bills tuck between the purple flowers and the whole lei looks like a fresh tropical bouquet of cash. Total spend: $34 in bills plus whatever the lei cost at the dollar store (usually $1 to $3). Total time: about 20 minutes once you have a folding rhythm. This is the method to use if graduation is tomorrow morning and you forgot. You can make three of these in an hour if you have multiple graduates in the family.

    Tip:

    Store the finished lei in a gift bag with tissue paper so the fans do not get crushed in transit. A flat clothing box also works.

    Back to all steps

  6. Step 6: Cut Construction Paper Strips for Method 2

    Watch this step · 2:05

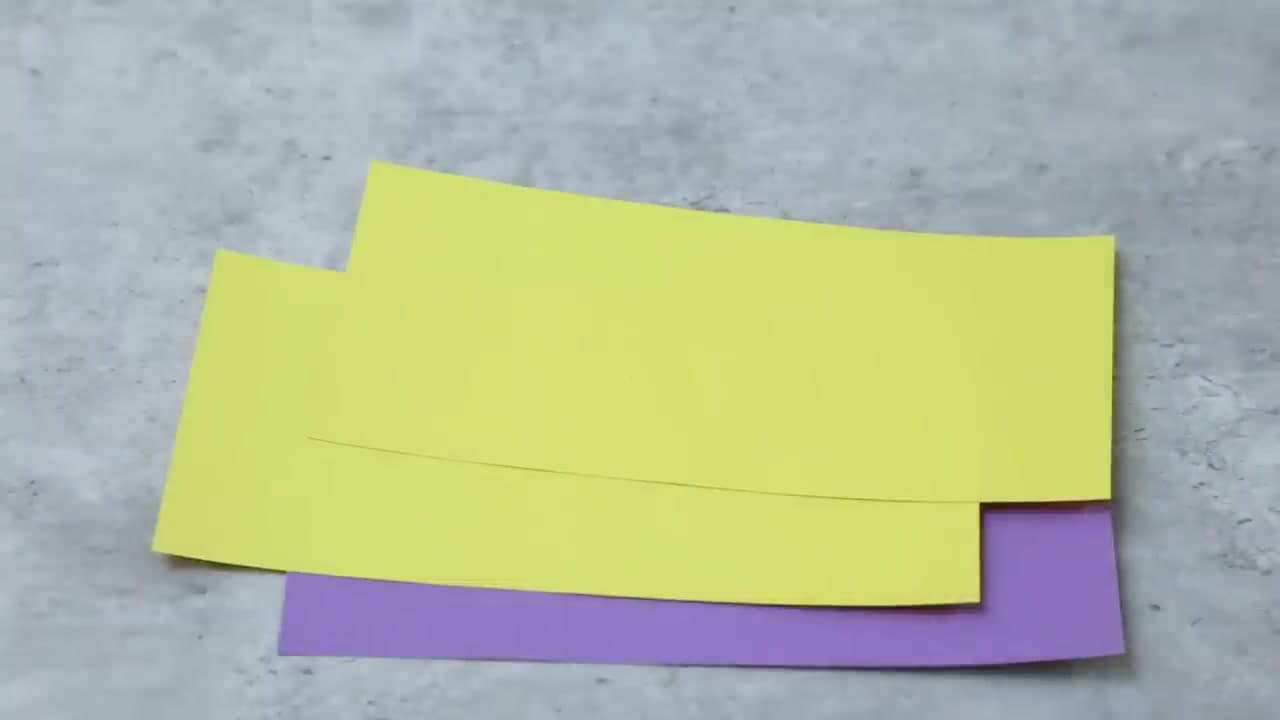
    For the paper lei method, start by cutting construction paper into rectangles the same size as a dollar bill - 6 inches long by 2.5 inches wide. Use a ruler and pencil to mark the cuts, then run scissors or a paper cutter along the lines. Pick two colors that match the graduate's school. Purple and yellow like this video work for LSU or East Carolina. Black and gold for Vanderbilt. Maize and blue for Michigan. Cut at least 24 paper rectangles per lei - 12 of each color if you are alternating. Have the same number of one-dollar bills ready.

    Tip:

    If you do not own a paper cutter, fold the construction paper sheet in thirds lengthwise then in half - you will get six rectangles roughly the right size with two cuts. Trim to dollar bill size afterward.

    Back to all steps

  7. Step 7: Fan-Fold the Paper Rectangles

    Watch this step · 2:28

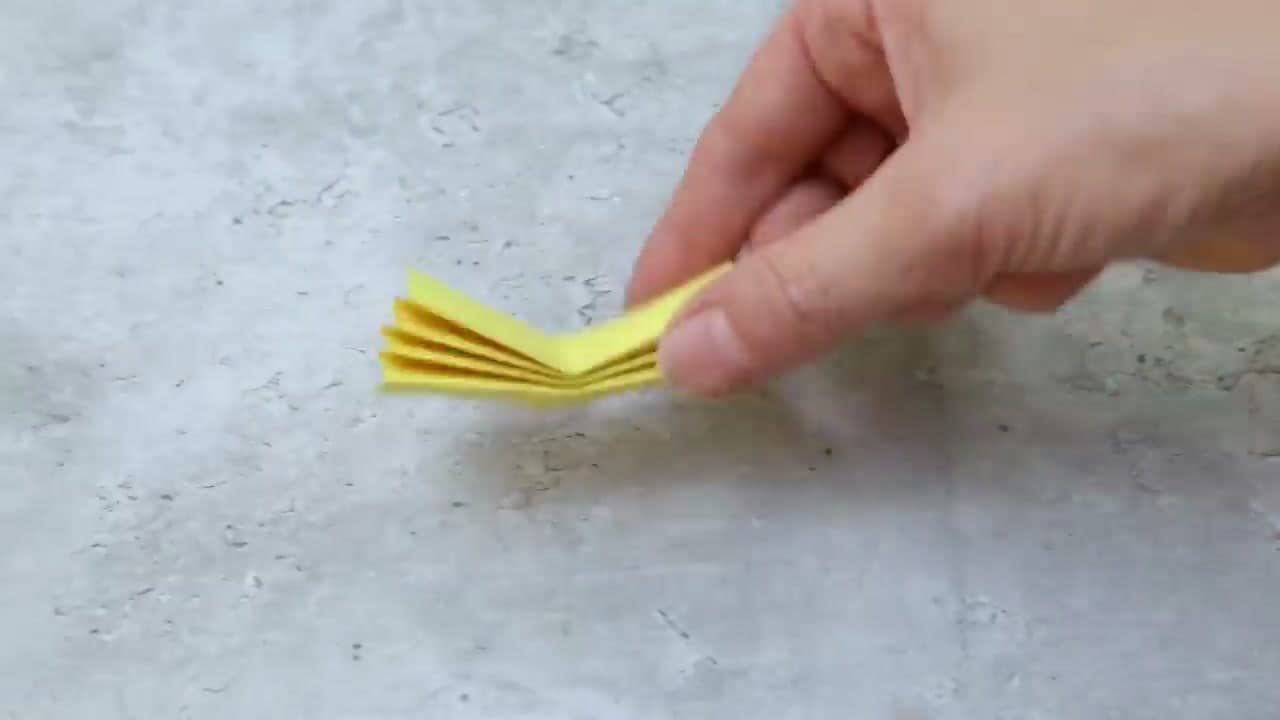
    Fold each paper rectangle exactly like the dollar bills earlier: in half, in half, in half. Then open it back up and accordion-fold along the creases - ridge up, ridge down, all the way across. Do not tape the center this time. The paper stays in a loose fan because in the next step you will gather and secure it with string, not tape. Repeat for every paper rectangle and every dollar bill. You will end up with a pile of loose paper fans alternating with loose bill fans.

    Tip:

    Stiff construction paper holds the accordion shape better than thin printer paper. If you only have copy paper on hand, fold the creases twice to set them deeper.

    Back to all steps

  8. Step 8: Cut and Knot a Length of String

    Watch this step · 2:48

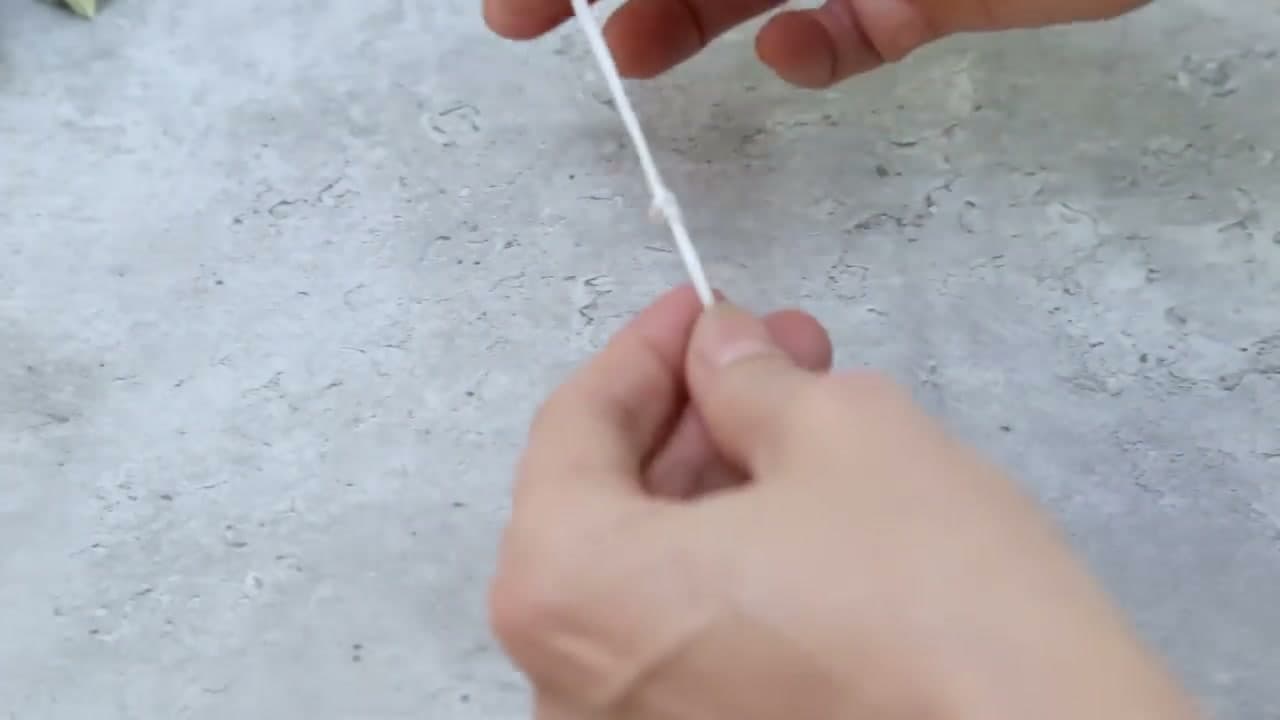
    Measure out 8 feet of cotton string, jute twine, or thin satin ribbon. Cut it. Fold the whole piece in half so you have two parallel strands running side by side. Pinch them about 2 to 3 inches from the folded end and tie an overhand knot. That leaves a small loop at the top you can use to hang the lei or tie off later, and the doubled string below becomes the spine that holds the bills and paper fans together. Pick string strong enough to support 24 bills without snapping at the knots.

    Tip:

    Cotton butcher's twine works well because it grips knots tightly. Slippery ribbon like polyester satin tends to loosen unless you double-knot every connection.

    Back to all steps

  9. Step 9: Thread a Bill onto the String and Tape It Closed

    Watch this step · 3:20

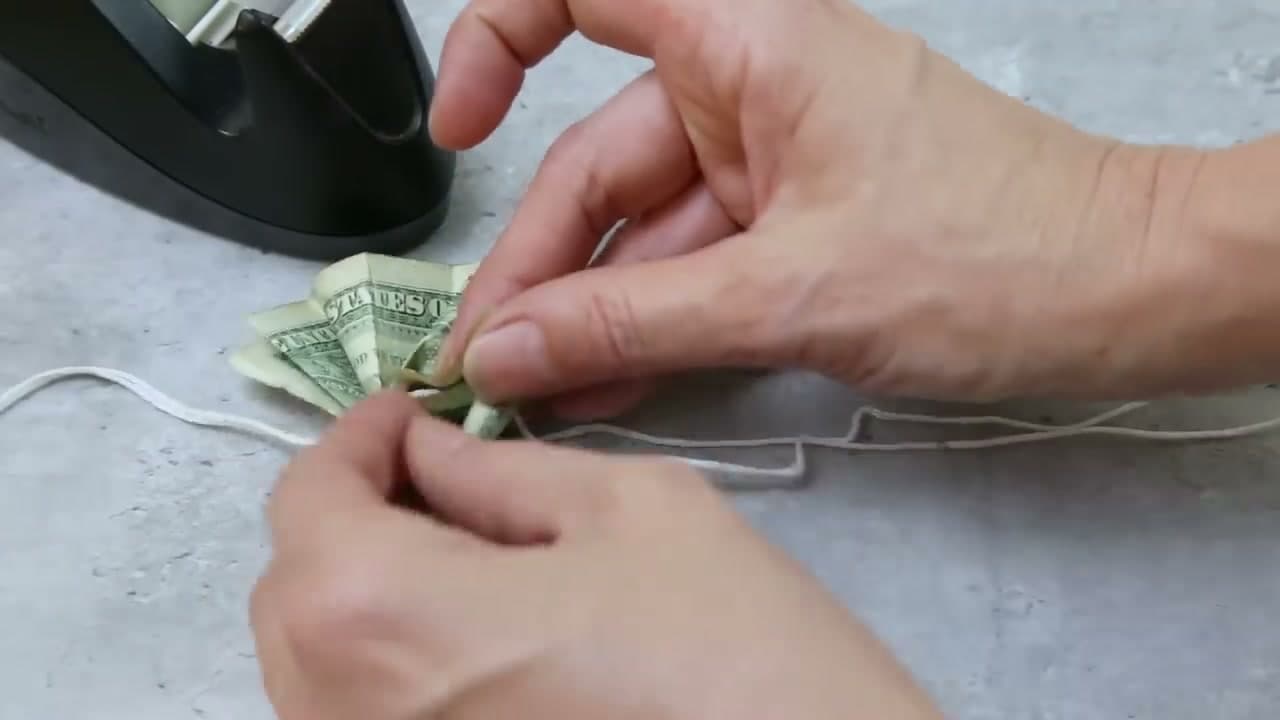
    Slide a fan-folded dollar bill between the two strands of string, lining its center up with the knot you just tied. Fold the two outer ends of the bill toward the front so they meet in the middle, gathering the fan into a tight rosette. Tape the two ends together where they meet. Now bring both strands of string up over the top of the rosette and tie another knot right against the bill. That knot locks the bill in place so it cannot slide around when the graduate wears the lei.

    Tip:

    If your tape will not stick to the bill, blot the bill with a dry cloth first. Hand oils and lotion residue keep tape from gripping paper.

    Back to all steps

  10. Step 10: Alternate Paper Fans and Bills All the Way Around

    Watch this step · 4:20

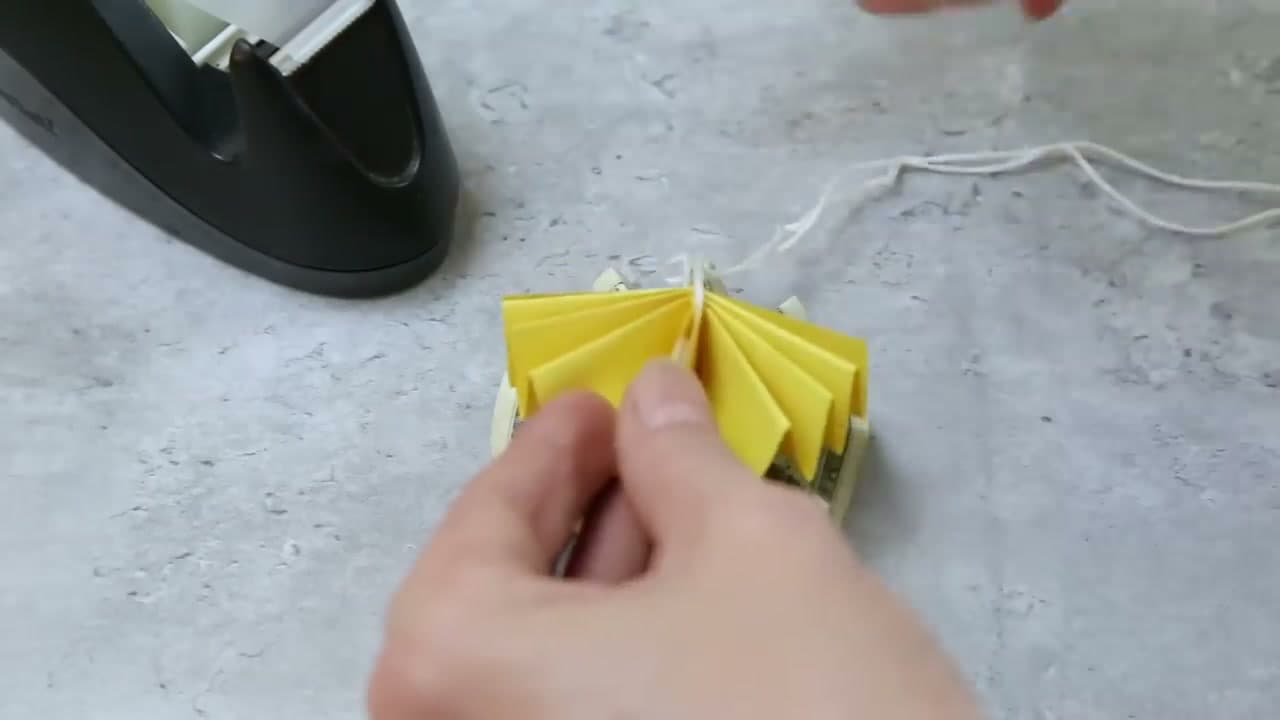
    Add a paper fan the same way you added the bill: slide it between the strings against the last knot, fold the edges in to gather a rosette, tape, then tie a knot above it. Alternate colors as you go - bill, purple paper, bill, yellow paper, bill, purple - so the finished lei has a striped look in school colors. If you want extra sparkle, slide a decorative bead onto the string between every few fans and knot it in. Keep going until you have used all your bills and paper fans, then tie the two free ends together at the back to close the loop.

    Tip:

    Lay out your fans in the planned color sequence before threading. It is faster to grab the next color from a planned line than to fish through a pile mid-build.

    Back to all steps

  11. Step 11: Finished Paper Money Lei in School Colors

    Watch this step · 5:20

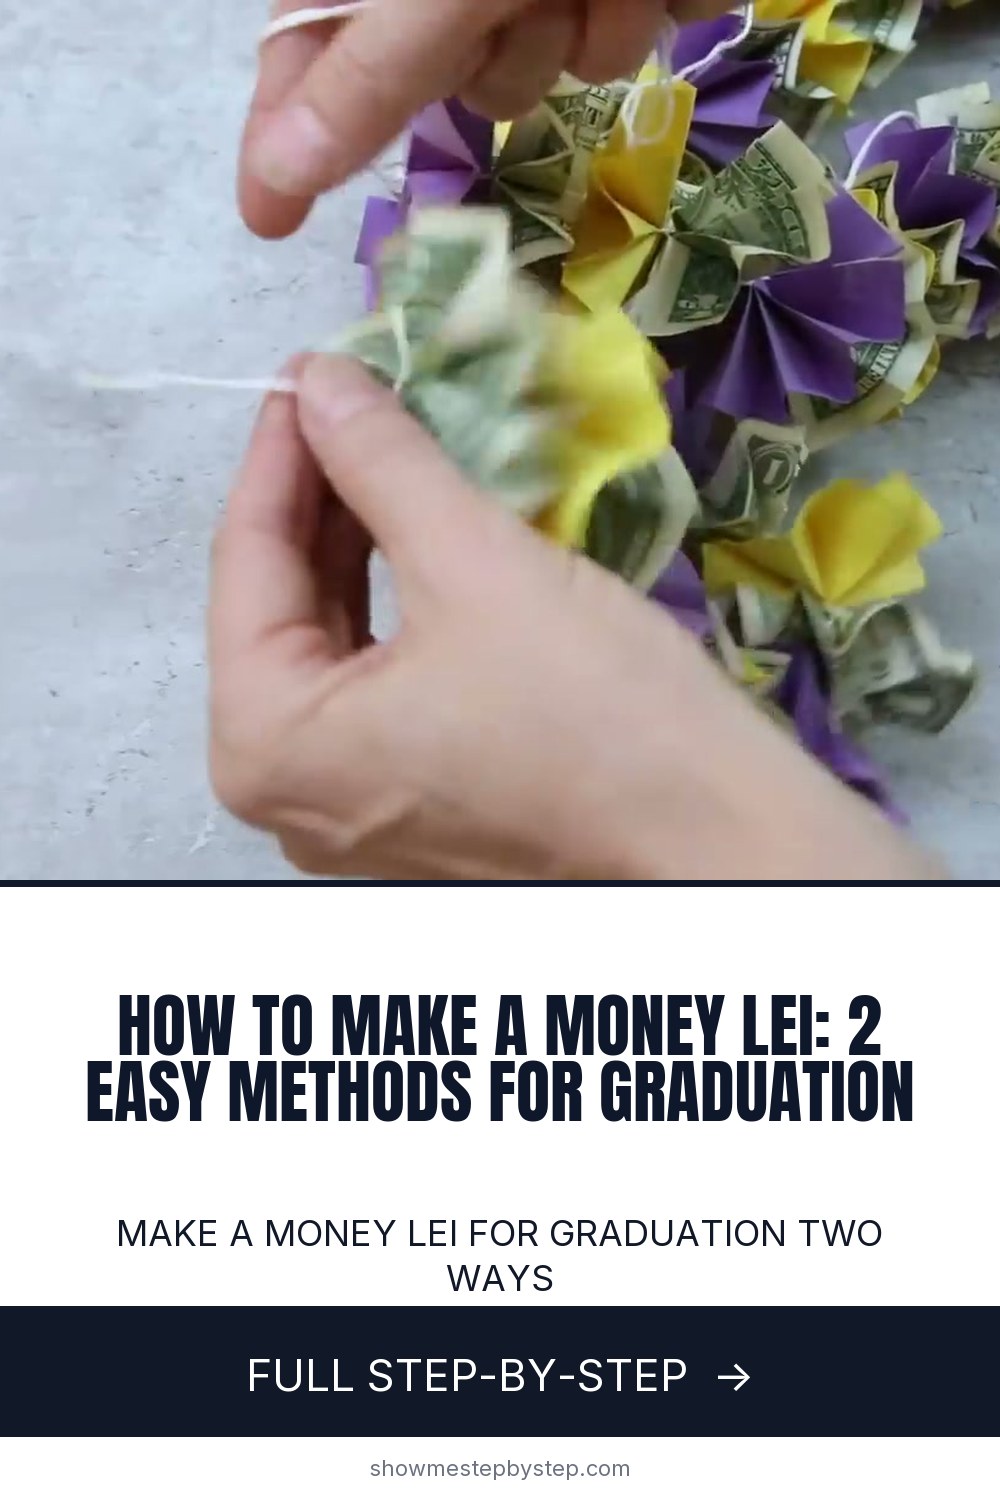
    Method 2 done. The paper fans bulk up the lei so 24 bills look like a much bigger gift than the cash alone, and the school-color paper personalizes it in a way the dollar store version cannot match. Tie the free string ends into a small bow at the back of the neck and the lei is ready to wear. Both methods are valid graduation gifts - the dollar store version is faster to make, the paper version costs less per dollar of visible gift and matches school spirit. Pick whichever fits the graduate, the school, and your weekend.

    Tip:

    Snap a photo of the lei on a hanger or doorknob before gifting it. Once it is around the graduate's neck during the ceremony, you will not have a clean shot of the craft itself.

    Back to all steps

How to Cut SVG Files with Cricut (Upload + Cut Tutorial)

Keep going

How to Cut SVG Files with Cricut (Upload + Cut Tutorial)

You reached the last step

Save this project to come back to it

Your ticked steps, the free printable and your other saved makes, together in My Projects. Free, no password.

You tapped Save

Save this project for later

We'll email you a link, no password.

How to Make a Money Lei: 2 Easy Methods for Graduation

  • Your saved projects in one list
  • Your ticked steps on any device

Check your inbox for an email from us. Not there? Look in your spam folder.

Free printable

Printable sheet for this project

The bonus is hidden until you sign up.

Free with a free account, no password. Every step above stays open to everyone.

Products Used

The Checklist

How to Make a Money Lei: 2 Easy Methods for Graduation

Tools
4
Materials
7
Steps
11
Video
6 min

Tools we recommend

As an Amazon Associate we earn from qualifying purchases. Links on this page may be affiliate links - clicking them and buying doesn't change your price, but helps support Crafting Step by Step.

Tags

The Crafter's Weekly

New crafts tutorials, every Sunday

One short email with the week's best step-by-step guides. Free, no spam, unsubscribe anytime.

Test your knowledge

Did the lesson stick? Start with this one.

5 questions covering what you just read. No signup, no score saved, and you can stop after this one.

Question 1 of 5

How many bills does the dollar-store lei in the video need?

Quick reference

Key takeaways from How to Make a Money Lei: 2 Easy Methods for Graduation

5 questions, answers, and one-line explanations. Tap to expand.

  1. 1.How many bills does the dollar-store lei in the video need?

    Answer: 34 bills

    34 plastic separators between the flowers means 34 bills. Count yours first - smaller leis use 24.

  2. 2.How many half-folds give the bill its fan creases?

    Answer: Three folds

    Three folds: in half lengthwise, in half again, in half once more. The crease pattern is what makes the accordion fan later.

  3. 3.What knot starts the Method 2 paper lei?

    Answer: Overhand knot

    Fold the 8-foot string in half and tie an overhand knot 2-3 inches from the folded end. That loop becomes the spine.

  4. 4.How long is the string for Method 2?

    Answer: 8 feet

    8 feet of cotton string, jute twine, or thin satin ribbon. Folded in half it gives the doubled spine that holds 24 bills.

  5. 5.How to store the finished lei so it survives transport?

    Answer: Gift bag with tissue

    Gift bag with tissue paper, or a flat clothing box. Both let the fans keep their shape - sealed bags crush them.

Did this work for you?

What's next

Related collections

Curated theme pages that include this tutorial.

Similar tutorials

Hand-picked next reads based on the one you just finished.

Liked this crafts tutorial?

Pick the crafts you want to hear about. One email every Sunday with new step-by-step tutorials. No spam, easy to unsubscribe.

Get more like this in your inbox

Weekly digest. Pick the categories you want. Unsubscribe anytime.

Send me tutorials about

We only email about new tutorials. Easy unsubscribe anytime.