How to Sew on a Patch

SewingEasy7:116 steps
Also in:Crafts

By CraftingStepByStepPublished Updated

Based on a video by Sew Anastasia.

Iron-on patches peel off in the wash. Glue cracks and turns yellow after a year. Hand-sewing is the only attachment that actually lasts, and it takes about ten minutes once you know the running stitch.

This walkthrough from Anastasia of Sew Anastasia uses just a needle, thread, and pins. The running stitch is the simplest hand stitch in existence - down through the fabric, up through the patch, repeat. Once you've sewn one, you can sew them onto anything: a denim jacket, canvas backpack, sweatshirt, hat, jeans.

Patches with rough backing are tougher to push a needle through, so a thimble helps a lot. If you're sewing onto thick denim or canvas, doubled thread keeps the stitches strong over time.

Step-by-Step Guide

1

Step 1: Position and pin the patch

1:40
Step 1: Step 1: Position and pin the patch

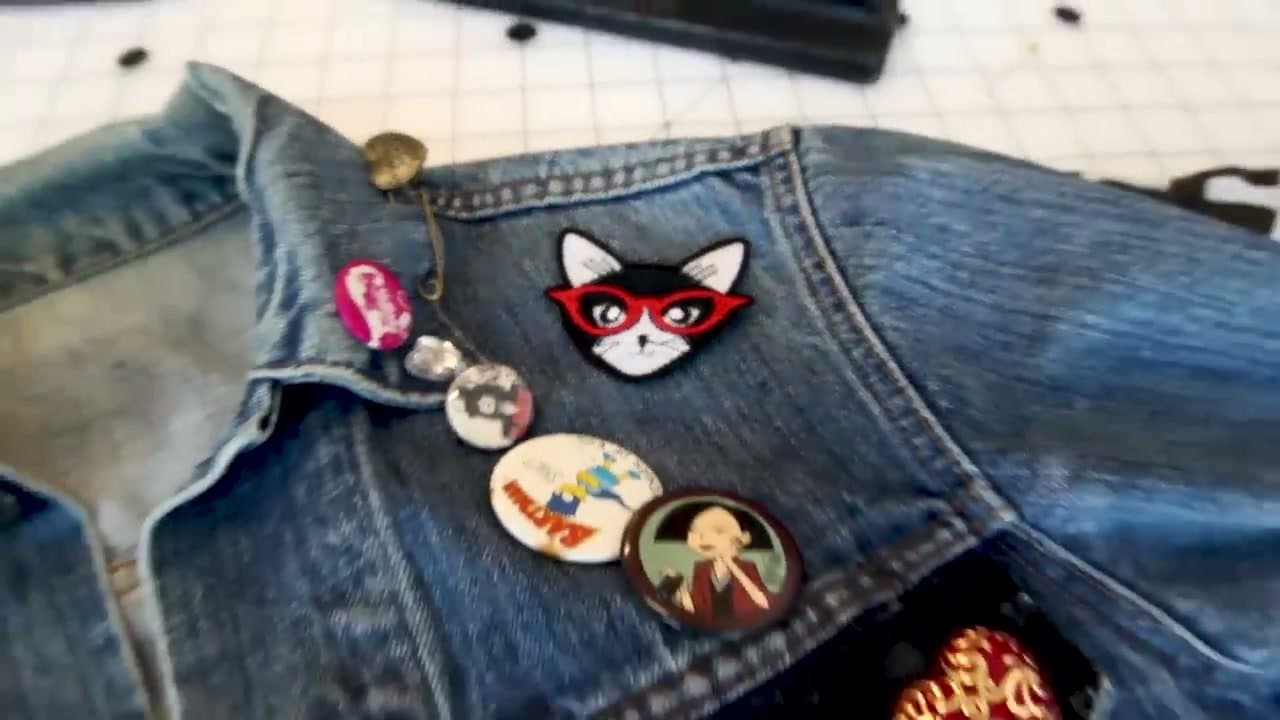
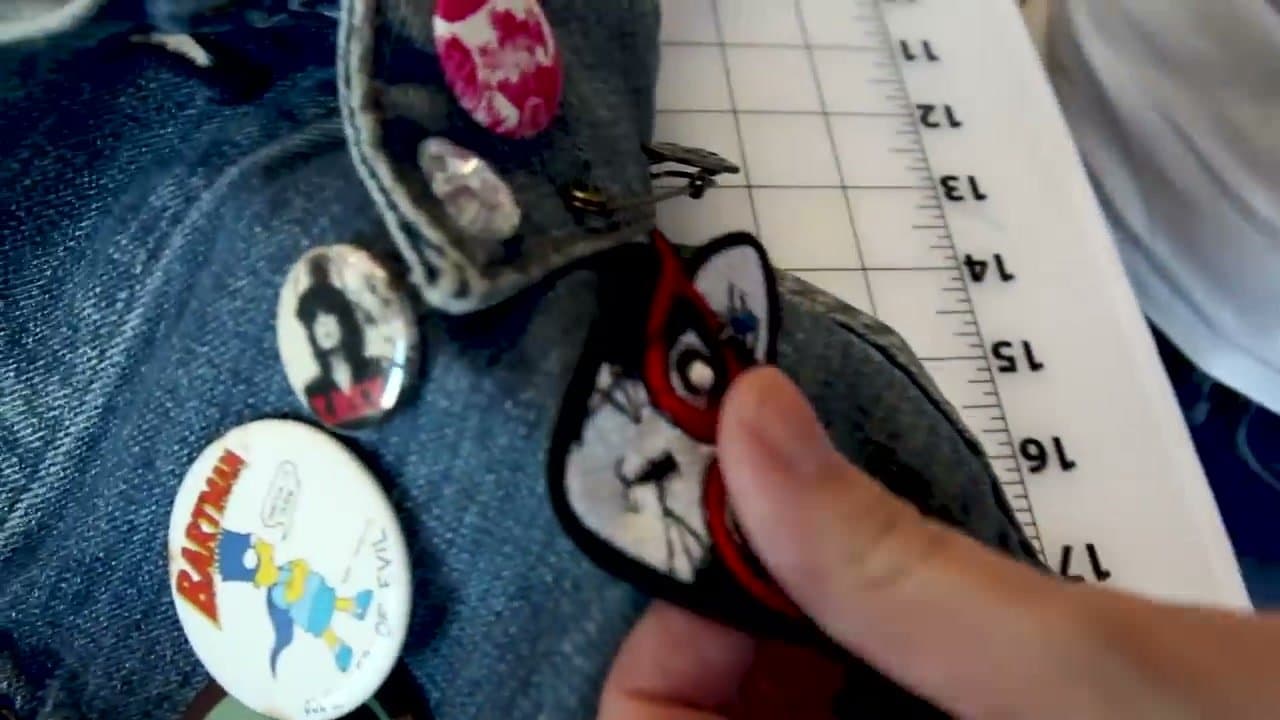
Lay the garment flat on a table and place the patch where you want it to live. Look at the spot from a few feet back to make sure the placement reads right - patches usually look smaller from a distance than you expect.

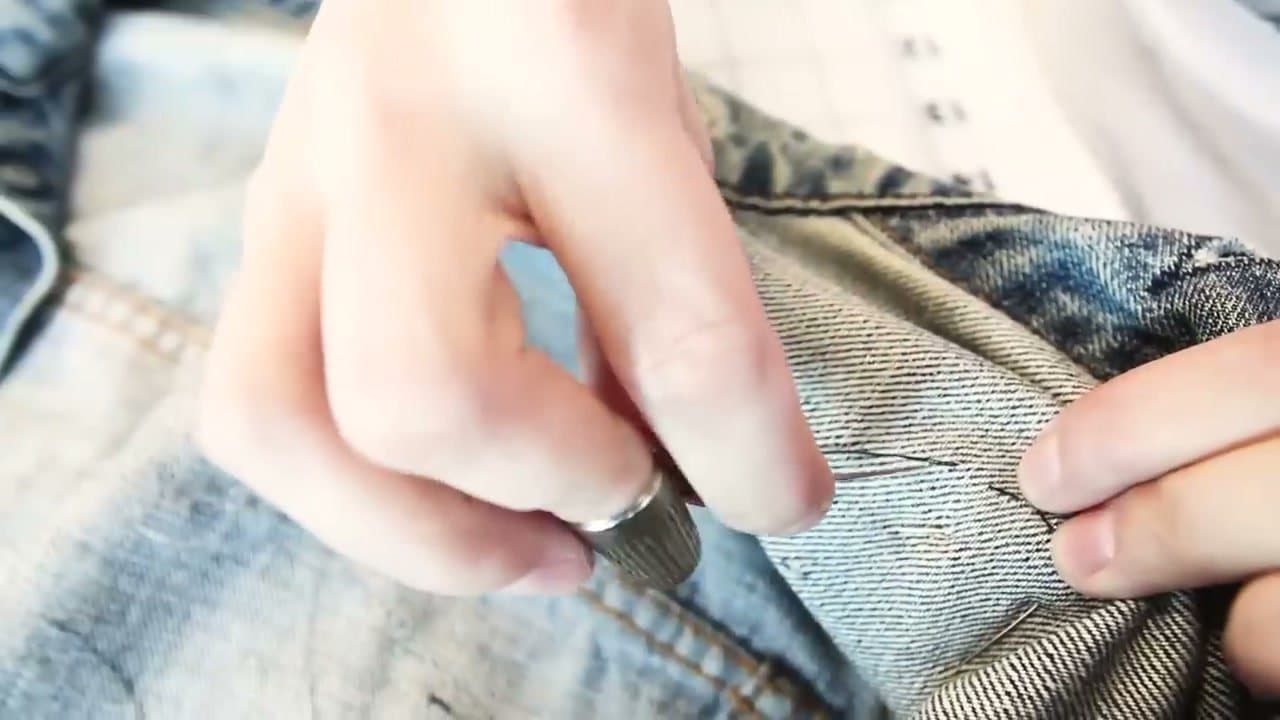
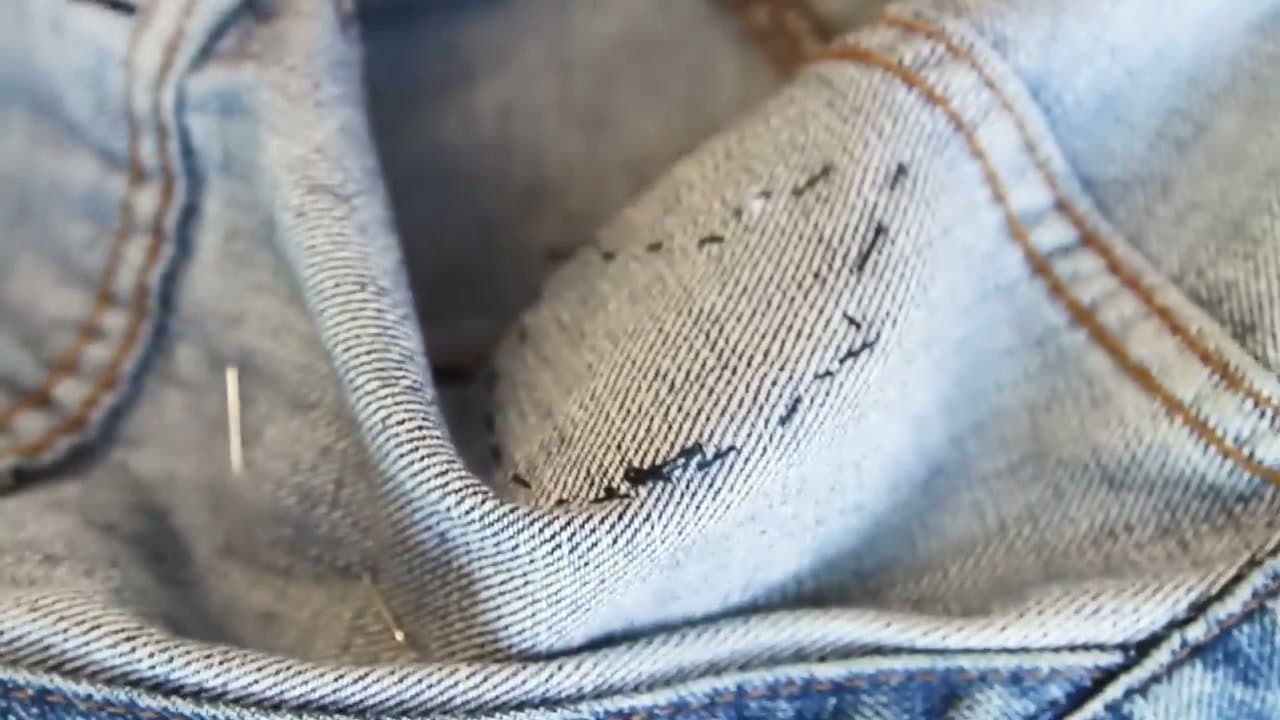
Push two or three straight pins through the patch and into the fabric to hold it in place. Pin from the front so the points stick out the back, then bend the points down so they don't poke you while you sew. Pinning beats glueing because you can still adjust if you change your mind.

Tip

Most patches come with iron-on glue on the back. Skip ironing it down - sewing through cured glue is rough on needles, and you lose the option to reposition if it ends up crooked.

2

Step 2: Thread the needle

2:40
Step 2: Step 2: Thread the needle

Cut a length of thread about 18 inches long. Push one end through the eye of the needle and pull through until you have two equal-length tails hanging from the eye.

You'll be sewing with doubled thread - both tails together - which is twice as strong as a single strand. That matters for patches because they take constant friction from arms, straps, and laundry.

Tip

Match the thread color to the edge of the patch, not the garment. Stitches close to a black patch border vanish; stitches that match the denim show as little dots.

3

Step 3: Tie a knot at the end of the thread

3:00
Step 3: Step 3: Tie a knot at the end of the thread

Hold the two thread tails between your thumb and the back of the needle so the thread forms a small circle around the needle's shaft. Wrap the thread around the needle four times.

Pinch the wraps under your thumb and pull the needle straight up while sliding your thumb down the thread. The wraps will slip off the needle and tighten into a small, tidy knot at the end of the thread. Snip any extra tail past the knot.

Tip

Four wraps is the magic number. Two or three slips loose under tension; five or more gives you a chunky knot that catches on the back of the patch.

4

Step 4: Push the needle up through the patch

4:00
Step 4: Step 4: Push the needle up through the patch

Bring the needle from the back of the garment up through the very edge of the patch. Pull the thread until the knot catches against the back of the fabric and stops the thread from going further.

Patch backing is denser than regular fabric, especially with embroidered patches. A thimble on the finger that pushes the needle saves your fingertip from getting sore. Slip a regular thimble on or use a leather thimble for better grip.

Products used in this step

5

Step 5: Sew a running stitch around the perimeter

4:50
Step 5: Step 5: Sew a running stitch around the perimeter

Push the needle back down through the fabric just outside the patch's edge, then back up through the patch about a quarter inch ahead of where you started. That's one stitch.

Continue around the entire patch - down outside the edge, up through the patch, down outside, up through. Keep stitches close to the outer border so they tuck into the patch's trim and stay nearly invisible. Pull each stitch snug but not so tight that it puckers the fabric.

Tip

Take the pins out as you reach them. Trying to sew around a pin makes the stitches messy and the pin can stab you mid-pull.

6

Step 6: Tie off on the inside

6:20
Step 6: Step 6: Tie off on the inside

When you've sewn all the way around back to your starting point, push the needle through to the inside of the garment. Catch a few fibers of the inside fabric with the needle - don't pierce all the way through to the front.

Pull the needle through but stop before the loop closes. Pass the needle through that loop and pull tight to make a knot. Repeat the loop-and-pull two more times so the knot stacks. Snip the thread close to the knot.

Tip

Making three stacked knots takes 10 extra seconds and means the patch will outlast the garment. A single knot can untie itself in the wash.

Products used in this step

Products Used

Your Guide

Sew Anastasia

As an Amazon Associate we earn from qualifying purchases. Links on this page may be affiliate links - clicking them and buying doesn't change your price, but helps support ShowMeStepByStep.

Tags

Related Tutorials