How to Draw a Tree: Step by Step

Save it for later. We'll email you a link, no password.

Find it again on your phone or computer, with your finished steps ticked.

You tapped Save

Save this project for later

We'll email you a link, no password.

How to Draw a Tree: Step by Step

  • Your saved projects in one list
  • Your ticked steps on any device

Check your inbox for an email from us. Not there? Look in your spam folder.

  • 7 steps
  • 13:57 video
  • Difficulty: Easy
  • About 30 minutes
  • Drawing

Based on a video by Circle Line Art School

Opens their YouTube channel

Steps written out by Crafting Step by Step · Published · Updated

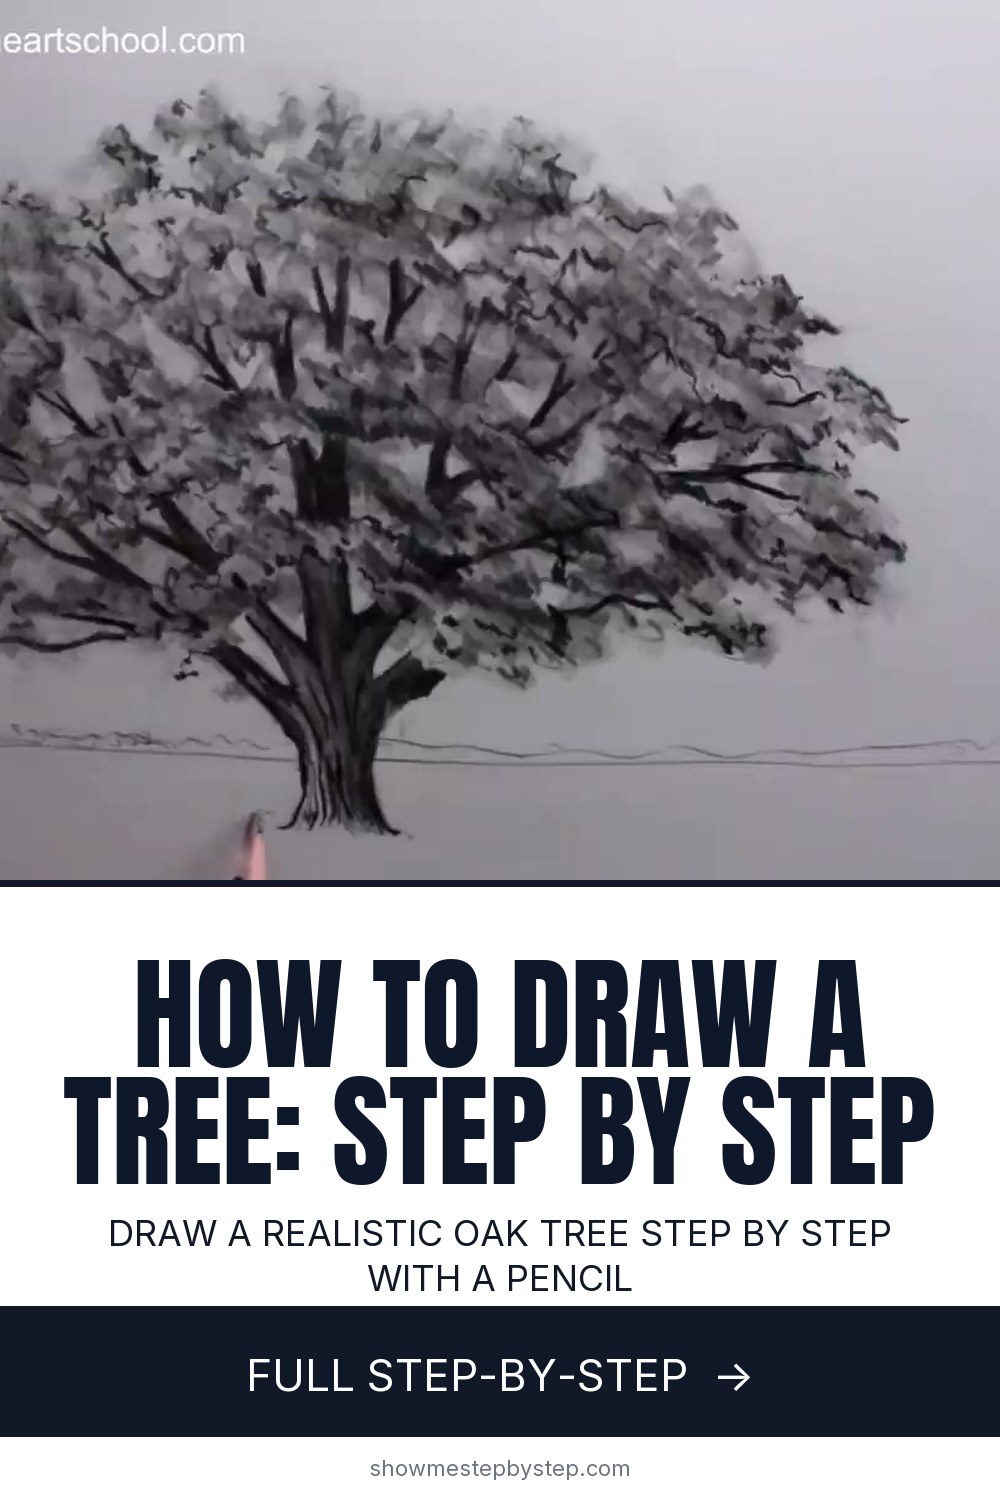
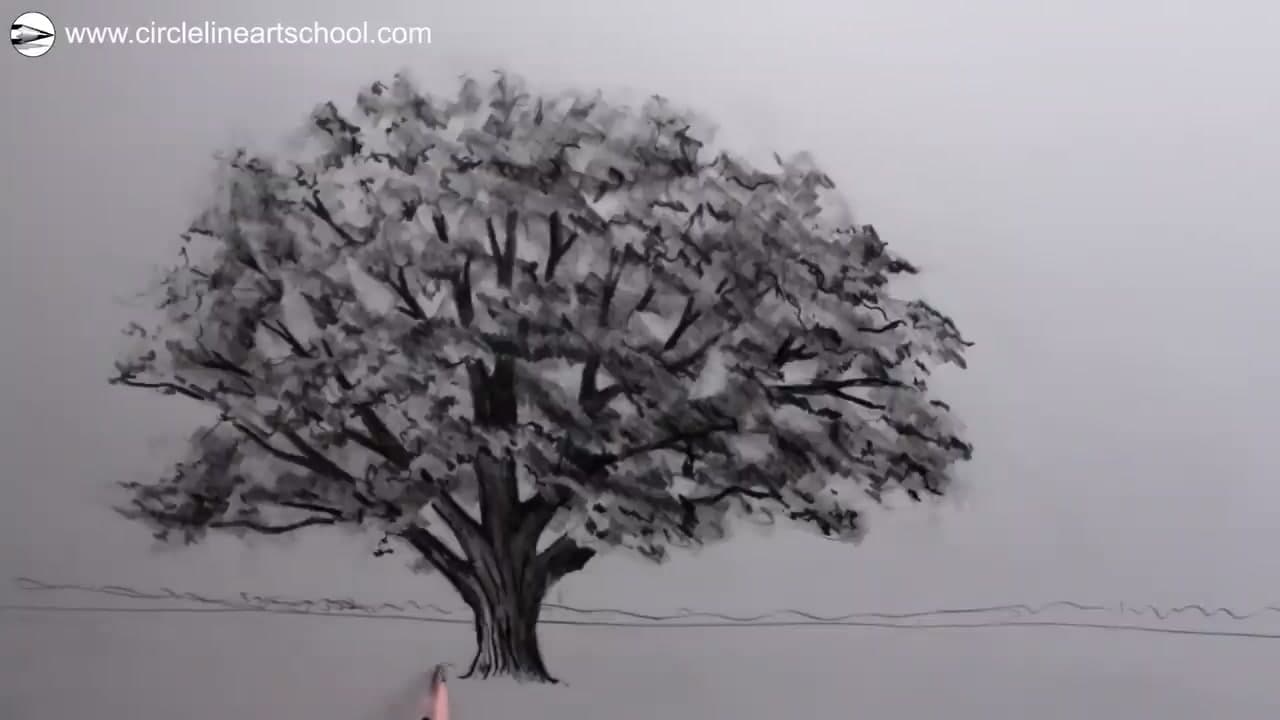
The finished result: How to Draw a Tree: Step by Step
Also in:Painting
Step 1 of 6 inLearn to Draw: Nature and Landscapes

A tree is the first thing most people try to draw outside, and the first thing they quit on. The hand is rarely the problem, the approach is. Drawn leaf by leaf, or branch by branch, a tree comes out looking like a diagram of a tree.

Tom McPherson of Circle Line Art School builds this oak the other way round. A loose shape, then a solid trunk, then tone laid down in passes until the canopy carries some weight. One graphite pencil does the whole drawing. The steps below follow that demonstration. The rest here carries over to the next tree you draw. If you have never shaded anything, the light-pass method and picking a light source are covered in how to draw.

Three Tree Shapes to Learn First

Almost every tree you draw is a variation on three silhouettes, and they get built in different orders.

  • Round deciduous (oak, maple, elm): a wide mass of foliage on a short, thick trunk. Build the canopy as one big shape, then break its edge apart. This is the tree below.
  • Conical evergreen (pine, spruce, fir): a straight center spine with branches hanging off it, longer toward the ground. Draw the spine first, then layer branches down it, trunk visible the whole way up.
  • Bare winter tree: no leaves to hide behind, so it is all branch structure. Every fork splits into two thinner limbs, each losing about half its thickness at the split.

Why Your Tree Looks Like a Lollipop

A lollipop is a smooth closed outline with shading poured inside it. It reads as a sign, not a tree. Three things fix it.

Break the outline: a real canopy edge is ragged, with clumps sticking out and bites taken out of it. Vary the clumps: thumbnail-sized, coin-sized, none evenly spaced. Then let sky through. Punch two or three real holes where you can see past the leaves to a branch behind. Those gaps do more for depth than any amount of shading. The same ragged-edge thinking runs through how to draw clouds.

Foliage Is Masses of Value, Not Leaves

Stand ten feet from a tree and you cannot pick out a single leaf. You see light clumps and dark clumps. Draw that instead.

Give each clump a lit top and a dark underside. Stacked through the canopy, those undersides are what make it read as deep. Put the heaviest darks where two clumps overlap and in the pocket beside the trunk. Leave the tops that face the light untouched - bare paper is brighter than anything an eraser lifts back out later.

Leaf shape only matters up close, where one leaf becomes the subject and the veins do the work. That is a different job: how to draw a leaf.

Bark Texture Comes From Direction, Not Outlines

Outlining every crack turns the trunk into a net. Use short strokes that run the length of the trunk and curve around it as it turns, so the marks describe a cylinder. Where a branch leaves the trunk, bend the strokes with it.

Keep most of that texture on the lighter side. On the dark side it vanishes into the tone anyway, and the contrast between a textured lit side and a solid shadow side is what sells the roundness. Darken the base of the trunk - it sits in its own ground shadow.

Tree drawing ideas to try next

The oak is the hard one. With its light and dark passes in your hand, these come quicker.

  • Cartoon tree. A cloud-shaped canopy, a trunk that flares at the base and two or three branch lines. Good for kids and maps.
  • Willow. Same trunk, but the foliage hangs in long downward strokes from the branch tips.
  • Palm tree. A curved, ringed trunk with five or six long fronds fanning out of the top.
  • Autumn tree in color. Lay the same lit and shadowed clumps in orange and red colored pencil, with a few loose leaves on the ground.
  • Snowy pine. Draw the evergreen spine, then leave white paper along the top of every branch. Our Christmas tree drawing dresses one up.

Pencil Grades: Two of Them Do the Work

A 24-pencil tin looks like the answer and it is not. An HB handles the sketch, the guideline marks and the first light passes. A 4B or 6B handles the darks under the clumps and the shadow side of the trunk.

Paper decides more than the grade count does. Smooth paper gives clean lines and fights you on tone. Paper with a little tooth grabs graphite and builds dark in fewer passes. A kneaded eraser earns its place either way: press and lift to pull a highlight back out of the canopy.

Those two pencils cover the rest of a landscape. How to draw mountains runs on the same light-to-dark passes, and how to draw water is where leaving the paper white pays off most.
Free printable

Print the steps and supply list for this project

One page you can take to the table. Free with a free account, no password.

Get the free printable

What you'll need

Free, for this project

Get this checklist by email

  • All 6 tools and materials, with tick boxes
  • A link to print all 7 steps on paper, to keep by you while you craft

No password. The whole tutorial stays free on this page.

Quick answer

A realistic tree drawing in pencil, step by step. An easy project: about 30 minutes. You need 6 things, including Sketchbook or drawing paper, Graphite pencils and Kneaded eraser. The 7 steps start with sketch the Oak Tree Trunk and Canopy Outline in Light Pencil, fix the Trunk and Branch Structure With a Firmer Line, shade the Trunk Light to Dark and Add Bark Texture and block In Foliage Clumps Across the Canopy With a Mid-Tone.

Step-by-step guide

7 steps, about 14 minutes. Tap a picture to jump to that step. Your progress saves automatically.

Tick each step off as you go.

  1. Step 1: Sketch the Oak Tree Trunk and Canopy Outline in Light Pencil

    Watch this step · 0:50

    Start with a short wide trunk near the base of the paper. From the top of the trunk, lift a few light lines for the main branches, then draw the overall outline of the canopy with a soft fluid stroke. Keep it loose. These are guideline marks, not the final tree.

    The whole shape should sit comfortably on the page, with room above for the canopy and room below for the trunk and the ground shadow you will add later.

    Tip:

    Hold the pencil a little farther back from the tip than you would for writing. It lightens your pressure and keeps these first lines easy to draw over.

    Back to all steps

  2. Step 2: Fix the Trunk and Branch Structure With a Firmer Line

    Watch this step · 1:15

    Press a little harder with the same pencil and go over the trunk edges and the start of the main branches with a more confident line. You are pinning the tree's frame to the page so everything else has something solid to hang off.

    Where the branches leave the trunk, vary the line a bit so they don't look like stiff sticks. A few small bumps and bends along the way will read as natural bark structure later.

    Tip:

    If your sketch lines from step 1 wandered, don't trace every one. Pick the cleanest path and commit to it. The rest will disappear under shading.

    Back to all steps

  3. Step 3: Shade the Trunk Light to Dark and Add Bark Texture

    Watch this step · 1:35

    Turn the pencil onto its side and lay shading across the trunk. The light is coming from the left in this drawing, so keep the left side lighter and the right side darker. Build up to a mid-tone first, then come back and deepen the right side to a proper dark tone.

    Add a few short marks for bark texture, mainly on the lighter side where they will read. The darkest part of the whole drawing should sit on the right side of the trunk and along the underside of the main branches.

    Tip:

    Always work from light tones to dark. It is much harder to lift graphite off the paper than to add more of it.

    Back to all steps

  4. Step 4: Block In Foliage Clumps Across the Canopy With a Mid-Tone

    Watch this step · 3:30

    Switch back to the side of the pencil and lay a mid-tone across most of the leaf area. Cover plenty of ground but leave little pockets of clean paper showing through. Those gaps will read as sunlight catching the top of the leaves.

    Don't finish one section before moving on. Drift your hand around the whole canopy as you shade so the tree develops together, not in patches. Right side a bit denser than the left because of where the light is coming from.

    Tip:

    If a section starts to look heavy too early, move to the opposite side of the canopy and come back. You stop yourself overworking the same patch.

    Back to all steps

  5. Step 5: Draw the Inner Branches Breaking Through the Leaves

    Watch this step · 4:40

    Pick up the pencil tip and add the inner branches that peek through the gaps in the canopy. The trick is to break each branch into short segments rather than drawing it as one continuous dark line. Leaves will sit in front of parts of the branch, hiding it.

    Vary the thickness too. Branches taper as they reach the edge of the tree, so the tips should be much thinner than where they leave the trunk. Look at the tree as a whole as you draw each one so they all relate.

    Tip:

    Resist drawing every branch. A handful of well-placed broken branches reads as a full tree because the eye fills in the rest.

    Back to all steps

  6. Step 6: Blend the Canopy With the Flat Pencil, Then Deepen the Shadow Side

    Watch this step · 8:30

    Lay the pencil almost flat on its side and drag a soft tone over much of the canopy. This blends the patches you have already made and stops anything looking too cut out. Keep some areas untouched so the tree still has bright spots.

    Once the surface is softened, switch to the tip and pick out small patches of deep dark in among the leaves, especially on the right side. Run a kneaded eraser around lightly to lift a few highlights back out. Light, dark, light, dark - that contrast is what makes the tree feel three-dimensional.

    Tip:

    If the whole canopy is looking flat and gray, you need more dark. If it looks scratchy and busy, you need more soft mid-tone blending. The drawing tells you which way to push.

    Back to all steps

  7. Step 7: Add Horizon, Background Trees, and Ground Shadow

    Watch this step · 12:00

    Sharpen your pencil and draw a low horizon line behind the trunk. Above it, sketch a thin row of distant trees with a light tone so they sit back in space. A sharp pencil tip gives them crisp dark edges without making them compete with the main tree.

    Below the trunk, on the left and right where it meets the ground, lay a dark shadow that stretches a little to the right. The shadow grounds the tree so it stops floating on the page. Once the shadow is in, step back. If you can't see what else to do, you're done.

    Tip:

    Keep the background trees lighter than the main tree, even if they look too light at first. Distance softens tone, and matching the foreground would flatten the whole scene.

    Back to all steps

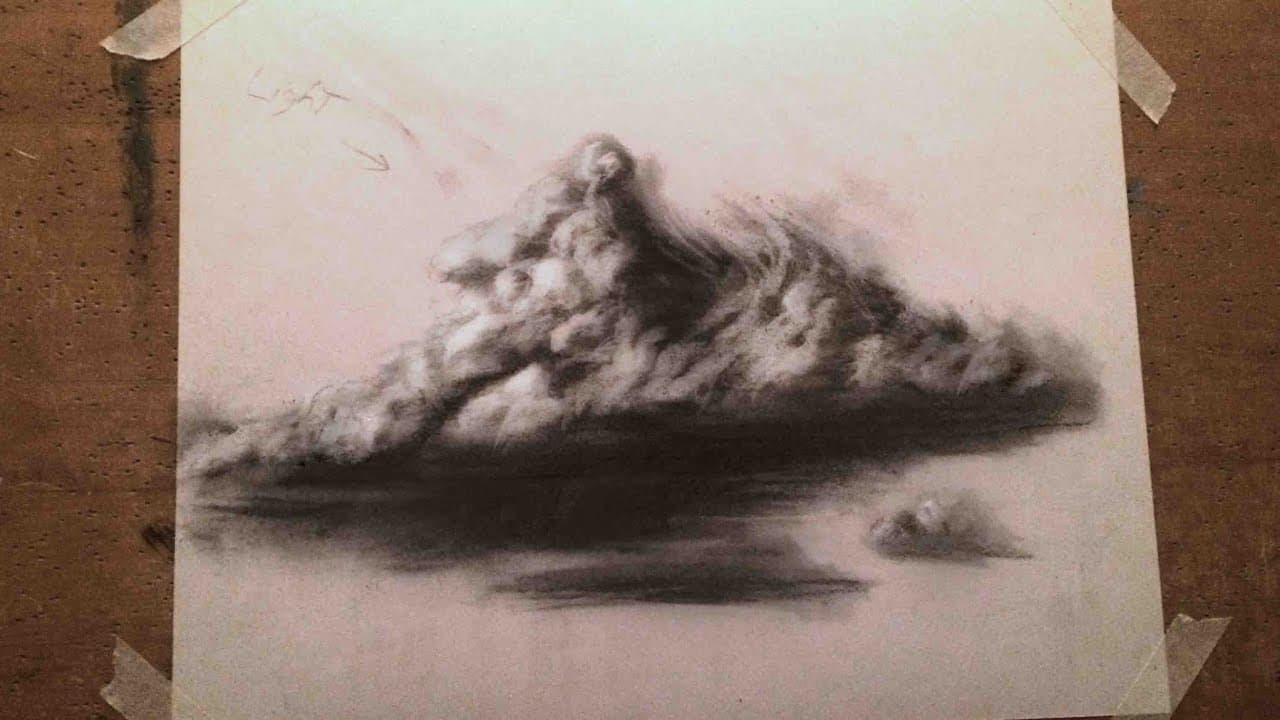
How to Draw Clouds (Step by Step Pencil Tutorial)

Keep going

How to Draw Clouds (Step by Step Pencil Tutorial)

You reached the last step

Save this project to come back to it

Your ticked steps, the free printable and your other saved makes, together in My Projects. Free, no password.

You tapped Save

Save this project for later

We'll email you a link, no password.

How to Draw a Tree: Step by Step

  • Your saved projects in one list
  • Your ticked steps on any device

Check your inbox for an email from us. Not there? Look in your spam folder.

Free printable

Printable sheet for this project

The bonus is hidden until you sign up.

Free with a free account, no password. Every step above stays open to everyone.

Products Used

The Checklist

How to Draw a Tree: Step by Step

Tools
5
Materials
1
Steps
7
Video
14 min

Tools we recommend

As an Amazon Associate we earn from qualifying purchases. Links on this page may be affiliate links - clicking them and buying doesn't change your price, but helps support Crafting Step by Step.

Tags

The Crafter's Weekly

New drawing tutorials, every Sunday

One short email with the week's best step-by-step guides. Free, no spam, unsubscribe anytime.

Test your knowledge

Did the lesson stick? Start with this one.

5 questions covering what you just read. No signup, no score saved, and you can stop after this one.

Question 1 of 5

How should the initial guideline marks be drawn?

Quick reference

Key takeaways from How to Draw a Tree: Step by Step

5 questions, answers, and one-line explanations. Tap to expand.

  1. 1.How should the initial guideline marks be drawn?

    Answer: Light loose strokes - this is scaffolding, not the final tree

    Light marks are easier to work over and erase.

  2. 2.After mid-tone shading on the canopy, what do the small clean-paper gaps represent?

    Answer: Sunlight catching the top of the leaves

    Untouched paper reads as bright highlights where light hits the leaves.

  3. 3.How should the inner branches that peek through the canopy be drawn?

    Answer: Broken into short segments where leaves don't hide the branch

    Branches break behind leaves; segmented lines read as natural occlusion.

  4. 4.What does a kneaded eraser let you do that a regular eraser doesn't, in this drawing?

    Answer: Erase without rubbing AND lift highlights back out of already-shaded areas

    Press-and-lift technique reclaims highlights inside the dark shaded canopy.

  5. 5.What grounds the tree on the page so it doesn't look like it's floating?

    Answer: A dark shadow stretching to one side at the base of the trunk

    The ground shadow anchors the tree to the page; without it the tree floats.

Did this work for you?

What's next

Related collections

Curated theme pages that include this tutorial.

Similar tutorials

Hand-picked next reads based on the one you just finished.

Liked this drawing tutorial?

Pick the crafts you want to hear about. One email every Sunday with new step-by-step tutorials. No spam, easy to unsubscribe.

Get more like this in your inbox

Weekly digest. Pick the categories you want. Unsubscribe anytime.

Send me tutorials about

We only email about new tutorials. Easy unsubscribe anytime.