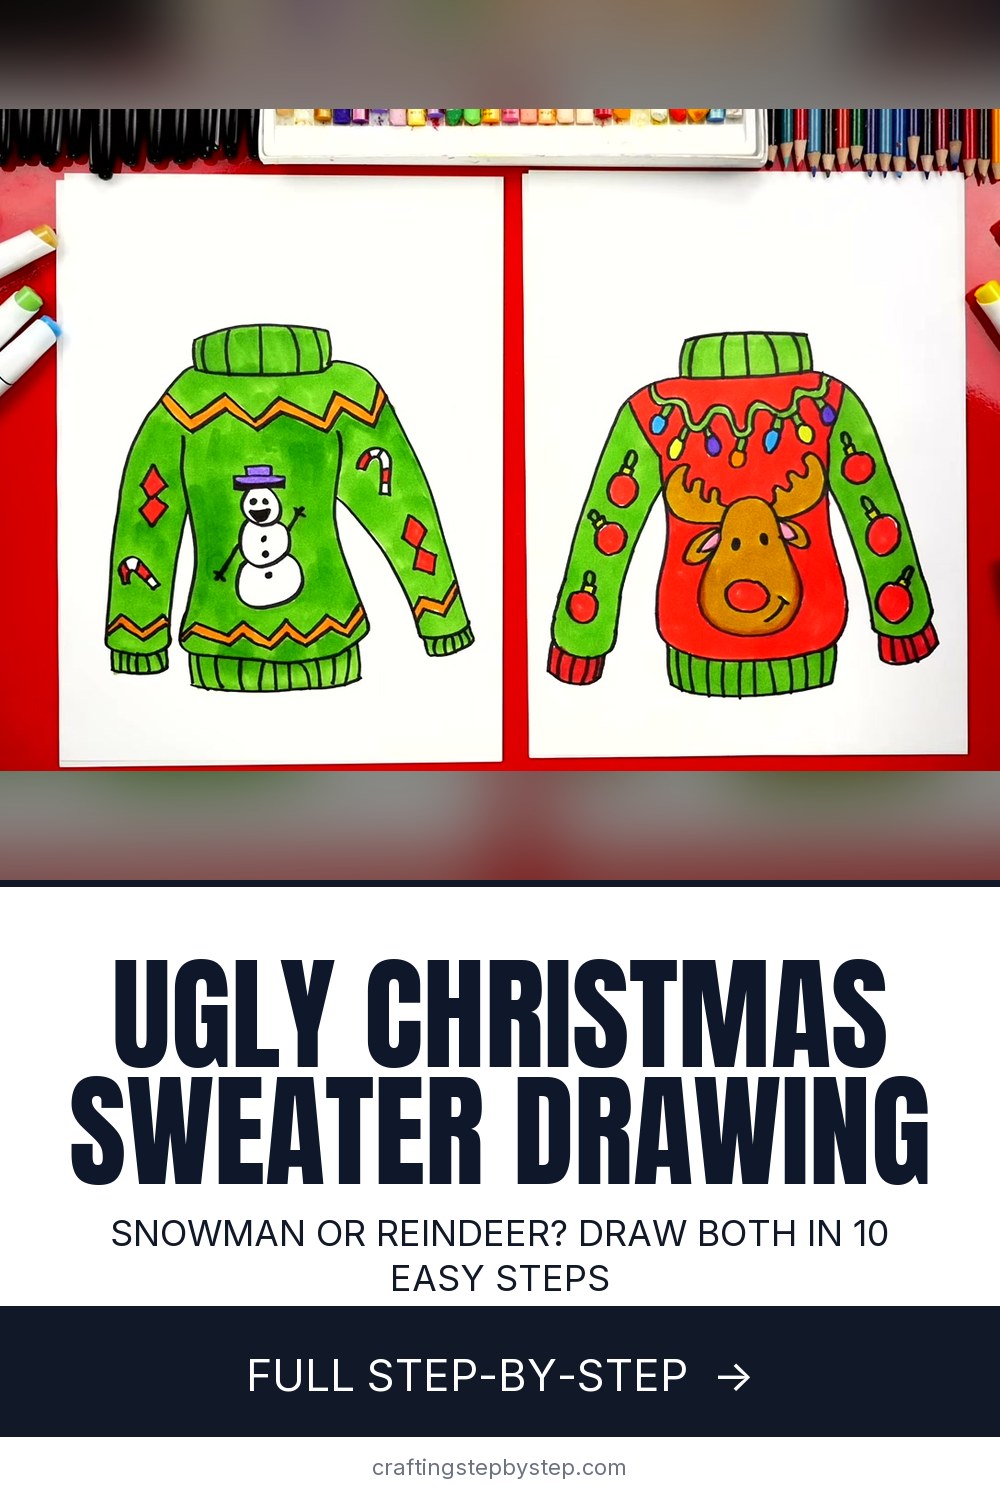
How to Draw a Christmas Sweater

Save it for later. We'll email you a link, no password.

Find it again on your phone or computer, with your finished steps ticked.

You tapped Save

Save this project for later

We'll email you a link, no password.

How to Draw a Christmas Sweater

  • Your saved projects in one list
  • Your ticked steps on any device

Check your inbox for an email from us. Not there? Look in your spam folder.

  • 10 steps
  • 4:16 video
  • Difficulty: Easy
  • About 25 minutes
  • Drawing

Based on a video by Art for Kids Hub

Opens their YouTube channel

Steps written out by Crafting Step by Step · Published · Updated

The finished result: How to Draw a Christmas Sweater

This ugly Christmas sweater comes from Rob at Art for Kids Hub, who draws it side by side with his wife. You draw a plain, cozy turtleneck first. Then the fun part: you cover it in snowmen, reindeer, zigzags and string lights until it is gloriously tacky. The whole lesson runs about four minutes.

You need a black marker, paper, and markers or colored pencils for the color.

Christmas sweater drawing ideas for the front

The plain sweater is a blank canvas. Here is what makes it ugly, in the best way:

  • A big center character. A snowman, a reindeer face, Santa, or a gingerbread man right on the chest.
  • Zigzag bands. One across the chest and one above the waistband. Use a bright color that clashes a little.
  • String lights. A wavy line with little colored bulbs hanging off it, draped across the shoulders.
  • Small repeats on the sleeves. Candy canes, diamonds, ornaments or snowflakes, spaced down each arm.
  • Pom-poms. A row of small circles colored in. Real ugly sweaters love a 3D pom-pom.

Pick two or three ideas, not all five. A clear theme reads better than clutter, even on an ugly sweater.

Drawing knit texture with simple marks

The ribbed collar, cuffs and waistband are what make this look like a knit sweater and not a T-shirt. Each band is two lines and a row of short strokes across. Keep the strokes close together and let them follow the curve of the band.

Want more texture? Add rows of small V shapes on the body, like knit stitches. Do it lightly in pencil first, then color over it. A darker shade of the sweater color along the sleeve seams adds a soft, puffy look.

An ugly sweater party invitation or family game

Hosting an ugly sweater party? Draw the plain sweater on a folded card, photocopy it, and let each guest decorate their own invitation. Or turn it into a game at the table. Hand everyone the same blank sweater, set a timer for ten minutes, and vote on the ugliest one. Grandkids love winning that prize.

A small sweater also makes a cute gift tag. Draw it on cardstock, cut it out, punch a hole in the collar and tie it on with ribbon. Pair it with homemade Christmas gift tags for a full set.

Common sweater drawing problems

  • The sweater looks skinny. Bring the shoulder curves out wide before they drop into the sleeves.
  • The sleeves look stiff. Let the inner sleeve line curve a little and end it near the waist.
  • The colors smear the outline. Use a permanent marker for the line work and let it dry before coloring.

Christmas sweater drawing ideas to try next

Borrow a character for the front of your sweater. Try how to draw a snowman or how to draw a reindeer. Swap the zigzags for a row of Christmas lights, or put a little Christmas tree in the middle.

Free printable

Print the steps and supply list for this project

One page you can take to the table. Free with a free account, no password.

Get the free printable

What you'll need

Free, for this project

Get this checklist by email

  • All 4 tools and materials, with tick boxes
  • A link to print all 10 steps on paper, to keep by you while you craft

No password. The whole tutorial stays free on this page.

Quick answer

Draw an ugly Christmas sweater in 10 easy steps: a ribbed turtleneck, then a snowman, a reindeer and string lights. An easy project: about 25 minutes. You need 4 things, including drawing paper or sketch pad, black fine point permanent marker and pencil and eraser. The 10 steps start with draw the Christmas Sweater's Thick Turtleneck Collar, add Ribbed Knit Lines to the Sweater Collar and draw the Sweater's Rounded Shoulders and Long Sleeves.

Step-by-step guide

10 steps, about 4 minutes. Tap a picture to jump to that step. Your progress saves automatically.

Tick each step off as you go.

  1. Step 1: Draw the Christmas Sweater's Thick Turtleneck Collar

    Watch this step · 0:41

    Start near the top middle of your paper. Draw a gently curved line across, then bring a short line down on each side and connect them at the bottom. You get a wide, rounded rectangle. That is the collar. Make it thick. Ugly sweaters have big, chunky turtlenecks, and a thick collar gives you room for the ribbing in the next step.

    Tip:

    Leave plenty of space below the collar. The sweater gets big and fluffy.

    Back to all steps

  2. Step 2: Add Ribbed Knit Lines to the Sweater Collar

    Watch this step · 0:53

    Draw a line straight down the middle of the collar. Then add a curved line on each side of it, and one more near each end. The lines curve outward a bit as they get closer to the edges. That curve makes the collar look round, like it wraps around a neck. These short lines are the knit ribbing.

    Tip:

    Odd numbers look tidy here. Five lines is a good count.

    Back to all steps

  3. Step 3: Draw the Sweater's Rounded Shoulders and Long Sleeves

    Watch this step · 1:06

    Start at one side of the collar. Draw a curve that swoops out for the shoulder, then keep going down and a little outward for the outside of the sleeve. Stop about two-thirds of the way down the page. Do the same thing on the other side. Wide shoulders make the sweater look oversized and cozy, which is what you want.

    Tip:

    Match the two sides by eye. Draw one, then mirror it.

    Back to all steps

  4. Step 4: Draw the Sides of the Sweater Body Under the Armpits

    Watch this step · 1:37

    Find where each armpit would be, a little in from the shoulder line. Draw a line down from there that curves in slightly at the middle and back out near the bottom. Repeat on the other side. These two lines form the body of the sweater. The space between them and the sleeve lines becomes the arms later.

    Tip:

    Start the body lines a bit below the shoulders, not touching them.

    Back to all steps

  5. Step 5: Close the Bottom of the Christmas Sweater Body

    Watch this step · 1:46

    Connect the bottoms of the two body lines with a gentle curve. Let it dip a little in the middle so the sweater looks soft and slouchy instead of boxy. Now the body is a closed shape. It already reads as a sweater, even without the arms finished. Leave room underneath for the waistband.

    Tip:

    A slight curve looks more like fabric than a straight ruler line.

    Back to all steps

  6. Step 6: Draw the Ribbed Waistband at the Sweater Hem

    Watch this step · 2:15

    Under the body, draw two short lines going down, like you did for the collar. Connect them with a curve that matches the one above it. That is the waistband. Fill it with short ribbing lines, the same as the collar. You can draw these lines closer together than the collar ribs. Go all the way from the left side to the right.

    Tip:

    Tight ribbing lines make the waistband look stretchy.

    Back to all steps

  7. Step 7: Draw the Inner Line of the Left Sweater Sleeve

    Watch this step · 2:38

    Go back to the armpit on one side. Draw a line that comes down and follows the outside sleeve line. Make it long, so the sleeve ends close to the waist. Then join the two sleeve lines with a small curve at the bottom. Add a cuff the same way you made the waistband: two lines, a curve, then short ribbing lines.

    Tip:

    Long sleeves look cozier. Let them reach down past the body.

    Back to all steps

  8. Step 8: Finish the Right Sleeve and Ribbed Cuffs on the Sweater

    Watch this step · 3:15

    Repeat the same steps on the other arm. Start in the armpit, draw a line down that follows the outside line, and join the two at the bottom. Add the cuff with two short lines, a curve and ribbing. Step back and look. You have a plain, cozy sweater. It does not look ugly yet. That comes next.

    Tip:

    Check that both cuffs sit at about the same height.

    Back to all steps

  9. Step 9: Decorate the Green Snowman Ugly Christmas Sweater

    Watch this step · 3:50

    Now make it ugly. Draw a snowman on the chest, a zigzag band across the top and bottom, and candy canes and diamonds on the sleeves. Then color. This sweater goes bright green with white zigzags, a white snowman and a green collar. Leave the snowman and the small shapes white at first so they pop against the green.

    Tip:

    Color the big areas first, then go back for the small details.

    Back to all steps

  10. Step 10: Color the Red Reindeer Ugly Christmas Sweater

    Watch this step · 3:52

    On the second sweater, draw a big reindeer face in the middle with antlers and a round red nose. Drape a string of lights across the shoulders and put round ornaments down the sleeves. Color the body red and the sleeves, collar and cuffs green. Add orange zigzags to the first sweater for extra clash. The uglier, the better.

    Tip:

    Give each light bulb a different color. That is what makes it look festive.

    Back to all steps

How to Draw a Hedgehog

Keep going

How to Draw a Hedgehog

You reached the last step

Save this project to come back to it

Your ticked steps, the free printable and your other saved makes, together in My Projects. Free, no password.

You tapped Save

Save this project for later

We'll email you a link, no password.

How to Draw a Christmas Sweater

  • Your saved projects in one list
  • Your ticked steps on any device

Check your inbox for an email from us. Not there? Look in your spam folder.

Free printable

Printable sheet for this project

The bonus is hidden until you sign up.

Free with a free account, no password. Every step above stays open to everyone.

Products Used

The Checklist

How to Draw a Christmas Sweater

Tools
2
Materials
2
Steps
10
Video
4 min

Tools we recommend

As an Amazon Associate we earn from qualifying purchases. Links on this page may be affiliate links - clicking them and buying doesn't change your price, but helps support Crafting Step by Step.

Tags

The Crafter's Weekly

New drawing tutorials, every Sunday

One short email with the week's best step-by-step guides. Free, no spam, unsubscribe anytime.

Did this work for you?

What's next

Related collections

Curated theme pages that include this tutorial.

Similar tutorials

Hand-picked next reads based on the one you just finished.

Liked this drawing tutorial?

Pick the crafts you want to hear about. One email every Sunday with new step-by-step tutorials. No spam, easy to unsubscribe.

Get more like this in your inbox

Weekly digest. Pick the categories you want. Unsubscribe anytime.

Send me tutorials about

We only email about new tutorials. Easy unsubscribe anytime.