How to Make an Advent Calendar

CraftsMedium7:1314 stepsBrowse more →
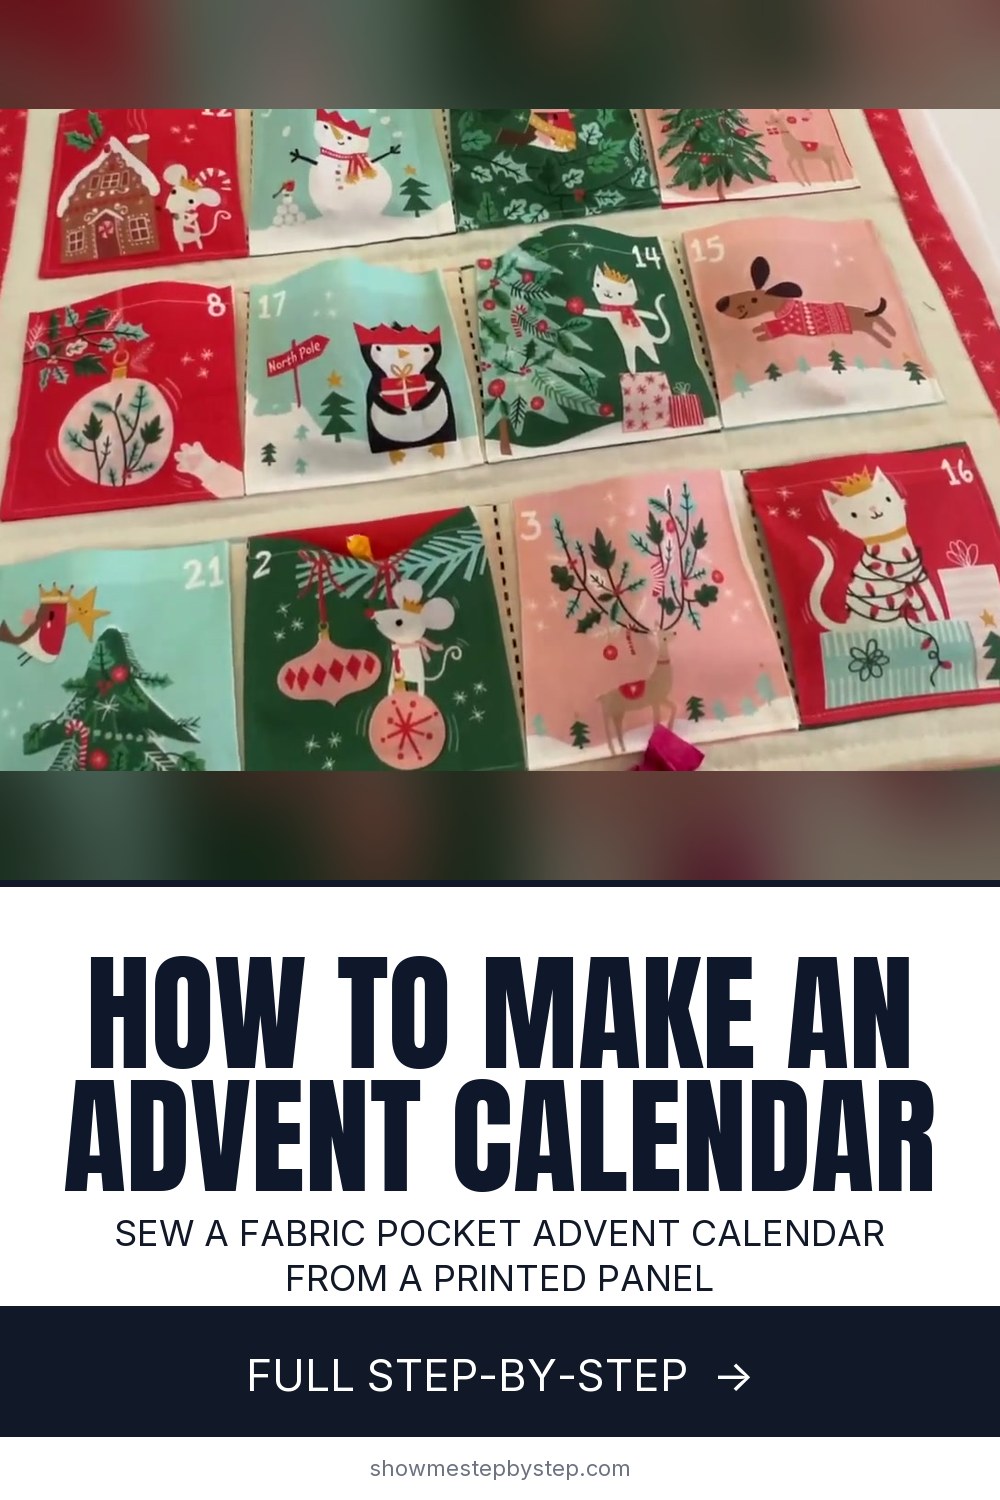
The finished result: How to Make an Advent Calendar
Also in:Sewing

By CraftingStepByStepPublished

Based on a video by Lauren Guthrie.

This is the kind of Christmas project that gets made once and used for twenty years. It is a proper sewing project rather than an afternoon craft - there is hemming, pressing, quilting through three layers and a bound edge - but none of the individual steps is difficult.

It starts from a printed fabric panel, which does the design work for you. The panel arrives as one large piece with the pockets, numbers and backing all marked out, and your job is to cut, press, sew and assemble.

Two pocket styles

The gusseted version has deep pockets with a fold at each side, so they hold more than a chocolate - small toys fit. The flat patch version is simpler and quicker, with each pocket cut and sewn individually. The quilting and binding stages are identical either way.

The part that needs a walking foot

Once the panel, wadding and calico backing are layered, you are sewing through three thicknesses. A walking foot has feed dogs on the top as well as underneath, so all three layers move through together instead of the top one shifting. Without it the layers creep and the finished piece puckers.

Numbers in random order

Most printed panels scatter the numbers rather than running 1 to 24 in sequence. That is deliberate - hunting for the right pocket is half the fun for children, and it is the detail that makes these worth keeping.

Step-by-Step Guide

14 steps · about 7 minutes.Check off each step as you go and your progress saves automatically.

1

Step 1: Cut Out the Pocket Strips

0:44
Step 1: Cut Out the Pocket Strips - How to Make an Advent Calendar

Cut the horizontal pocket strips out of the printed fabric panel. The panel arrives as one large piece with everything marked on it.

Tip

The panel comes as one big piece. Cut along the printed lines - the horizontal strips are your pocket rows.

2

Step 2: Hem the Top of Each Pocket

0:54
Step 2: Hem the Top of Each Pocket - How to Make an Advent Calendar

Press the top edge of each pocket strip back with an iron, then sew along it to hem it.

Tip

Press the top edge back first, then stitch. Doing it in that order gives a far crisper line than trying to fold as you sew.

Used in this stepsteam iron
3

Step 3: Press the Gusset Folds

1:04
Step 3: Press the Gusset Folds - How to Make an Advent Calendar

Press the side edges back, then fold each pocket edge over to the dashed black line to form the gusset and press that in place too.

Tip

Bring the pocket edge over to the dashed black line and press it flat. This fold is what gives the pocket its depth.

4

Step 4: Press the Bottom Edge Last

1:30
Step 4: Press the Bottom Edge Last - How to Make an Advent Calendar

Press the bottom edge back last, holding the gusset folds in position as you go.

Tip

Hold the gussets in place while you do it, or they spring open and you lose the depth you just built.

5

Step 5: Pin the Strip to the Panel

1:42
Step 5: Pin the Strip to the Panel - How to Make an Advent Calendar

Line the strip up on the panel and pin it down. The numbers sit in random order, which is half the fun of finding yours each morning.

Tip

Line the strip up before you commit any pins. The numbers are scattered on purpose, so there is no sequence to get wrong.

Used in this stepglass head quilting pins
6

Step 6: Sew Between the Pockets

2:00
Step 6: Sew Between the Pockets - How to Make an Advent Calendar

Sew down the dashed lines between the pockets first, then along the sides and bottom. Repeat for every column.

Tip

Stitch the dividing lines first, then the sides and bottom. Doing the dividers last tends to leave the pockets baggy.

7

Step 7: Layer and Spray-Baste

3:12
Step 7: Layer and Spray-Baste - How to Make an Advent Calendar

Layer calico backing, wadding and the panel, holding them together with temporary spray adhesive. Smooth out every wrinkle before it sets.

Tip

Calico at the back, wadding in the middle, panel on top. Temporary spray adhesive saves pinning the whole thing and washes out - though this is not a piece you will ever wash.

8

Step 8: Fit a Walking Foot

3:48
Step 8: Fit a Walking Foot - How to Make an Advent Calendar

Fit a walking foot to the machine. Its top feed dogs pull all three layers through evenly instead of shifting the top one.

Tip

Its top feed dogs pull all three layers through evenly. This is the one piece of equipment the project genuinely needs.

9

Step 9: Quilt Between the Pockets

4:04
Step 9: Quilt Between the Pockets - How to Make an Advent Calendar

Quilt between the pockets and around the outer edge of the design to lock the layers together.

Tip

Quilt the dividing lines and around the outside of the design. It locks the layers together and adds the texture that makes it look finished.

10

Step 10: Trim the Layers Even

4:22
Step 10: Trim the Layers Even - How to Make an Advent Calendar

Trim all three layers back to the same size so the edges are even and ready to bind.

Tip

Wadding and backing always end up slightly larger. Trim all three flush before binding or the edge will be lumpy.

Used in this stepquilting ruler
11

Step 11: Pin the Hanging Loops

4:34
Step 11: Pin the Hanging Loops - How to Make an Advent Calendar

Pin 10cm loops of red ribbon along the top back edge - two at the sides and a few spread across the middle - to carry the hanging dowel.

Tip

Ten-centimetre lengths of ribbon, two at the corners and three or four spread across the middle. They carry the whole weight, so do not skimp.

Used in this stepred grosgrain ribbon
12

Step 12: Sew On the Binding

5:00
Step 12: Sew On the Binding - How to Make an Advent Calendar

Sew the binding on, stopping just short of each corner and folding it back on itself to form a mitered corner.

Tip

Stop just short of each corner, fold the binding back on itself, then carry on down the next edge. That fold is what makes the mitre.

Used in this stepbias binding tape
13

Step 13: Hand-Stitch the Binding Down

5:48
Step 13: Hand-Stitch the Binding Down - How to Make an Advent Calendar

Press the binding round to the back and catch-stitch it down by hand, flipping each ribbon loop upward as you reach it.

Tip

Press it round to the back and catch-stitch by hand. Flip each ribbon loop upward as you reach it so it sits proud of the top edge.

Used in this stephand sewing needles
14

Step 14: Add the Dowel and Fill It

6:18
Step 14: Add the Dowel and Fill It - How to Make an Advent Calendar

Feed a wooden dowel through the loops, pin the label on, and fill the pockets.

Tip

Any hardware shop dowel works and cuts easily. Then fill the pockets - chocolates in the flat version, small toys in the gusseted one.

Used in this stepwooden dowel rod

Keep going

How to Make Pinecone Christmas Ornaments

10 steps · about 8 minutes

Products Used

The Checklist

How to Make an Advent Calendar

Tools
7
Materials
7
Steps
14
Video
7 min

Tools we recommend

Your Guide

Lauren Guthrie

As an Amazon Associate we earn from qualifying purchases. Links on this page may be affiliate links - clicking them and buying doesn't change your price, but helps support CraftingStepByStep.

Tags

Sunday How-To

New crafts tutorials, every Sunday

One short email with the week's best step-by-step guides. Free, no spam, unsubscribe anytime.

Did this work for you?

What's next

Related collections

Curated theme pages that include this tutorial.

Similar tutorials

Hand-picked next reads based on the one you just finished.

Weekly Digest

Liked this crafts tutorial?

Pick the categories you want to hear about. Weekly digest of new step-by-step tutorials. No spam, easy unsubscribe.

Send me tutorials about

We only email about new tutorials. Easy unsubscribe anytime.