How to Make a No-Crochet Yarn Pumpkin (2 Easy Methods)

CraftsEasy8:199 steps5-question quiz at endBrowse more →
The finished result: How to Make a No-Crochet Yarn Pumpkin (2 Easy Methods)

By CraftingStepByStepPublished Updated

Based on a video by Pumpkin Emily.

Two yarn pumpkins, zero crochet. If you've ever scrolled past a fluffy farmhouse pumpkin and thought you needed a hook and a pattern to make one, good news. You don't. This tutorial shows two ways to turn a one-dollar foam pumpkin into something that looks like it came off a Magnolia shelf, and neither one uses a single crochet stitch.

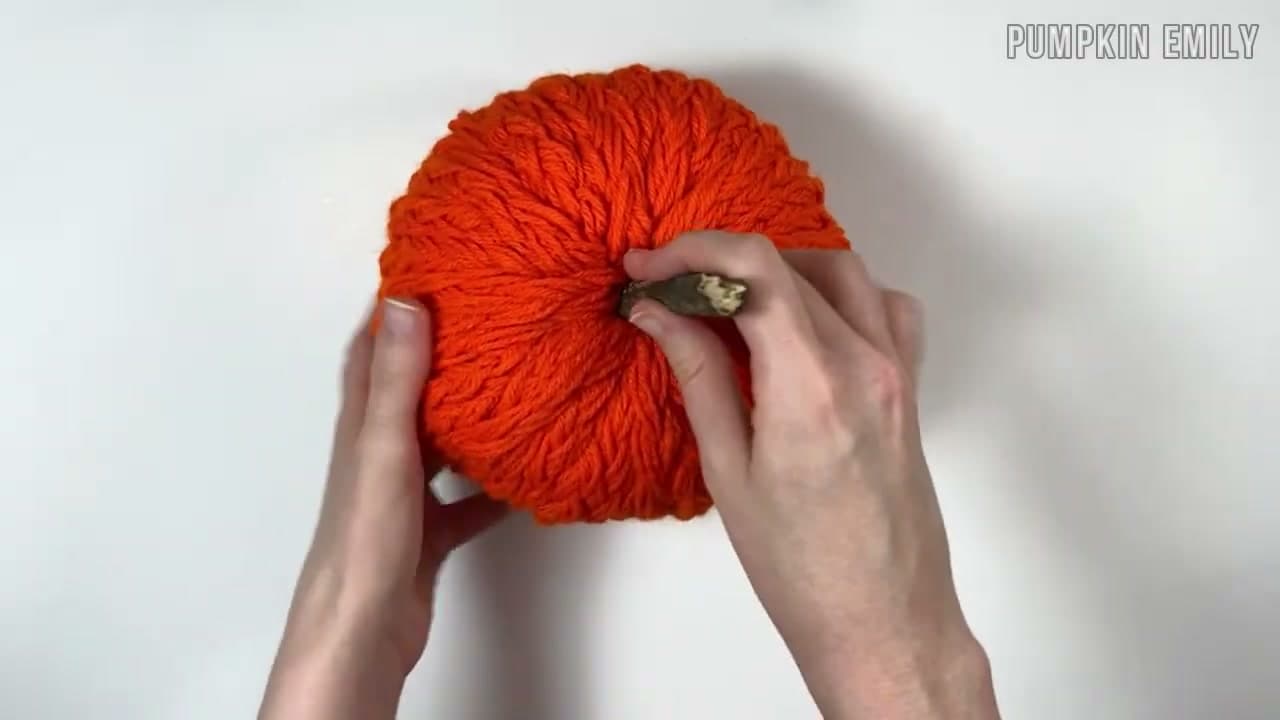
Method 1 is the chunky yarn wrap. Cut a hole in the top and bottom of the foam pumpkin, scoop out the foam, and wrap thick fluffy yarn through the body using a paperclip to feed the strand. The result is a soft heirloom pumpkin that takes about twenty minutes. No crochet skill required.

Method 2 is the braided yarn pumpkin. Cut 30-inch strands of regular orange yarn, braid them into ropes, and tuck the braids over the foam pumpkin one at a time. The braids give you the knit-look ridges that everyone associates with a crochet pumpkin, except you got there with elementary-school braiding. Still no crochet needed.

Both methods use the same base - a small foam pumpkin from Dollar Tree, scissors, an x-acto knife, and a twig for the stem. The hot glue gun is optional. You can finish a pair of these in an afternoon and have a fall mantel display by dinner. For a Halloween-ready pair, set one next to a no-sew cheesecloth ghost for a porch vignette that takes a single craft session start to finish.

If you've already mastered the crochet version, our farmhouse crochet pumpkin tutorial uses bulky yarn and a single half-double stitch. Different audience, same fall vibe. And if pumpkin-decorating in general is your thing, see how to carve a pumpkin or how to paint a pumpkin to round out the porch.

Credit to Pumpkin Emily, who put this on YouTube. Her channel is full of Dollar Tree craft hacks that make exactly this kind of no-skill-needed fall decor accessible to anyone with twenty minutes and a glue gun.

Step-by-Step Guide

9 steps · about 8 minutes.Check off each step as you go and your progress saves automatically.

1

Step 1: Gather Your Supplies for Method 1

0:18
Step 1: Gather Your Supplies for Method 1 - How to Make a No-Crochet Yarn Pumpkin (2 Easy Methods)

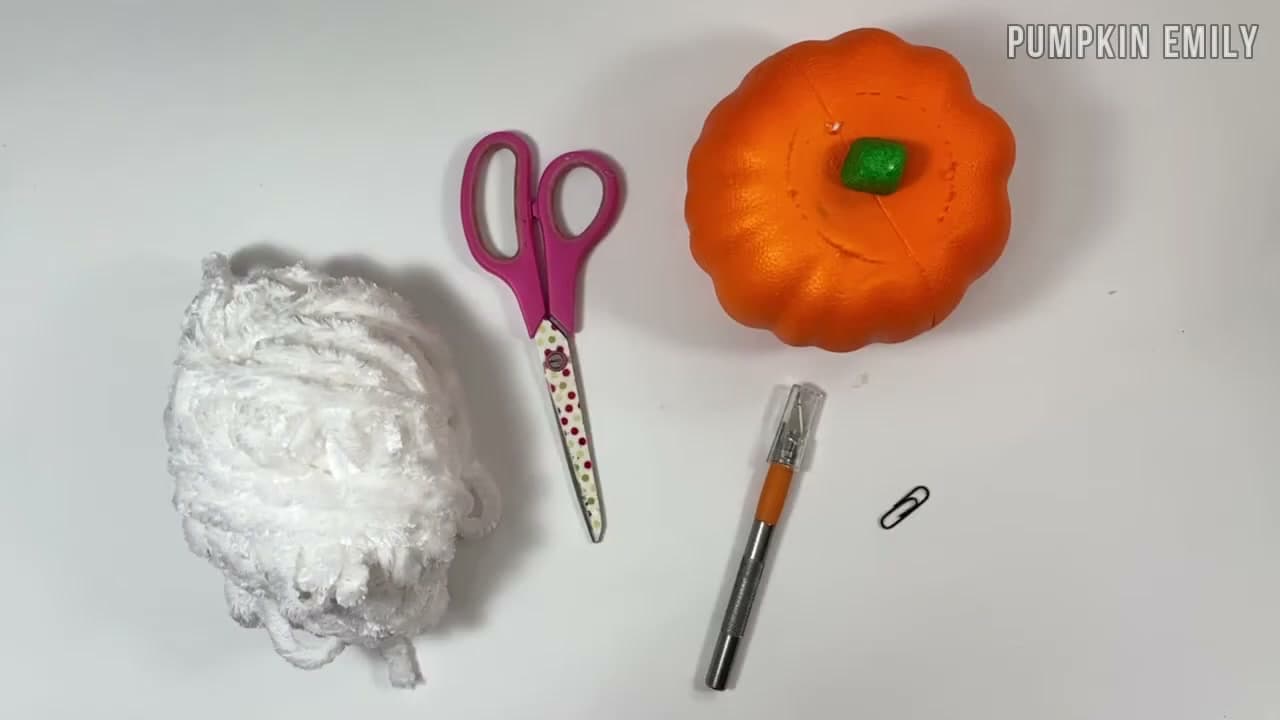
Lay out a small foam pumpkin from Dollar Tree, a pair of sharp scissors, an x-acto or craft knife, a paperclip, and one skein of thick chunky yarn. Pumpkin Emily uses a fluffy white chenille-style yarn that gives the pumpkin a soft heirloom texture, but any chunky yarn works - cream, pumpkin orange, mustard, or a moody black for Halloween.

The chunky yarn matters more than the color. Thin yarn will take forever to cover the pumpkin, and the result will look stringy instead of soft. Go with super bulky or size 6 yarn if you can find it. Grab a twig from the yard for the stem, or use a cinnamon stick if you want it to smell faintly of fall.

Tip

The paperclip is the secret weapon. Bend one end open into a hook and use it to feed the yarn through the holes you cut in the pumpkin. Without it, the yarn snags on the foam edges and you'll be muttering at the third pass.
Used in this step: Lion Brand Wool-Ease Thick & Quick Yarn Fisherman, Bernat Blanket Yarn Cream, X-Acto Number 1 Craft Knife with Cap, Sharp Fabric Scissors 8 inch, Foam Pumpkin Set Small Orange 6 Pack, Hot Glue Gun with Glue Sticks

2

Step 2: Cut Holes in the Top and Bottom of the Foam Pumpkin

0:55
Step 2: Cut Holes in the Top and Bottom of the Foam Pumpkin - How to Make a No-Crochet Yarn Pumpkin (2 Easy Methods)

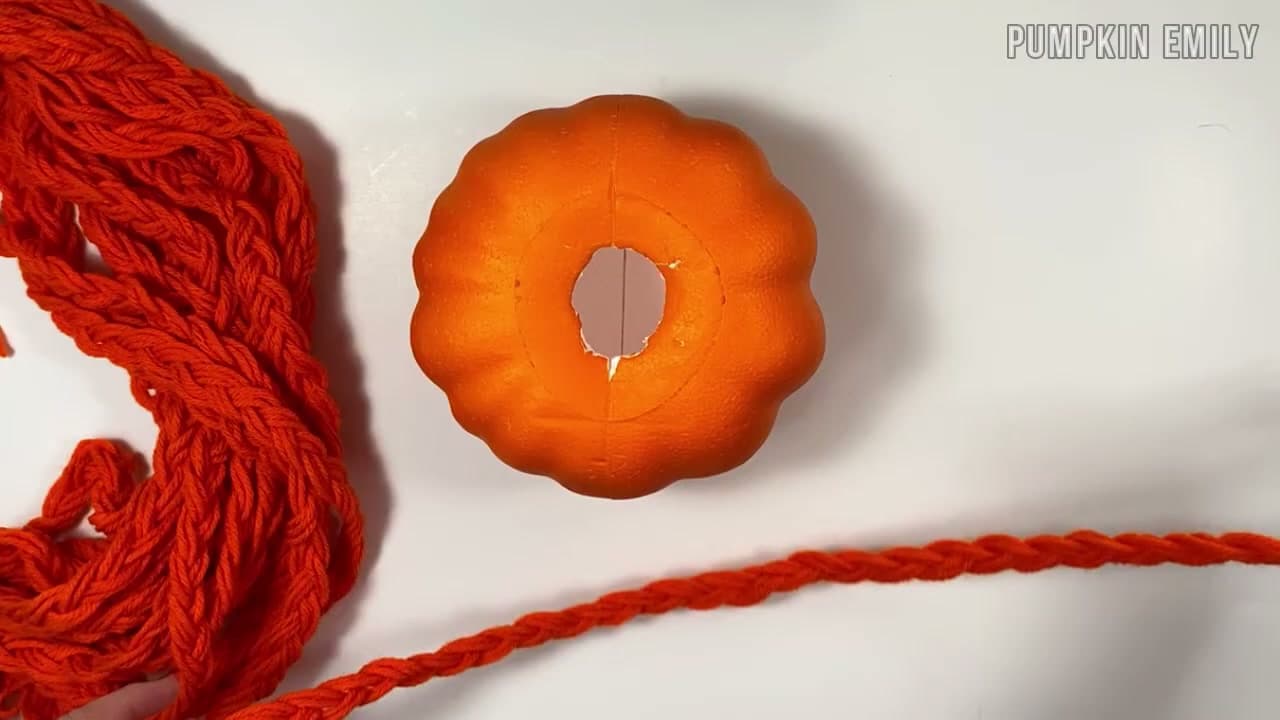
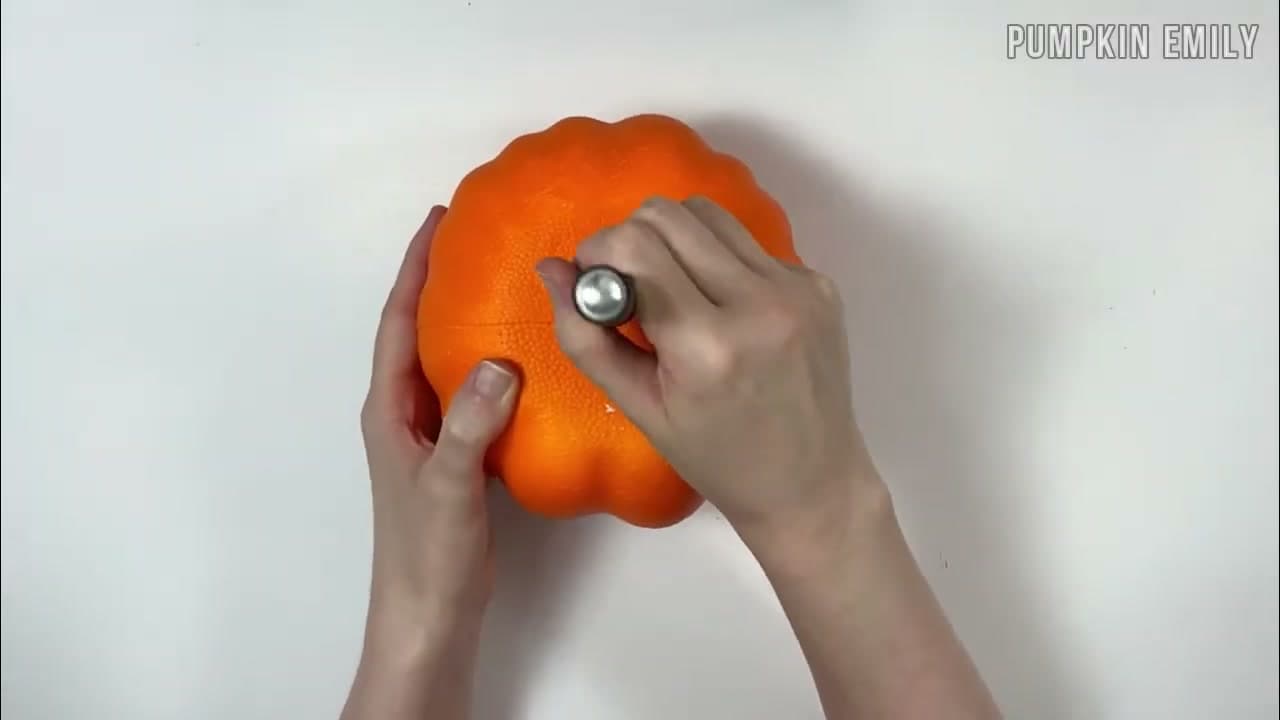
Pull the plastic stem off the foam pumpkin and set it aside - you won't need it again. Use the x-acto knife to cut a 1.5-inch circle out of the top of the pumpkin where the stem used to sit. Flip the pumpkin over and cut a matching 1.5-inch hole in the bottom.

Tip the pumpkin upside down over a trash can and shake out the loose foam crumbs. You want a hollow path running straight through the body from top to bottom. This is what the yarn will wrap through.

Tip

Cut slowly. Foam pumpkins are soft and the x-acto blade glides through them - it's easy to cut a hole that's way bigger than 1.5 inches if you push too hard. A small hole is better than a big one. You can always make it bigger; you can't make it smaller.

Used in this step: X-Acto Number 1 Craft Knife with Cap, Foam Pumpkin Set Small Orange 6 Pack

3

Step 3: Wrap Chunky Yarn Through the Pumpkin

2:10
Step 3: Wrap Chunky Yarn Through the Pumpkin - How to Make a No-Crochet Yarn Pumpkin (2 Easy Methods)

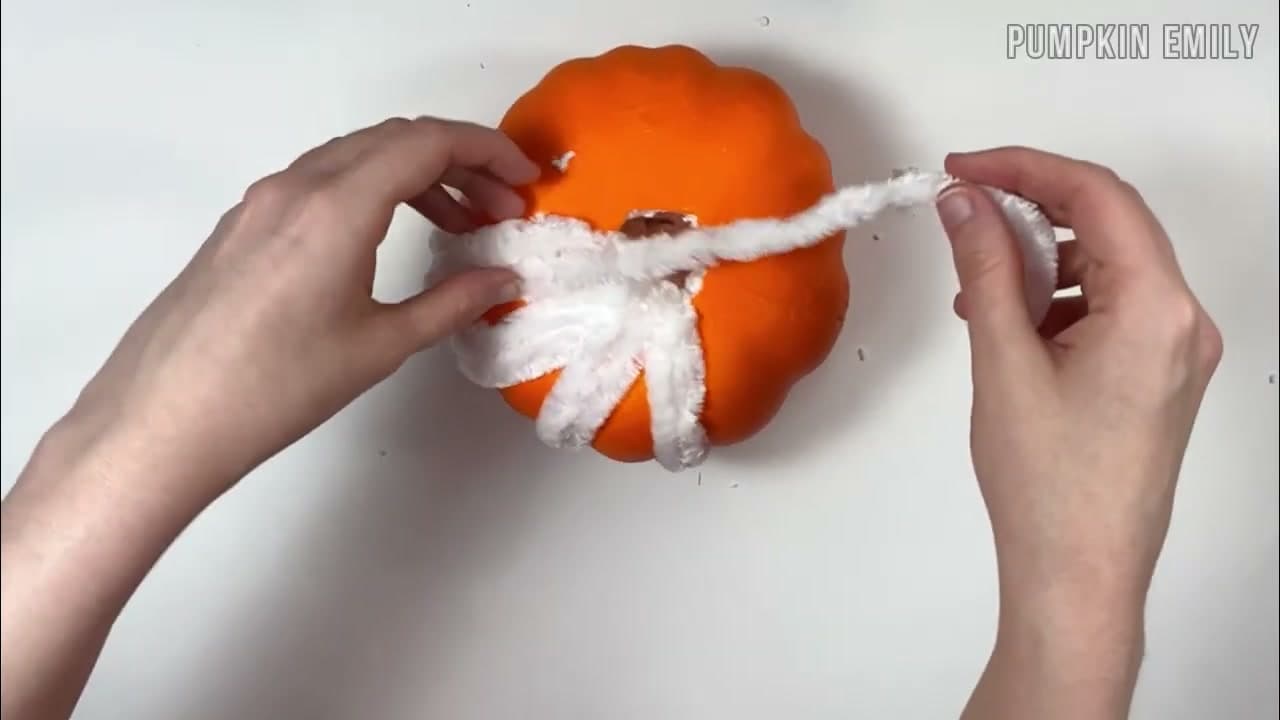
Cut a long piece of chunky yarn - at least three or four feet to start. Push one end of the yarn down through the top hole and out the bottom. Now wrap the strand around the outside of the pumpkin and back up through the bottom hole and out the top. That's one wrap.

Keep going. Each pass adds another vertical line of yarn across the pumpkin body. Slip the paperclip onto the working end whenever the yarn is being stubborn - it makes pulling through the holes much faster. Rotate the pumpkin slightly between wraps so the yarn spreads evenly around the surface.

Tip

If you run out of yarn mid-wrap, just tuck the end inside the hole and start a new piece. The wraps cover the joins so no one will ever see them. You don't need to tie anything off until the very end.

Used in this step: Lion Brand Wool-Ease Thick & Quick Yarn Fisherman, Bernat Blanket Yarn Cream, Standard Paper Clips 100 Pack

4

Step 4: Finish the Wrap and Add the Stem

3:40
Step 4: Finish the Wrap and Add the Stem - How to Make a No-Crochet Yarn Pumpkin (2 Easy Methods)

Keep wrapping until the entire foam pumpkin is hidden under yarn. When you can't see the orange anymore, you're done. Tuck the loose end of the yarn down inside the pumpkin through the top hole. Wrap it once around one of the side strands to lock it in place, then trim any excess with scissors.

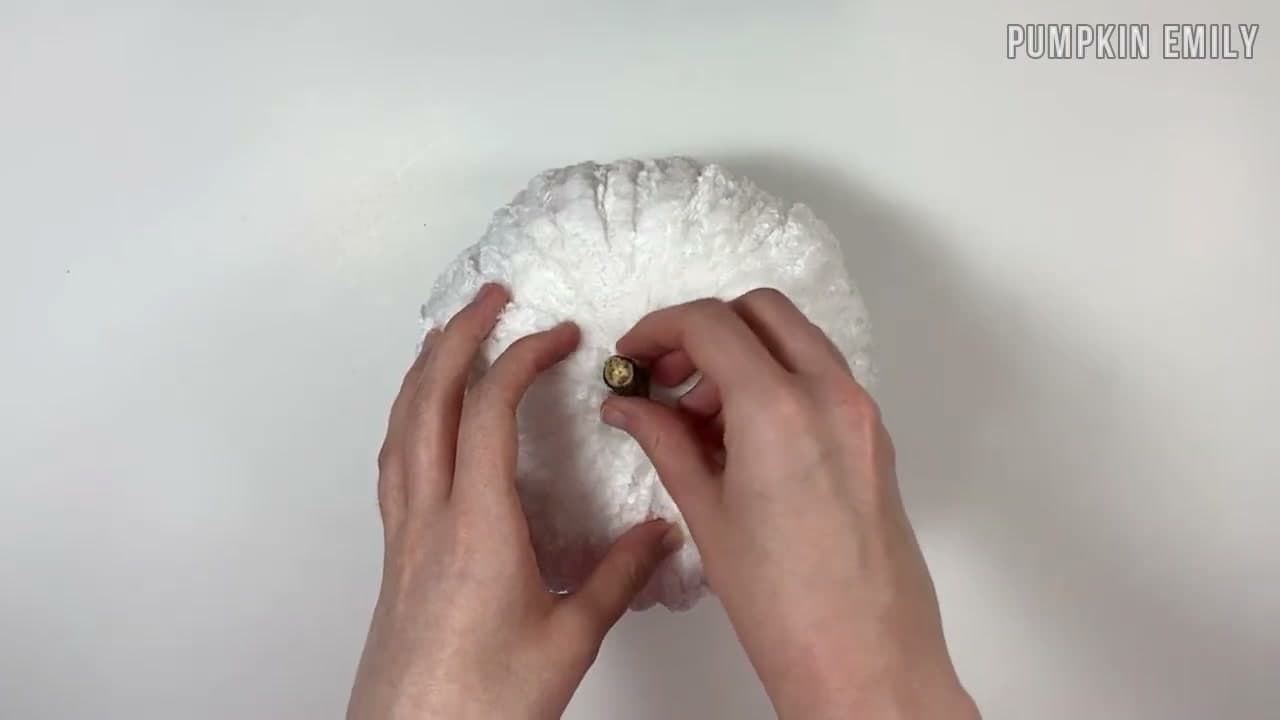
Push a small twig or cinnamon stick straight down into the top hole as the stem. The yarn holds it in place naturally - if it wobbles, add a tiny dab of hot glue at the base. That's Method 1 finished. No crochet, no needles, no stitches. Just yarn wrapped through a foam pumpkin.

Tip

Fluff the yarn with your fingers after the stem goes in. The chunky strands relax and settle into a softer, fuller shape once you stop pulling on them.

Used in this step: Cinnamon Sticks 3-inch 8 oz Bag, Hot Glue Gun with Glue Sticks, Wired Faux Fall Leaves Bundle

5

Step 5: Gather Your Supplies for Method 2

4:05
Step 5: Gather Your Supplies for Method 2 - How to Make a No-Crochet Yarn Pumpkin (2 Easy Methods)

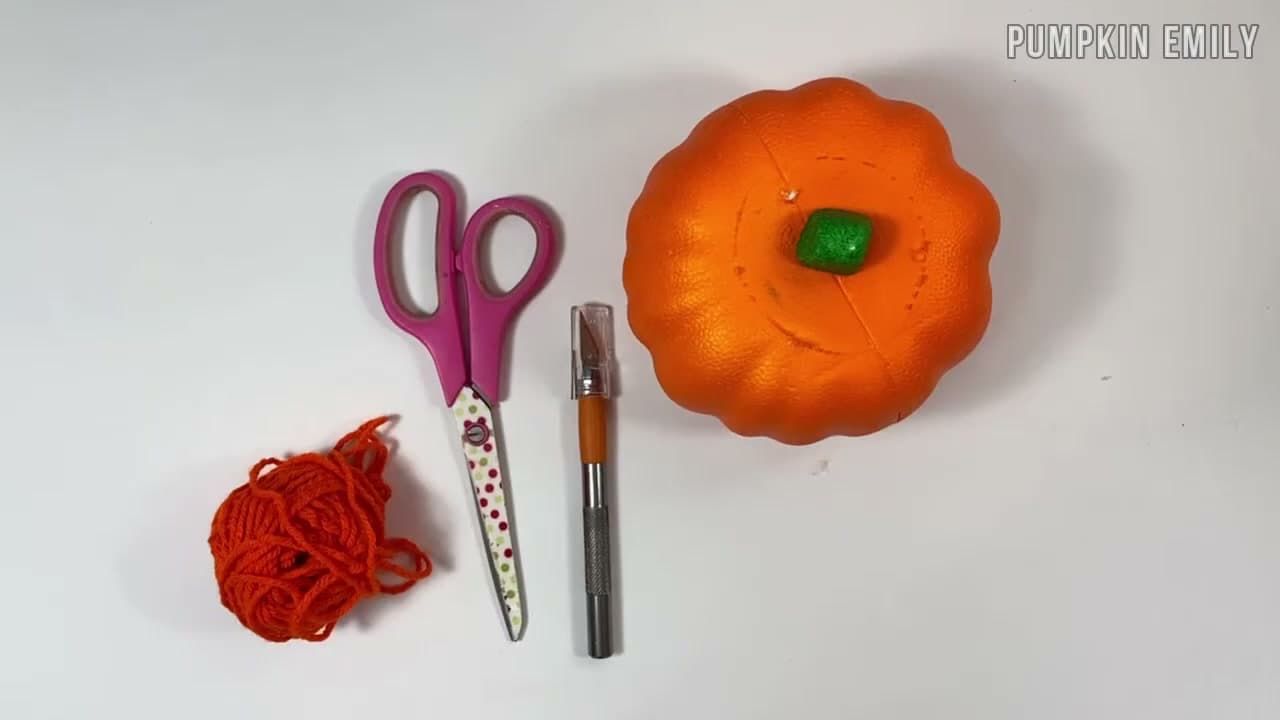
For the braided pumpkin you need a second foam pumpkin, one skein of orange worsted-weight yarn (regular thickness, not chunky), the x-acto knife, scissors, and another twig for the stem. The paperclip stays in the drawer for this one - you won't need it.

Pull the stem off the foam pumpkin and cut a 1.5-inch hole in the top, just like Method 1. This time you can skip the bottom hole - the braids tuck into the top only, so the bottom stays sealed. Set the pumpkin aside and grab the orange yarn. You're about to make a lot of braids.

Tip

If your yarn is on a roll instead of a skein, pull a long working tail out before you start cutting. Cutting tiny pieces off a tight skein is annoying. Pull, then cut.

Used in this step: Red Heart Super Saver Yarn Pumpkin Orange, Caron Simply Soft Yarn Pumpkin, X-Acto Number 1 Craft Knife with Cap, Foam Pumpkin Set Small Orange 6 Pack

6

Step 6: Cut 30-Inch Strands and Make the First Braid

4:50
Step 6: Cut 30-Inch Strands and Make the First Braid - How to Make a No-Crochet Yarn Pumpkin (2 Easy Methods)

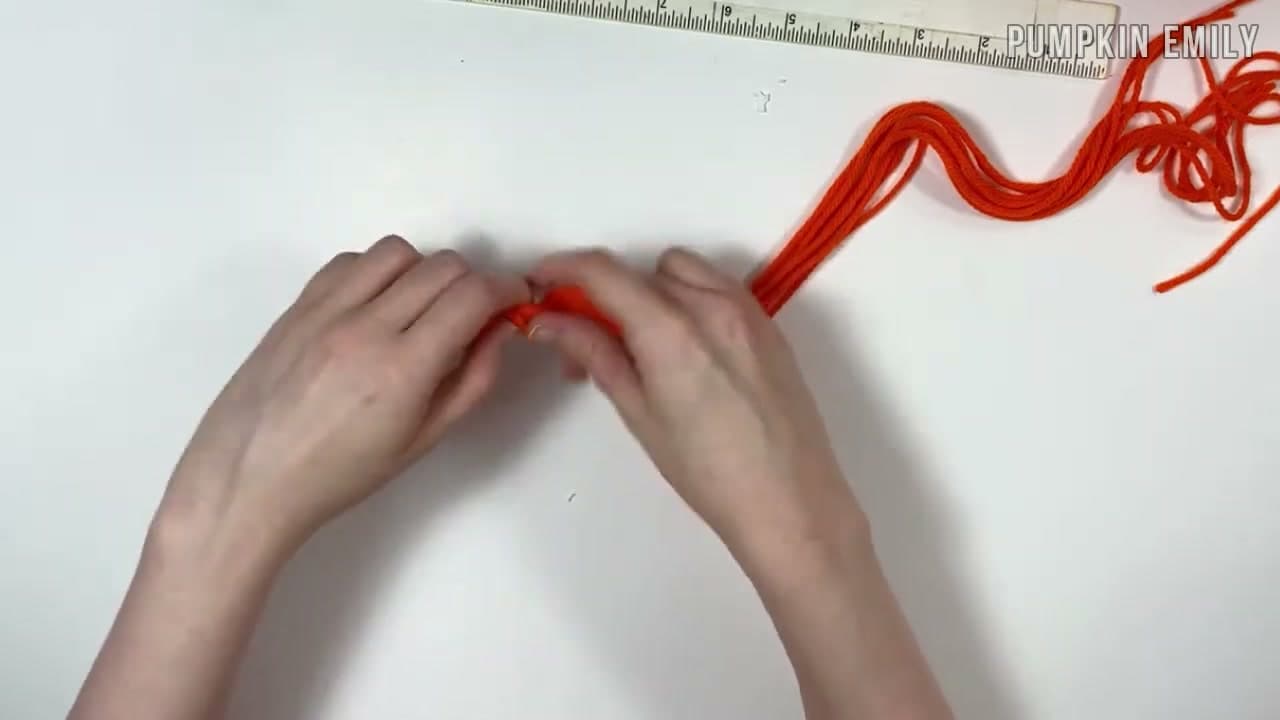
Cut nine pieces of yarn, each about 30 inches long. A ruler or measuring tape helps - or just measure the first one and use it as a template for the rest. Stack the nine strands together and tie one end in a tight overhand knot, leaving a small tail.

To braid, tape the knotted end to the table or clip it onto a clipboard so it stays put. Separate the nine strands into three groups of three. Now braid - left over middle, right over middle, repeat - all the way down to the other end. Tie a second knot to lock the braid in place. That's one braid done.

Tip

If you can braid hair, you can braid this. The three-strand braid you learned as a kid is exactly the technique. Keep the tension consistent so the braid is even from top to bottom.

Used in this step: Red Heart Super Saver Yarn Pumpkin Orange, Caron Simply Soft Yarn Pumpkin, Measuring Tape Soft Cloth

7

Step 7: Make About 20 Braids Total

6:00
Step 7: Make About 20 Braids Total - How to Make a No-Crochet Yarn Pumpkin (2 Easy Methods)

Repeat the braiding process until you have a stack of about 20 finished braids. Each one should be roughly the same length so the pumpkin looks even when they're all on. The exact count depends on how thick your yarn is and how big your pumpkin is - thicker yarn means fewer braids, smaller pumpkin means fewer braids.

Start with 20 and adjust as you go. If you cover the pumpkin and still see orange foam between the braids, make a few more. If you have braids left over, save them for a second pumpkin.

Tip

Turn on a podcast. Twenty braids takes a while, and it's a perfect mindless task to pair with audio. Most people can finish the whole batch in under thirty minutes.

Used in this step: Red Heart Super Saver Yarn Pumpkin Orange, Sharp Fabric Scissors 8 inch

8

Step 8: Lay Braids Across the Pumpkin and Tuck the Ends In

6:55
Step 8: Lay Braids Across the Pumpkin and Tuck the Ends In - How to Make a No-Crochet Yarn Pumpkin (2 Easy Methods)

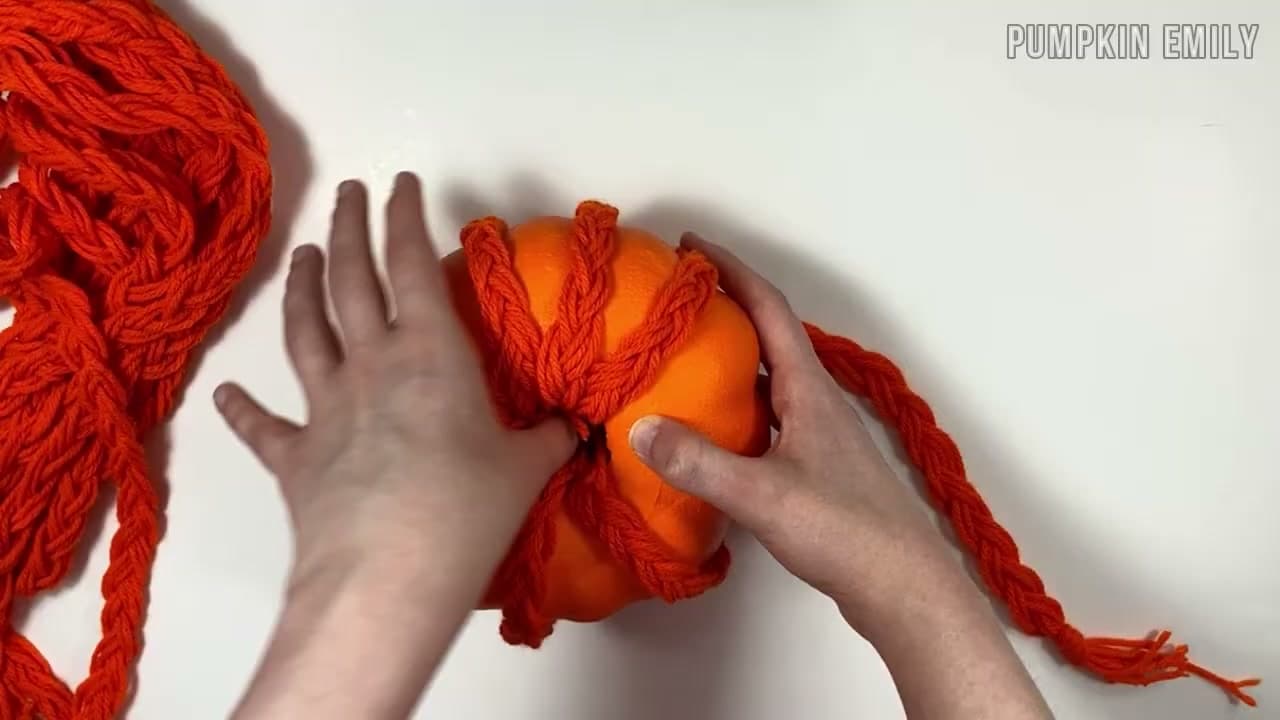
Lay out the first braid flat on the table. Set the pumpkin in the middle so the braid runs underneath it from one side to the other. Pick up both ends of the braid and tuck them down into the hole at the top of the pumpkin. The braid now runs from the top, down one side, under the bottom, up the other side, and back into the top.

Rotate the pumpkin a few degrees, lay the next braid the same way, and tuck both ends into the top hole. Keep rotating between braids so they spread evenly around the pumpkin and the ridges look like the segments of a real pumpkin.

Tip

Rotating between braids is the whole trick. If you stack braids side by side without turning the pumpkin, they all crowd on one face and the back stays bare. Turn a quarter-inch each time and the coverage spreads naturally.

Used in this step: Foam Pumpkin Set Small Orange 6 Pack

9

Step 9: Fluff the Bottom, Add the Stem, and Display

7:40
Step 9: Fluff the Bottom, Add the Stem, and Display - How to Make a No-Crochet Yarn Pumpkin (2 Easy Methods)

Once the foam pumpkin is fully covered, flip it over and tuck or rearrange any braid ends sticking out the bottom so it sits flat on a surface. The braids will spread naturally with a little finger work.

Push a small twig or cinnamon stick into the top hole as the stem. The braid ends bunched up at the top hold the stem snug - no glue needed unless it leans badly. Add a faux leaf or a snip of plaid ribbon tied around the base of the stem for a little extra fall touch. Done. Two yarn pumpkins, no crochet, no needles, no patterns to read. Set them on the mantel with a no-sew cheesecloth ghost and you've got a Halloween table that took one afternoon to build.

Tip

Pair this with the carved or painted version for a full porch display. Carving a real pumpkin and painting a foam pumpkin both round out the yarn version nicely. And if you do want to try the hook-and-yarn route, our crochet farmhouse pumpkin takes about the same time.

Used in this step: Cinnamon Sticks 3-inch 8 oz Bag, Wired Faux Fall Leaves Bundle, Plaid Ribbon Fall Colors 10 Yards

Keep going

How to Make a Concrete Pumpkin (Fall Decor)

Products Used

The Checklist

How to Make a No-Crochet Yarn Pumpkin (2 Easy Methods)

Tools
4
Materials
5
Steps
9
Video
8 min

Tools we recommend

Your Guide

Pumpkin Emily

As an Amazon Associate we earn from qualifying purchases. Links on this page may be affiliate links - clicking them and buying doesn't change your price, but helps support CraftingStepByStep.

Tags

Sunday How-To

New crafts tutorials, every Sunday

One short email with the week's best step-by-step guides. Free, no spam, unsubscribe anytime.

Test your knowledge

Did the lesson stick? Start with this one.

5 questions covering what you just read. No signup, no score saved, and you can stop after this one.

Question 1 of 5

For Method 1 (wrapped), what kind of yarn works best?

Quick reference

Key takeaways from How to Make a No-Crochet Yarn Pumpkin (2 Easy Methods)

5 questions, answers, and one-line explanations. Tap to expand.

  1. 1.For Method 1 (wrapped), what kind of yarn works best?

    Answer: Chunky / super bulky yarn - thin yarn takes forever and looks stringy

    Chunky yarn gives the fluffy heirloom texture; thin yarn looks stringy.

  2. 2.What modification do you make to the foam pumpkin?

    Answer: Cut 1.5-inch holes in BOTH the top AND bottom - hollow path through the body

    Top + bottom holes give the yarn a path to wrap through.

  3. 3.What's the paperclip used for in Method 1?

    Answer: Clipping onto the working yarn end so it pulls through the holes faster when stubborn

    Paperclip = makeshift threading aid for pulling yarn through tight holes.

  4. 4.For Method 2 (braided), how many strands per braid?

    Answer: 9 strands separated into three groups of three

    Nine strands braided three-by-three gives the right braid thickness for the pumpkin segments.

  5. 5.What do you use as the stem?

    Answer: A small twig from the yard or a cinnamon stick pushed into the top hole

    Real twig or cinnamon stick - the yarn holds it; dab of hot glue if it wobbles.

Did this work for you?

What's next

Related collections

Curated theme pages that include this tutorial.

Weekly Digest

Liked this crafts tutorial?

Pick the categories you want to hear about. Weekly digest of new step-by-step tutorials. No spam, easy unsubscribe.

Send me tutorials about

We only email about new tutorials. Easy unsubscribe anytime.