How to Make a Scarecrow

CraftsEasy5:2612 stepsBrowse more →
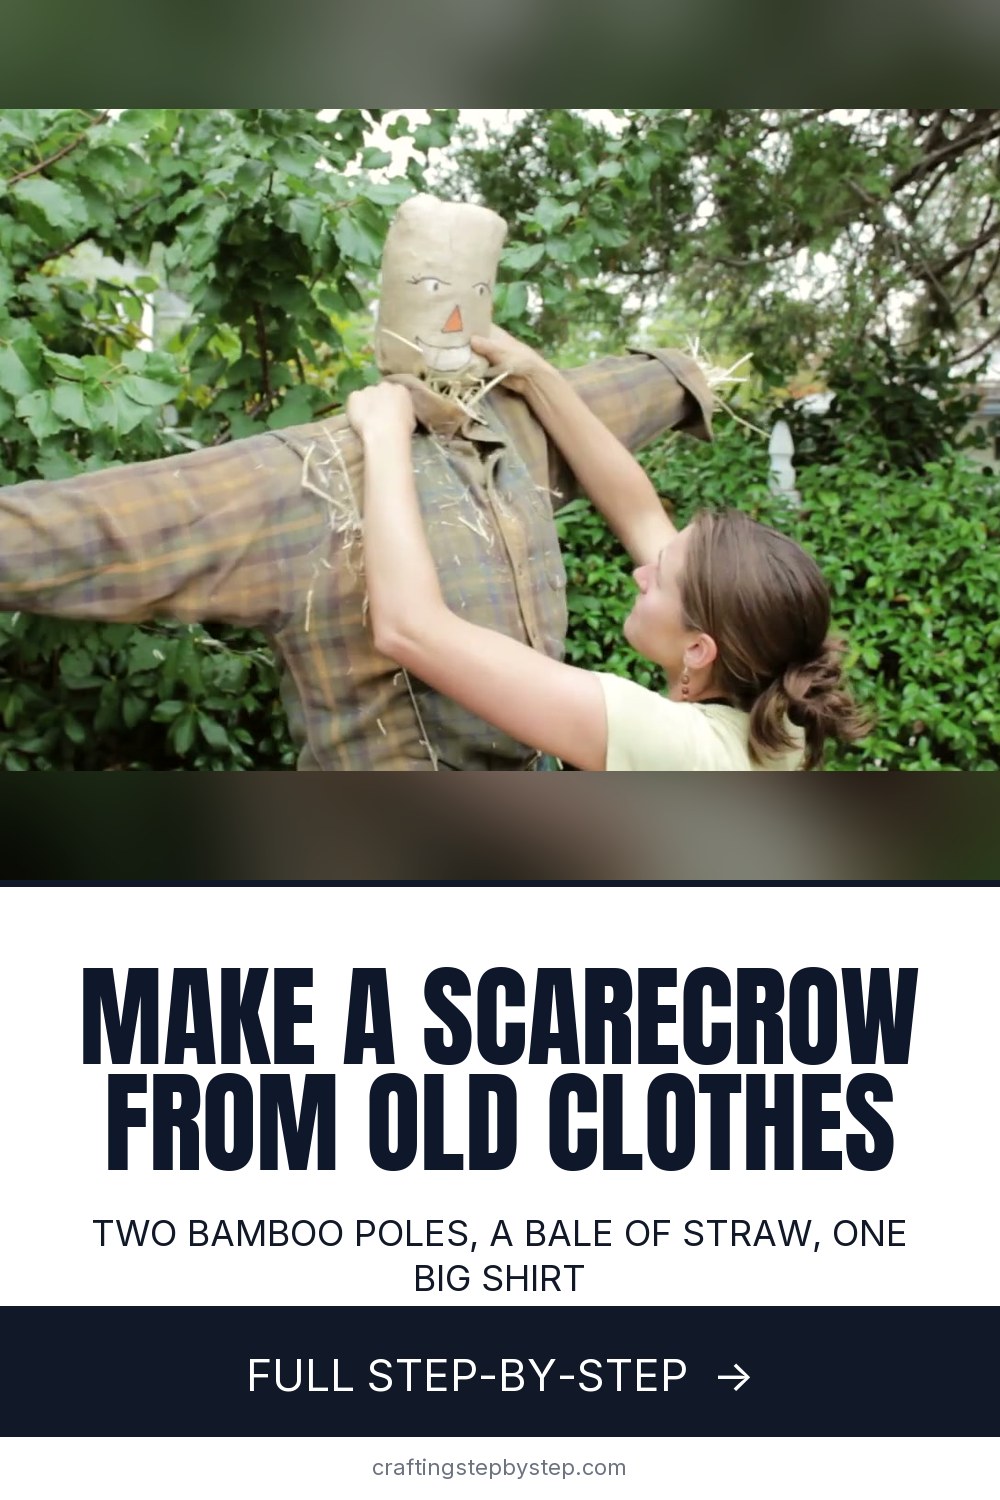
The finished result: How to Make a Scarecrow
Also in:Gardening

By CraftingStepByStepPublished

Based on a video by GrowOrganic Peaceful Valley.

Chard with holes chewed through it. Sunflower heads pecked to bits. If that is what your beds look like right now, you need a scarecrow, and you almost certainly have most of the parts already.

Virginia from Peaceful Valley Farm & Garden Supply builds one here in about five minutes of video, and the whole thing comes down to two bamboo poles, a bale of straw, and whatever old clothes are heading for the charity bag. The only real skill in it is the clove hitch that holds the arms on, and that is two loops and a tug.

What makes a scarecrow actually stand up

The part people get wrong is the frame. A scarecrow that flops over at the waist has usually been built on one pole with the arms wired on as an afterthought. Two poles lashed properly, with the crosspiece about six inches down from the top, gives you shoulders that hold their shape all season.

The other trick is netting. It is optional, and it is the difference between stuffing an arm in thirty seconds and fighting a shirt sleeve for ten minutes. Any garden netting works.

Make him weatherproof from the start

Use waterproof paint markers on the burlap head. A regular marker looks fine on day one and runs straight down his chest in the first rain, and there is no fixing it once it has bled into the fabric.

Step-by-Step Guide

12 steps · about 5 minutes.Check off each step as you go and your progress saves automatically.

1

Step 1: Lay Out Your Materials

0:30
Step 1: Lay Out Your Materials - How to Make a Scarecrow

Get everything in one place before you start. You want old clothes, hemp twine, a bale of straw, a sewn burlap bag for the head, and two bamboo poles - one about seven foot for the body, one about four foot for the arms.

Pick a button-up shirt if you have one, and go a size or two bigger than you think. You will be feeding it over a rigid crosspiece, and a pullover turns that into a wrestling match.

Tip

Netting is listed as optional and it genuinely speeds this up. Stuffing a loose net tube and sliding it into a sleeve beats packing straw down the sleeve by hand.

2

Step 2: Stuff the Netting to Build the Arms

1:28
Step 2: Stuff the Netting to Build the Arms - How to Make a Scarecrow

Pack straw into a length of netting to form each arm. Push it in firmly and keep going until the tube holds its own shape - a loosely packed arm sags at the elbow within a week.

Not using netting? Rubber-band the shirt cuffs shut and stuff straw straight down the sleeves instead. Same result, more patience required.

Tip

Straw, not hay. Hay holds moisture and rots from the inside out.

Used in this stepgarden nettingstraw bale
3

Step 3: Slide the Arms onto the Four Foot Pole

1:36
Step 3: Slide the Arms onto the Four Foot Pole - How to Make a Scarecrow

Thread a stuffed arm onto each end of the four foot pole. Work the netting along the bamboo until both sides sit evenly and you have bare pole left in the middle for the lashing.

4

Step 4: Start a Clove Hitch on the Tall Pole

1:48
Step 4: Start a Clove Hitch on the Tall Pole - How to Make a Scarecrow

Cut yourself five or six feet of twine. About six inches down from the top of the seven foot pole, make two loops in the same direction, slip one behind the other, and drop the pair over the top of the pole.

Pull it snug. That is a clove hitch, and it is the anchor everything else hangs off.

Tip

Six inches of pole above the hitch is what the burlap head sits on later. Go much lower and the head has nothing to grip.

5

Step 5: Lash the Crosspiece On

2:04
Step 5: Lash the Crosspiece On - How to Make a Scarecrow

Lay the arm pole across the tall one and start wrapping. Take the twine under, over, under, over the crosspiece three or four times.

Then change direction and wrap between the two poles, the same three or four times. Those wraps between the poles are what actually pull the joint tight - the ones over the top just hold position.

6

Step 6: Finish with an X and Tuck the End

2:37
Step 6: Finish with an X and Tuck the End - How to Make a Scarecrow

Make an X across the join with the last of the twine, then slip the loose end under the cross to lock it off. No knot needed.

Grab both arms and give them a twist. If the crosspiece moves at all, unwrap and add another round of wraps between the poles before you dress him.

7

Step 7: Dress the Frame in the Shirt

2:50
Step 7: Dress the Frame in the Shirt - How to Make a Scarecrow

Feed one sleeve over an arm, then the other, and button the shirt up the front. This is where the oversized button-up earns its place.

8

Step 8: Tie Off and Stuff the Trouser Legs

3:44
Step 8: Tie Off and Stuff the Trouser Legs - How to Make a Scarecrow

Tie off the bottom of each trouser leg with twine so the straw cannot fall out the ankles, then pack both legs full.

Once they are stuffed, lash the waistband to the frame. The trousers are carrying real weight now, so use twine rather than trusting the fit.

9

Step 9: Rig Twine Suspenders

4:02
Step 9: Rig Twine Suspenders - How to Make a Scarecrow

Cut two lengths of twine, three to four feet depending on how tall your scarecrow is. Run them from the front belt loops, up over the crosspiece, and down to the back belt loops - exactly like suspenders.

Skip this and the trousers slide down the pole the first time the wind gets under the shirt.

10

Step 10: Stand Him Up and Pack His Chest

4:08
Step 10: Stand Him Up and Pack His Chest - How to Make a Scarecrow

Lean him against a wheelbarrow or a fence so he stays upright while you work. Push handfuls of straw in at the waist and up through the shirt until his chest fills out.

The pole will stick out the back at the bottom. Leave it. That is the bit you drive into the ground.

Tip

A bit of straw poking out at the cuffs and collar is the look. Do not tidy it away.

11

Step 11: Make the Burlap Head

4:40
Step 11: Make the Burlap Head - How to Make a Scarecrow

Turn the sewn burlap bag inside out so the seams sit on the inside, then draw a face on it with waterproof paint markers.

Waterproof is not a suggestion here. An ordinary marker will run down his front in the first rain and there is no getting it back out of burlap. Stuff the bag with straw and cinch the bottom with twine.

12

Step 12: Add the Head, Hat and Accessories

4:56
Step 12: Add the Head, Hat and Accessories - How to Make a Scarecrow

Push the head down onto the top of the pole so it sits tight against the shoulders. Add a straw hat, tie on a bandana, and knot a few strips of bird scare tape to the arms if you have it - the flash and rattle does more work than the scarecrow does.

Name him. Then stand him where the birds have been winning.

Tip

Move him every couple of weeks. Birds work out very quickly that a thing which never moves is not a threat.

Used in this stepbird scare tapestraw hat

Keep going

How to Make Fake Blood

Products Used

The Checklist

How to Make a Scarecrow

Tools
2
Materials
11
Steps
12
Video
5 min

Tools we recommend

Your Guide

GrowOrganic Peaceful Valley

As an Amazon Associate we earn from qualifying purchases. Links on this page may be affiliate links - clicking them and buying doesn't change your price, but helps support CraftingStepByStep.

Tags

Sunday How-To

New crafts tutorials, every Sunday

One short email with the week's best step-by-step guides. Free, no spam, unsubscribe anytime.

Did this work for you?

What's next

Related collections

Curated theme pages that include this tutorial.

Weekly Digest

Liked this crafts tutorial?

Pick the categories you want to hear about. Weekly digest of new step-by-step tutorials. No spam, easy unsubscribe.

Send me tutorials about

We only email about new tutorials. Easy unsubscribe anytime.