1
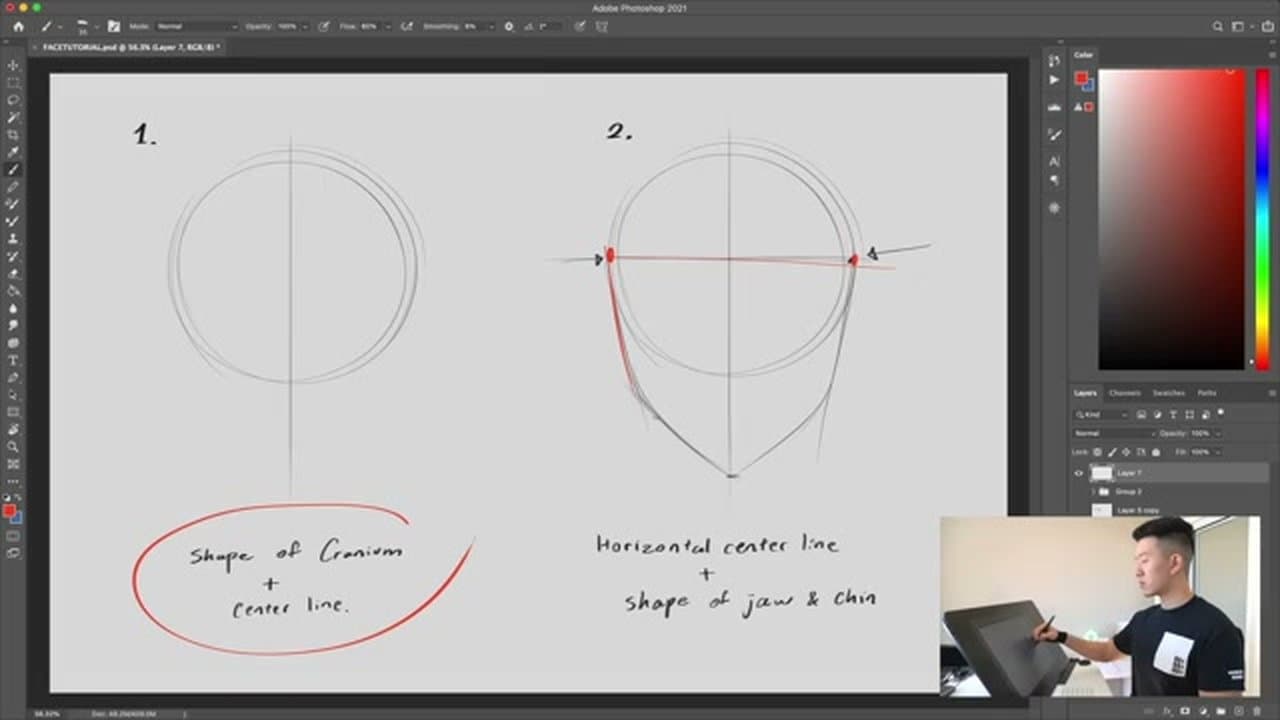
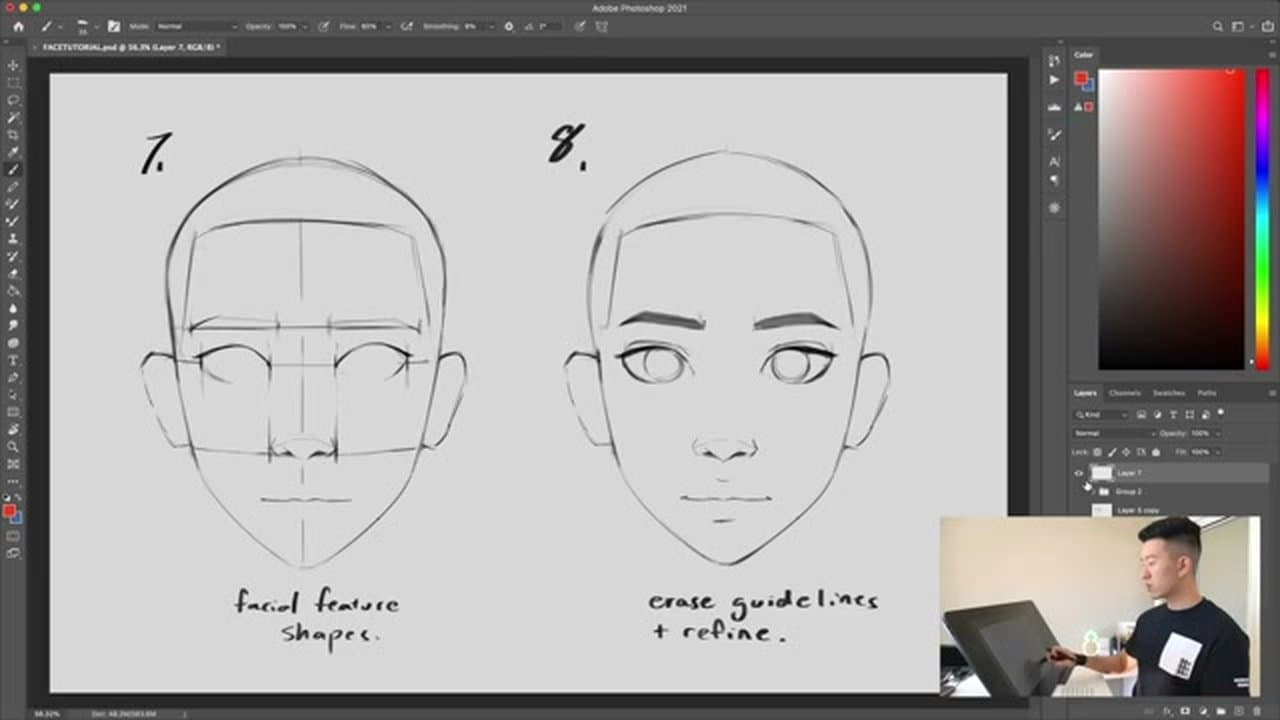
Step 1: Draw the Cranium and Center Line
1:00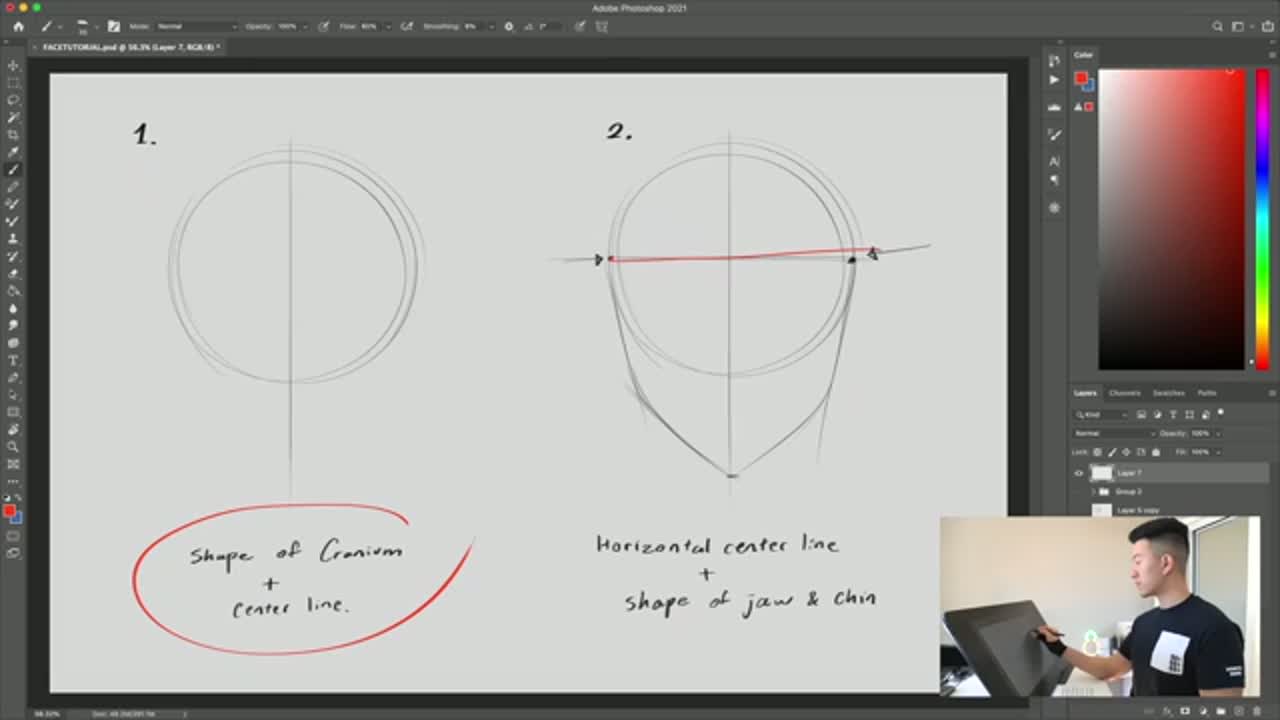
Start with a circle for the cranium - that's the top part of the skull that holds your brain. From the front, the cranium reads as a round egg shape, so a circle is close enough to get going.
Now run a vertical center line straight down through it. The center line is your anchor for everything that follows. If you ever tilt the head later, the center line tilts with it, so every feature stays glued to the right spot on the face.
Tip
Keep the circle loose. You'll refine the outline later, so don't sweat a perfect shape - what matters is that the proportions are right.