How to Draw a Cat - Gesture-Drawn Sitting Cat in 7 Steps

CraftsEasy7:127 stepsBrowse more →
Also in:Painting

By CraftingStepByStepPublished Updated

Based on a video by Art ala Carte.

Cats are hard to draw stiffly. The whole point of a cat is fluid motion, and a careful, tight pencil line strips that out. The fix is gesture drawing - fast, loose strokes that prioritize energy over accuracy. You'll trace over each shape multiple times, and the line you end up with is the one that feels right.

Art ala Carte builds a sitting cat from three circles - head, chest, rump - then adds ears, a spine, paws, and a tail. The construction is intentionally messy. Once the silhouette is there, she breaks the smooth outline with little fur tufts at every direction change, which is what makes the cat read as a cat and not a stuffed animal.

The whole tutorial runs about seven minutes. Plan for a loose hand, a soft pencil, and a willingness to redraw the same line three or four times. Tight grips and committed first strokes are what kill cat drawings.

Step-by-Step Guide

1

Step 1: Sketch a Loose Head Circle Using Gesture Drawing

0:55
Step 1: Step 1: Sketch a Loose Head Circle Using Gesture Drawing

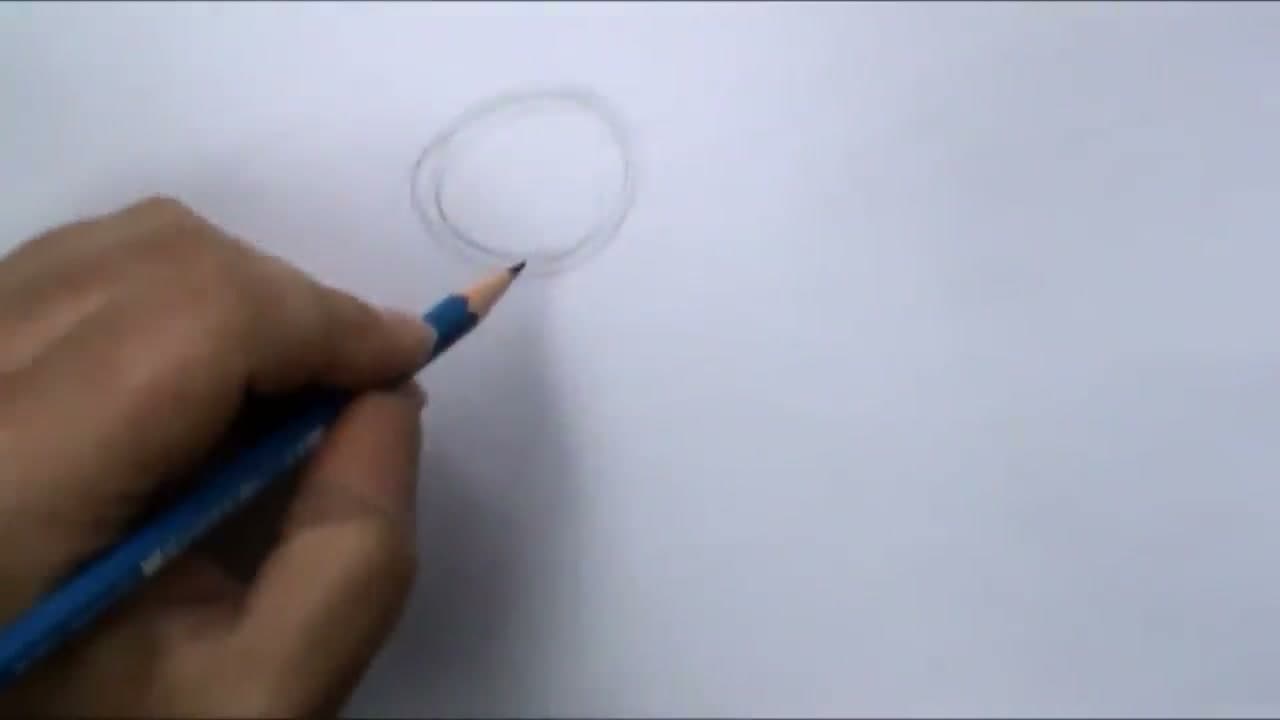
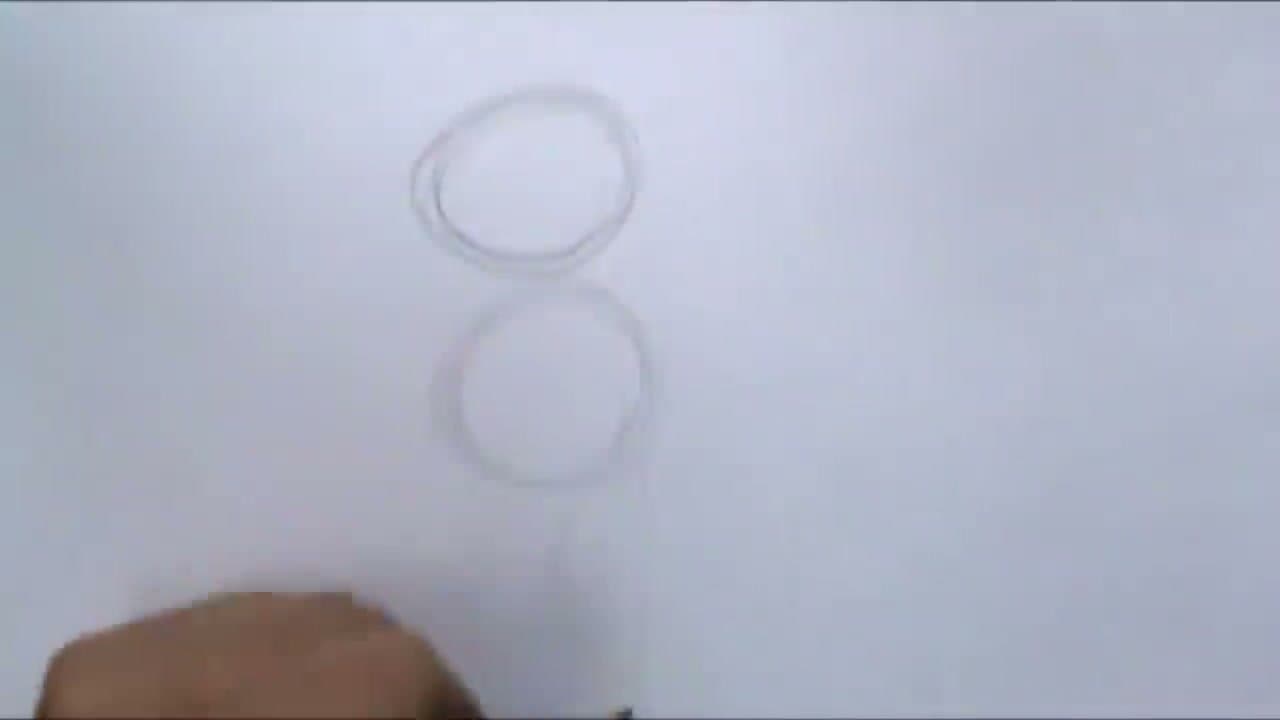
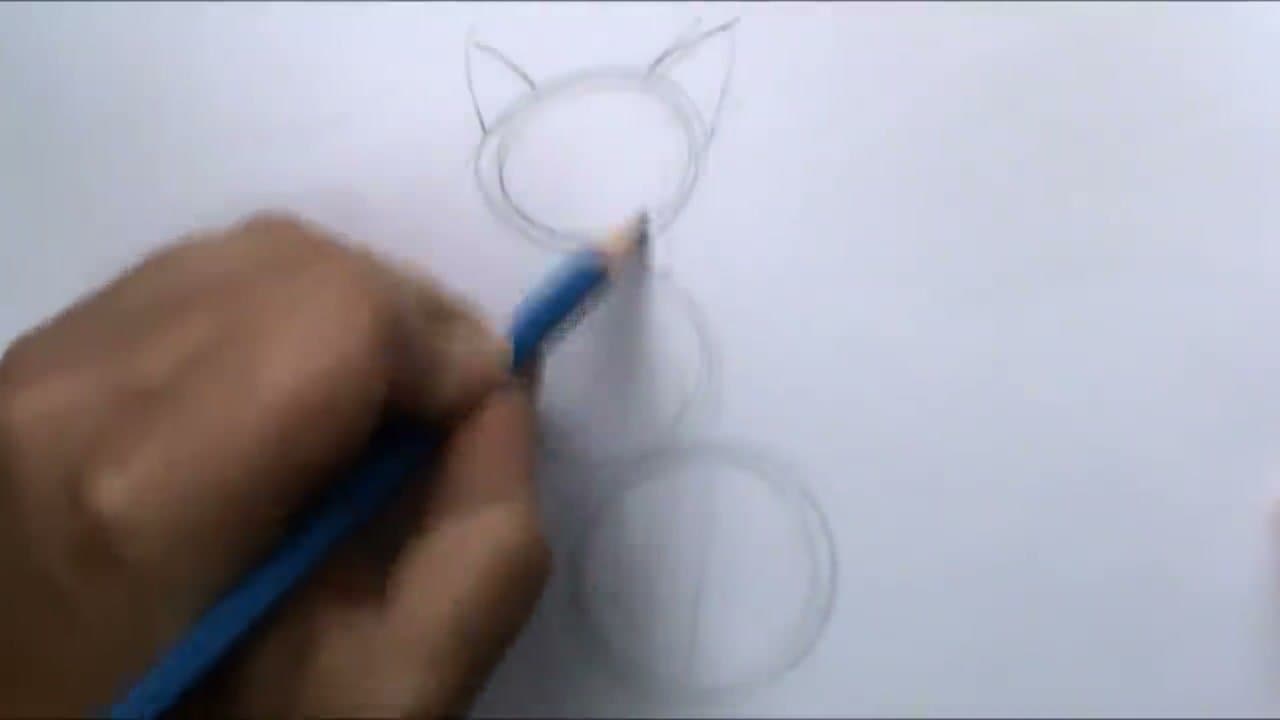
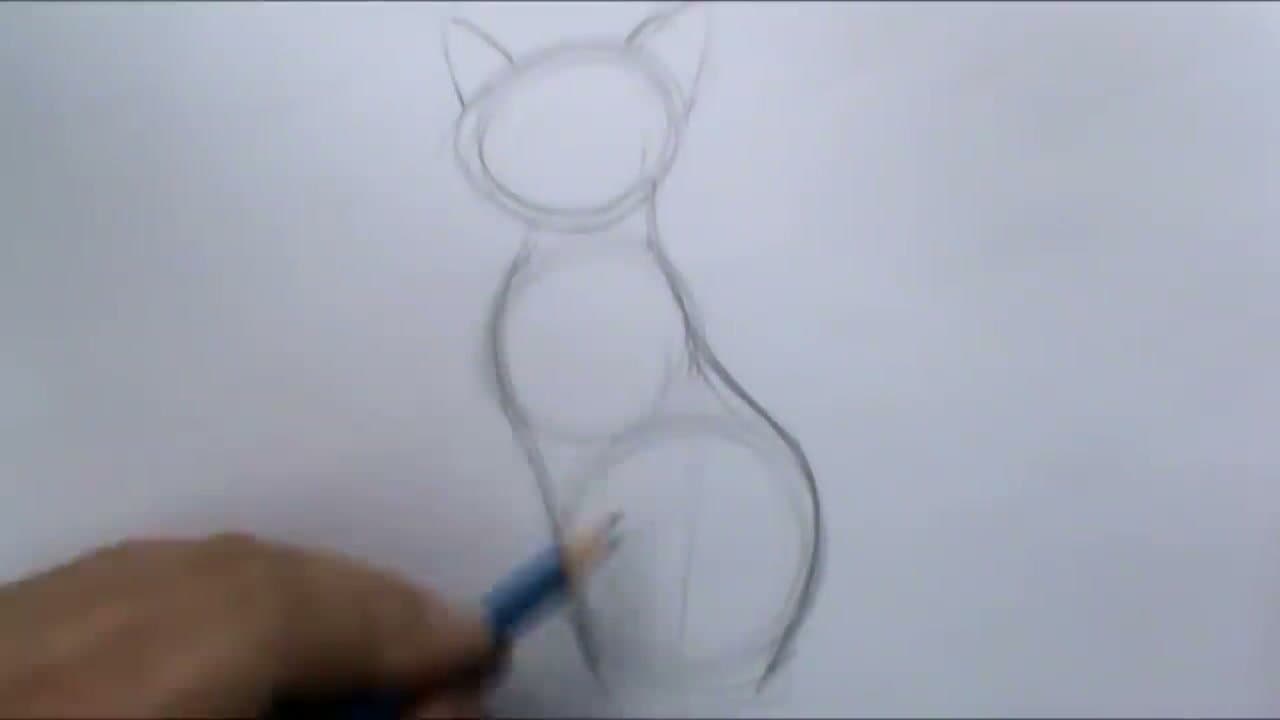
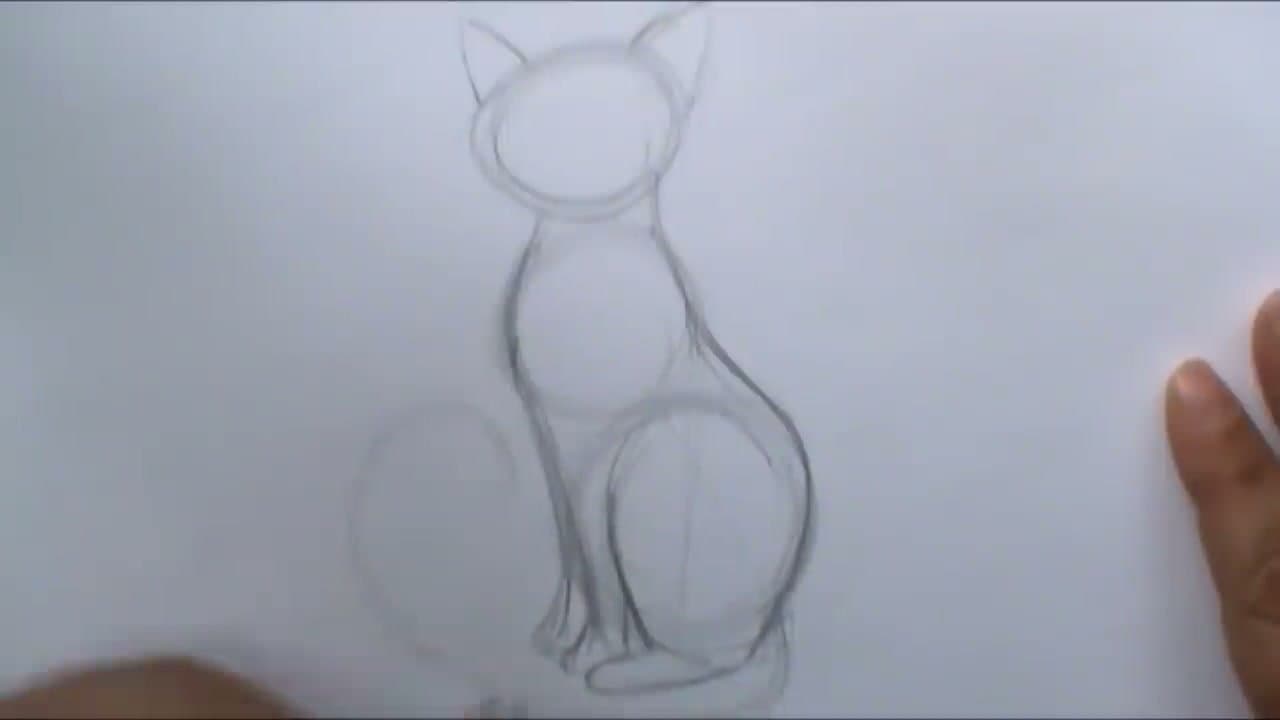
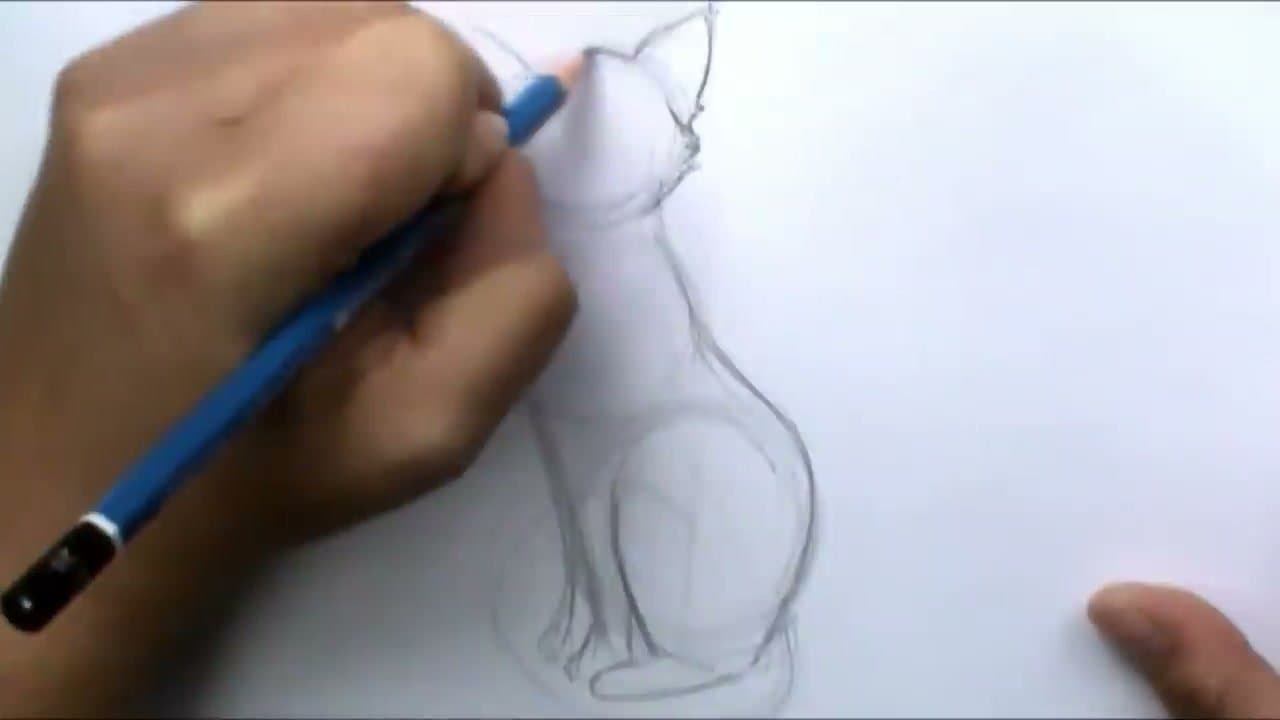
Hold your pencil loosely. Don't grip it like you're writing - more like you're balancing it. Sketch a circle near the top of the page for the cat's head. Go around the same shape three or four times, letting your hand find the line you want.

This is gesture drawing - fast movement, light pressure, multiple passes. You're not committing to anything yet. The whole point is to keep your hand moving so the cat ends up with motion rather than stiffness.

Tip

If your pencil starts pressing hard, stop and shake out your hand. Tight muscles produce tight lines, and tight lines kill the gesture.

2

Step 2: Add Chest and Body Circles

1:15
Step 2: Step 2: Add Chest and Body Circles

Draw a second circle just below the head for the chest. Make it roughly the same size as the head circle.

Then drop down and draw a third, larger circle for the body and rump. Offset it - only the top half should overlap with the chest circle, leaving the bottom half forming the seat of the cat.

Stand back. Right now you have three circles that look like a snowman tipping forward. That's correct. The cat shape is hiding inside this construction.

3

Step 3: Add Ears and the Spine Line

2:00
Step 3: Step 3: Add Ears and the Spine Line

On top of the head circle, draw two triangle shapes for the ears. Sit them slightly forward of the top - cats hold their ears up and a little forward when relaxed.

Now draw the spine. Start at the back of the head, curve down over where the shoulder would be, run across the back, and end at the rump. This single curving line connects the three circles into one continuous shape.

Tip

The spine curve sets the cat's mood. A pronounced arch reads as alert or stretched; a gentle slope reads as relaxed and sitting. Match the energy you want.

4

Step 4: Define the Chest, Hind Leg, and Front Paws

2:30
Step 4: Step 4: Define the Chest, Hind Leg, and Front Paws

Smooth out the chest by tracing along the front of the head and chest circles. Some cats are sleek, some are sturdier - decide how solid you want yours to look and adjust the chest line accordingly.

The hind leg blends into the rump because of how loose a cat's fur and skin are. Don't draw a hard line at the joint - just curve gently from the rump and tuck the back paw underneath.

Drop two short verticals down from the chest for the front paws. Keep them light. You'll refine them in the outline pass.

5

Step 5: Sketch the Tail (Try a Few Variations)

3:20
Step 5: Step 5: Sketch the Tail (Try a Few Variations)

The tail is where you choose the cat's personality. Sketch a few options lightly - tail wrapping around the front paws, tail curling up over the back, tail curling around one foot. Don't commit to one yet.

Step back and pick the version you like best. Then erase the alternates so your eye isn't fighting between two tail lines while you draw the rest.

Tip

A wrapped tail makes a cat look settled. A curled-up tail makes it look interested. Pick the mood before you commit.

6

Step 6: Outline With Little Fur Tufts at Direction Changes

4:30
Step 6: Step 6: Outline With Little Fur Tufts at Direction Changes

Now go around the whole cat with a slightly darker line - but not a smooth one. Every time the outline changes direction, break the line with a little tuft of fur.

Tuft locations: top of each ear, behind the shoulder, halfway down the back, where the rump meets the hind leg, and right at the base of the tail. These small irregular marks tell the eye there's fur there without forcing you to draw individual hairs.

Tip

Don't draw a tuft at every single point. Three or four well-placed tufts read as fur; ten makes the cat look spiky. Spacing matters.

7

Step 7: Erase Construction Lines and Sketch the Face

6:20
Step 7: Step 7: Erase Construction Lines and Sketch the Face

Lightly erase the three construction circles and any leftover tail variations. Use a kneaded eraser pressed and lifted rather than rubbing - this protects the paper and the lines you want to keep.

Touch up any outline marks that got faded during cleanup. Then sketch the face: two eyes on the upper half of the head, a small triangular nose at the center, and a curved mouth below. A few whisker lines on each cheek finish it.

Tip

Cat faces work in big shapes, not fine detail. Almond eyes with a pupil, a small inverted triangle for the nose, and a tiny curved mouth read as a cat at any size.

Products Used

☐ The Checklist

How to Draw a Cat - Gesture-Drawn Sitting Cat in 7 Steps

Tools
3
Materials
2
Steps
7
Video
7 min

Your Guide

Art ala Carte

As an Amazon Associate we earn from qualifying purchases. Links on this page may be affiliate links - clicking them and buying doesn't change your price, but helps support ShowMeStepByStep.

Tags

What's next

Weekly Digest

Liked this crafts tutorial?

Pick the categories you want to hear about. Weekly digest of new step-by-step tutorials. No spam, easy unsubscribe.

Send me tutorials about

We only email about new tutorials. Easy unsubscribe anytime.