How to Crochet a Turtle: Beginner Amigurumi

CrochetEasy1:00:027 stepsBrowse more →
Also in:Crafts

By CraftingStepByStepPublished Updated

Based on a video by The Mary Jay.

This amigurumi turtle works up in about an hour once you have the rhythm. Mary at The Mary Jay walks through every stitch in US terms, so even if magic circles and invisible decreases are new to you, the video pauses long enough to learn them in real time. The finished turtle is a chunky three-inch palm-sized plushie with a brown shell, a teal belly, four flat flippers, and a tiny tail.

The pattern is built in seven separate pieces that you sew together at the end: a two-color shell-and-body, a head, a tail, and four legs. Most of the work happens in the round with single crochet, which is the only stitch you really need to know. The only twist is round 10 where you crochet into the front loops only - that leaves a row of back loops that you'll later pick up in a contrasting color to form the visible shell-and-belly ridge.

If you have never used safety eyes before, this is a great first try. They're 18 mm posts that you push through the fabric and lock from the inside with a plastic washer. Once that washer clicks, the eye is permanent - so place both eyes before you commit, step back, and only snap the washers on when the face looks right. For plushies given to small children or pets, skip the safety eyes and embroider the eyes with floss instead.

If you're new to amigurumi techniques, the linked guides on crocheting a magic ring, single crochet, and fastening off cover the foundations. After this, the amigurumi octopus is a natural next step.

Step-by-Step Guide

1

Step 1: Gather Supplies and Make the Shell's Magic Circle

1:40
Step 1: Step 1: Gather Supplies and Make the Shell's Magic Circle

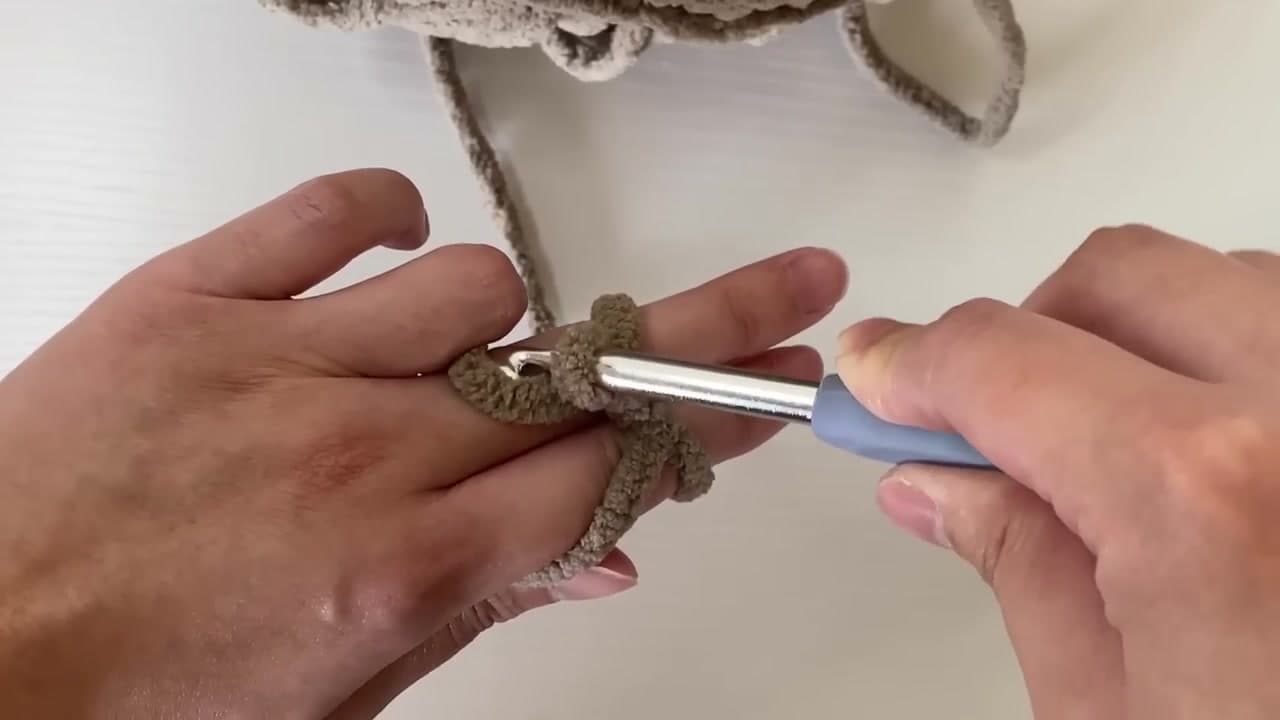
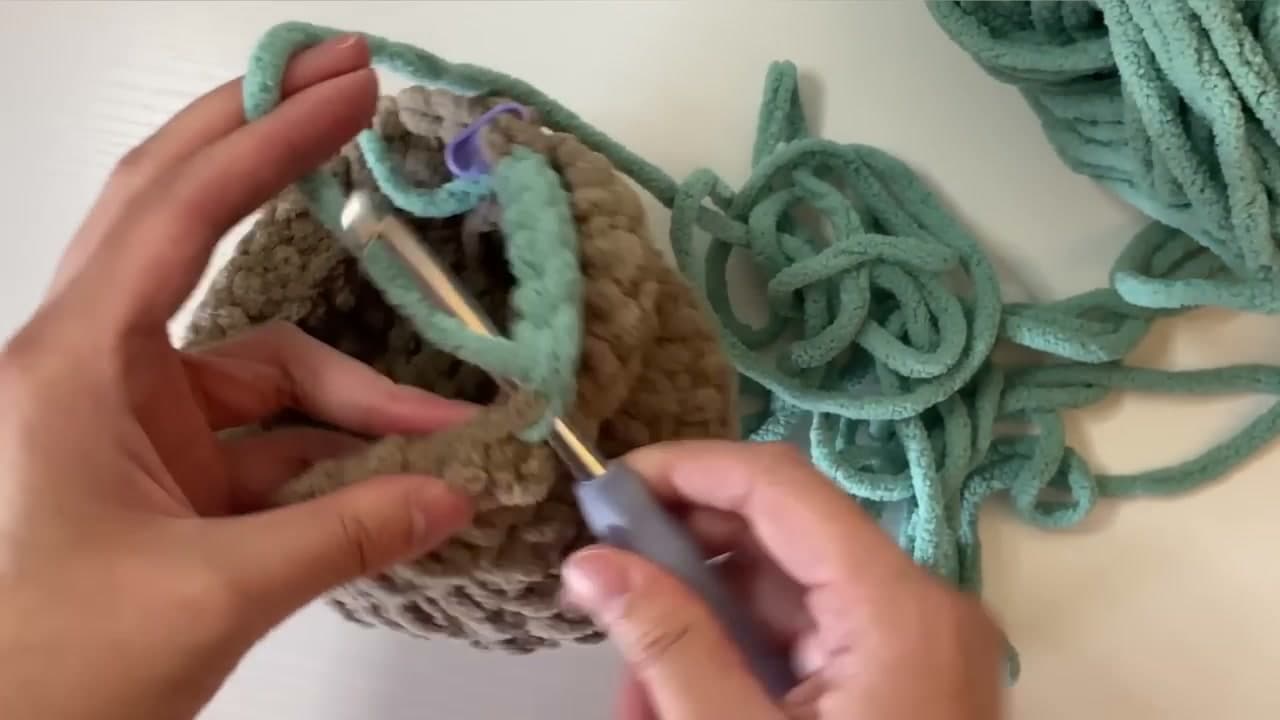
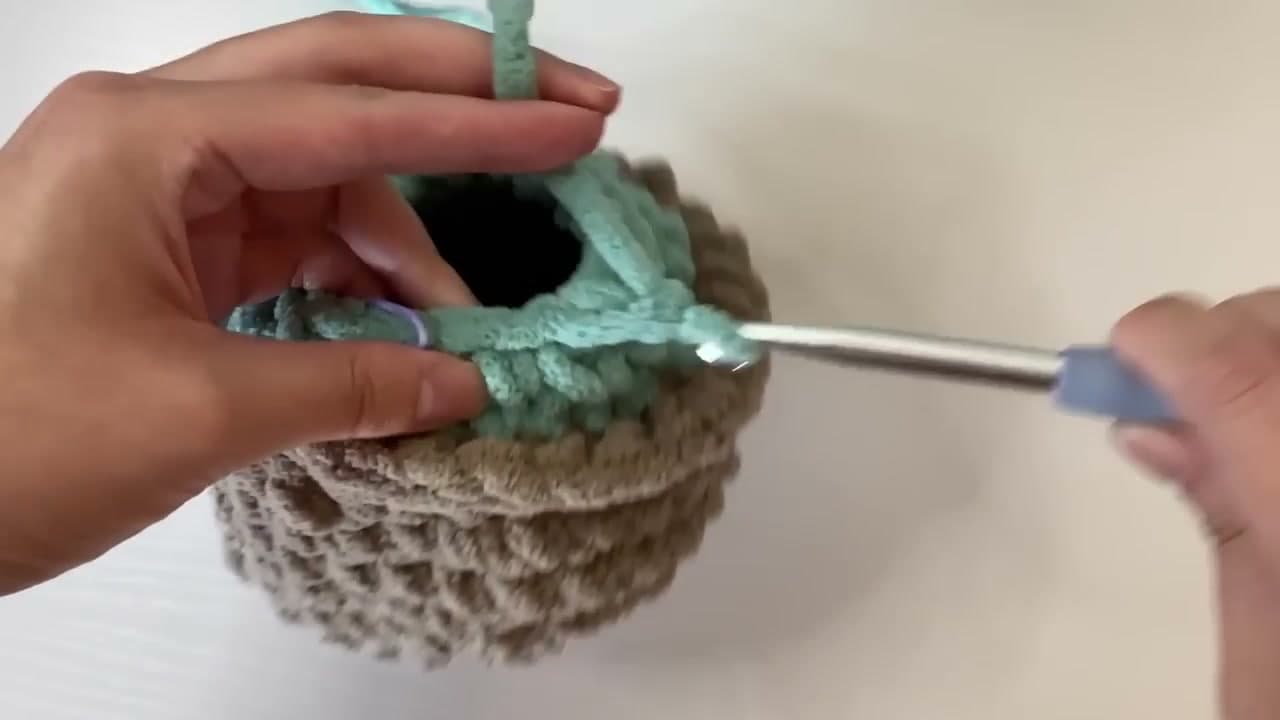
Lay out everything you need before you sit down: a 7 mm crochet hook, one skein of super bulky brown yarn for the shell, one skein of green for the body and limbs, polyester fiberfill, two 18 mm safety eyes with their locking washers, a yarn needle, sharp scissors, and at least two stitch markers.

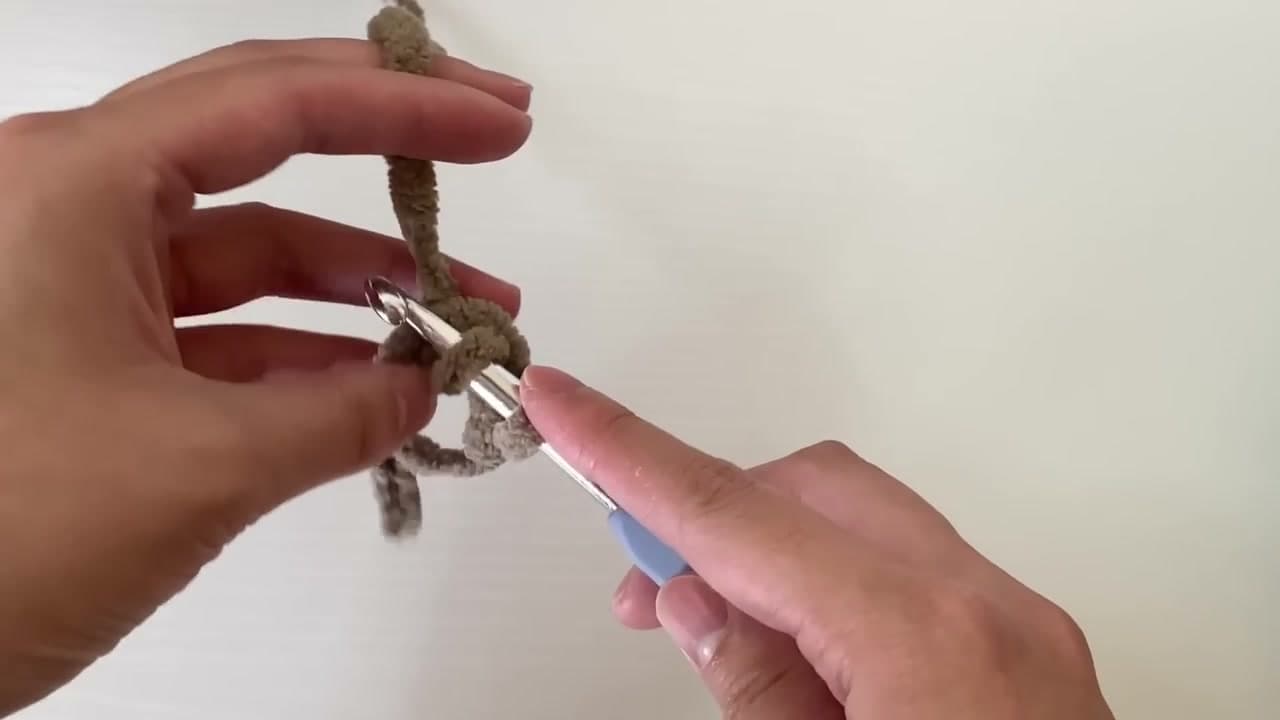
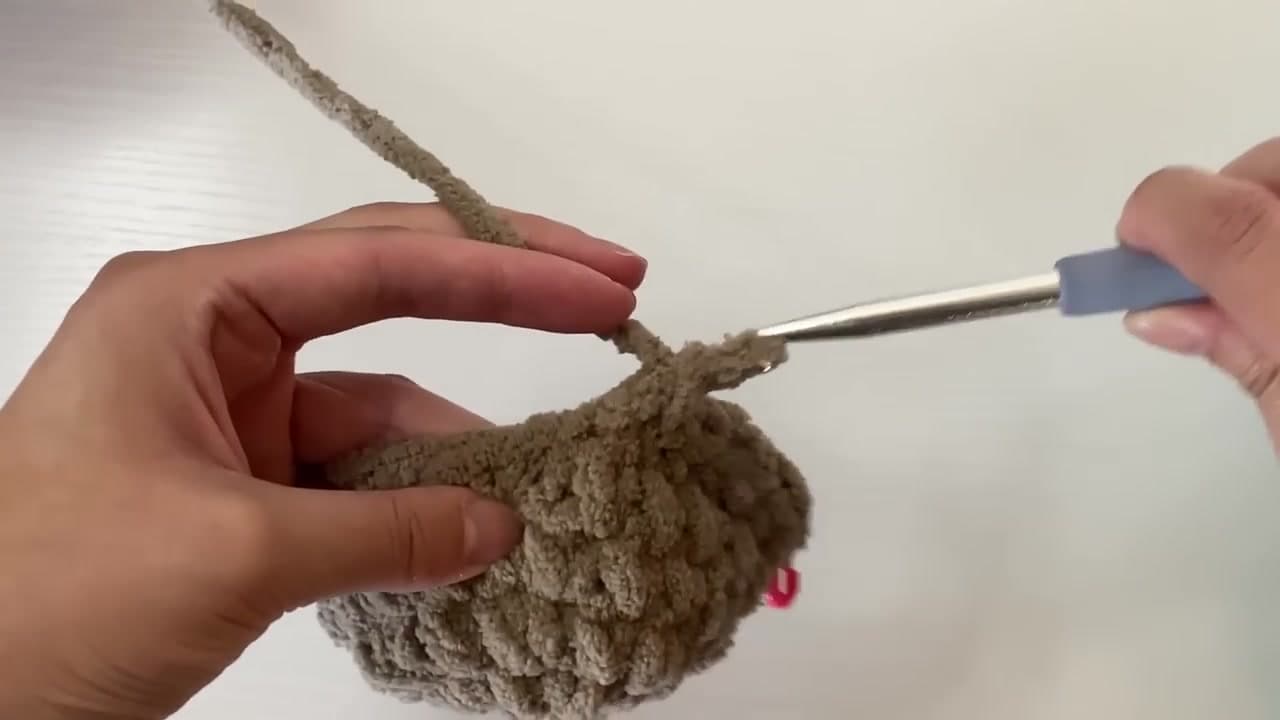
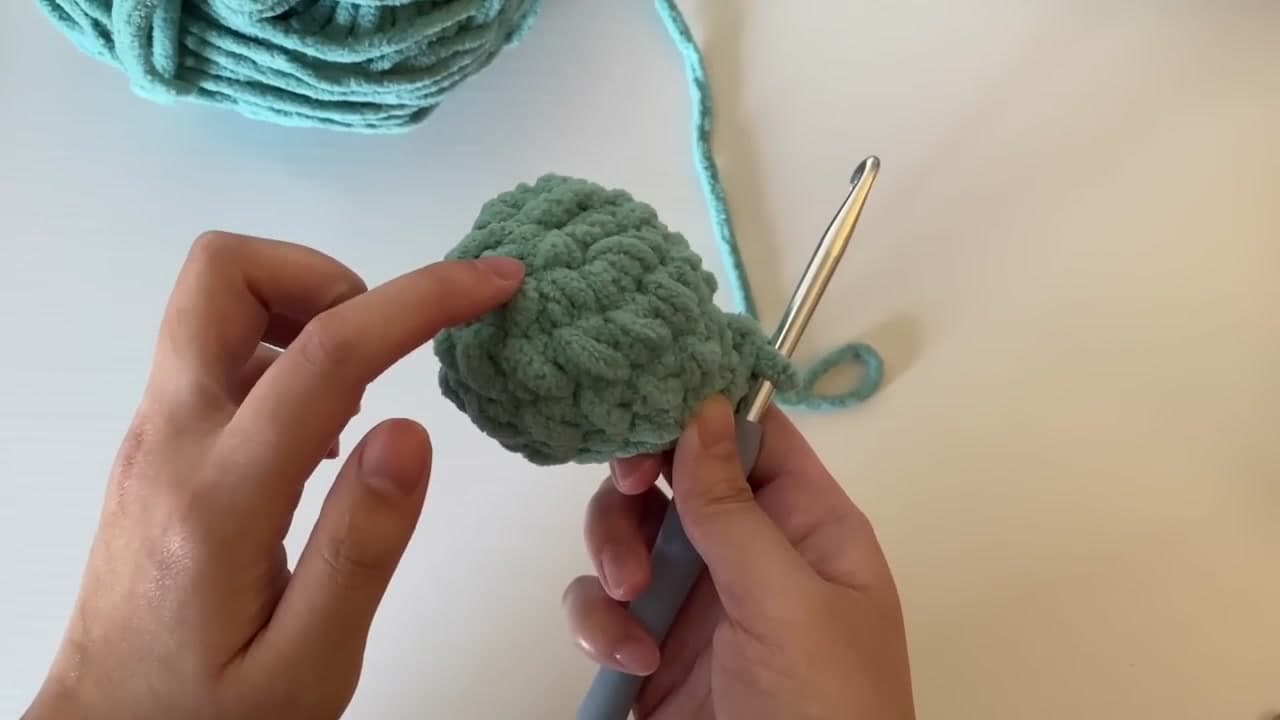
Start the shell with the brown yarn. Pinch the working end between your thumb and pointer finger, then wrap the yarn around the pointer and middle finger to form an X. Hold the X in place, slide your hook under it, turn the hook 180 degrees to catch the lower strand on the middle finger, and pull that strand back under the X. Turn the hook again, go over the X, and pull another loop through. That's your magic circle - one tidy adjustable ring ready to take its first round of stitches.

Tip

The magic circle is fiddly the first three times you try it. If you can't get it after two or three attempts, chain 2 instead and work the first round into the second chain - the look is nearly identical and most people will not notice. The step-by-step magic ring guide has more practice tips.

2

Step 2: Build the Shell with Five Increase Rounds

2:25
Step 2: Step 2: Build the Shell with Five Increase Rounds

Round 1: work 7 single crochets into the magic ring, then pull the tail to cinch the ring shut. Drop in a stitch marker on that last stitch so you can find the end of the round later. Every round from here ends at the marker.

Round 2 is all increases: 2 single crochets into each of the 7 stitches, giving you 14 total. Round 3 alternates 1 single crochet and 1 increase seven times, ending at 21. Round 4 is a plain round with a single crochet in every stitch (still 21). Round 5 goes 2 single crochets, 1 increase, repeated seven times, finishing at 28. Move the marker up to the last stitch of every round as you go.

Tip

An invisible single crochet increase is just two regular single crochets worked into the same stitch. Don't yarn-over before inserting the hook - go straight in, pull a loop, then complete the stitch as usual.

3

Step 3: Work Plain Rounds and Set Up the Front-Loop Row

14:30
Step 3: Step 3: Work Plain Rounds and Set Up the Front-Loop Row

Rounds 6 through 9 are plain: 28 single crochets in each round, no increases or decreases. The shell will start to look like a domed bowl. Counting helps - jot a tally mark each time you pass the stitch marker.

Round 10 is the trick that defines the turtle. Work all 28 single crochets in the front loops only, which means you slide your hook under just the front strand of each V instead of both strands. The back loops are left exposed as a horizontal ridge. Right after you finish round 10, place a second stitch marker into the very first back loop you skipped. That marker tells you where to pick up the contrasting yarn for the belly in the next step.

Tip

Front-loop-only is a real round 10 thing, not a typo - you'll undo this on the very next round when you come back through the back loops in green. The visible front-loop ridge is what gives the turtle its iconic green-meets-brown shell line.

4

Step 4: Change to Green and Work the Belly in Back Loops

19:45
Step 4: Step 4: Change to Green and Work the Belly in Back Loops

The color change happens on the last stitch of round 10. Pull your brown yarn through the front loop and stop with two loops still on the hook. Lay the green yarn over the hook, pull it through both loops, and the stitch finishes in green. Tie the green and brown tails together with three knots and trim the brown tail short.

Now go back to that stitch marker you placed in the first abandoned back loop. Insert your hook into that loop and work 28 single crochets all the way around in back loops only. The green yarn closes the bowl from underneath and the brown shell hangs above like a turtle's domed top. The exposed front-loop ridge from round 10 becomes the visible band between shell and belly.

Tip

Don't worry if the first green stitch looks loose - it tightens up once you've worked three or four more around it. Keep tugging the brown tail gently as you go to lock the knot in place.

5

Step 5: Decrease the Belly, Stuff, and Close the Body

23:50
Step 5: Step 5: Decrease the Belly, Stuff, and Close the Body

Round 11 starts the decreases. Work 2 single crochets, then 1 invisible decrease, repeated seven times, ending at 21 stitches. The invisible decrease keeps the fabric tight: hook through the front loops of two stitches at once, pull up a loop, then finish the stitch as usual.

Round 12 is 1 single crochet and 1 invisible decrease seven times, ending at 14 stitches. Pause here and stuff the turtle firmly with small handfuls of fiberfill. Push it into the corners with the end of a pencil or the back of the hook. Round 13 is 7 invisible decreases for 7 stitches, and you're done with the body. Cut a 10-inch tail, fasten off, and thread it through a yarn needle. Weave it through the remaining 7 stitches, pull tight to cinch the hole closed, knot a few times, and bury the tail inside the body.

Tip

Stuff a little firmer than feels right - the fiberfill compresses inside the body, and an under-stuffed turtle looks deflated within a week. See how to fasten off for the cinch-and-knot technique that keeps the tail hidden.

6

Step 6: Crochet the Head and Attach the Safety Eyes

45:00
Step 6: Step 6: Crochet the Head and Attach the Safety Eyes

Start the head with a fresh magic circle in green. Round 1: 7 single crochets into the ring. Round 2: 7 increases for 14 stitches. Rounds 3, 4, and 5: plain rounds of 14 single crochets each.

Before round 6, push the safety eyes through the fabric between rounds 3 and 4, about a quarter turn apart - count six or seven stitches between them. Set the locking washers loosely, step back, and check the face from the front. Once you're happy, snap the washers down hard - they don't come off again.

Round 6 is 7 invisible decreases, finishing at 7 stitches. Fasten off with a long 24-inch tail because you'll need that yarn to sew the head onto the shell in step 7.

Tip

Eye placement makes or breaks the personality. Push the posts through, hold the head up like a puppet, and ask yourself: does this look like a happy turtle, a confused turtle, or a panicked turtle? Adjust before you snap the washers on.

7

Step 7: Crochet the Tail, Four Legs, and Assemble

59:50
Step 7: Step 7: Crochet the Tail, Four Legs, and Assemble

Make the tail: magic circle with 4 single crochets, then 2 plain rounds of 4 single crochets each. Fasten off with a 12-inch tail for sewing. Make each leg: magic circle with 6 single crochets, then 3 plain rounds of 6 single crochets. Fasten off with a 12-inch tail. Repeat three more times so you have four matching legs in total.

Thread the head's long tail through your yarn needle and sew the head onto the brown shell, starting 2 to 3 rows up from the green-and-brown ridge. Work in a small circle, pinning the head straight before you commit. About halfway around, the seam crosses onto the green belly - keep going so the head is anchored to both colors. Go around twice for security.

Sew the tail directly opposite the head along the ridge, pinching it flat instead of stuffing it. Sew each of the four legs flat against the ridge: one on either side of the head and one on either side of the tail. Weave in all the loose ends with the yarn needle and your turtle is finished.

Tip

If a leg or tail leans crooked, snip the sewing yarn and redo it - it's much faster than living with it. The legs should sit flat, not dangle. Tag The Mary Jay on Instagram or TikTok if you share your finished turtle - she loves seeing them.

Products Used

☐ The Checklist

How to Crochet a Turtle: Beginner Amigurumi

Tools
5
Materials
5
Steps
7
Video
1 hr

Your Guide

The Mary Jay

As an Amazon Associate we earn from qualifying purchases. Links on this page may be affiliate links - clicking them and buying doesn't change your price, but helps support ShowMeStepByStep.

Tags

What's next

Related collections

Curated theme pages that include this tutorial.

Weekly Digest

Liked this crochet tutorial?

Pick the categories you want to hear about. Weekly digest of new step-by-step tutorials. No spam, easy unsubscribe.

Send me tutorials about

We only email about new tutorials. Easy unsubscribe anytime.