How to Fasten Off Crochet (the Beginner-Friendly Way)

CrochetEasy3:466 steps

By CraftingStepByStepPublished Updated

Based on a video by Knots & Kneedles.

Fastening off feels nerve-wracking the first time you try it. You finished a whole project and now you have to cut the yarn and trust that a couple of small moves will hold the whole thing together. Spoiler: they do, and you can learn the move in under five minutes.

Rachel from TLC Inspiration walks through the basic fasten off and then weaves in the tail on a single crochet swatch. We follow her exact sequence, with a quick note at the end on the invisible fasten off if you are working on amigurumi or finishing a piece worked in the round.

This pairs with how to single crochet and how to weave in ends as the three finishing skills every new crocheter should lock in early.

Step-by-Step Guide

1

Step 1: Cut Your Yarn With a 4 to 6 Inch Tail

1:25
Step 1: Step 1: Cut Your Yarn With a 4 to 6 Inch Tail

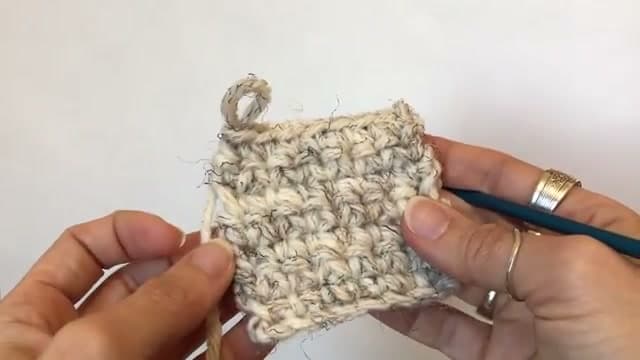
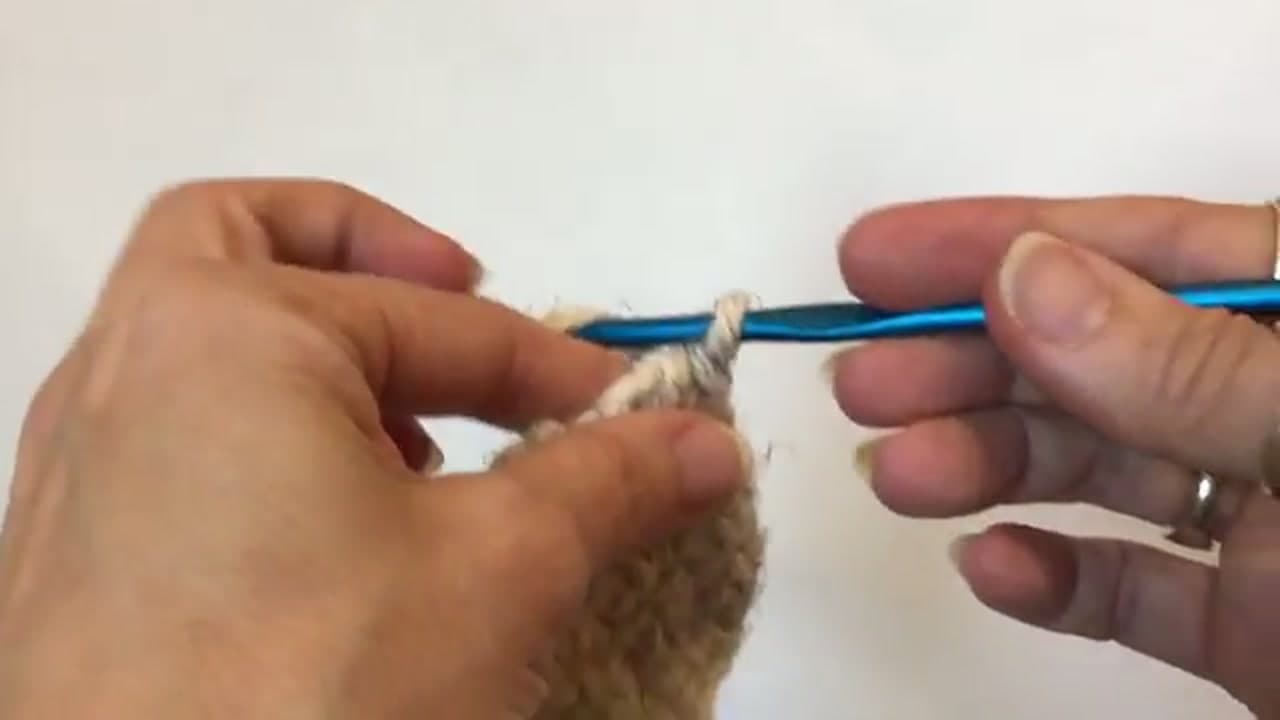
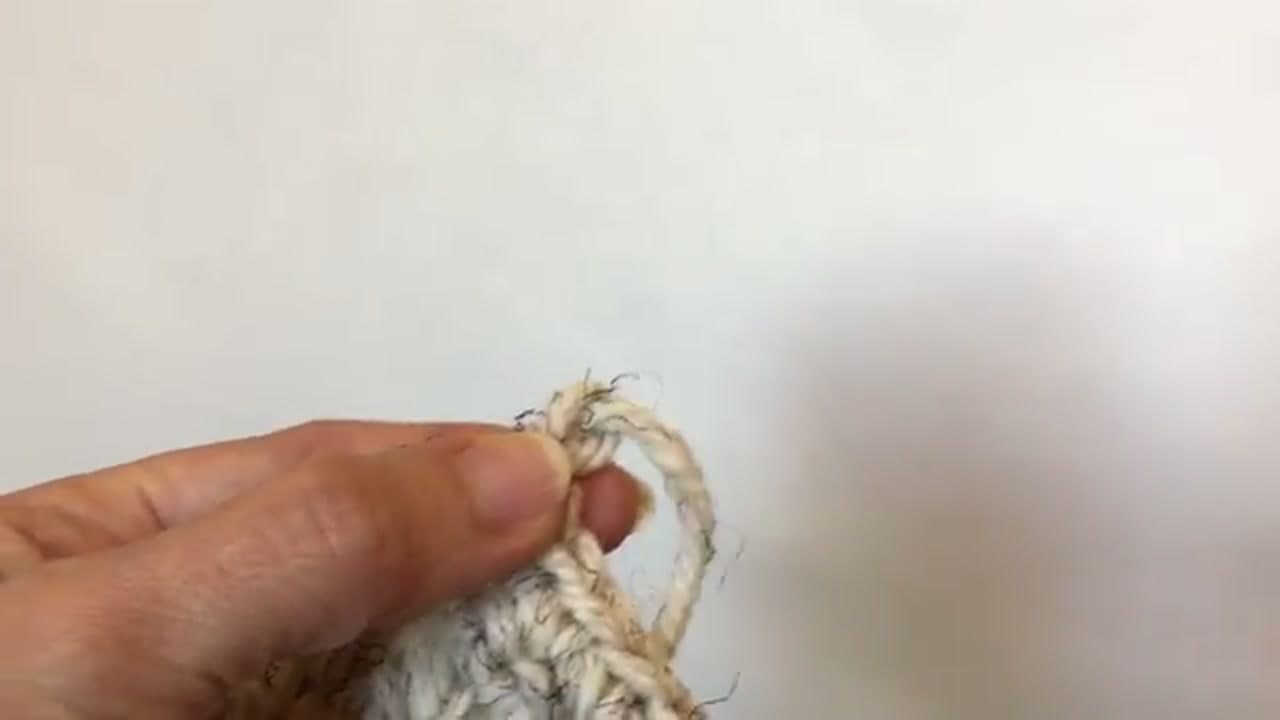
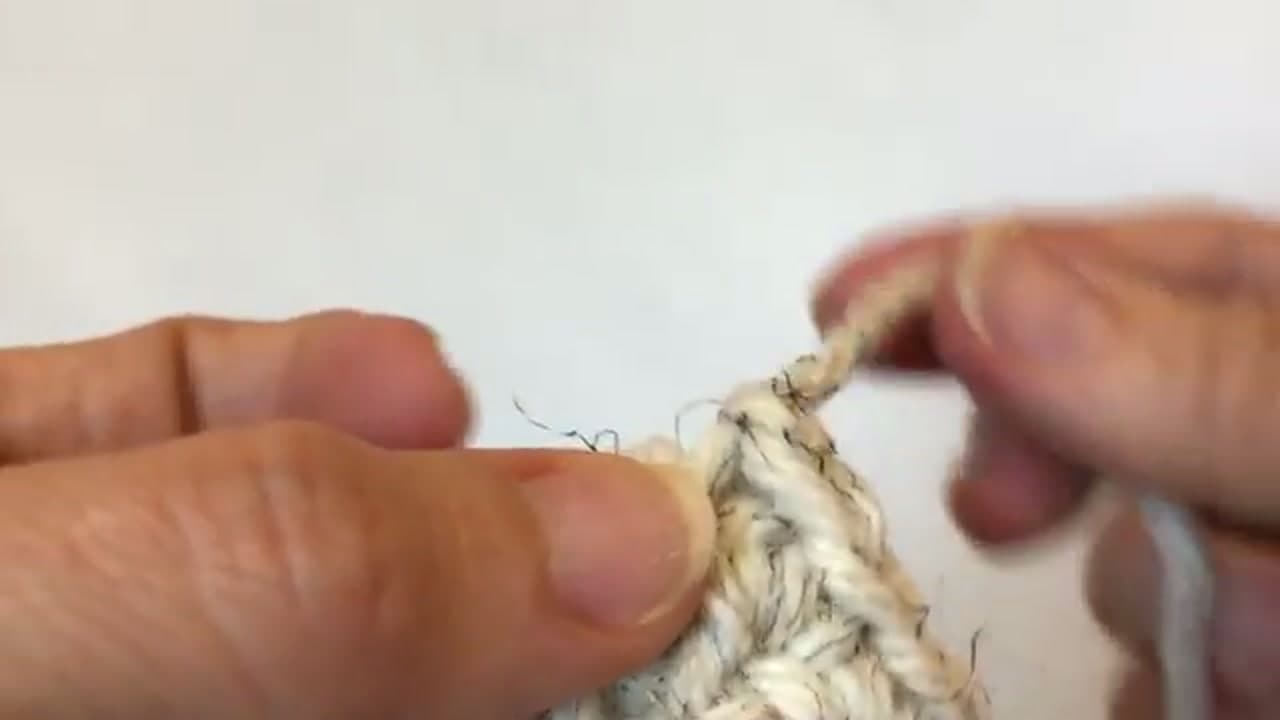
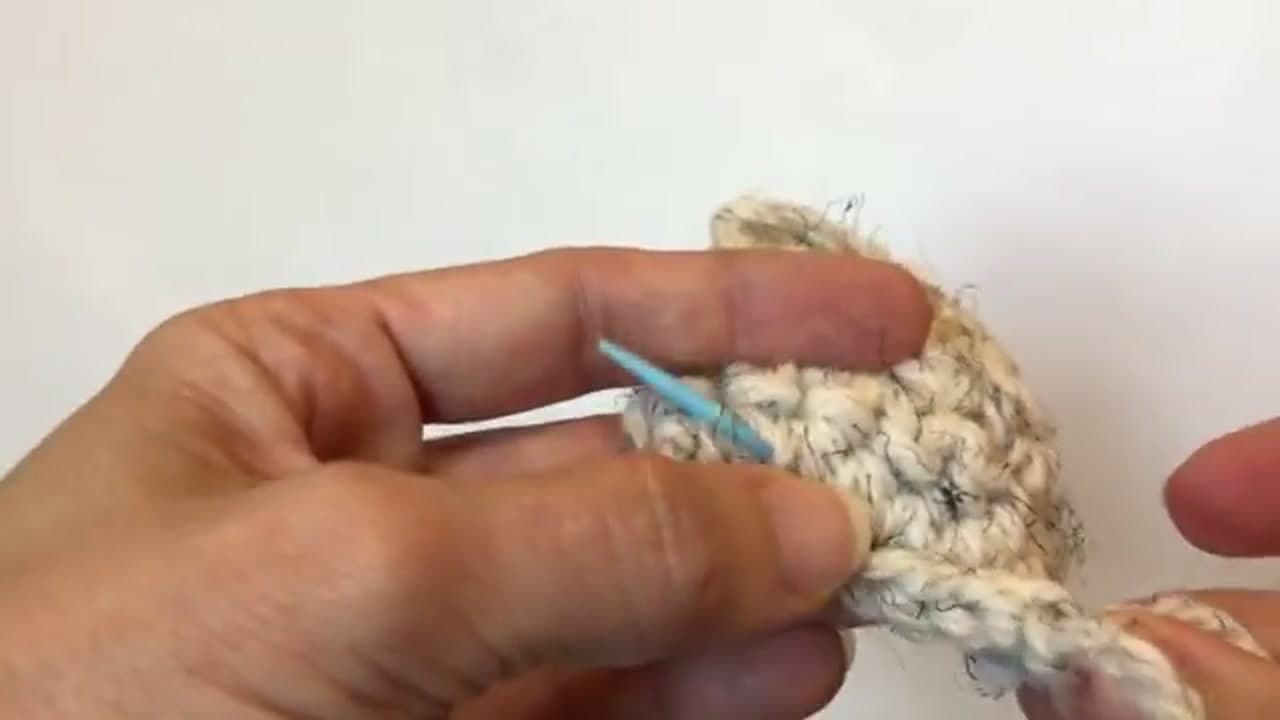
Finish your last stitch so you have one loop sitting on your hook. Then grab your scissors and snip the working yarn about four to six inches from that final loop.

A longer tail makes the rest of this easier. Four inches is the minimum that gives you enough length to thread a yarn needle and weave the end back into the fabric. Six inches gives you a little breathing room, which is what Rachel recommends if you are still getting the hang of it.

Tip

Cut on the long side, not the short side. You can always trim a tail down later, but you cannot add length back once it is too short to thread a needle.

2

Step 2: Yarn Over Your Hook With the Cut Tail

1:32
Step 2: Step 2: Yarn Over Your Hook With the Cut Tail

Slide your hook back into the loop you were working from and yarn over with the cut tail, exactly the way you would with the working yarn. The motion is identical to every yarn over you have done all the way through your project.

The only difference is that you are using the short, cut end instead of the strand running to the yarn ball. Keep the loop loose enough that the hook moves easily.

Tip

If the tail keeps slipping off the hook, pinch it against the hook with your thumb while you make the yarn over. Worsted yarn likes to skitter around.

Products used in this step

3

Step 3: Pull the Tail All the Way Through the Loop

1:40
Step 3: Step 3: Pull the Tail All the Way Through the Loop

Now pull the tail all the way through that last loop on your hook. This is different from a regular stitch where you stop with new loops on the hook. Here you pull the entire tail end through and let the hook slide free.

That single pass is what locks the stitch. The tail is now anchored on the inside of the work, and the loop cannot reopen because there is no working yarn feeding back into it.

Tip

You will see a little knot-like loop form at the top of your last stitch. That is what you want. It looks a bit lumpy until you weave the tail in, which flattens everything out.

Products used in this step

4

Step 4: Pull the Tail Tight to Secure

1:46
Step 4: Step 4: Pull the Tail Tight to Secure

Give the tail a firm tug to snug the loop down against the rest of your work. The little knot you saw in step three should pull in close to the top of the stitch.

That is your fasten off done. The project is now secure and will not unravel even if you set it down and never touch it again. But the tail is still hanging there, which brings you to the weave in.

Tip

Do not pull so hard that the top of the work puckers. A firm tug is enough. If you see the fabric bunching, ease off and let the stitch sit naturally.

5

Step 5: Thread the Tail Onto a Blunt Yarn Needle

2:02
Step 5: Step 5: Thread the Tail Onto a Blunt Yarn Needle

Pick up a blunt-tip yarn needle with an eye big enough to hold your yarn. Rachel uses a plastic darning needle because the eye is wide and the tip will not split the plies as you weave.

Thread the tail through the eye and pull through a few inches so the yarn does not slide back out while you work. A blunt tip is non-negotiable here. A sharp sewing needle will pierce the yarn strands and leave a visible bump on the front of the work.

Tip

Plastic yarn needles work great for worsted and bulky yarn because the eyes are huge. Metal tapestry needles are sharper and slide through tighter fabric more easily.

Products used in this step

6

Step 6: Weave the Tail In and Trim

2:32
Step 6: Step 6: Weave the Tail In and Trim

Slide the needle through the body of several stitches in one direction, running it inside the fabric rather than across the front. Pull the yarn through gently, then go back the other way to lock the tail in place. Rachel runs hers vertically and then horizontally for extra security.

Once both passes are in, stretch the fabric to release any tightness, then trim the tail close. Be careful not to nick a working stitch with your scissors. That is the whole finish.

Tip

For amigurumi or any piece worked in the round, swap this last step for the invisible fasten off. After step 4, thread the tail and skip the first stitch of the round, then go under both loops of the second stitch and back down through the center of your last stitch. The fake V you create blends right into the round so the join disappears. Save this trick for stuffed animals and socks.

Products Used

☐ The Checklist

How to Fasten Off Crochet (the Beginner-Friendly Way)

Tools
3
Materials
1
Steps
6
Video
4 min

Your Guide

Knots & Kneedles

As an Amazon Associate we earn from qualifying purchases. Links on this page may be affiliate links - clicking them and buying doesn't change your price, but helps support ShowMeStepByStep.

Tags

Related Tutorials