How to Make a Wooden Cutting Board (with Minimal Tools)

Woodworking CraftsMedium10:008 steps
Also in:Crafts

By CraftingStepByStepPublished Updated

Based on a video by MWA Woodworks.

Cutting boards are the classic first woodworking project, but most tutorials assume you have a jointer and a planer to flatten the glue-up. This one doesn't. The trick is to use pre-surfaced hardwood lumber - most hardwood dealers sell boards with one straight edge already ripped, ready to take to the table saw - and to keep the glue-up to four joints maximum so you can flatten the result with sandpaper alone.

The example boards mix walnut, maple, and cherry. You can pick any three hardwoods that look good together. Stay away from softwoods like pine, fir, or cedar - they dent under a knife and can transfer flavors to food. Each finished board takes about 8 hours of clamp time plus an hour of active work, so plan it as a weekend project.

Credit to MWA Woodworks for the source video.

Step-by-Step Guide

1

Step 1: Pick Your Hardwoods

0:25
Step 1: Step 1: Pick Your Hardwoods

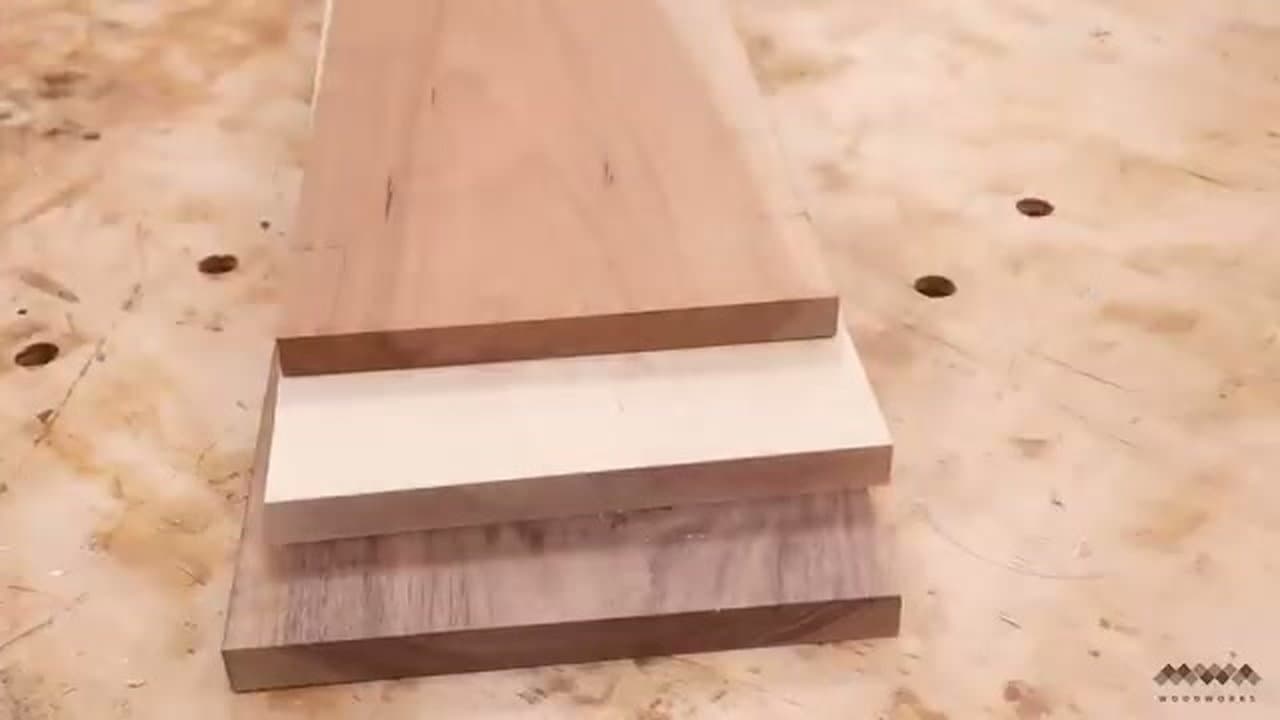
Walnut, maple, and cherry are the classic combo - each is a different color and the contrast looks great in the finished board. Stay away from softwoods like pine, fir, and cedar; they're too soft for cutting boards, dent easily under a knife, and can transfer flavors to food.

If you don't have a jointer or planer, buy pre-surfaced lumber from a hardwood dealer. They've already done the planing for you, and most ship boards with one straight-line edge ripped on the table saw - which is exactly what you need to start cutting.

Tip

Two-foot lengths from the leftover bin at most hardwood dealers are perfect for this project. You'll cut them down anyway, and they're usually heavily discounted.

2

Step 2: Cut Strips on the Table Saw

1:30
Step 2: Step 2: Cut Strips on the Table Saw

Trim the rough edge off each board first to give yourself two parallel reference edges. Now rip strips from each board, mixing widths so you can vary the visual rhythm in the final board.

Repeating-width trick: use one cut strip as a reference against the blade, then slide the fence in until your next board matches it. That gives you identical strips back-to-back without measuring each time. The key requirement here is that your saw can hold a perfect 90-degree angle - a portable table saw is fine as long as the blade is square to the table.

3

Step 3: Lay Out the Color Design

2:20
Step 3: Step 3: Lay Out the Color Design

Aim for at least one strip of each wood species in every board so the colors stay balanced. The example uses three boards: a walnut base with two maples and a cherry, a maple base with two cherries and a walnut, and a cherry base with two maples and a walnut.

Keep each board to four glue joints maximum. Without a planer, every extra joint is another spot where the glue-up can step out of flat - and you'll have to fix it with sandpaper. Wider boards (9-10 inches) and fewer joints make the difference between an easy sand and a frustrating one.

4

Step 4: Glue Up with Type Bond 3

3:35
Step 4: Step 4: Glue Up with Type Bond 3

Use a water-resistant wood glue. Type Bond 3 is the standard for cutting boards - water-resistant means the board can survive a sponge wipe-down or a spill without the joints failing. A condiment bottle gives you a fine bead so you can see the glue line at every joint.

Add clamps slowly, watching that the strips don't slide up or down on each other. If you see squeeze-out along each joint, you have enough clamping pressure - cranking harder starves the joint and can introduce tension that warps the board. Plywood-scrap cauls with packing tape on one side keep the surface flat under the clamps.

Tip

After 30 minutes of clamping, run a paint scraper along each joint to lift the squeeze-out off cleanly. It's much less mess than sanding dried glue later.

5

Step 5: Trim to Final Size

5:50
Step 5: Step 5: Trim to Final Size

After at least 8 hours in the clamps (overnight is better), pull the board out and scrape off any remaining glue with a paint scraper. Crosscut to your final length on the table saw using a crosscut sled or a miter gauge.

Always reference the same side of the board against the fence for every cut. That guarantees each new cut is square to that one reference edge - critical when you don't have a jointer to true things up later.

6

Step 6: Sand Through the Grits

6:35
Step 6: Step 6: Sand Through the Grits

Start at 80 grit because you don't have a planer to flatten the glue-up. Move through 120, 180, and finish at 220.

Pencil trick: scribble pencil marks across the board between each grit. When all the pencil is sanded off, you've worked the surface evenly and it's safe to step up to the next grit. Without this, it's easy to leave high spots untouched and waste time at finer grits where they'll show up as dull patches.

7

Step 7: Chamfer the Edges

7:20
Step 7: Step 7: Chamfer the Edges

A chamfer bit in a trim router gives clean 45-degree angles on every edge that look much sharper than a roundover. Run the router slowly along each edge, with the board held against a non-slip mat so it can't shift.

If you don't have a router, a hand plane gets the same result. It takes a little longer but you get more control and there's less risk of grain tear-out, which a router will sometimes do at the end of a stroke.

8

Step 8: Pop the Grain and Apply Finish

8:20
Step 8: Step 8: Pop the Grain and Apply Finish

Spritz the sanded board with water from a spray bottle. The wood fibers stand up like the hairs on your arm when it gets cold, the grain darkens to its true color, and you get a real preview of how the finished board will look. Once dry, knock those raised fibers down with one final 220-grit pass and the board is silky smooth.

Now rub on a paste of mineral oil and beeswax. Coat all sides liberally, let it sit for several hours, and the wood absorbs what it needs while leaving the wax behind to harden on the surface. Buff clean with a cotton rag until it's smooth. Do not bathe the board in mineral oil - long-grain boards don't soak up oil like end-grain butcher blocks do, and the excess will leach onto countertops for weeks.

Products Used

☐ The Checklist

How to Make a Wooden Cutting Board (with Minimal Tools)

Tools
9
Materials
8
Steps
8
Video
10 min

Your Guide

MWA Woodworks

As an Amazon Associate we earn from qualifying purchases. Links on this page may be affiliate links - clicking them and buying doesn't change your price, but helps support ShowMeStepByStep.

Tags

Related Tutorials