How to Paint Cherry Blossoms (Easy Acrylic for Beginners)

PaintingEasy10:007 stepsBrowse more →

By CraftingStepByStepPublished

Based on a video by Jay Lee Painting.

This cherry blossom painting comes from Jay Lee Painting, a channel known for turning simple acrylic techniques into art anyone can hang on a wall. What makes it perfect for beginners is that you never have to draw a thing. The whole painting is built from loose brush strokes and little dabs of color, so you can skip the sketching and go straight to paint.

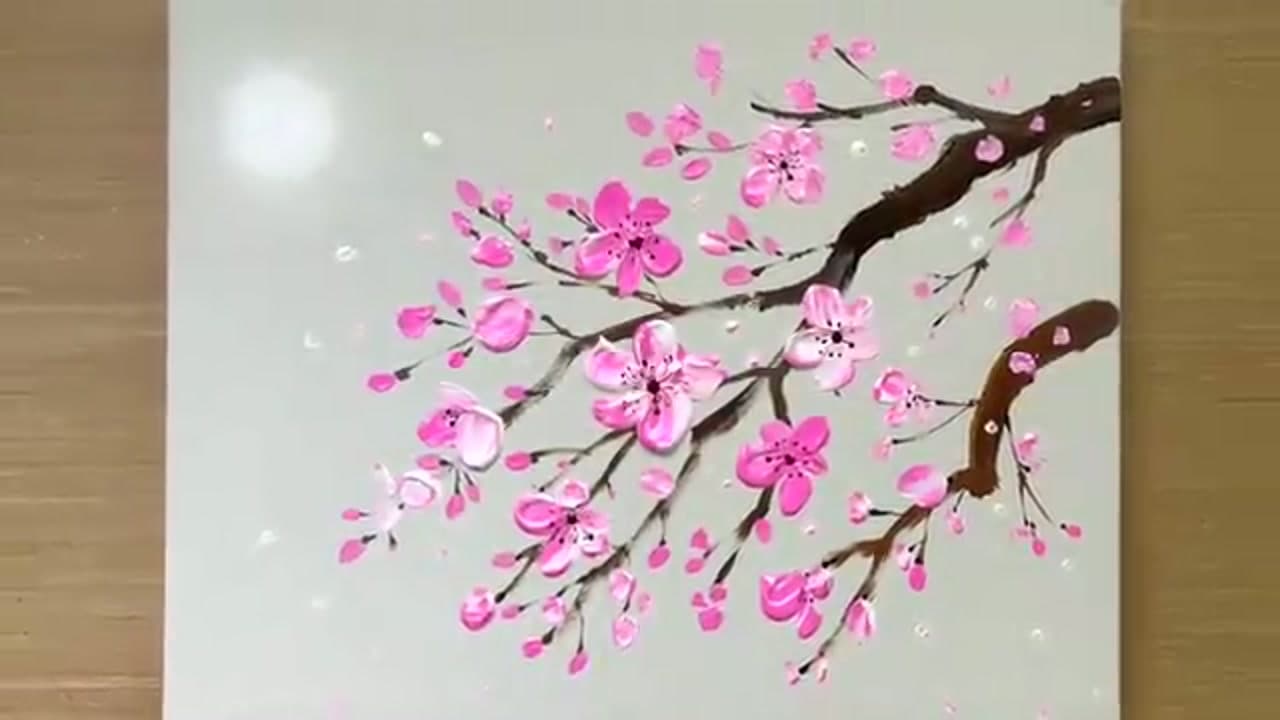
You'll start by pulling a bare branch across the canvas, then add thin twigs off of it. From there it's all dabbing: press pink onto the canvas for the petals, layer white on top for highlights, and tap in dark centers for detail. A few falling petals and a soft moon in the corner finish it off. If you can hold a brush and press it down, you can paint this.

The finished piece is a pink cherry blossom branch reaching across a soft gray sky, the kind of spring scene that brightens up any room. Once you get the dabbing rhythm down, try it again with white blossoms or a wider branch. For more relaxing acrylic scenes, take a look at how to paint the northern lights and how to paint birch trees.

Step-by-Step Guide

1

Step 1: Paint the Main Branch

0:45
Step 1: Step 1: Paint the Main Branch

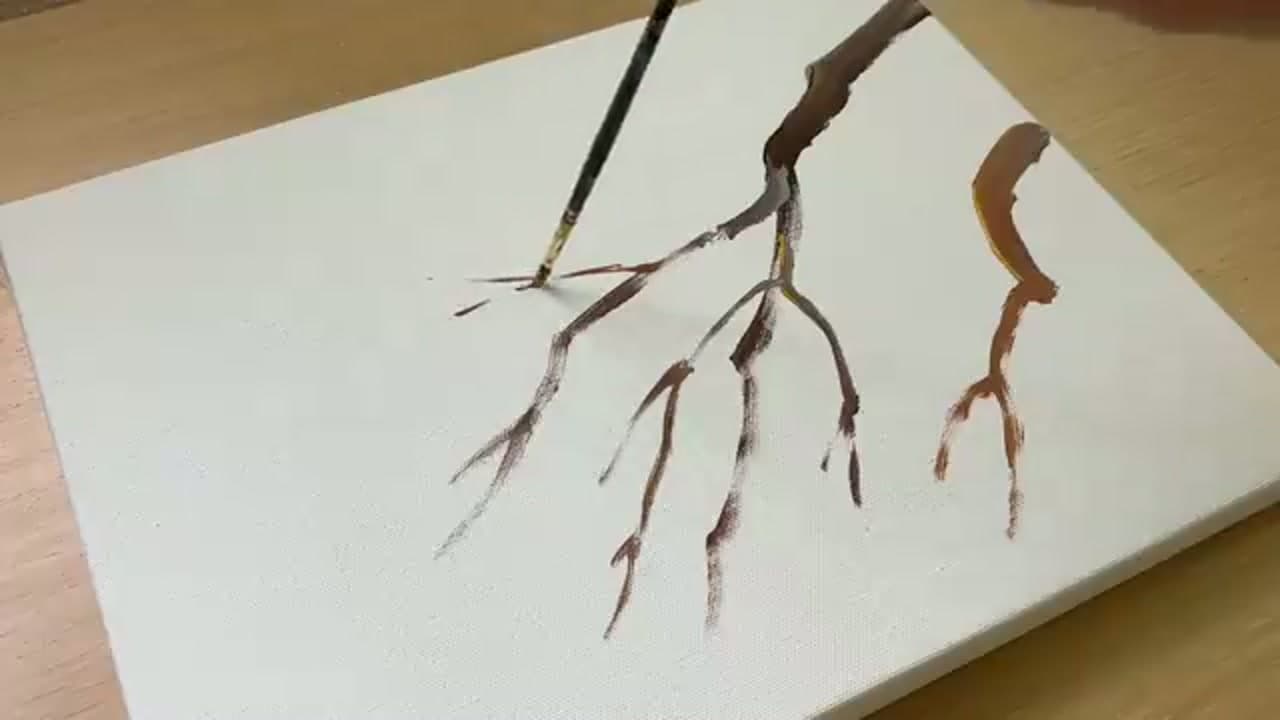
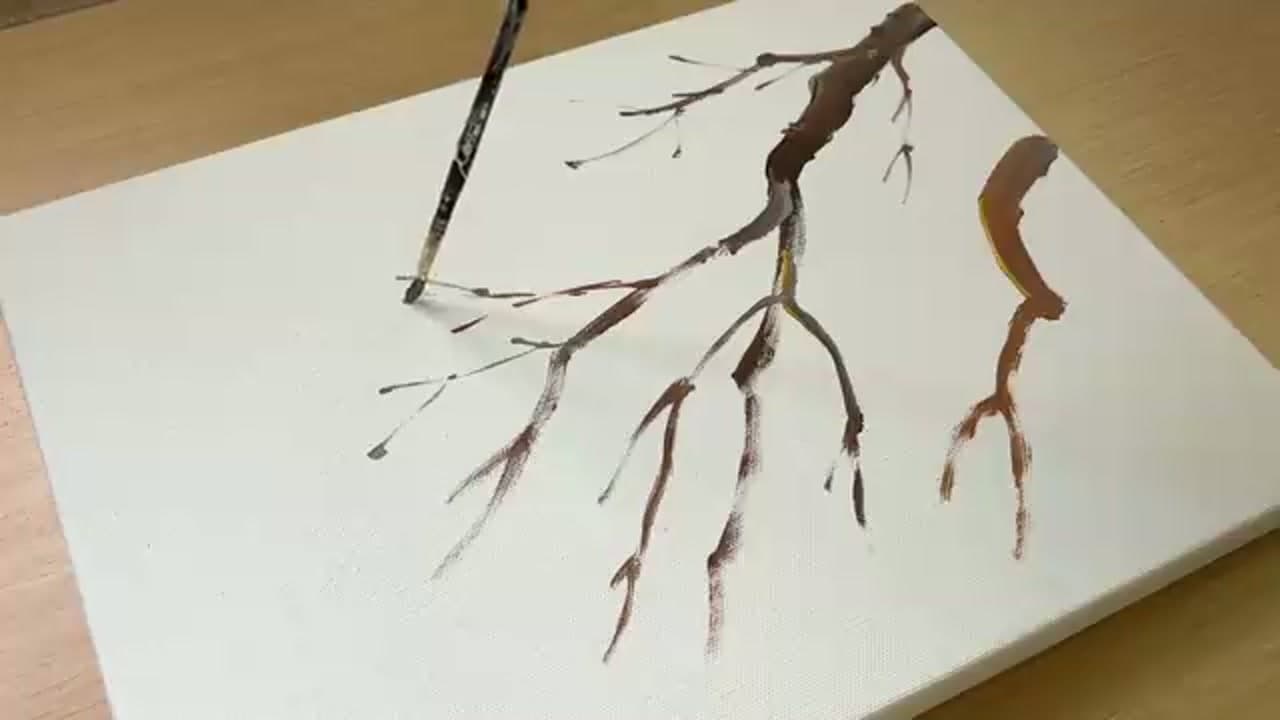
Load a round brush with brown paint and pull the main branch across the upper right of the canvas. Start thick where the branch enters the frame, then let the stroke thin out and taper as it reaches toward the middle. Twist the brush slightly as you go so the line stays uneven, that's what makes it read as bark instead of a stick.

Lift the pressure at the tips so the branch fades into finer points. A little wobble in the line looks more natural than a smooth curve, so don't fuss over keeping it straight.

Tip

Watch this step Keep your paint on the drier side for the branch. A slightly dry brush drags across the canvas and gives you that rough bark texture for free.
2

Step 2: Add the Thin Side Twigs

1:20
Step 2: Step 2: Add the Thin Side Twigs

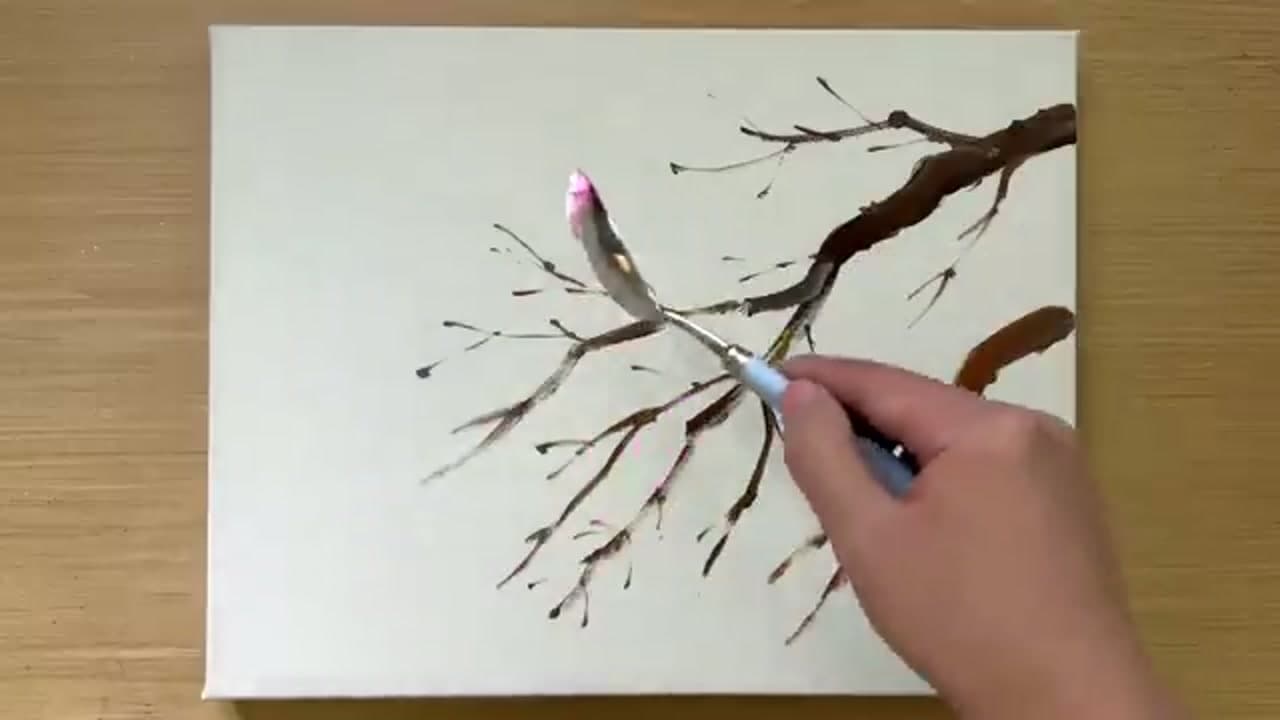
Switch to a smaller round brush or a liner and add the thin twigs that branch off the main limb. Pull each one outward from the branch in a quick, light stroke. Vary the direction so some point up, some droop down, and a few cross over each other the way real twigs do.

These little offshoots are where your blossoms will sit, so scatter them around the branch instead of lining them up evenly. Leave open space between clusters. You want somewhere for the flowers to breathe.

Tip

Watch this step Flick the brush off the canvas at the end of each twig. The quick lift gives you a naturally tapered point without any extra work.

Products used in this step

3

Step 3: Dab the First Pink Blossoms

1:55
Step 3: Step 3: Dab the First Pink Blossoms

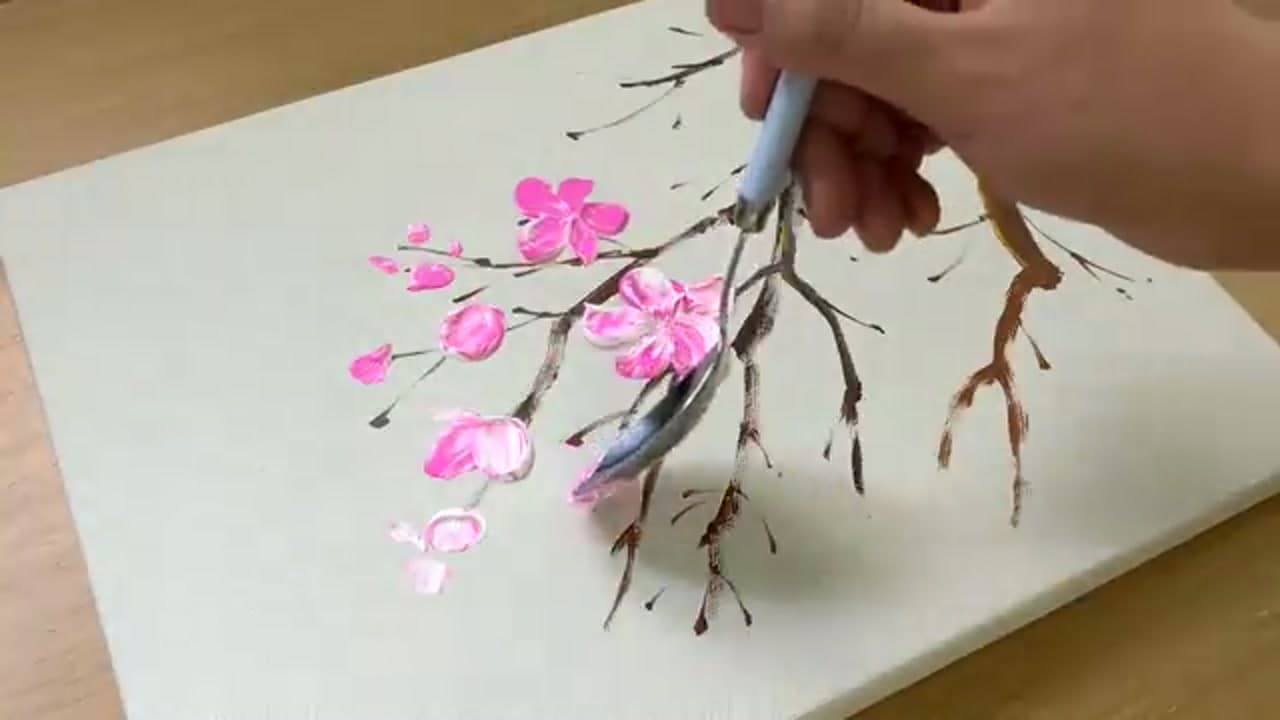
Now the fun part. Load a round brush with pink and press the tip onto the canvas to make a single petal. Five little dabs arranged in a rough circle gives you one cherry blossom. Work right where the twigs meet so the flowers look like they're growing off the branch.

Don't aim for perfect flowers. Some blossoms face you head-on, others turn sideways and only show two or three petals. That variety is what sells it. Start with a few and build out from there.

Tip

Watch this step Press and lift straight down rather than dragging. Each petal is one clean tap, so you get that rounded blossom shape instead of a smear.

4

Step 4: Build Up the Blossom Clusters

3:05
Step 4: Step 4: Build Up the Blossom Clusters

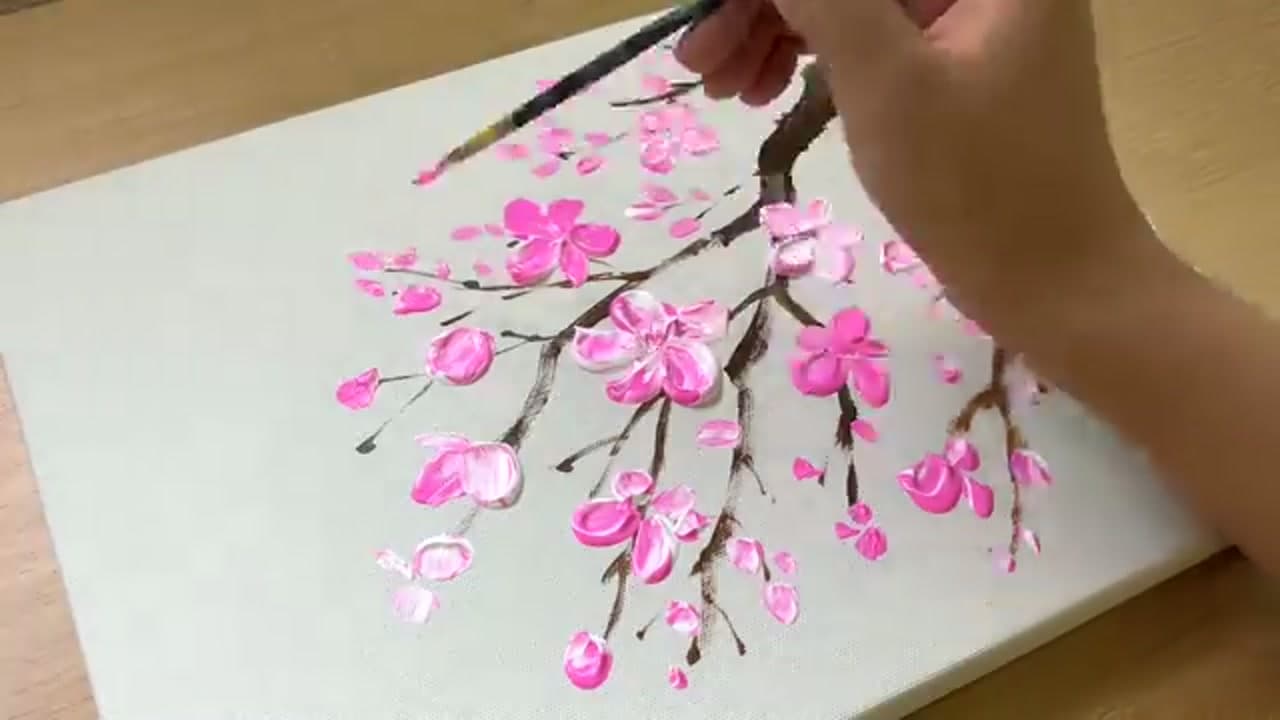
Keep dabbing blossoms along the branch, grouping them into loose clusters. Bunch several flowers together in some spots and leave a lone bloom or two out on the thinner twigs. Mix full open flowers with tiny buds, which are just one or two small dabs of pink.

Step back every so often and check the balance. If one side feels empty, add a cluster there. The goal is a branch that looks heavy with spring blossoms without every inch being covered.

Tip

Watch this step Overlap a few petals from neighboring flowers. Blossoms that touch and crowd look far more real than ones spaced out like polka dots.

Products used in this step

5

Step 5: Add White Highlights to the Petals

4:50
Step 5: Step 5: Add White Highlights to the Petals

Load your brush with white and a touch of the pink still on it, then dab lighter tips over the pink blossoms. Focus the light color toward the outer edge of each petal so the middle stays darker. This two-tone effect is what gives the flowers their glow and depth.

You don't need to highlight every single blossom. Hit the ones nearest the front and the top of the branch, where light would naturally catch them. Leave the back flowers darker so they sit deeper in the painting.

Tip

Watch this step Don't fully mix the white and pink on your palette. A half-blended brush lays down streaky light-and-dark petals in one stroke, which looks more like a real blossom.

6

Step 6: Tap in the Blossom Centers

8:20
Step 6: Step 6: Tap in the Blossom Centers

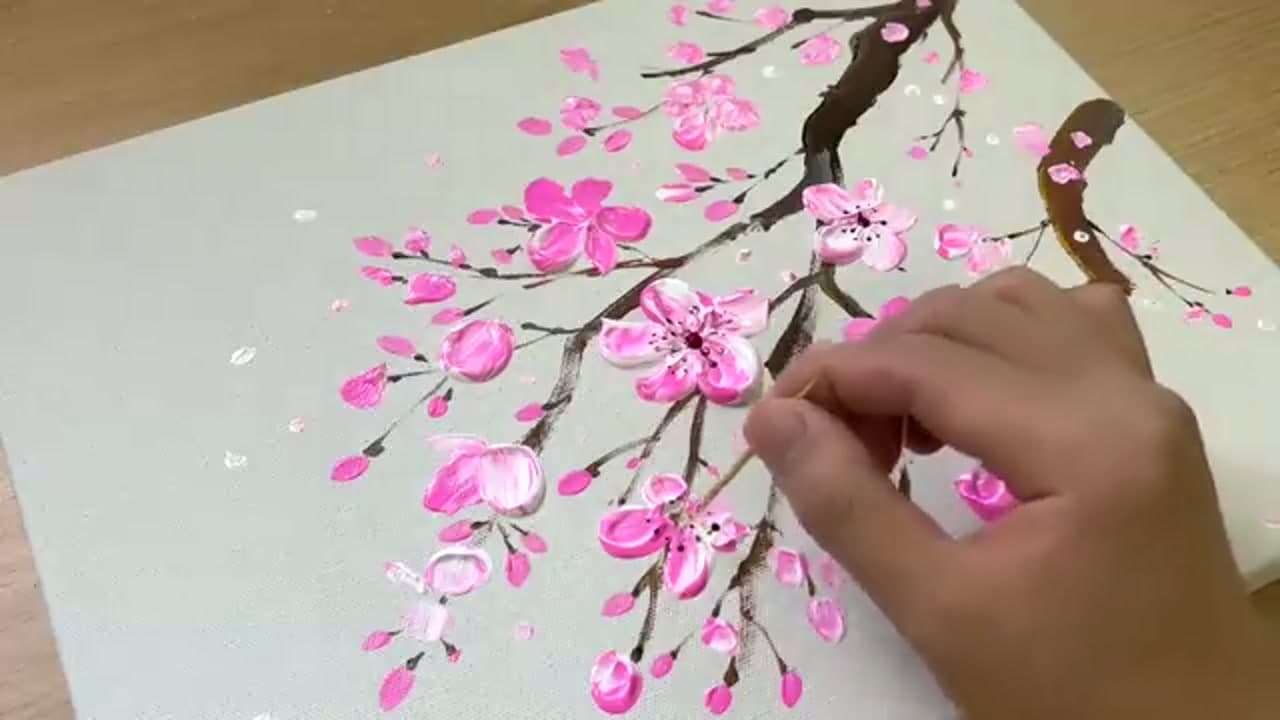
Grab a fine detail brush and a bit of dark paint. Tap a small dot in the middle of each open blossom for the center, then add a ring of tiny dots or short lines radiating out for the stamens. This is the detail that turns a pink blob into a recognizable cherry blossom.

Work only on the flowers facing forward. Side-view blossoms and buds don't need centers. Keep the dots small and light, you're accenting the flowers, not covering them.

Tip

Watch this step Use the very tip of the brush and barely any paint. A light hand keeps the centers crisp instead of blobbing out over the petals.

7

Step 7: Add Falling Petals and the Finishing Touches

9:55
Step 7: Step 7: Add Falling Petals and the Finishing Touches

To finish, dip a brush in a little white and flick or dab small dots floating around the branch for falling petals. Add a soft round moon in the open corner if you want, blending the edges lightly so it glows behind the flowers. These small accents pull the whole scene together.

Take one last look at the finished painting and add a blossom or a petal anywhere that feels bare. Then set the brush down. Your cherry blossom branch is done and ready to hang once it dries.

Tip

Watch this step Let the painting dry fully before touching it, at least a couple of hours. Acrylic looks glossy while wet and can smudge, but it sets to a durable matte finish.

Products Used

☐ The Checklist

How to Paint Cherry Blossoms (Easy Acrylic for Beginners)

Tools
5
Materials
5
Steps
7
Video
10 min

Your Guide

Jay Lee Painting

As an Amazon Associate we earn from qualifying purchases. Links on this page may be affiliate links - clicking them and buying doesn't change your price, but helps support ShowMeStepByStep.

Tags

Sunday How-To

New painting tutorials, every Sunday

One short email with the week's best step-by-step guides. Free, no spam, unsubscribe anytime.

Did this work for you?

What's next

Related collections

Curated theme pages that include this tutorial.

Weekly Digest

Liked this painting tutorial?

Pick the categories you want to hear about. Weekly digest of new step-by-step tutorials. No spam, easy unsubscribe.

Send me tutorials about

We only email about new tutorials. Easy unsubscribe anytime.