How to Crackle Paint - Weathered Wood Finish in 7 Steps

PaintingEasy8:487 steps

By CraftingStepByStepPublished Updated

Based on a video by Our Upcycled Life.

This crackle technique uses one secret ingredient: Elmer's school glue. The glue dries faster than the paint on top of it, which makes the wet paint pull apart into authentic-looking cracks. The result mimics decades of paint chipping and weathering on old wood - the look that drives the entire farmhouse and cottagecore aesthetic.

The technique works on any flat painted surface. New pine boards become weathered barn wood. A plain MDF sign becomes a vintage shop sign. A modern thrift-store frame becomes a chippy heirloom. There's no specialty product - just glue, paint, and patience as it dries.

The full effect takes a base coat, an accent coat, the glue-and-stamp step, an overnight dry, an aggressive sand, and a final water-and-stain weathering pass. Eight or nine ingredients in your kitchen and craft drawer create something that looks like it came out of a 100-year-old barn.

Step-by-Step Guide

1

Step 1: Gather the Supplies (Elmer's Glue is the Secret)

0:05
Step 1: Step 1: Gather the Supplies (Elmer's Glue is the Secret)

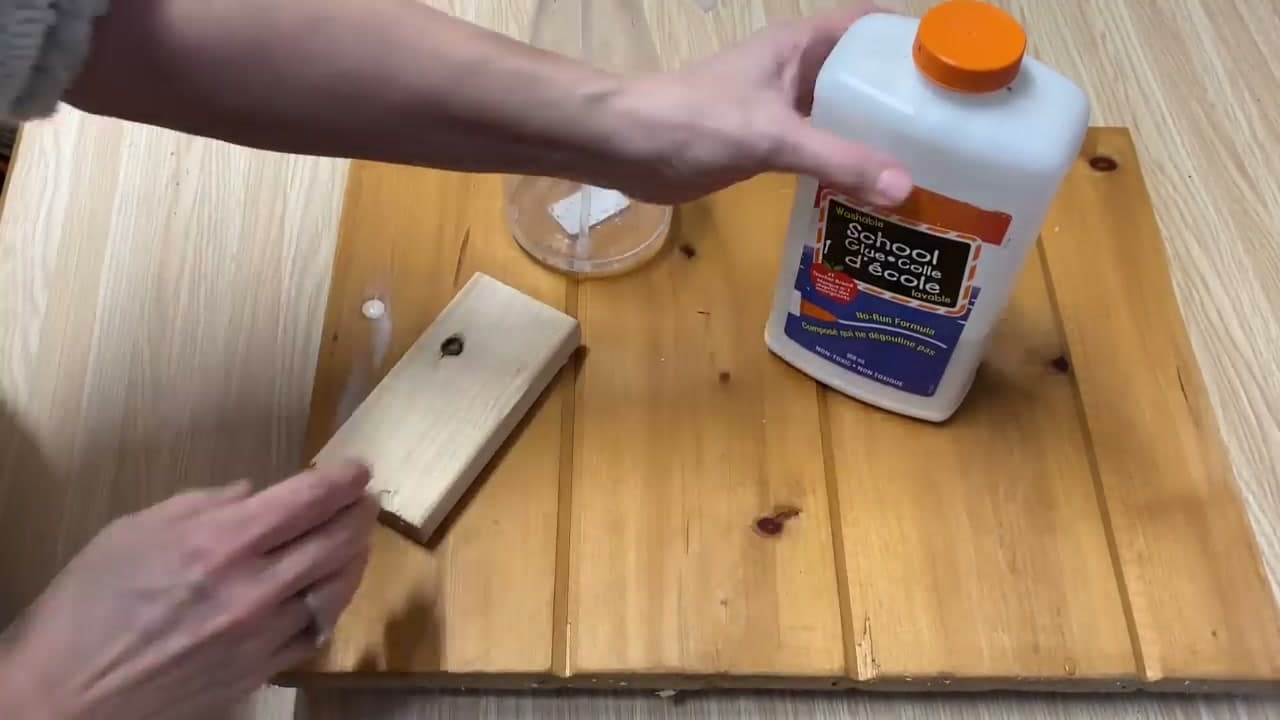
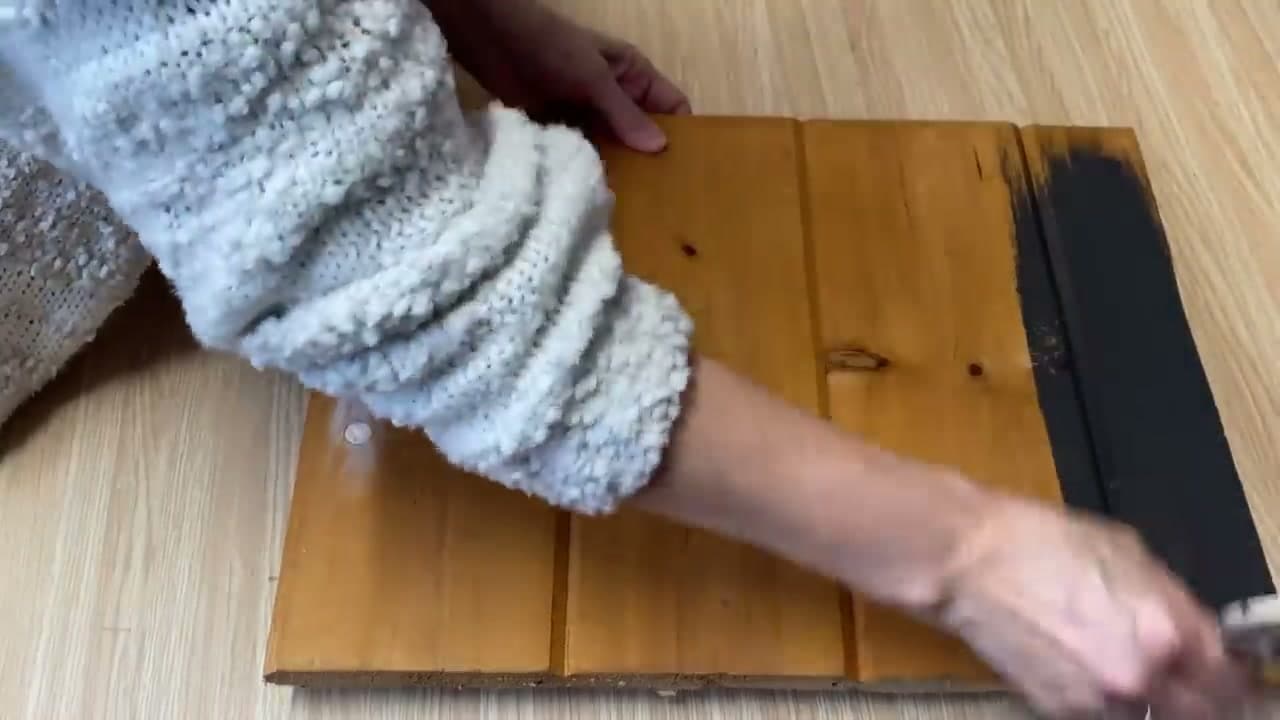
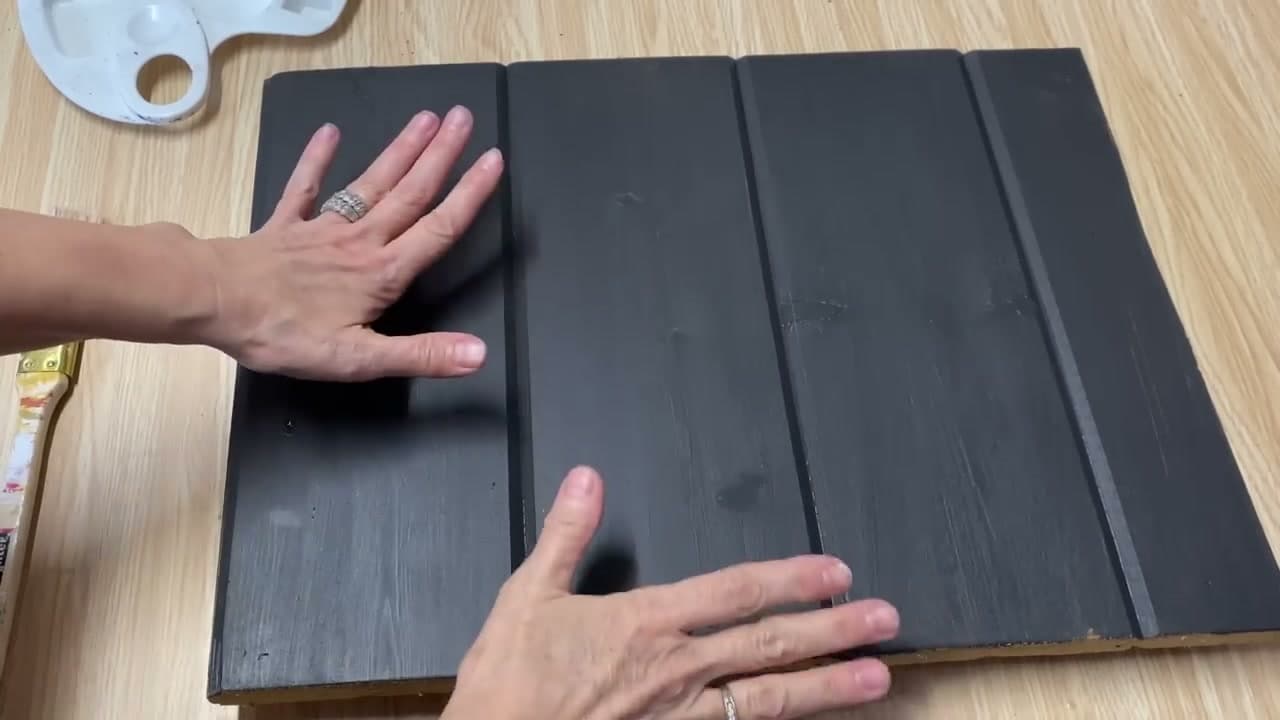
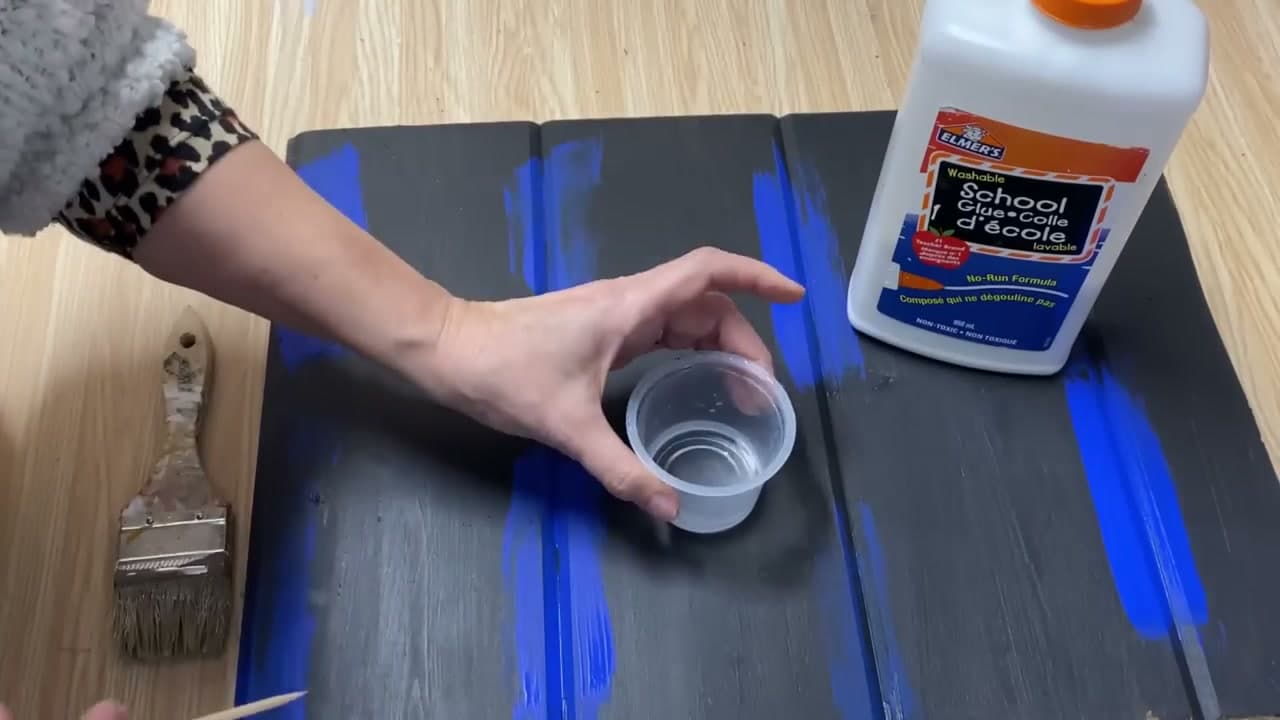
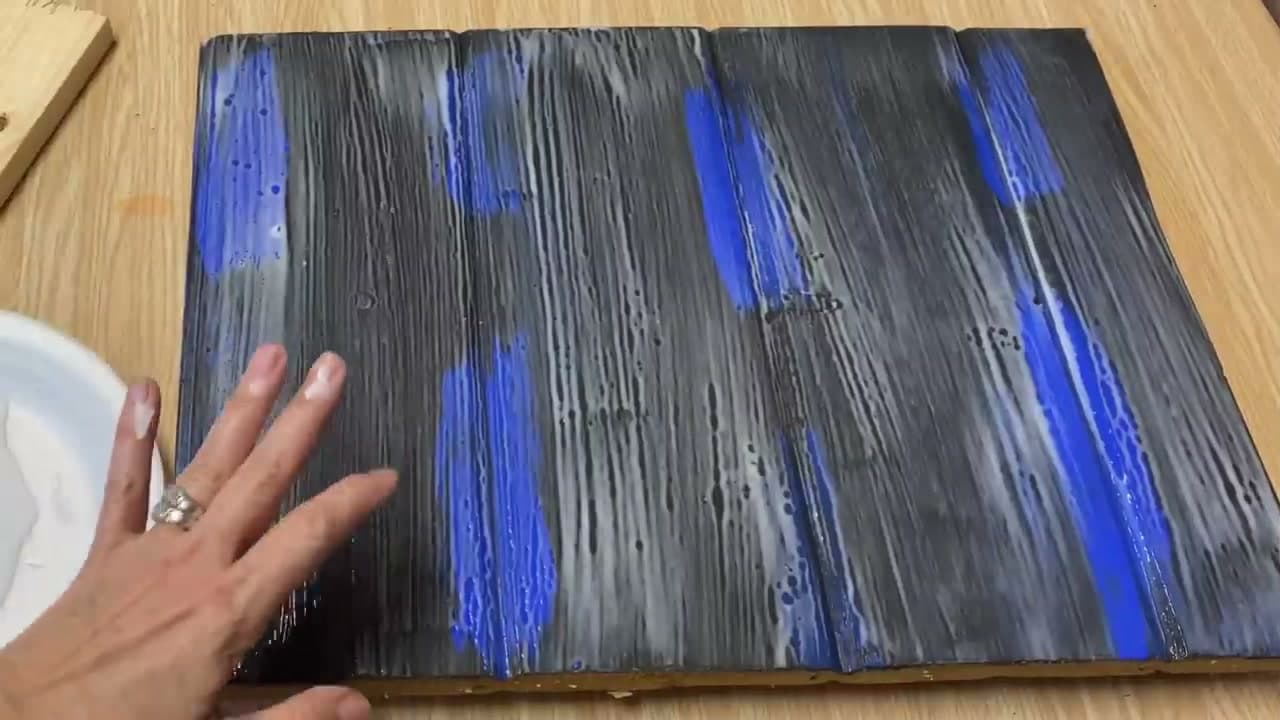
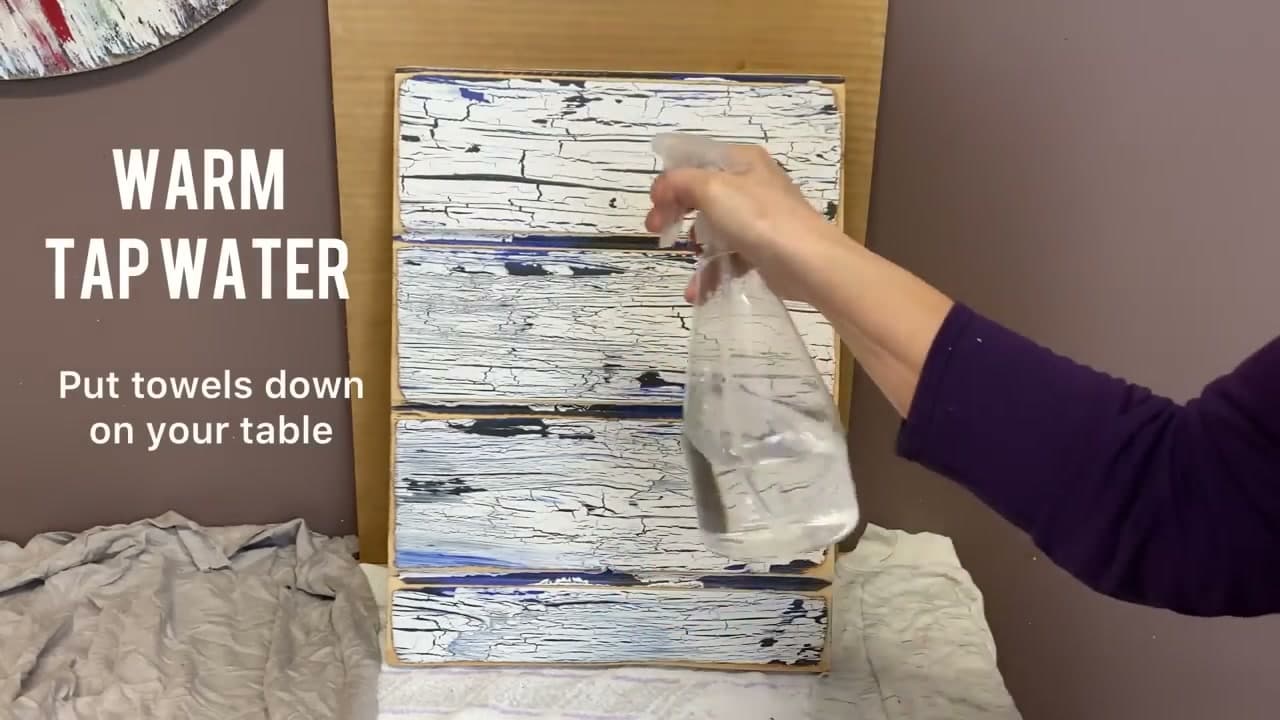
Pull together everything you need: a piece of wood (any flat painted surface works for practicing the technique), Elmer's school glue (any school glue will work - the specific brand doesn't matter), a small block of wood for the texture stamping, a spray bottle of warm water, and three paint colors.

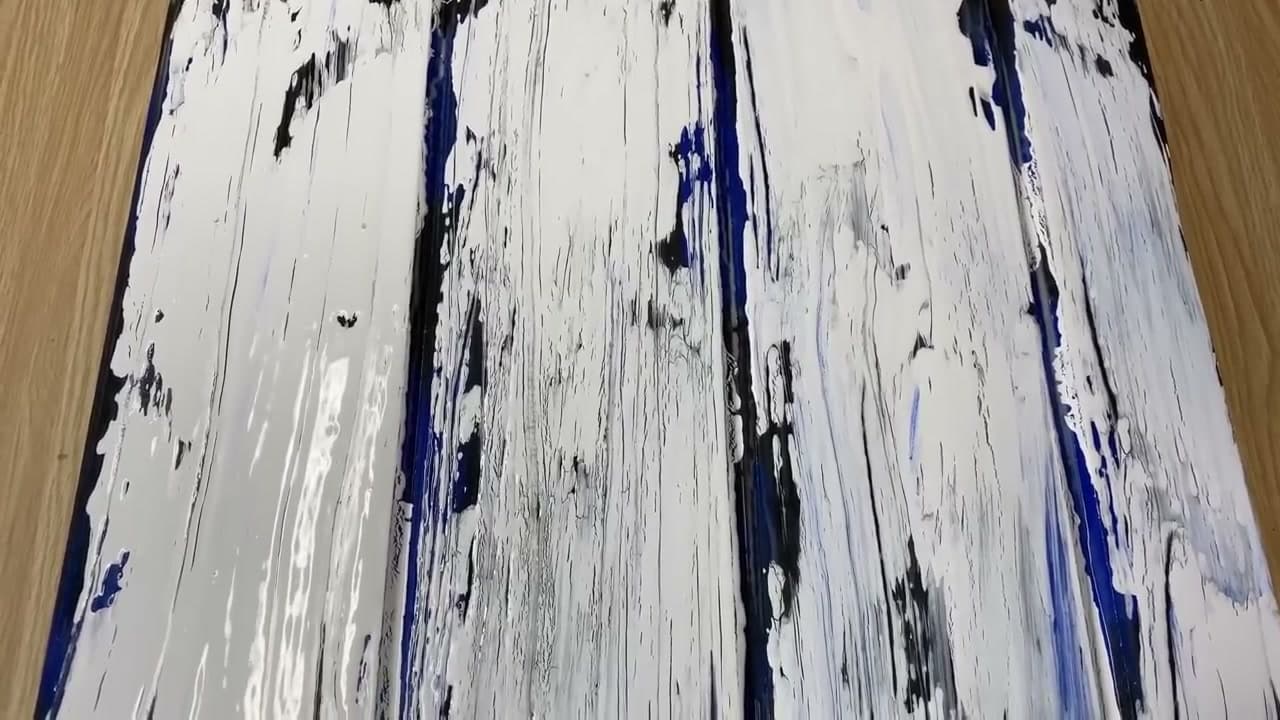
The three colors are: a dark base color (charcoal, navy, deep brown), a contrasting accent color (lighter wood tone or a contrasting hue), and a lighter top color that will show as the dominant final color (white works perfectly). Latex, acrylic, or chalk paint all work - this technique is a great way to use up partial paint cans.

Tip

This is a fantastic project for the leftover paint at the back of your craft cabinet. The technique looks better with imperfect color matches than with perfectly coordinated paints, so don't stress about matching.

2

Step 2: Paint a Solid Dark Base Coat

0:28
Step 2: Step 2: Paint a Solid Dark Base Coat

Brush a solid coat of the dark base color over the entire wood surface. The base color will peek through the cracks once the crackle effect develops, so pick something with strong visual contrast to the lighter topcoat - a deep navy, charcoal, or rich brown all work well behind white.

Cover the surface completely and let it dry fully before moving on (about 30 minutes for chalk paint, longer for latex). The base coat needs to be dry to the touch or the next layer will smear.

Tip

Use a foam or chip brush rather than a fancy bristle brush - this technique creates intentional roughness, so brush quality doesn't matter.

3

Step 3: Add the Accent Color in Random Patches

0:44
Step 3: Step 3: Add the Accent Color in Random Patches

Once the dark base coat is dry, add the accent color in random patches across the board - don't cover the whole surface, just dab it on here and there. The accent adds visual depth so the cracked surface looks like it has multiple layers of old paint underneath, rather than just one solid color.

Let this layer dry fully too. The accent color will show through in different spots than the base color, giving the final piece an authentic many-decades-of-repainting look.

Tip

Vary the patch sizes and don't make them symmetric. Real old paint chips don't have a pattern - random is more convincing.

4

Step 4: Mix the Glue and Brush It On

1:10
Step 4: Step 4: Mix the Glue and Brush It On

Mix the secret crackle potion: 1 part water to 2 parts Elmer's school glue. The mix doesn't have to be exact - the goal is glue thinned just enough that it flows from a brush in long even strokes (the consistency should be like maple syrup). Stir with a wooden skewer until smooth.

Brush the glue mixture onto the entire painted board using long single-direction strokes - short choppy strokes give uneven crackles. The thicker the glue layer, the bigger the cracks. The thinner the layer, the smaller and finer the cracks. Let the glue sit for about 5 minutes until just tacky to the touch.

Tip

Test by lightly touching with a fingertip - the glue should feel slightly sticky but not transfer to your finger. That's the magic moment for the next step.

5

Step 5: Apply the Topcoat with a Wood Block

2:20
Step 5: Step 5: Apply the Topcoat with a Wood Block

While the glue is tacky, dip a small block of wood (any scrap, end-grain side down) into white chalk paint. Press the painted face of the block onto the tacky surface and drag it across in single passes - don't rework an area or you'll mush the glue around.

The block transfers paint into the wet glue. As the glue dries, it contracts under the paint and pulls the paint film apart into authentic-looking cracks. This is the step that creates the chippy weathered texture. Cover the entire surface with single passes of the block.

Tip

End-grain wood blocks (the cut end of a 2x4) give the best texture because the grain pattern transfers along with the paint. Side-grain blocks give a smoother result.

6

Step 6: Let it Dry Overnight Then Sand Aggressively

4:15
Step 6: Step 6: Let it Dry Overnight Then Sand Aggressively

Let the board dry fully - overnight is best. Don't use a hair dryer or heat gun: forced drying gives less dramatic cracks than letting the glue contract naturally over hours. The crackles develop progressively as the glue shrinks.

Once fully dry, take the board outside or to a well-ventilated area and aggressively sand the entire surface with 80-grit sandpaper. Knock down the highest paint and expose more of the cracks underneath. Don't be gentle - the goal is to make this look like authentic old weathered wood that's been beaten by time.

Tip

Wear a dust mask while sanding. Old paint plus glue plus aggressive sanding creates a lot of fine dust that you don't want in your lungs.

7

Step 7: Water and Black Paint Weathering Pass

5:25
Step 7: Step 7: Water and Black Paint Weathering Pass

For the final aging effect, stand the board upright and mist water across the whole surface with a spray bottle. Dab black latex paint along all the edges and exposed raw wood spots with a chip brush. Spray more water over the black paint and let it run down the board in streaks - this creates the look of a piece that's sat outside in the weather for years.

Blot any pooled water with an old t-shirt, then lay the board flat to dry overnight without touching it (touching reactivates the glue and smears the paint). Seal with poly acrylic if the piece will see use - skip the sealer for purely decorative signs.

Tip

Don't touch the board after the water spray. The water reactivates the glue layer underneath the paint, and any pressure smears the paint. Just spray, walk away, come back in the morning.

Products Used

☐ The Checklist

How to Crackle Paint - Weathered Wood Finish in 7 Steps

Tools
7
Materials
5
Steps
7
Video
9 min

Your Guide

Our Upcycled Life

As an Amazon Associate we earn from qualifying purchases. Links on this page may be affiliate links - clicking them and buying doesn't change your price, but helps support ShowMeStepByStep.

Tags

Related Tutorials