How to Crochet a Bee: Beginner Amigurumi

CrochetEasy33:127 stepsBrowse more →
Also in:Crafts

By CraftingStepByStepPublished Updated

Based on a video by The Mary Jay.

This chunky little amigurumi bee works up in about half an hour once you have the rhythm down, which is what makes it a great first stuffed animal. The body is a sphere worked in the round - magic ring at the base, two increase rounds to widen, then alternating yellow and black stripes for the body, decrease rounds to close the top, and two small wings crocheted separately and sewn on. The Mary Jay walks through every skill in the video, so even if magic rings and color changes are new, the on-camera pacing is gentle.

The visual payoff is the stripes. Five color blocks of yellow and black give the bee its unmistakable look, and the seamless color change technique (slip stitch and chain instead of a hard cut) keeps the stripes looking continuous instead of stepped. Add 18 mm safety eyes, a tiny pink yarn blush below each eye, and two white wings sewn over the back seam and you have a finished plushie that reads instantly as 'bee' from across a room.

If you want a related beginner skill warm-up first, brush up on single crochet and the magic ring. Once your bee is done, try a crochet flower as a companion piece - bee on a flower stem photographs beautifully and makes a sweet pollinator-themed gift for a gardener or a teacher.

Step-by-Step Guide

1

Step 1: Gather Supplies and Start the Magic Ring

0:57
Step 1: Step 1: Gather Supplies and Start the Magic Ring

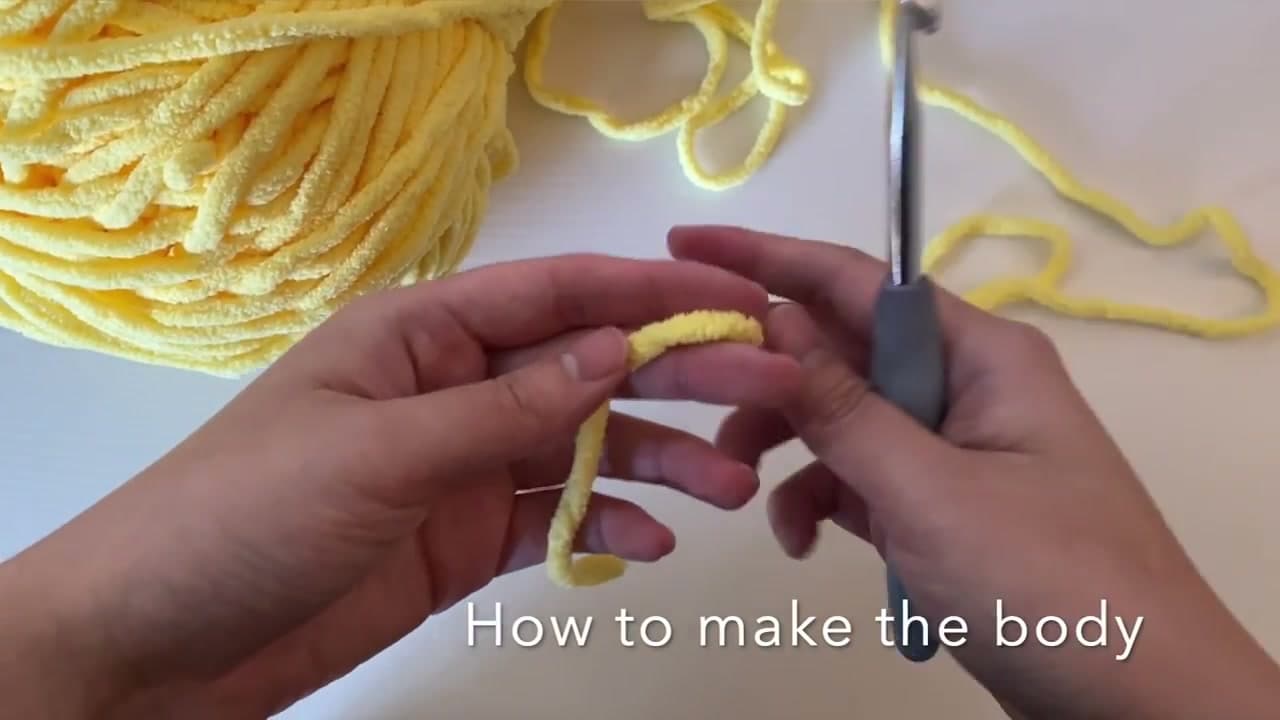
Lay out a 7 mm crochet hook, super bulky blanket yarn in yellow, black, white, and a scrap of pink, two 18 mm safety eyes, polyester fiberfill, a yarn needle, scissors, and a stitch marker.

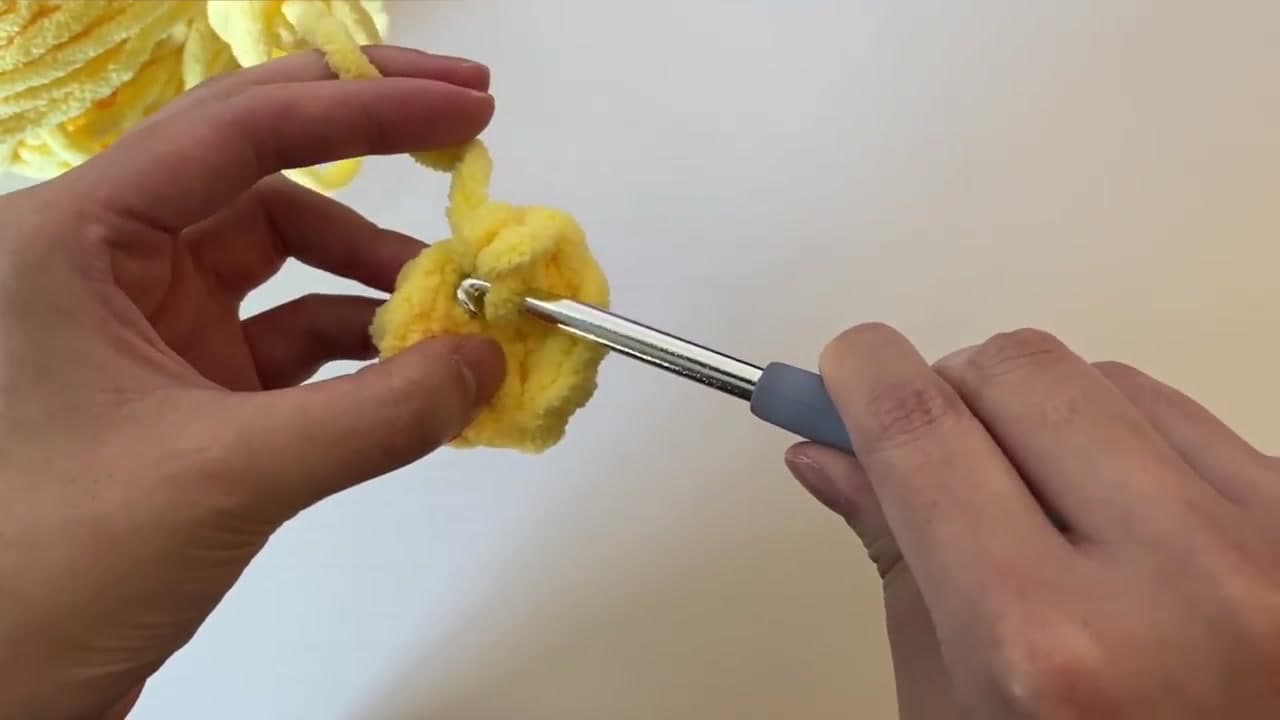
Start with yellow. Pinch the working yarn between your thumb and pointer finger, wrap it around your pointer and middle finger to form an x, and hold the x in place with your ring finger. Insert the hook under the x, turn it 180 degrees, grab the lower strand, pull it under the x. Turn the hook again, go over the x, grab the lower strand and pull it through the loop on the hook. That's your magic circle. Work 7 single crochets into the ring, then pull the tail to cinch it closed.

Tip

If the magic ring feels fiddly, slow it down on the first one and don't worry about speed. You're learning the muscle memory, not winning a race. The Mary Jay has a slower magic ring walkthrough linked in her video description if you need it.

2

Step 2: Work the Increase Rounds to 21 Stitches

4:40
Step 2: Step 2: Work the Increase Rounds to 21 Stitches

Place a stitch marker in the last stitch so you know where round 1 ended. For round 2, work an increase (two single crochets) in every single stitch. That doubles the count from 7 to 14.

For round 3, alternate one single crochet and one increase, repeating seven times around. You'll end with 21 stitches. Round 4 is one plain single crochet in every stitch - no increases, no decreases - which keeps the count at 21 and gives the bee its rounded base shape.

Tip

An increase in single crochet is just two single crochets worked into the same stitch. Count carefully through these first few rounds - if you end up with the wrong stitch count, the stripes won't line up later.

3

Step 3: Change to Black Yarn for the First Stripe

10:00
Step 3: Step 3: Change to Black Yarn for the First Stripe

For a seamless color change, start in the stitch just before where you want black to appear. Pull the loop off the hook, undo half of that last yellow single crochet so only two loops are on the hook, and reinsert the hook. Now finish that stitch with the black yarn pulled through the two yellow loops.

Tie the black yarn to the working yellow yarn three times like the start of a shoelace, then trim the excess yellow. Move into the first stitch of the new round, but instead of a single crochet do a slip stitch followed by a chain. That slip-stitch-and-chain counts as the first single crochet of the round and hides the color jog. Continue around with one single crochet in each stitch.

Tip

The seamless change is what separates an amigurumi bee from a striped ball. If your first attempt looks stepped, undo it and try again - the second pass clicks into place much faster.

4

Step 4: Crochet the Yellow and Black Striped Body

21:40
Step 4: Step 4: Crochet the Yellow and Black Striped Body

Repeat the color change every round to build the bee's signature stripes. The pattern is one round black, one round yellow, one round black, one round yellow, one round black - five total stripes once round 5 through 10 are finished.

Every time you switch colors, skip that first stitch of the new round (the leftover stitch from the slip-stitch chain), then do another slip stitch and chain as your first single crochet of the new color. After the final black stripe, work one full yellow round with no color change to round off the top.

Tip

If you lose count, hold the bee up and look at the stripes from the side. There should be alternating yellow and black bands all the way around with no white gaps. Yellow rounds and black rounds are the same height because each is exactly one round of single crochets.

5

Step 5: Add Safety Eyes and Pink Blush

23:40
Step 5: Step 5: Add Safety Eyes and Pink Blush

Set the crochet aside and grab the two 18 mm safety eyes. Place the first eye between rounds 2 and 3 on the front of the bee (the part of the body you want to be the face - usually placed opposite the color-change seam). Eyeball the second eye directly across so the spacing looks even, then push both backings on firmly from inside.

Cut a short piece of pink yarn, thread it onto a yarn needle, and sew a small horizontal blush stitch just below each eye, going from inside the body outward and back. Tie off the pink yarn on the inside.

Tip

Safety eyes are a choking hazard, so skip them for bees made for babies, toddlers, or pets. Embroider the eyes with black yarn instead, or sew on small felt circles.

6

Step 6: Stuff the Body and Decrease to Close

25:25
Step 6: Step 6: Stuff the Body and Decrease to Close

Stuff the bee body with polyester fiberfill in small pinches rather than one big handful. Smaller pinches give a smoother shape and help you spot any thin spots that need more filling.

Once stuffed, work the final round: seven invisible decreases all the way around (one decrease combines two stitches, so seven decreases reduce 14 stitches down to 7). For an invisible decrease, insert the hook through the front loop only of the next two stitches, then yarn over and pull through all three loops. Fasten off, leave a long tail, and thread the tail through the front loops of those seven stitches. Pull tight to cinch the hole closed and weave the tail in.

Tip

If the bee feels lumpy after stuffing, work the filling around with your fingertips through the open top before you close it. Once decreases start, it's much harder to reach inside.

7

Step 7: Crochet Two White Wings and Sew Them On

30:50
Step 7: Step 7: Crochet Two White Wings and Sew Them On

For each wing, start with a magic ring in white yarn and work 6 single crochets into it. Pull the tail to close. Round 2: increase in every stitch for a total of 12 single crochets. Fasten off, leaving a 12 to 18 inch tail for sewing. Make a second wing the same way.

Position the wings on the back of the bee over the color-change seam (this hides any unevenness from the stripe joins). Use the long tail to whip-stitch each wing along one straight edge so the two halves meet in the center like a butterfly. Knot the tail securely inside the body, thread the needle through the bee a few times to bury the knot, then trim.

Tip

The wings can be a soft pleat rather than fully flat - pinch them gently in the middle as you sew so they cup slightly upward. That little curve sells the wing look.

Products Used

☐ The Checklist

How to Crochet a Bee: Beginner Amigurumi

Tools
4
Materials
6
Steps
7
Video
33 min

Your Guide

The Mary Jay

As an Amazon Associate we earn from qualifying purchases. Links on this page may be affiliate links - clicking them and buying doesn't change your price, but helps support ShowMeStepByStep.

Tags

What's next

Related collections

Curated theme pages that include this tutorial.

Weekly Digest

Liked this crochet tutorial?

Pick the categories you want to hear about. Weekly digest of new step-by-step tutorials. No spam, easy unsubscribe.

Send me tutorials about

We only email about new tutorials. Easy unsubscribe anytime.