How to Draw a House: Cartoon Cottage Step by Step

CraftsEasy9:137 stepsBrowse more →
Also in:Painting

By CraftingStepByStepPublished Updated

Based on a video by Art for Kids Hub.

A cartoon house looks complicated until you break it down. It is just a peaked box with a triangle on top, a few rectangles for the door and windows, and a bunch of small U-shapes for the leaves on the tree. Once you draw the parts in the right order, the cottage shows up on its own.

This tutorial follows Art for Kids Hub's house emoji lesson with a dad-and-kid format and an overhead view of the paper. It is designed for younger artists but works just as well as a five-minute warm-up for older kids or adults who want a confident win on the page.

Grab a black marker, a sheet of drawing paper, and colored pencils for the finish. Work from the bottom up. The shrub in the front comes first because it sets the position of everything else. Take the lessons slow on the roof and the door so the proportions stay friendly and cartoony.

Step-by-Step Guide

1

Step 1: Draw the Front Shrub and Start the Baseline

0:18
Step 1: Step 1: Draw the Front Shrub and Start the Baseline

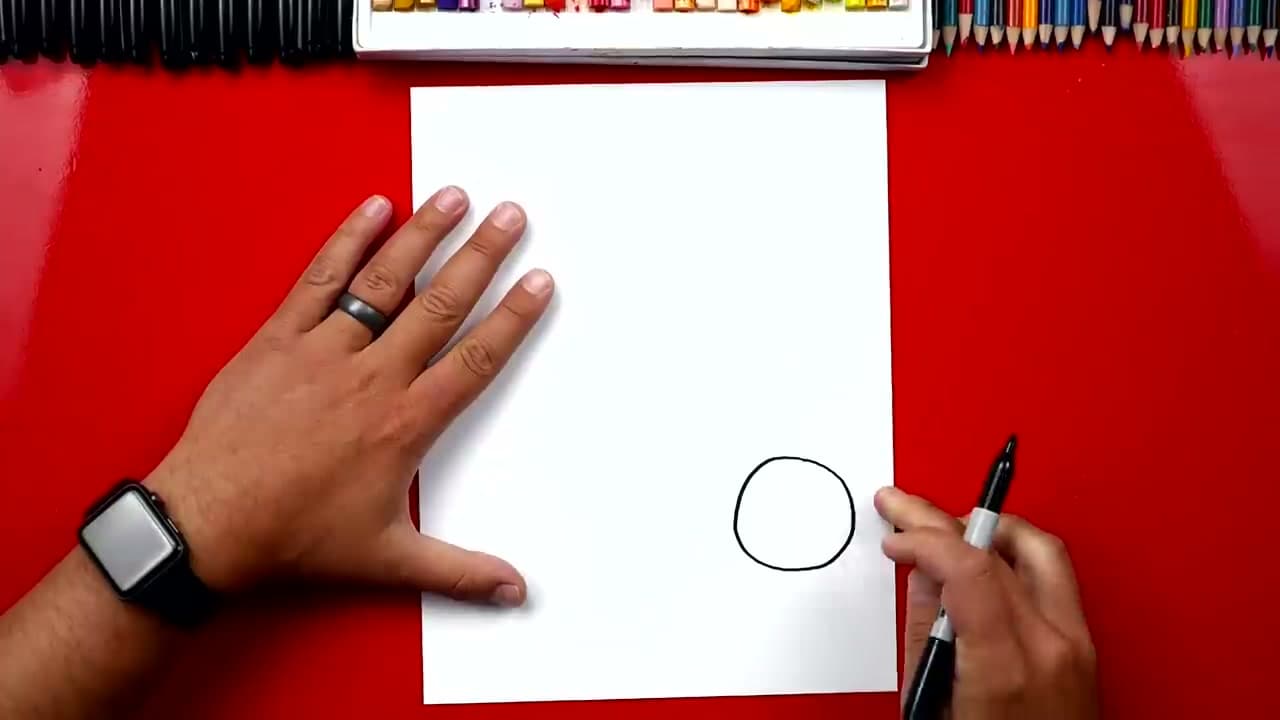
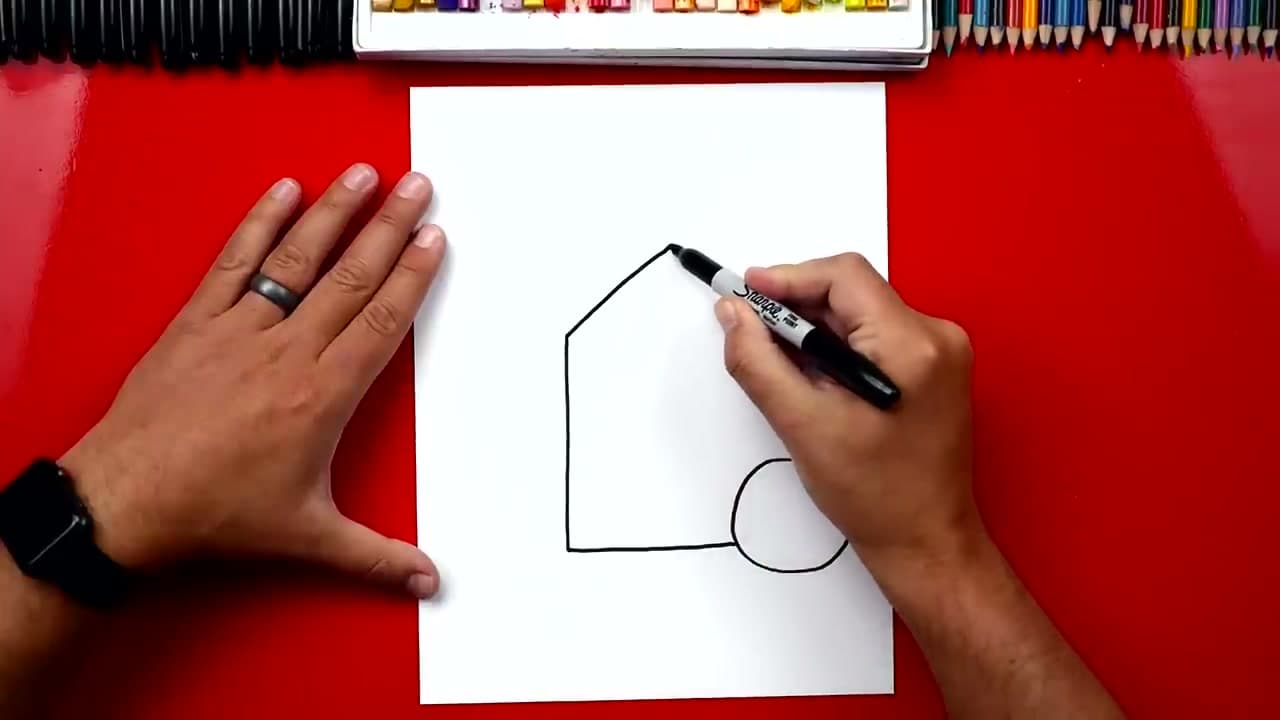
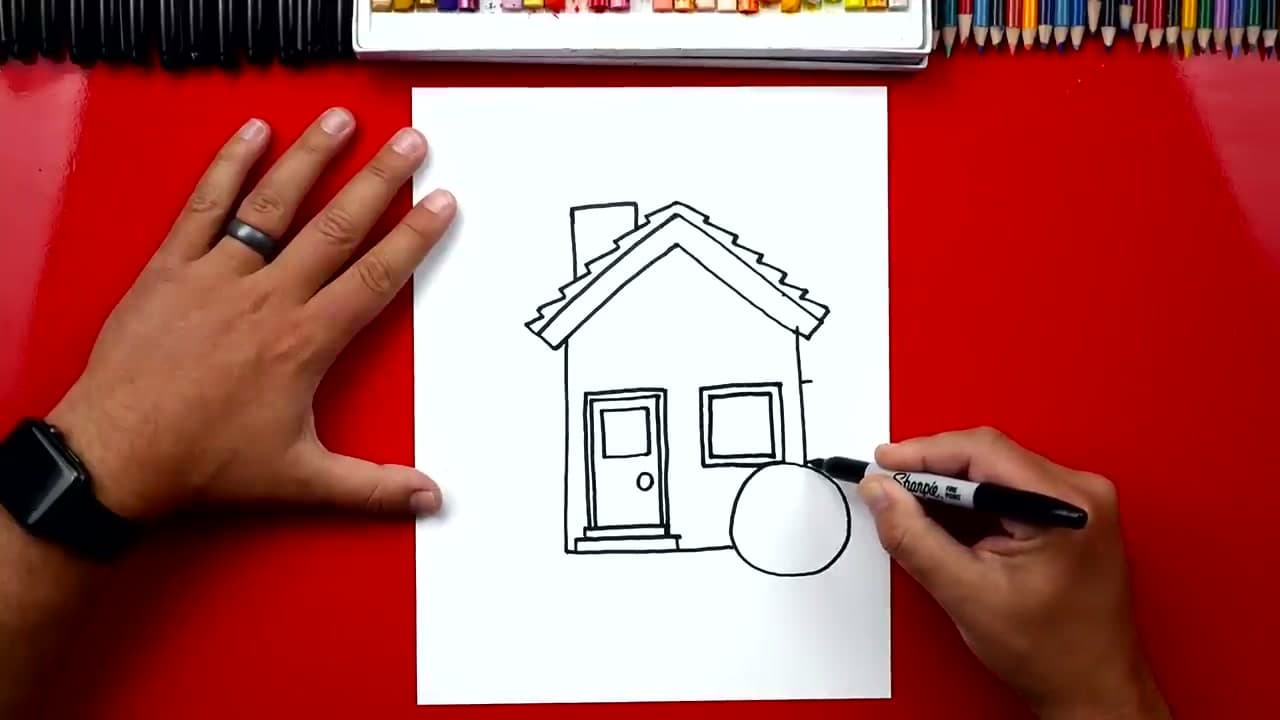
Place your paper in portrait orientation. With your black marker, draw a small circle in the bottom-right area of the paper for the shrub that sits in front of the house. Keep it about the size of a lime - small enough to leave room for the whole house and a tree above it.

Now run a horizontal line out of the left side of the shrub. That line is the ground line and the bottom edge of the house. Stop the line at the right side of where the house will sit.

Tip

Position the shrub low and slightly to the right of center. If you start it dead-center, the house ends up crowding the left edge of the paper and the tree has nowhere to go.

2

Step 2: Add the Walls and the Peak

0:55
Step 2: Step 2: Add the Walls and the Peak

From the right end of the baseline, draw a vertical line straight up for the right wall. From the left end of the baseline, draw a matching vertical line up to the same height for the left wall.

For the roofline, draw an upside-down V on top - go up from the top of the left wall to a center point, then back down to the top of the right wall. Aim the peak right in the middle so the house looks balanced from the front.

Tip

The peak does not have to be tall. A short, wide triangle looks more like a cottage; a steep narrow one starts to look like a tower.

3

Step 3: Build Out the Roof Overhangs

1:18
Step 3: Step 3: Build Out the Roof Overhangs

Now widen the roof so it overhangs the walls. From the top of the left wall, draw a short line that pushes out past the wall to the left, then come back up at a matching angle to mirror the original roof slope.

Do the same thing on the right side - small overhang out, then a parallel line going up. Connect the two new top lines with a second, smaller upside-down V across the top of the roof. The roof now has thickness.

Tip

Keep the two roof slopes parallel. If the inside slope and the outside slope head different directions, the roof reads as broken instead of stylized.

4

Step 4: Add Shingles and the Chimney

2:25
Step 4: Step 4: Add Shingles and the Chimney

Start at the peak of the roof. Draw a zigzag down the front face of the roof - short line, drop, short line, drop - to suggest a row of shingles along the front edge. Repeat the same zigzag down the right slope of the roof until it meets the wall.

For the chimney, drop down the left side of the roof and draw a small upright rectangle. Connect a slightly higher matching line and close the top across. The chimney sits on the back slope of the roof, so the line closest to the peak should be taller than the line on the outside.

Tip

You only need a handful of shingle teeth on each side. More than eight and the roof starts looking busy.

5

Step 5: Draw the Front Steps and the Door

3:35
Step 5: Step 5: Draw the Front Steps and the Door

At the bottom of the house, draw two small stacked rectangles to make a pair of front steps. The lower step is wider than the upper one - a quick way to suggest depth.

For the door, draw a tall narrow rectangle in the middle-left of the wall, starting from the top step. Repeat the same shape just inside it for the door frame border. Add a small square near the top of the door for the door window, drawing an L first and then an upside-down L to close it. Finish with a tiny circle for the doorknob.

Tip

Center the door over the steps. If the door floats above one of the steps, the cottage looks like it cannot decide where the front entrance is.

6

Step 6: Add the Front Window and Side Window

4:30
Step 6: Step 6: Add the Front Window and Side Window

Next to the door, draw a square for the front window using the same L-shape trick: draw an L, then an upside-down L to close the box. Repeat a smaller box just inside for the window frame.

On the left wall of the house there is one more window - a small rectangle on the side. Draw a short line out from the wall at the top of where the window goes, a matching short line at the bottom, and connect them. That side window catches the eye and makes the cottage feel three-dimensional.

Tip

Match the height of the front window to the top of the door for a cleaner look. Two different heights pull the eye in opposite directions.

7

Step 7: Draw the Tree, Add Leaf Texture, and Color the Drawing

4:40
Step 7: Step 7: Draw the Tree, Add Leaf Texture, and Color the Drawing

Behind the house on the left side, draw a tree trunk that curves out at the base and connects into the wall. Then sketch the canopy: start with a backwards J shape coming up from the trunk, add two more U-shapes to round it out, and curve the top of the canopy across and over the roof, ending where the roof meets the right side.

Fill the canopy with the leaf texture. Draw rows of small U-shapes connected together to look like clumps of leaves, working across and down. Add the same U-shape texture across the top of the front shrub.

Once the marker outlining is done, color the drawing in. Tan or yellow walls, a red roof, blue windows, a brown door, and green for the tree and shrub. Take your time on the coloring - this is where the cottage really comes to life.

Tip

You do not have to match the leaf pattern exactly. A loose handful of U-shapes reads as leaves; trying to make them perfectly even makes the tree look stiff.

Products Used

☐ The Checklist

How to Draw a House: Cartoon Cottage Step by Step

Tools
4
Materials
3
Steps
7
Video
9 min

Your Guide

Art for Kids Hub

As an Amazon Associate we earn from qualifying purchases. Links on this page may be affiliate links - clicking them and buying doesn't change your price, but helps support ShowMeStepByStep.

Tags

What's next

Weekly Digest

Liked this crafts tutorial?

Pick the categories you want to hear about. Weekly digest of new step-by-step tutorials. No spam, easy unsubscribe.

Send me tutorials about

We only email about new tutorials. Easy unsubscribe anytime.