How to Make a Magic Spinning Kirigami Card

By CraftingStepByStepPublished Updated

Based on a video by KirigamiArt.

This spinning kirigami card from KirigamiArt looks like a magic trick but it really comes down to two types of cuts made in the right places. One type goes all the way through the cardstock; the other stops about a third of the way in. Those two cut types combine to create a series of nested square rings that rotate and cascade outward when you open the card.

You need one sheet of colored cardstock, a craft knife, a metal ruler, and a cutting mat. The free template is linked in the video description above - download and print it before you start.

Step-by-Step Guide

1

Step 1: Download and Study the Template

1:10
Step 1: Step 1: Download and Study the Template

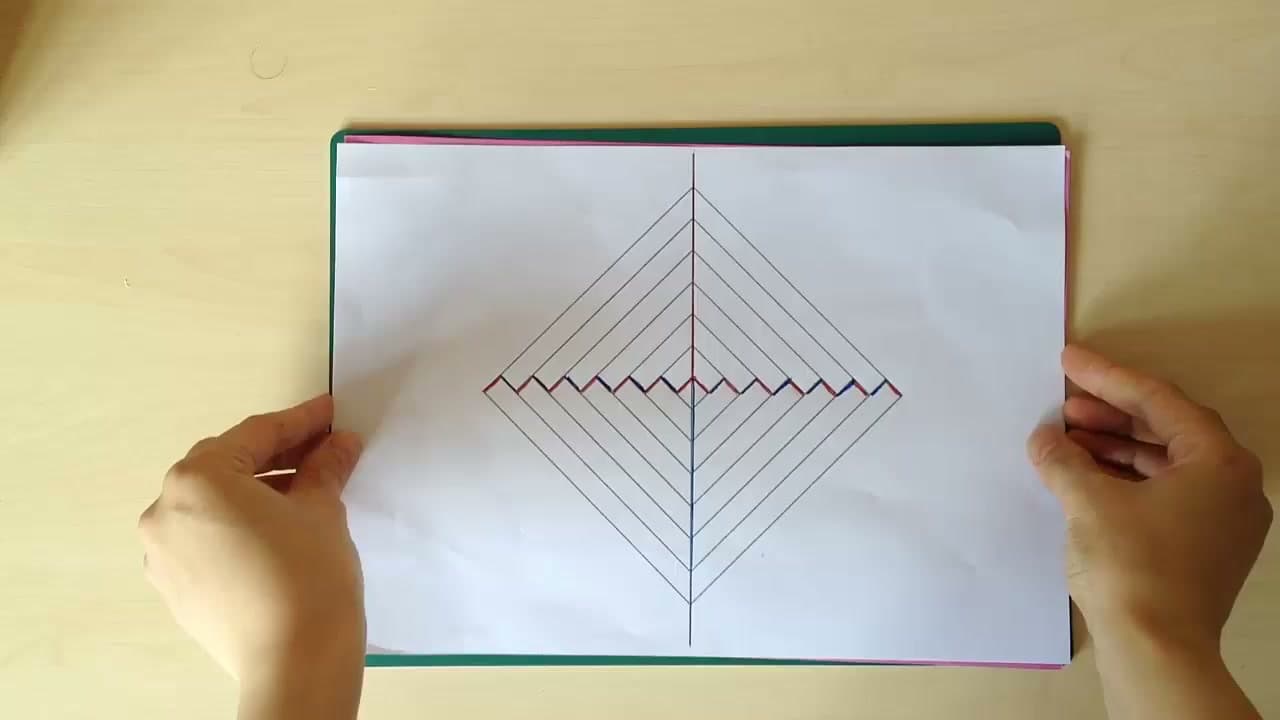
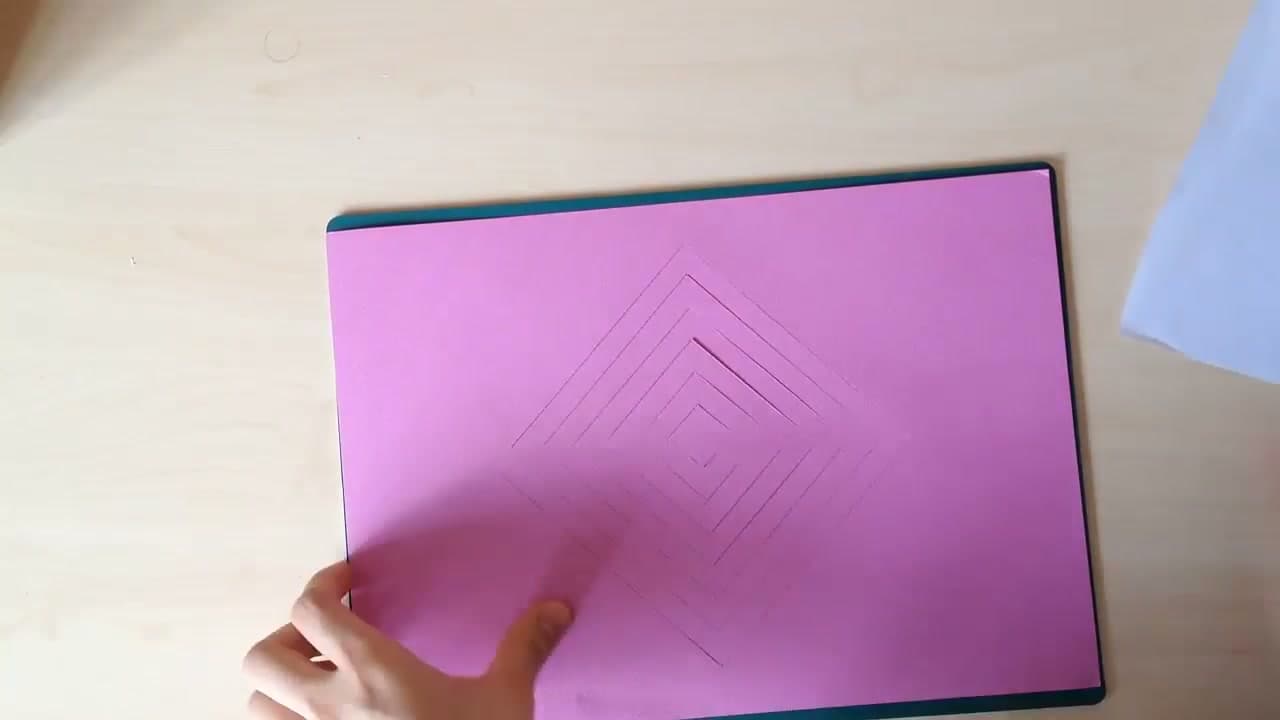
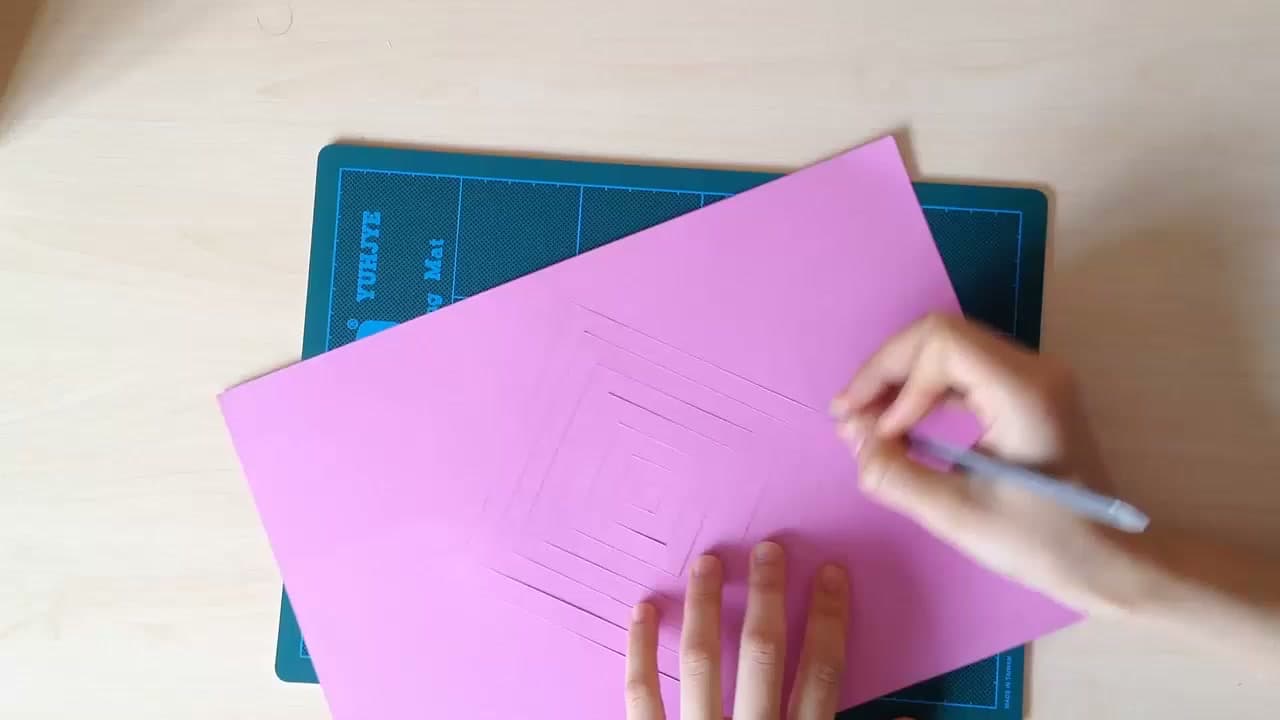
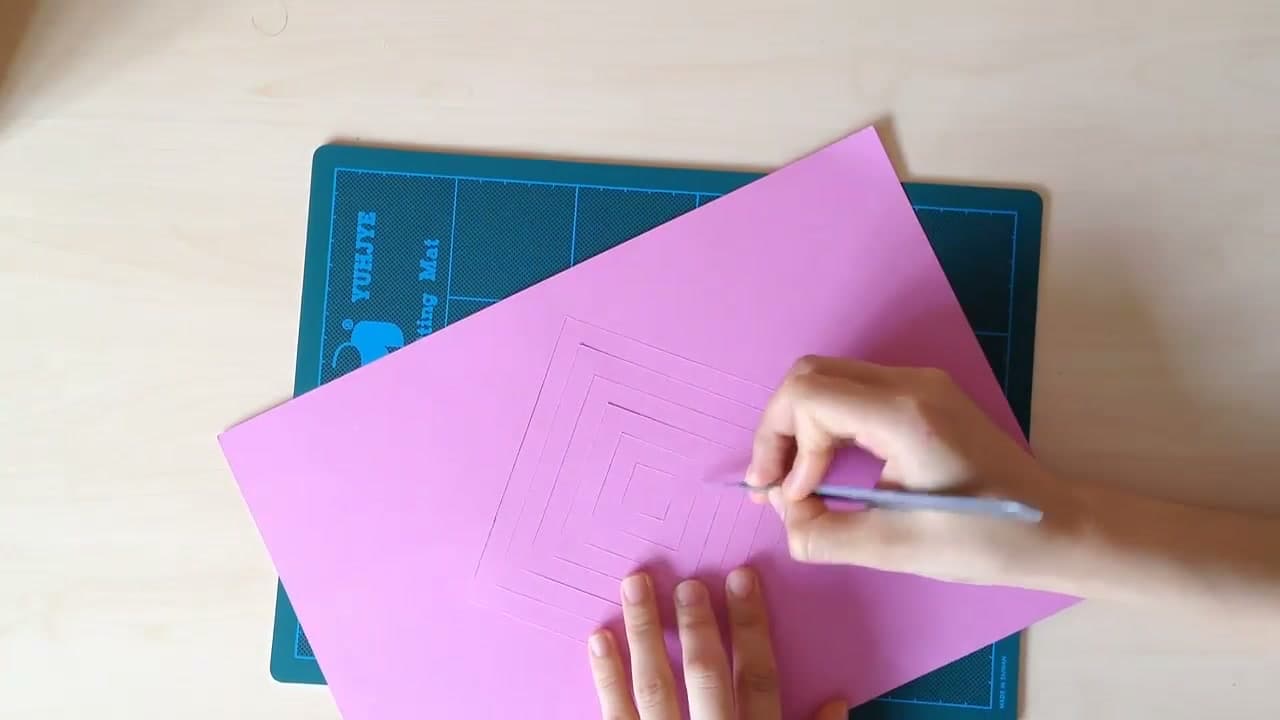
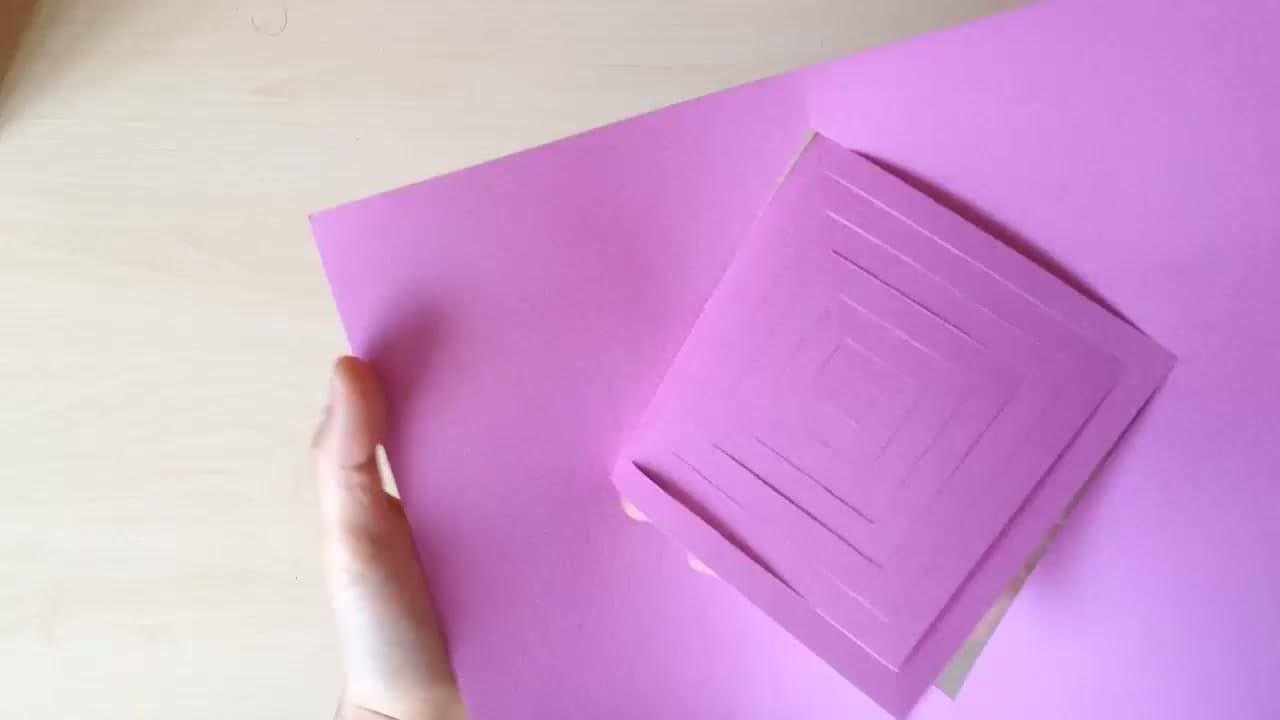
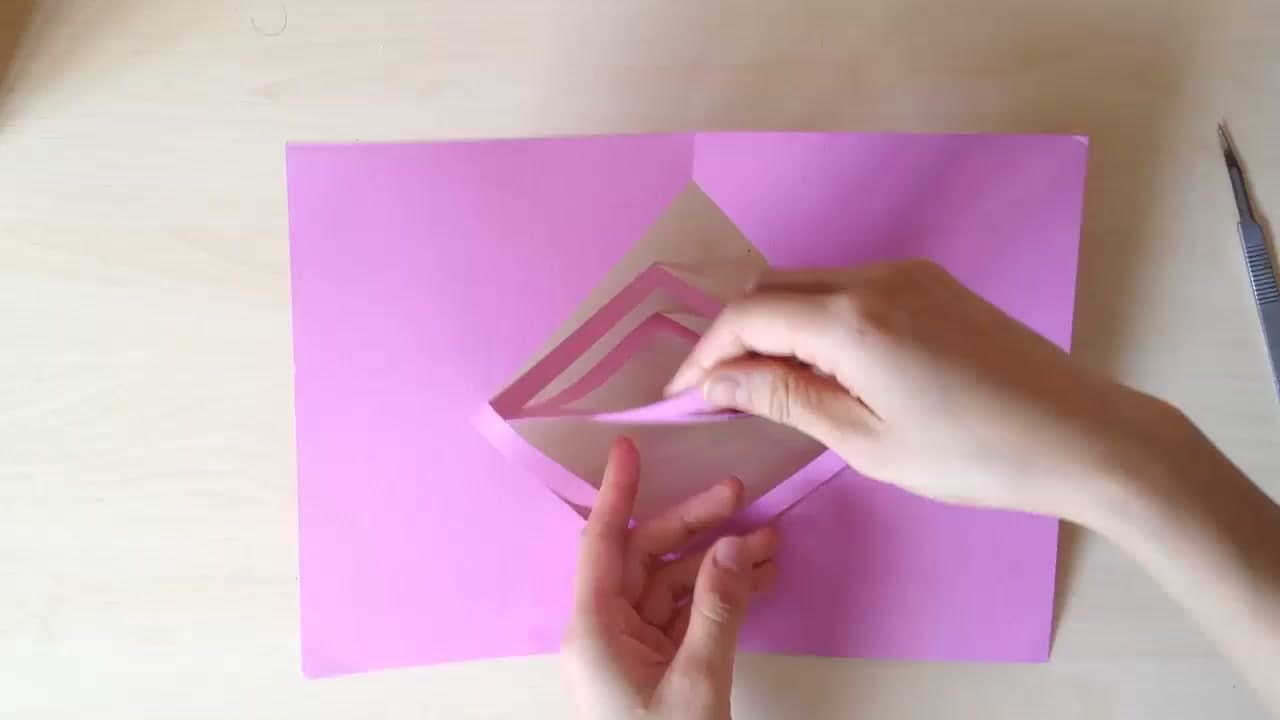
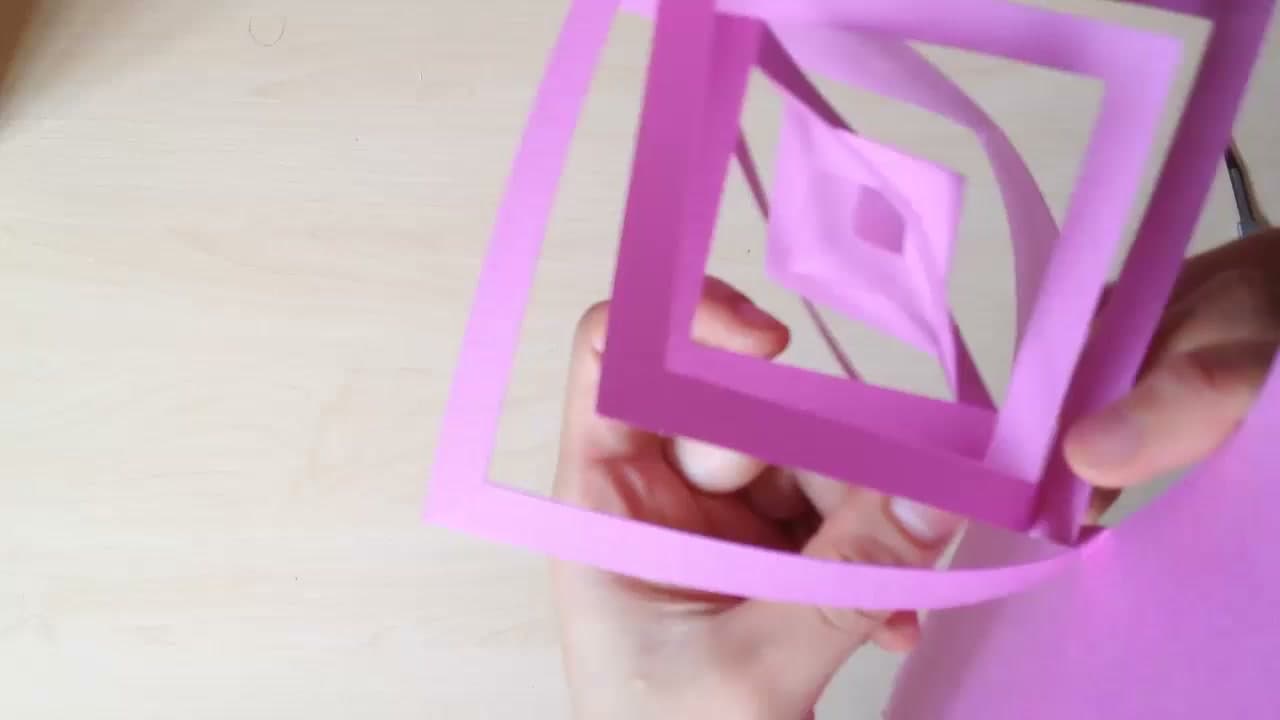
Grab the free template from the link in the video description. It shows a diamond shape made of concentric nested squares with two types of lines on it: solid black lines that you cut all the way through, and colored lines that you score only partway. Print it onto regular paper and look it over carefully before you transfer it to your cardstock.

Tip

The two line types are the whole key to this project. Black lines = cut through completely. Colored lines = score partway only. Keep that distinction clear in your head before your first cut and the rest follows naturally.

2

Step 2: Transfer the Pattern to Cardstock

2:13
Step 2: Step 2: Transfer the Pattern to Cardstock

Place your printed template on top of a sheet of colored cardstock and trace all the lines lightly with a pencil. Transfer paper works too if you have it. Center the diamond design on the cardstock with even margins on each side. Set it on your cutting mat before you start - you want the paper positioned correctly before the first cut goes down.

3

Step 3: Cut the Through-Lines

2:30
Step 3: Step 3: Cut the Through-Lines

Using a craft knife and metal ruler, cut along all the solid black diagonal lines - these go completely through the cardstock. These are the structural cuts that create the ring strips forming the spinning design. Work from one side to the other, keeping your cuts clean and straight. A sharp blade makes a big difference on cardstock this thick.

Tip

Use a metal ruler, not a plastic one. The knife can bite into plastic and send the blade off track. Change your blade if it starts dragging instead of gliding - a dull blade tears the cardstock fibers instead of cutting cleanly.

4

Step 4: Score the Crossing Lines

2:37
Step 4: Step 4: Score the Crossing Lines

Now work along the shorter colored lines. Cut in from each edge but stop about a third of the way across the paper - do NOT cut all the way through. These partial cuts weaken the paper so each ring bends in the right direction when you open the card. Score in from one side to the center, then score in from the opposite side to the center. This step is what makes the spinning effect work.

Tip

The depth of the score cuts matters. Too shallow and the paper won't bend cleanly; too deep and it tears all the way through. Aim for about one-third of the paper width on each side and keep the depth consistent across every colored line.

5

Step 5: Open the Card for the First Time

3:15
Step 5: Step 5: Open the Card for the First Time

Pick up the cardstock and slowly open it from the center fold. The cut strips will rise away from the flat surface as nested square rings. Tease each layer apart gently with your fingers. You should see a series of concentric square frames connected at the corners. If a small tear appears at a score line, that's fine - the paper is bending exactly where it's supposed to.

6

Step 6: Train the Spinning Motion

3:45
Step 6: Step 6: Train the Spinning Motion

Hold one outer edge in each hand and gently push your hands toward each other. The rings rotate and twist as they compress, alternating direction to create the spiral effect. Work each ring with your fingers to encourage it to fold the right way. The more you open and close the card, the smoother the motion gets - the paper memory improves with each repetition.

7

Step 7: Your Magic Spinning Kirigami Card

5:05
Step 7: Step 7: Your Magic Spinning Kirigami Card

Hold both outer edges and slowly pull them apart - the rings cascade outward in a spinning spiral. Open and close it as many times as you like. The card folds completely flat for mailing or storing in an envelope. Write your message on the back before you seal it up. It's the kind of card people keep on their desk instead of throwing away.

Products Used

☐ The Checklist

How to Make a Magic Spinning Kirigami Card

Tools
5
Materials
3
Steps
7
Video
7 min

Your Guide

KirigamiArt

As an Amazon Associate we earn from qualifying purchases. Links on this page may be affiliate links - clicking them and buying doesn't change your price, but helps support ShowMeStepByStep.

Tags

Test your knowledge

Did the lesson stick? Find out in 2 minutes.

5 quick questions covering what you just read. No signup, no score saved — just a gut check.

Quick reference

Key takeaways from How to Make a Magic Spinning Kirigami Card

5 questions, answers, and one-line explanations. Tap to expand.

  1. 1.What's the difference between through-lines and crossing lines?

    Answer: Through-lines are cut; crossing lines are scored

    Cutting makes the slits; scoring makes the fold lines without separating the paper.

  2. 2.Why train the spinning motion after first opening?

    Answer: Paper needs flexing so scored folds settle into their direction

    Working the fold back and forth sets the crease direction so the spin becomes smooth.

  3. 3.Best paper for this project?

    Answer: Cardstock

    Cardstock holds scored folds and spins cleanly without collapsing under its own weight.

  4. 4.What does the sheet look like right after cutting and scoring?

    Answer: Flat with slits and score lines — no sign of the 3D effect yet

    The mechanism only reveals itself when you open the card for the first time.

  5. 5.Which step confirms the cuts and scores are correct?

    Answer: Opening the card for the first time

    The mechanism only shows itself when opened — that's when you see if everything aligns.

What's next

Related collections

Curated theme pages that include this tutorial.

Weekly Digest

Liked this card making tutorial?

Pick the categories you want to hear about. Weekly digest of new step-by-step tutorials. No spam, easy unsubscribe.

Send me tutorials about

We only email about new tutorials. Easy unsubscribe anytime.