What to Do With Fabric Scraps: 5 Zero-Waste Sewing Projects

SewingMedium14:087 stepsBrowse more →

By CraftingStepByStepPublished Updated

Based on a video by Sweet Smiling Soul.

Fabric scraps multiply faster than you can use them. Even small projects leave behind a pile of off-cuts, frayed strips, and odd shapes that feel too small to bother with but too pretty to throw away. So they sit in a box. For years.

This tutorial is the answer to that box. Lauren from Sweet Smiling Soul rounded up five projects she has actually made from her own scrap stash, ranging from a 30-minute zipper pouch to a fabric dollhouse storybook her inner child is obsessed with. Each one leans into the patchwork look instead of fighting it, which means you do not have to worry about whether your fabrics coordinate. The clash is the point.

If you have a sewing machine and a bag of leftovers, you can make at least three of these in a weekend. The dollhouse takes longer, but it is also the most rewarding. Pick the one that matches your skill level and dig in.

Step-by-Step Guide

1

Sort Your Scraps Before You Start

0:45
Step 1: Sort Your Scraps Before You Start

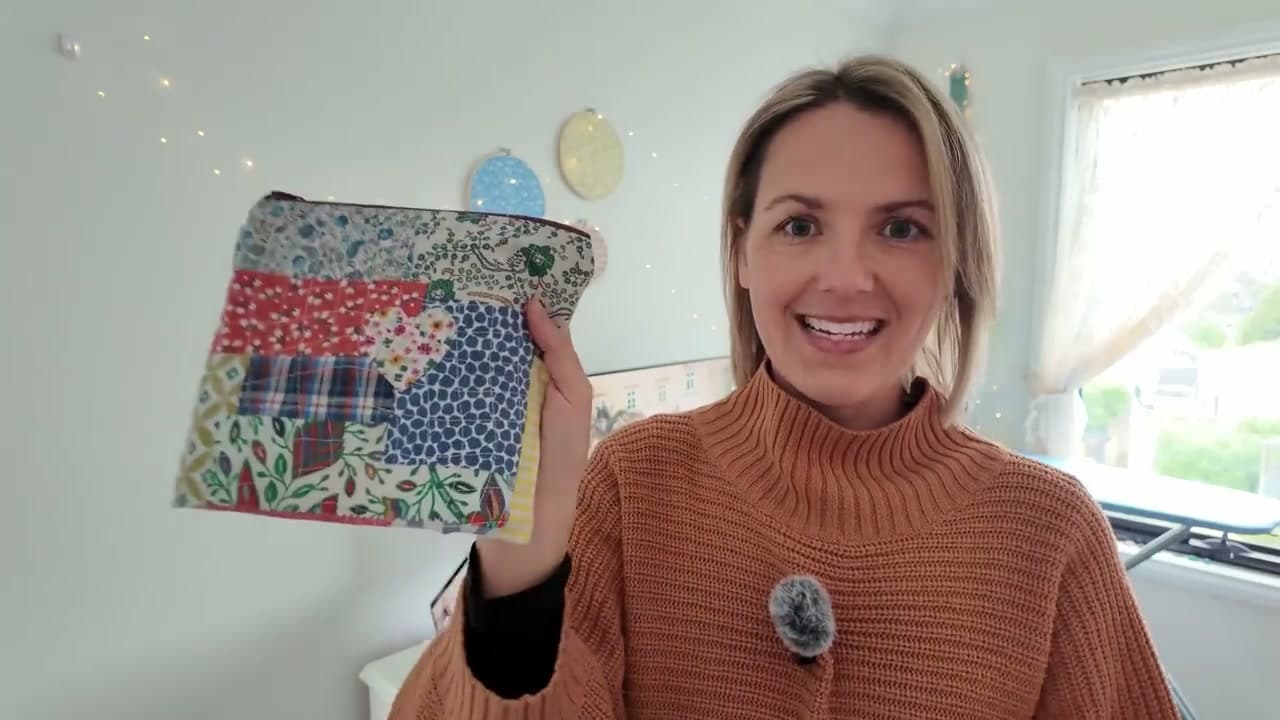
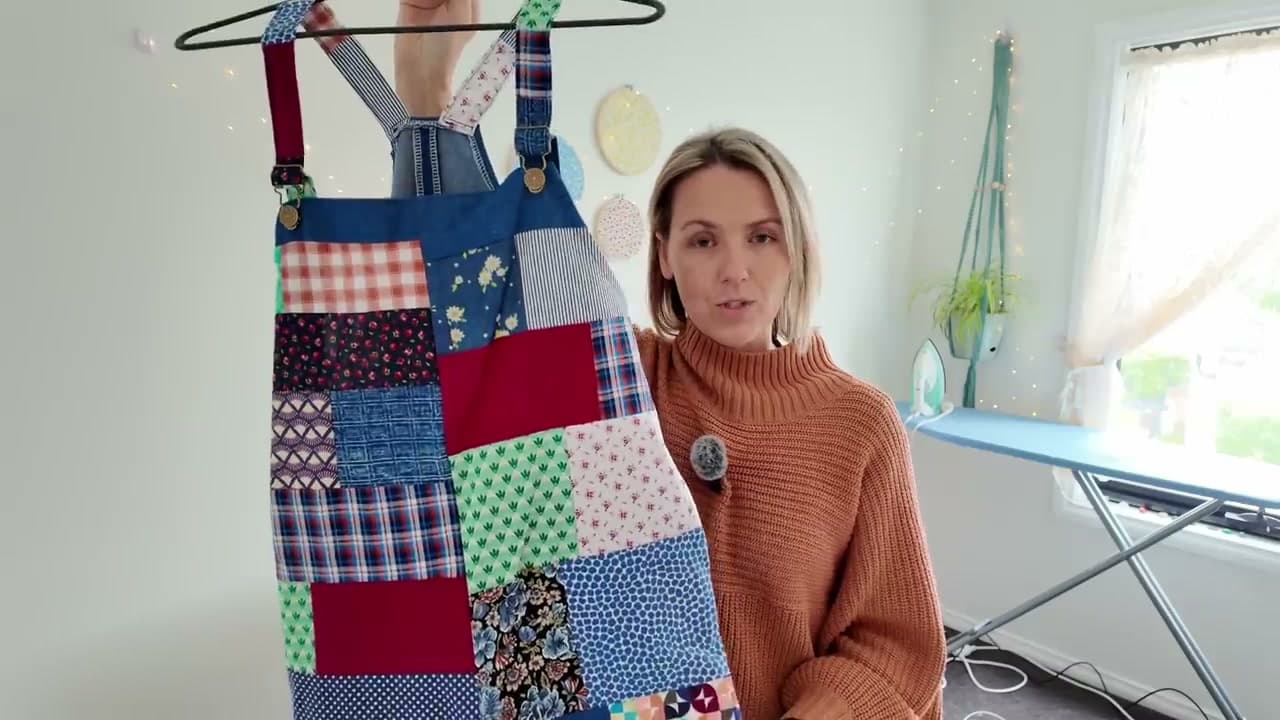
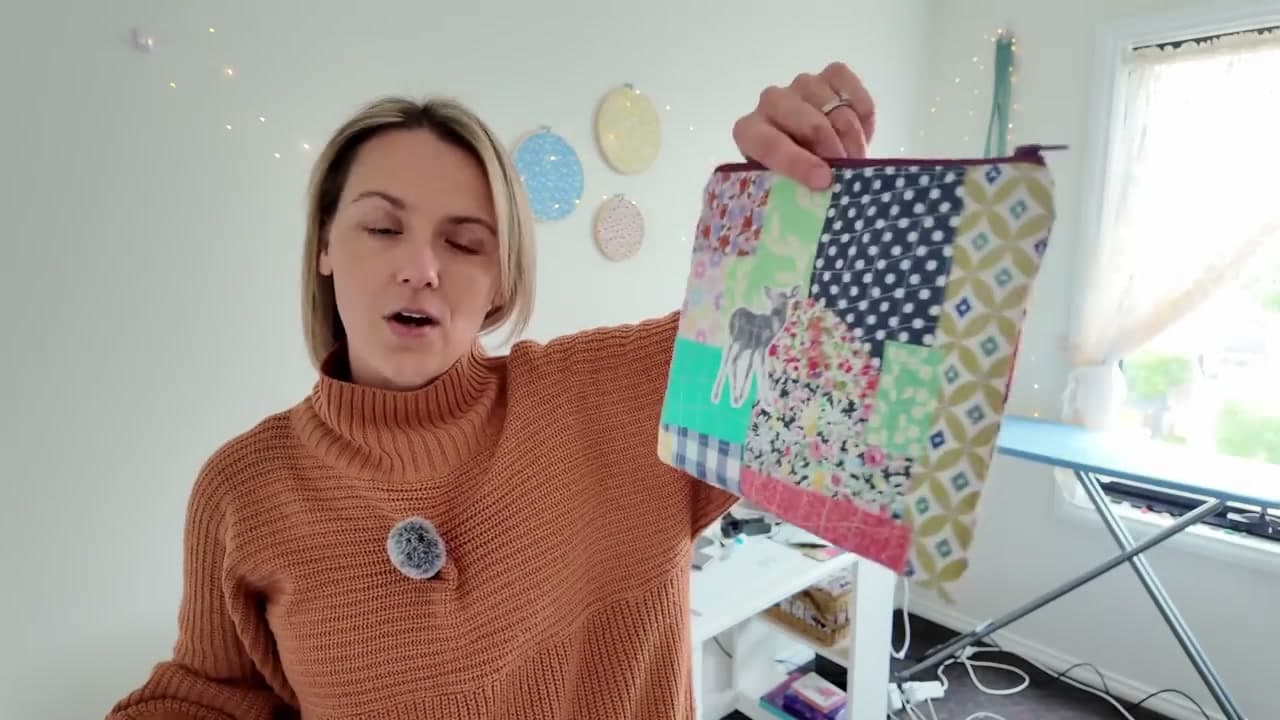
Pull the scrap stash out and spread it across a table so you can see what you have. Lauren keeps two containers: a box of usable off-cuts and a separate bag of tiny trimmings and fibre bits she saves for stuffing. Group the larger pieces by rough size and colour family so they are easier to grab when you start a project.

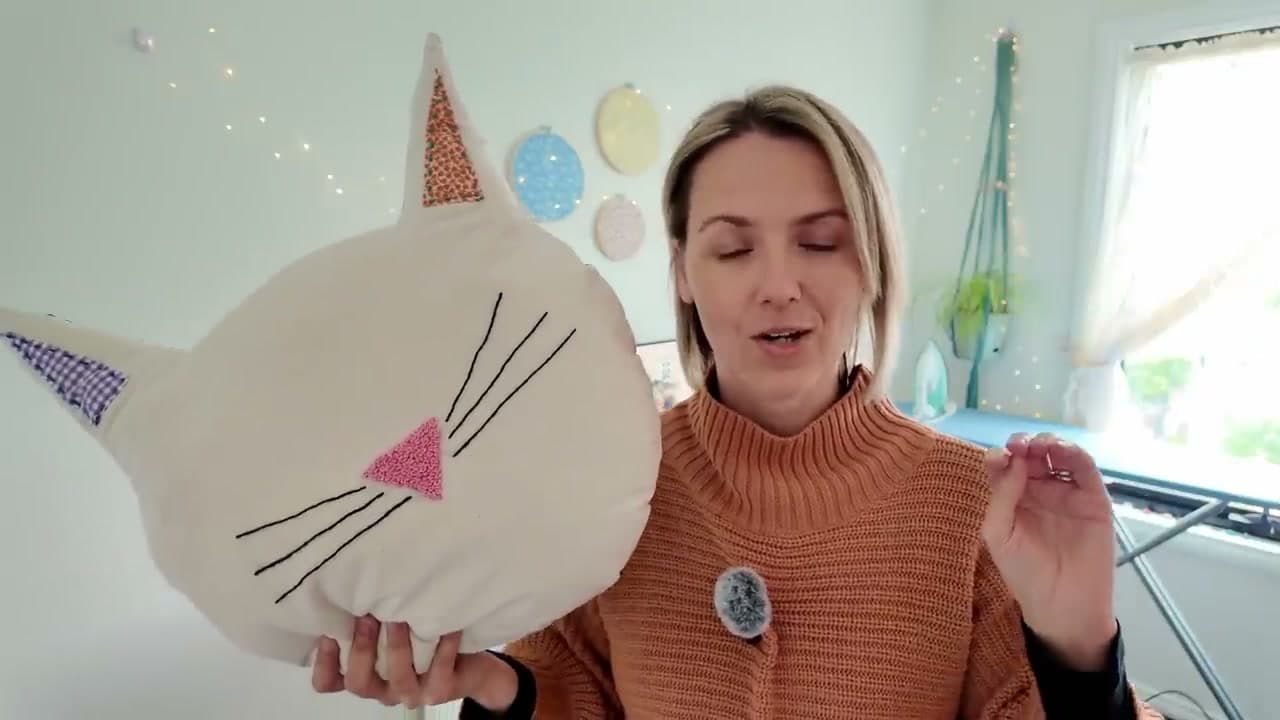
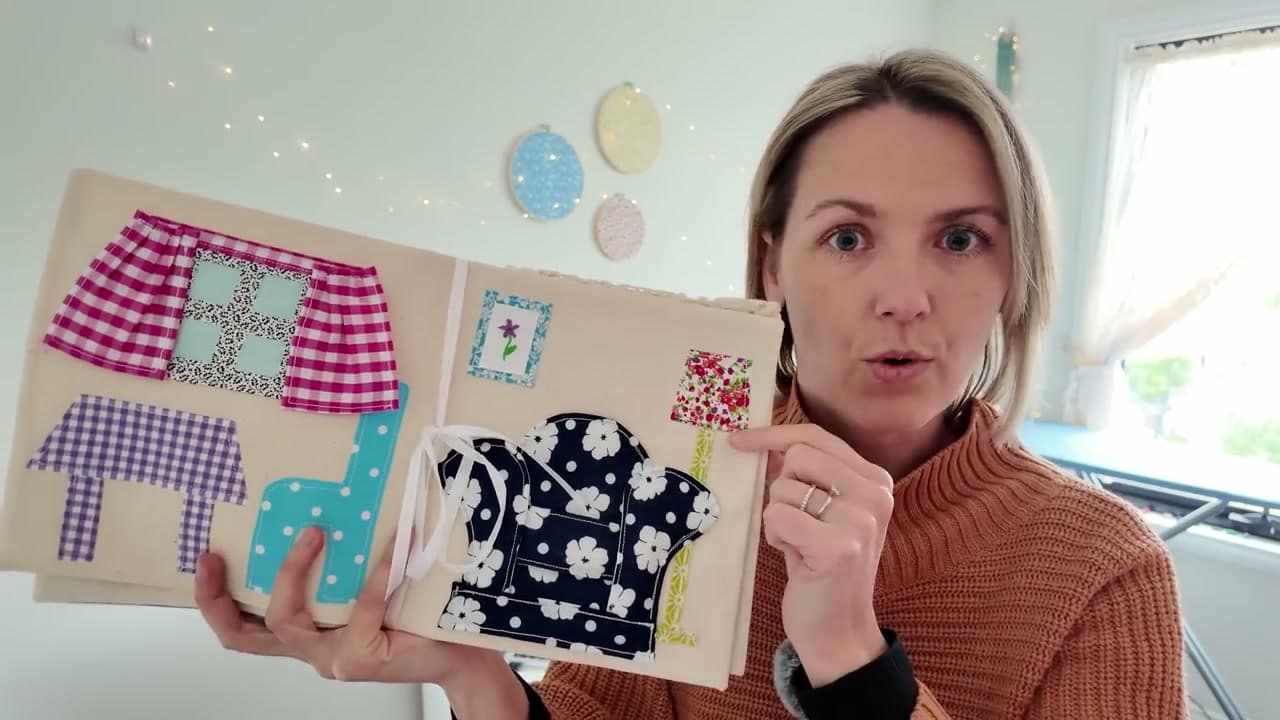
Do not toss the frayed bits or the weird shapes. Every piece in the pile earns a place in one of the five makes coming up, and the smallest scraps are exactly what the dollhouse and the cat cushion need.

Tip

Use a clear plastic bin for the usable scraps so you can see colours through the side without rummaging. Keep the trimmings bag tied near your machine - if it is right there, you will actually use it instead of binning the off-cuts.

2

Make a Scrappy Zipper Pouch with Tulle

2:25
Step 2: Make a Scrappy Zipper Pouch with Tulle

Cut a base layer of fabric the size you want the finished pouch to be. Lay scraps loosely across the base, overlapping the raw edges however you like - no need to trim anything straight. Cover the whole top with a layer of tulle, then quilt across it in close parallel lines through every layer.

The tulle traps each scrap in place and stops the raw edges from fraying further. Once the front and back panels are quilted, add a 20 cm zip across the top and a lining inside, then sew the pouch together along the sides and bottom. The whole make comes together in an afternoon.

Tip

If you want to skip the tulle, just sew your quilting lines closer together - maybe a quarter inch apart - to lock the scraps down. Cotton tulle is gentler on the machine than the stiff nylon kind.

3

Build a Patchwork Tote Bag with Loose Scraps

4:55
Step 3: Build a Patchwork Tote Bag with Loose Scraps

Same tulle-and-quilt method, but skip the trimming entirely. Rummage the scrap box, drop pieces straight onto the base fabric in their original shape, and overlap them like a collage. Lauren only trims the most badly frayed edges - everything else stays as-is, which keeps waste down.

Lay tulle over the top, quilt it down across both panels, then assemble the tote with two patchwork sides and a pair of handles. As you trim the seam allowances, drop the off-cuts into your stuffing bag for the next project on this list.

4

Sew a Reversible Patchwork Cat Cushion

6:45
Step 4: Sew a Reversible Patchwork Cat Cushion

This one is the fully zero-waste pick. Cut squares from your scrap pile and sew them together panel by panel for the back of the cushion. For the front, applique a simple cat face onto a plain panel - two triangles for ears, a triangle nose, and stitched whiskers.

Join the two sides into a cushion cover and leave an opening for stuffing. Then pack it tight with the trimmings, thread snips, macrame cord, and embroidery floss you have been collecting. The cushion ends up dense enough to sit up on its own, and nothing goes to landfill.

Tip

Press every seam open as you go. With so many tiny patches joined together, unpressed seams make the cushion lumpy. A quick iron after each panel keeps it flat.

5

Piece Together Patchwork Overalls

8:15
Step 5: Piece Together Patchwork Overalls

Grab a dungarees pattern - Lauren uses the one from Make It Yours The Label. Instead of cutting each pattern piece from a single fabric, cut smaller squares and rectangles from your scraps and sew them into larger panels first. Mix prints you would never normally pair. The clash is what makes it work.

Run every seam through a serger so the patchwork is secure and washable. Once you have enough finished panels, lay your pattern pieces on top and cut them out, then assemble the overalls the same way you would from regular yardage.

Tip

If you do not own a serger, finish the seams with a zigzag stitch or pinking shears. The garment will still wash fine - patchwork seams just like extra reinforcement because there is more raw edge than usual.

6

Stitch a Fabric Doll and Dollhouse Storybook

9:50
Step 6: Stitch a Fabric Doll and Dollhouse Storybook

Tiny scraps are perfect for tiny features. Use a pattern - Lauren sells her own dollhouse storybook pattern - and cut the doll, her clothing, and the little book pages from your smallest pieces, the ones you would normally toss. Mix fabric with felt for the firmer shapes like the cubby house, the boat, and the little furniture.

Hand-stitch the smallest details so you can place them exactly. The whole book folds up like a suitcase when it is closed, and the inside uses almost nothing but stash. This is the project most likely to convert your scrap pile into something you will keep forever.

Tip

Stiffen the storybook pages with a layer of fusible interfacing before you applique on the details. The pages hold their shape when the book is open and the appliqued scenes do not droop.

7

Set Up a Scrap-Saving Habit

12:25
Step 7: Set Up a Scrap-Saving Habit

Two containers, kept near your machine. One box for usable scraps sorted loosely by size, one bag for the tiny trimmings and thread that is too small for anything else. Whenever you finish a project, sort the leftovers into the right one before you put the machine away.

The big-scrap box feeds patchwork projects like the pouch, the tote, and the overalls. The trimmings bag becomes stuffing for the cushion and the doll. Use what you have before you buy new fabric - the pile shrinks fast when every project pulls from it.

Products Used

☐ The Checklist

What to Do With Fabric Scraps: 5 Zero-Waste Sewing Projects

Tools
7
Materials
9
Steps
7
Video
14 min

Your Guide

Sweet Smiling Soul

As an Amazon Associate we earn from qualifying purchases. Links on this page may be affiliate links - clicking them and buying doesn't change your price, but helps support ShowMeStepByStep.

Tags

What's next

Related collections

Curated theme pages that include this tutorial.

Weekly Digest

Liked this sewing tutorial?

Pick the categories you want to hear about. Weekly digest of new step-by-step tutorials. No spam, easy unsubscribe.

Send me tutorials about

We only email about new tutorials. Easy unsubscribe anytime.