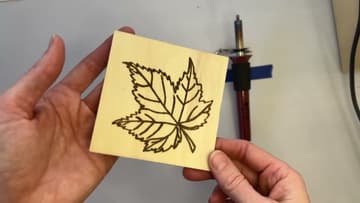
How to Wood Burn
Source: Burn Savvy • Full tutorial: www.craftingstepbystep.com/woodworking-crafts/how-to-wood-burn
- Difficulty
- Easy
- Hands-on time
- About 30 minutes
- Wait time
- 10 minutes
- Cost
- About $10 to $20
- Makes
- 1 wood burned tile

Tools
- Wood burning pen with heat control
- Wire stand for the burner
- Brass nibs (flow point, shader, calligraphy)
- Sanding block
- Tracing stylus
- Drill (optional, for a hanging hole)
Materials
- Poplar or basswood blank
- 220 grit sandpaper
- Blue painter's tape
- Carbon or graphite transfer paper
- Printed pattern
- Polycrylic, polyurethane or butcher block oil
- Jute twine or a sawtooth hanger
Steps
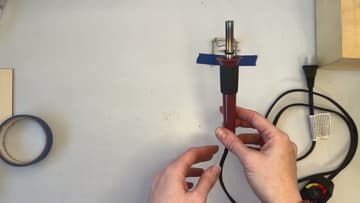
1. Tape the Wire Stand to Your Table and Rest the Burner In It
The stand in the box folds out and bends backwards. Open it so the cradle faces you, then push it back until it stops.
Tip: Leave enough slack in the cord to reach the far corner of your board without dragging the stand along with it.
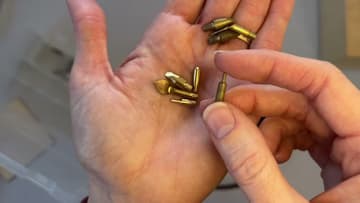
2. Pick a Nib: Flow Point for Lines, Shader for Fill
Nibs go by several names. Tips, points, nibs, all the same brass part that screws into the front of the pen.
Tip: Keep loose nibs in a shallow dish rather than on the open bench. They are small, they roll, and a hot one that rolls off the edge lands somewhere you would rather it did not.
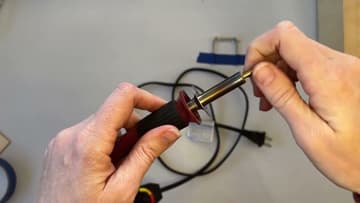
3. Screw the Nib Into the Pen Finger Tight
Hold the pen in one hand and start the nib into the threaded socket with the other. It should catch on its own and turn freely.
Tip: Swapping nibs later means letting the pen cool down first. A hot nib will not come out with bare fingers, and pliers on hot brass chew up the flats.
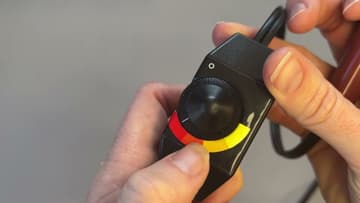
4. Turn the Heat Dial to the Red Band and Wait Ten Minutes
The Versa Tool puts its heat control on an inline box partway down the cord. The printed arc runs from mustard yellow through orange to red.
Tip: Work near an open window or run a small fan across the bench and away from your face. Wood smoke is not harmless.
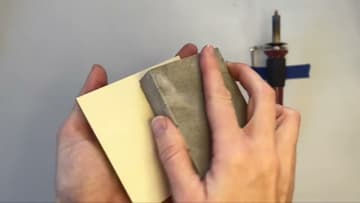
5. Sand a Poplar Blank Smooth with 220 Grit
Poplar, basswood and sourwood all burn cleanly and take a line without fighting back. Pine works, and it is cheap and everywhere, though the hard and soft bands in its grain will send one stroke dark and pale in the same inch.
Tip: Never burn treated, painted, stained or varnished wood, and leave reclaimed lumber alone unless you know exactly what it is.
6. Trace Your Pattern Through Carbon Paper
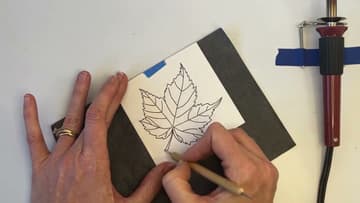
Print or draw a pattern sized to the blank. Lay the carbon paper dark side down on the wood, put the pattern on top, and tape one edge so the stack cannot shift while you work.
Tip: Carbon paper takes dozens of uses before it stops transferring. Store the sheet flat in a folder instead of folding it and the creases will not print onto your next piece.
7. Pull the Burner Toward You Along the Traced Lines
Rest the nib on a traced line and draw it toward your body. Do not press down and do not push the pen away from you.
Tip: Turn the board instead of turning your wrist. Every line then gets pulled at the same comfortable angle, which is most of what keeps a long curve smooth.
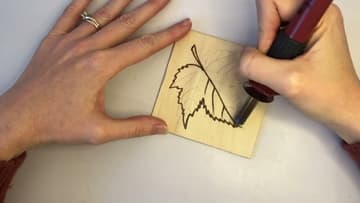
8. Finished Wood Burned Tile, Ready to Seal or Hang
Let the piece cool and brush the dust off. A finish is optional on something that lives indoors, though it deepens the contrast between the burn and the bare wood.
Tip: Unplug the burner when you stop and leave it sitting in the stand. The nib holds enough heat to scorch a tabletop or a sleeve for several minutes after the power is off.